Business units
Business units represent a hierarchical structure within an organization. You can assign the following items to a business unit in License Optimizer:
- Licenses
- Purchase History
- Software
- Hardware
- Non-Audited Usage
- Software Users
When you import data into License Optimizer, records are assigned to the business unit specified in the import file. If the business unit does not already exist in License Optimizer, a new business unit is automatically generated during the import with the prefix Imported so that you can assign relevant records to the newly created business unit. If you import data without specifying a business unit, it is assigned to the business unit Imported: UNSPECIFIED.
You can separately import OSI to business unit mappings from a spreadsheet (see Creating a new data source for information). After you have set a business unit to OSI mapping, re-importing the original inventory data source with blank business unit mappings does not reset the existing business unit to OSI mappings, but leaves the mappings that you have previously set.
Creating business units
The Business Units page enables you to edit business units and create a business unit structure.
To create a business unit structure:
1.Click Business Units under Estate Management on the menu bar.
The Business Units page appears.
2.To add a business unit, hover over an existing business unit, then on the in-line gears menu for that row, click either Add child business unit or Add sibling business unit to create a new business unit as either a child or at the same level.
To edit an existing business unit, select Edit from the in-line gears menu.
The Add Business Unit dialog appears.
3.Enter a Business Unit Name.
4.Enter a unique Code for the business unit.
Business unit codes are used to identify business units that may have similar names, such as differentiating between the Sales department in the US and the Sales department in the UK.
5.Select the Business Unit Type.
6.Add tags to the business unit by selecting the required tag in the Tags drop-down, then clicking  .
.
The tag appears on the dialog.
Tags provide an additional way of grouping and filtering business units. You can add multiple tags to a business unit and one or more business units can have the same tag. Click ![]() alongside a tag to remove it. Add new tags by clicking + Add New.
alongside a tag to remove it. Add new tags by clicking + Add New.
7.Click Save.
8.If required, drag and drop business units to move them between parents in the business unit hierarchy.
Deleting business units
You can delete business units that do not have data associated with them.
To delete multiple business units at a time (including entire branches):
1.Select the check boxes alongside the business units you no longer require.
2.Click Deleted selected.
The business units are deleted.
Alternatively, click Delete All at the top of the page to delete all of the business units in your system.
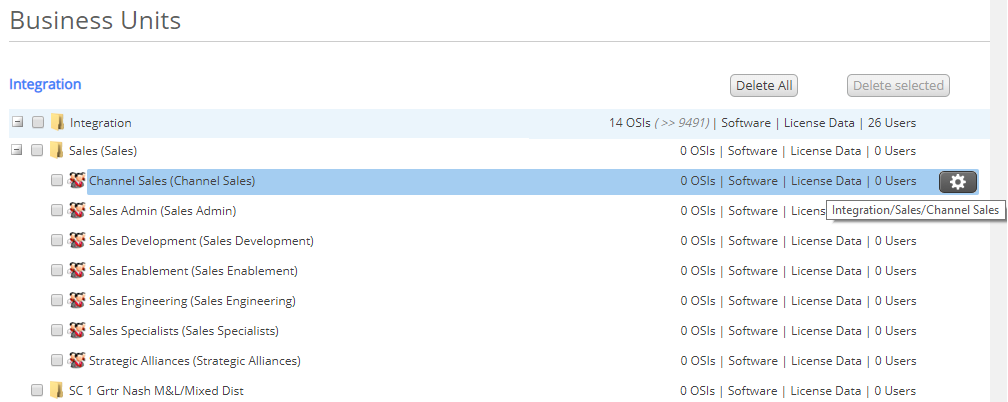
Viewing data associated with business units
Each entry in the Business Units structure has four links at the right of the page: OSIs, Software, License Data, and Users. Information about the number of OSIs assigned to the business unit and the number of user records assigned to the business unit appears with the OSI and Users links. Click these links to display the corresponding data for the selected business unit.
Related topics and videos
For information about importing business units, see Creating a new data source or
Watch a related video (6:08)
There is also a video that describes ways in which you can use business units to help you to better understand your IT estate and to accurately report your license position:
Watch the video (4:17)