Variables
As administrator, you can create variables and then assign them to one or more user accounts for use as a filter condition in a dashboard or document. You also have the ability to set the initial variable value for each user account, as well as give users the right to edit that value if appropriate.
Because variables filter content at the user-account level, they eliminate the need to create a separate dashboard or document for each user. Rather, a content designer can apply a variable condition to a single dashboard or document that tailors the display for individual users. For example, with a dashboard titled "My Open Service Tickets," a variable condition can filter the display to show open tickets for the current user viewing the dashboard.
For more guidance on how to use variables, see the User Profile Variables video on the Ivanti community website.
1.At bottom of the page, click the Administration > User Administration link.
2.Click the Variable Administration tab.
3.Right-click in the Name pane of the dialog and select Add variable. If variables already exist, you can also edit or remove them.
4.If adding or editing a variable, the Variable dialog displays with these fields:
•Text: The variable name as seen by the user.
•Variable Name: The variable name that is used in the variable condition filter. You can name variables any way you want, but note that they're case sensitive, so you'll want to standardize the naming conventions you use.
•Associated Field: The name of a field from the data source that you're associating with this variable. Click the ![]() icon to select the data source and view all available fields.
icon to select the data source and view all available fields.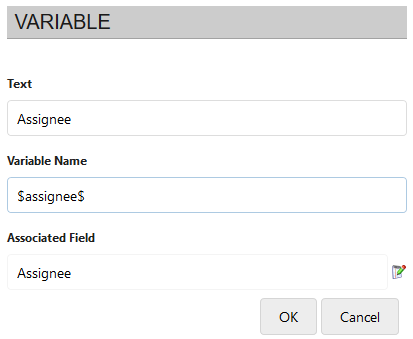
5.Click OK when finished.
You can assign a variable to one or more user accounts and give it a default value that will be substituted in the variable condition filter. See the next section for details.
After creating a list of variables, if you remove one from the list, that variable will be removed from each user account to which it was assigned. This action will not remove the variable condition filters from the dashboards or documents to which they're associated.
Assigning variables to user accounts
Xtraction provides two ways of assigning variables to user accounts as explained in the procedures below.
You can also enable users to edit the variable value through their user profile when they click the Profile > Settings link > Variables tab. Only editable variables will display in a user's profile. Depending on the variable, you may want to give editing rights only to the user accounts of senior managers or executive designers.
1. At bottom of the page, click the Administration > User Administration link.
2.Click the Variable Administration tab to display the list of variables.
3.Select a variable in the list, then right-click in the Users pane and select Add User(s) to add one or more users. Use your Ctrl key to select multiple users. Click OK.
4.The Variable Value dialog displays. Click the ![]() icon to assign a default value to this variable for all users. To make the value editable, select the User can edit? option.
icon to assign a default value to this variable for all users. To make the value editable, select the User can edit? option. 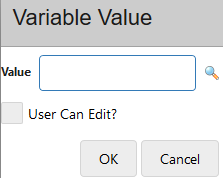
5.Click OK when finished.
1. At bottom of the page, click the Administration > User Administration link.
2.Click the User Administration tab to display the user list.
3.Right-click a user and select Edit.
4.Click the Variables tab to view a list of available variables. You can select from these options:
•Assign: Select to assign a variable to this user account.
•Editable: Select to enable the user to edit the variable value. Depending on the variable, you may want to give editing rights only to the user accounts of senior managers or executive designers.
•Variable: The variable text that the user will see, as added in the "To create a variable" procedure above.
•Value: The value that will be substituted in the variable condition filter.
•Search: Click the button at the end of any row to assign a value to the Value column.
5.Click OK when finished.
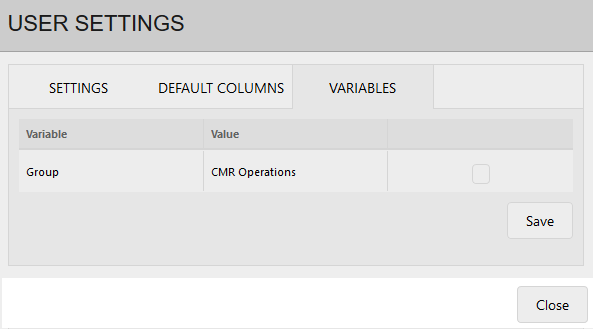
The user will see the following information in their profile, based on selections in the image example above. Only the variable "Group" is visible since it's editable. The user can click the button at the end of the row to select a different value from the default of "CMR Operations."