Filters
You must have designer rights to create filters for dashboards and documents.
Xtraction enables you to narrow the viewable data in a dashboard or document by using filters on the included components. Each filter imposes a set of filter conditions on a single data source that you define as part of the filter. Xtraction has two types of content filters, standard and advanced, as well as several types of filter conditions that you can apply to those filters.
It's recommended that you become familiar with filter conditions before creating a standard or advanced filter.
Use one or more filter conditions within a filter to further narrow the viewable data in a dashboard or document. You can add filter conditions to any standard or advanced filters you create, as well as the default filter for a data source (if one is defined).
Available filter conditions:
•Value-based: If you enter a value-based condition, only data that matches the selected field and value is included in the result. For example, if you select "Priority" equals "1," then only incidents with the value of 1 in the Priority field display in the results.
•Date dynamic or fixed: You can create date conditions as:
•Dynamic date, based on past, present, or future periods of time. You can use "Last month" or "This quarter last year" with an option to also select Include current for those dynamic values marked with an asterisk in the Add Condition dialog. For example, "Last 7 days" with "Include current" ends on the current date, minus one day.
You can reuse dynamic dates on a recurring basis, without having to update them. For example, if you run a report each month and it has a condition of "Last month," the report will automatically use the last calendar month of data.
•Fixed, based on a fixed start and end calendar date.
•Field: Use a field condition when you want to compare the values of two fields in a record as part of the filter. For example, when looking at all open incidents for the month, if you want to see which ones were opened and resolved on the same day, you could specify "Open date" equals "Resolve date" to return only the incidents where the dates in these two fields match.
•Subquery: Use subqueries to create a filter within a filter; they're useful for one-to-many relationships in a data source. For example, if a parent incident has many child incidents, a subquery can find a list of parent incidents with one or more child incidents in a particular status or of a certain priority. If you were to apply the filter directly on the child incident fields, the returned record count would display matching child incidents, not parent incidents.
Whether subqueries are enabled depends on the data model in use. You can use them as filter conditions only if the required subqueries have been defined by your administrator as part of the data model.
•Variable: Apply a variable condition to filter data using a variable that the administrator has assigned to one or more user accounts. If no variables have been assigned, this list is empty.
Variables eliminate the need to create a separate dashboard or document for each user. Rather, you can apply a variable condition to a single dashboard or document that tailors the display for each user. For example, with a dashboard titled "My Open Service Tickets," a variable condition can filter the display to show open tickets for the current user viewing the dashboard.
When a variable is assigned to a user account, rights to edit the variable value may also be enabled. To edit a value, click the Profile > Settings link at the bottom of the page. In the User Settings dialog, open the Variables tab to see the editable variable values. The Variables tab is dimmed if editing is not enabled.
Standard and advanced filters
With standard filters, you can:
•Impose an unstructured list of one or more conditions per filter.
•Save as a named item within a folder, and reuse for any number of data components.
•Apply at the level of a dashboard or individual component.
•Apply as the default filter during the design process.
•Interact with the filter by clicking the ![]() icon displayed in the dashboard and individual component panes.
icon displayed in the dashboard and individual component panes.
Use standard filters to define one or more filter conditions on your data source (for details, see "About filter conditions" above). Xtraction optimizes the sequence in which your definitions are best applied.
1.Open the Dashboard Designer or Document Designer.
2.On the top menu bar, click Tools > Filters > New Filter to open the Select Data Source dialog.
3.Select the data source on which to impose the filter and click OK. The Filter dialog opens with the General tab displayed.
4.For Title, enter a name for the filter.
5.Select Create a new filter for each condition if you want Xtraction to do so. Otherwise, all of your conditions will be saved under the one filter.
6.For Permissions, select Public (accessible to everyone) if the filter is for public use.
7.Right-click in the Conditions area to open a menu that can include any of the following options. After creating each condition, click Add condition to add it to the list. For details about conditions, see "About filter conditions" above.
•Add conditions: Enables you to add a value-based condition, so that only the data that matches your value is included in the content.
•Field: Select the field on which to impose your condition.
•Operation: Select an option for narrowing the data to include or exclude from your content.
•Value: Enter a value directly, search for values, or type/paste a set of values.
•Add date condition: Enables you to add a date-based condition, so that data is only shown for a specific time period.
•Dynamic date filter: Select to set a dynamic date, such as "Last 7 days" with an option to also select "Include current" for those dynamic values marked with an asterisk in the Add Condition dialog. In this example, "Last 7 days" with "Include current" ends on the current date, minus one day.
•Fixed date filter: Select to set a specific date to filter on.
•Add field conditions: Enables you to compare the values of two fields as part of the filter.
•Field: Select the field on which to impose your condition.
•Operation: Select an option for narrowing the data to include or exclude from your content.
•Comparison Field(s): Select the comparison field on which to impose your condition.
•Add subquery condition: Enables you to apply a subquery, creating a filter within a filter (useful for one-to-many relationships in the data source). The effect is that your result set is further narrowed by the subquery condition.
•Link: Open the list of available links for use in the subquery. The available options indicate the conditions encoded in the subquery.
•Operation: Select In to include the values that match the condition, or Not in to exclude those values from the condition.
•Filter: Click the filter icon to find and select the filter to apply the subquery condition to.
•Add variable conditions: Enables you to apply variables (predefined by your administrator and assigned to one or more user accounts) to filter data based on the variable’s value.
•Field: Select the field on which to impose your condition.
•Operation: Select an option for narrowing the data to include or exclude from your content.
•Variable: Select a variable from the predefined list.
•Change to advanced filter: Enables you to create an advanced filter using nested sets of conditions.
•Clear conditions: Removes all conditions from the list.
•Reset filter: Enables you to replace a standard filter with an advanced filter or vice versa.
•Open saved filter: Imports a saved standard filter into the one you're working on.
8.After you've set up all conditions, click the Folder tab to select a location to save the filter. Click OK when finished.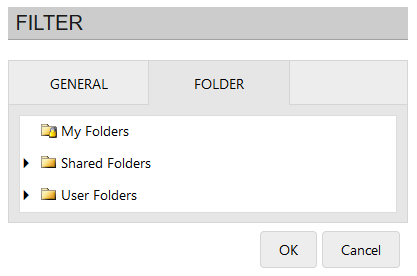
With advanced filters, you can:
•Build a nesting structure using logic operators (AND, OR).
•Apply at the component level within a dashboard or document.
• Interact with the filter by clicking the ![]() icon displayed in the individual component panes.
icon displayed in the individual component panes.
•Apply as the default filter during the design process.
•Use only once; advanced filters can't be saved.
Use advanced filters when the flat list of conditions in a standard filter can't produce the results you're looking for. Advanced filters differ from standard filters only by the option to create nested sets of conditions using AND/OR operators.
You can create an advance filter from most of the same dialogs where you create a standard filter.