Exporting windows
To export windows from your database:
- Start the Design Transfer component.
- Expand the Export tree (
 ).
). - Expand the Windows folder.
- Select the required window, then on the Actions list, click Select.
- On the Export tree, the window icon changes to
 to indicate that it has been selected.
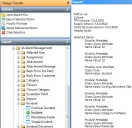
When you select a window, the related custom defined business objects and attributes associated with that window are also exported. - Repeat as required.

To remove an item, select it on the tree, then on the Actions list, click Clear Selection.
- On the Actions list, click Export Selected Items.
The Save As dialog appears.
If required, you can select all of the required items, then on the Actions list, click Export Selected Items.
- Navigate to where you want to export the file to, then type a name for the file, then click Save.
The selected items are exported. The file is XML format.
You can click Export Selected Items even if you have not completed selecting all of the required items. You can reopen the export file, and continue selecting the items when it is convenient.