The Design Ideas Database
The Design Ideas database is a database with many ITIL processes pre-built inside it for you to use as a template for your own designs. Below is a description of how each of the processes is managed and followed in the database.
Incident Management
The Incident process is described by ITIL as being the process responsible for restoring normal service as quickly as possible while minimizing adverse effect on business operation. Therefore, the process is designed to help the analyst who owns the incident collect and manage information pertaining to the incident and use it to find a solution.
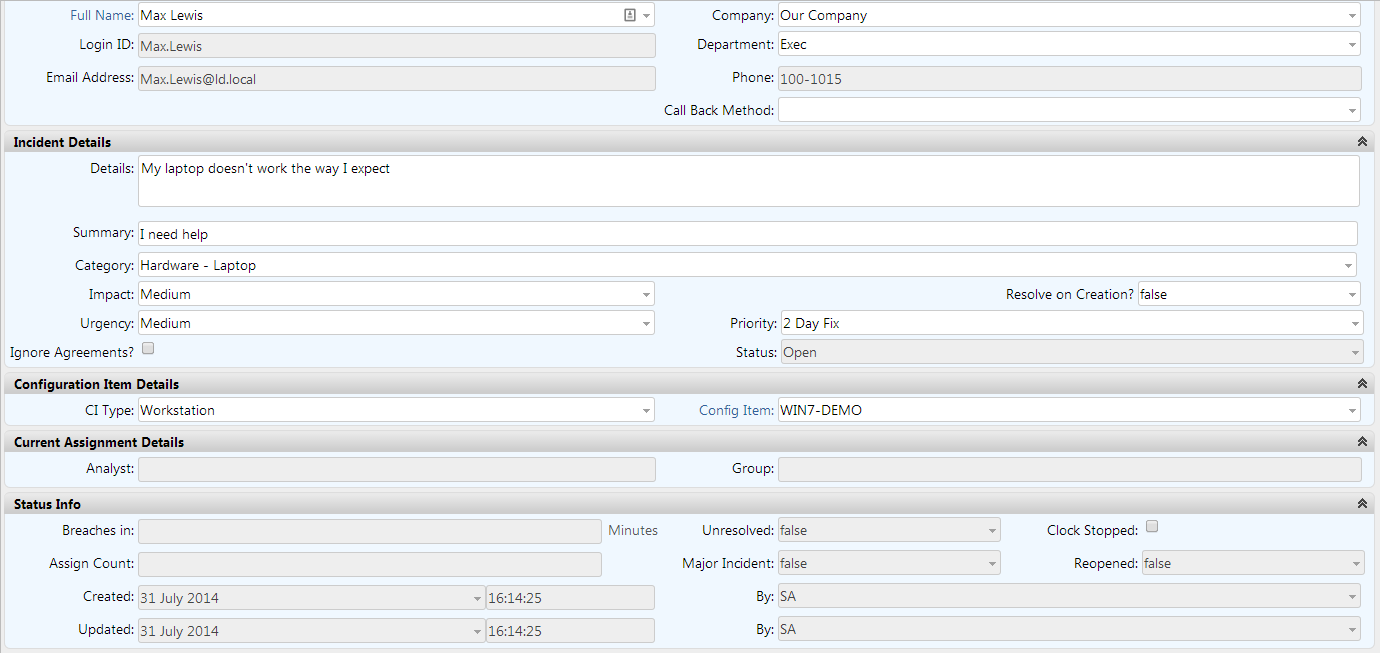
In order to capture information about the Incident being logged to assist with diagnosis, resolution and reporting, the most useful fields to include are:
- Creation Datetime (default)
- Update Datetime (default)
- Creation User (default)
- Update User (default)
- Affected User (Raise User, default)
- The Incident source (how the Incident was logged)
- Contact information of affected user (telephone number, email address – default)
- Preferred call back method (add a reference list for this)
- Category
- Priority (calculated from Impact & Urgency and/or escalation breaches on SLA)
- Impact
- Urgency
- SLA
- Symptoms (description – default)
- Diagnostic activities (this is the notes collection – default; or a custom new collection – see Designer)
- Status (default)
- Known errors associated with this Incident (by category, CI, CI type or keyword)
- CI (default)
- CI type (default)
- “Caused by change” – action to associate the underlying change to the records it causes
Process Actions
Create Request. This action allows the analyst to create a request from the incident. This is usually done when it becomes apparent that the reason the user contacted the Service Desk is not because of a service outage but because they require a service or some information.
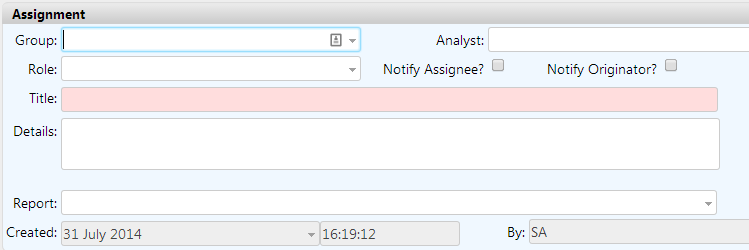
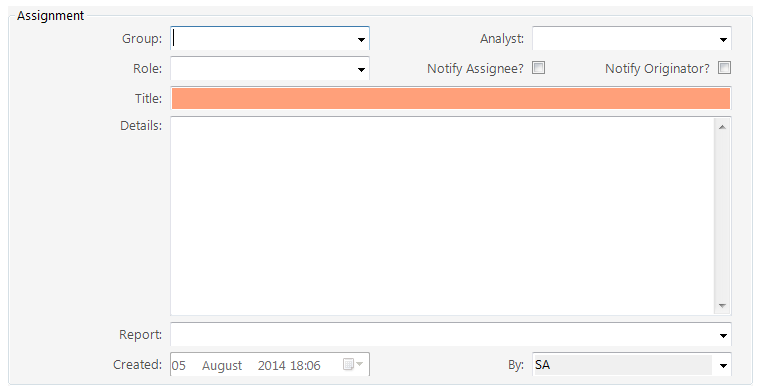
Assign to user/group. This action is used alter the assignment of an incident from one group, role or user to a different set of users. There are several ways of doing this in the process designed in the database, you should use the method most appropriate to your organization and the situation with the incident. For example, if you are a distributed organization with teams of service desk analysts that support users in different languages then the ‘Assign to Local Support’ assignment action is the most appropriate.
The assignment window contains fields for selecting the appropriate group, role or user and a mandatory title field. The title and description are used in the notification to the group or role members or the individual to tell them why the incident has been assigned to them.
Add affected user. This action is used when a major incident has been identified and other users are notifying the service desk that they have the same issue. This action will automatically add an incident for the affected user and attach it to the major incident. When the major incident is resolved, all the attached incidents will also be resolved and the affected users notified that the issue has been resolved

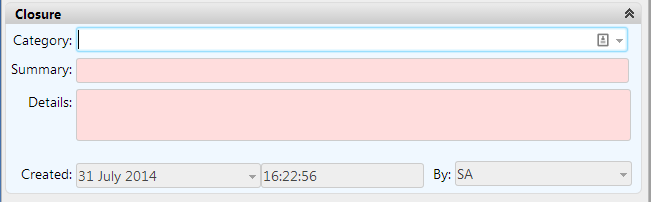
Close. The close action is used when the assigned analyst has confirmed with the user who reported the incident that it has been resolved to their satisfaction. A close category is used for reporting purposes to understand what the incident was ultimately caused by.
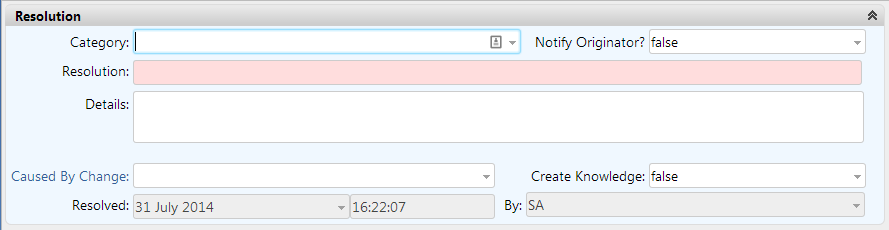
Resolve. The resolve action is used to identify what was done to resolve the incident as reported. This information is often used to create knowledge from for use in future incident investigations. A ‘Caused by Change’ field is included in the resolution to identify if a particular change was the cause of the service outage that led to this incident being reported.
Complete survey. The complete survey action can be published to the users or analysts and is a way for the user to report their experience and satisfaction with their contact with the service desk. You can make surveys only required for certain users, or on every x incidents logged.

Change priority. This action is used to ensure that the priority can only be changed by authorized users (using privileges) and requires that they complete a justification field to audit why the change in priority was made.
Add Problem. This is used to select an existing problem record to associate it with the current incident to show that the root cause of the incident is still being investigated.
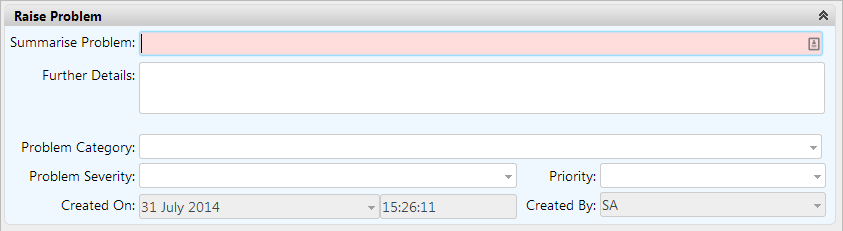
Create Problem. When an incident cannot be resolved or the root cause of it is not identified during investigation then a problem may be logged to deal with managing the underlying cause going forward. This action is used to create a problem record and associate it with the incident.
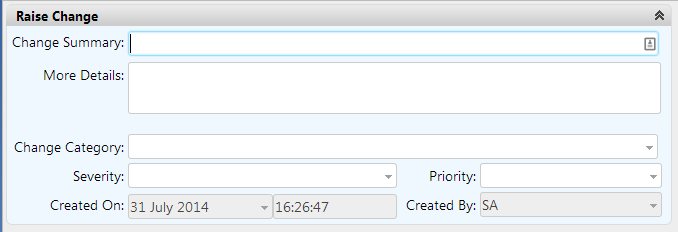
Create Request for Change. On occasion, an incident that has been logged can only be addressed by making a change to the environment or turns out to actually be an RFC. This action creates a change record from the incident and then associates the records to each other.
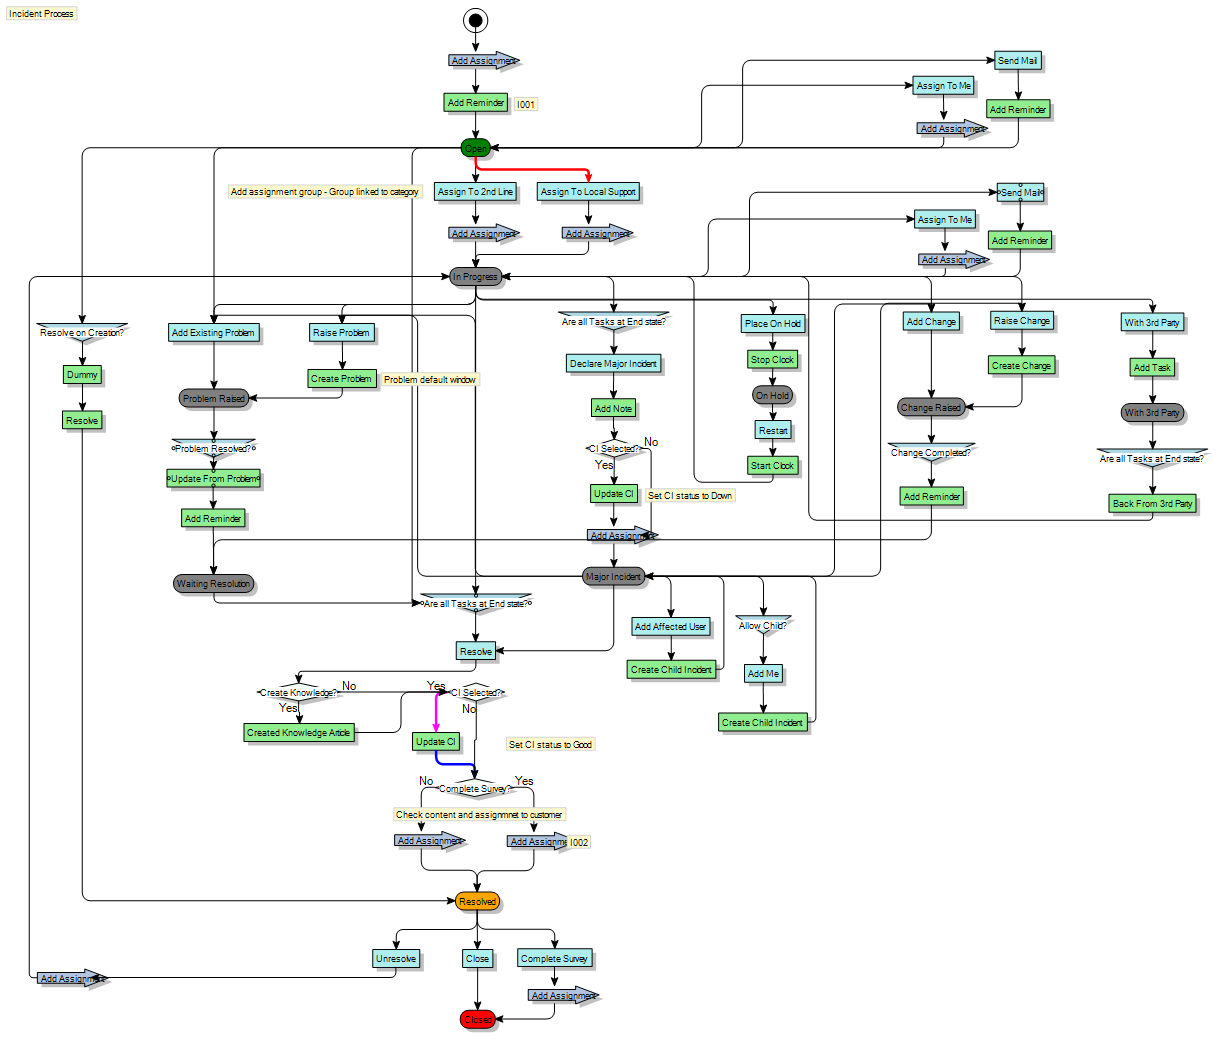
Process Design
Problem Management
A problem is logged either reactively, in response to a particular incident or group of related incidents or proactively when a trend in categorization is identified.
In order to capture useful information about the Problem being logged to assist with diagnosis, resolution and reporting, the most useful fields to include are shown on the screenshot of the window below and described in detail.
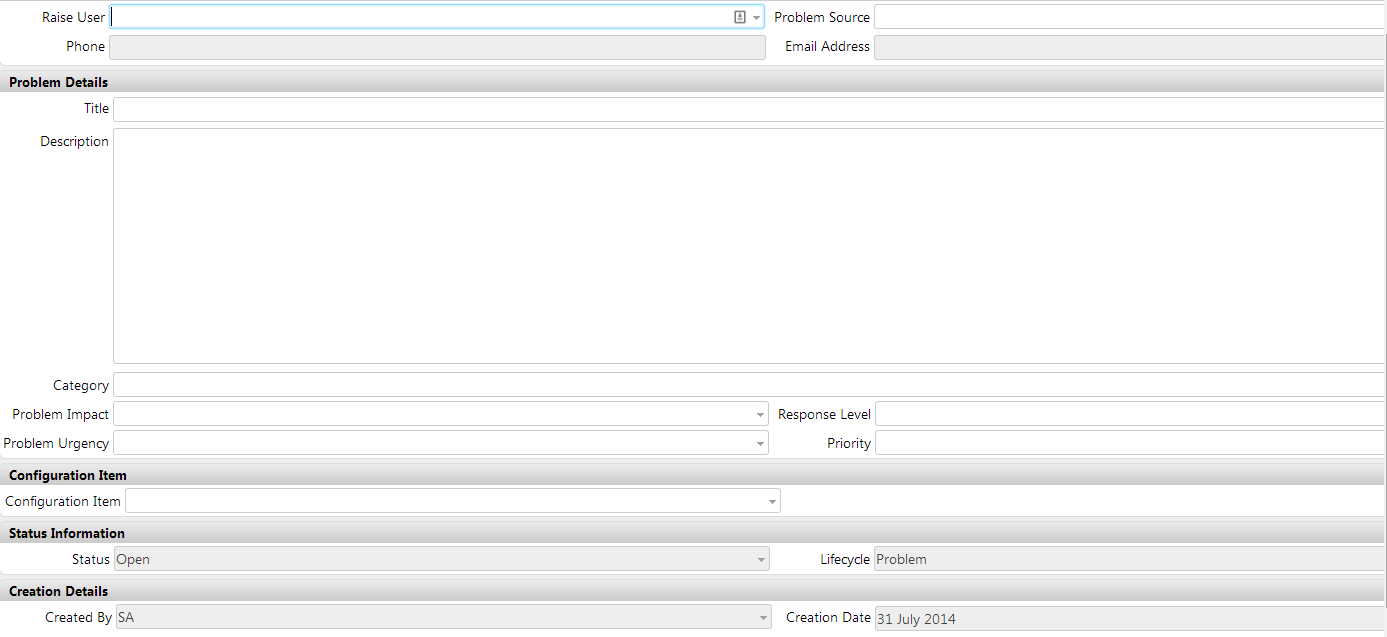
- Creation Datetime (default)
- Update Datetime (default)
- Creation User (default)
- Update User (default)
- Affected User (Raise User, default)
- The Problem Source – this may be an Incident or Event number
- Contact information of affected user (telephone number, email address – default)
- Preferred call back method (add a reference list for this)
- Category
- Priority (calculated from Impact & Urgency and/or escalation breaches on SLA)
- Impact
- Urgency
- SLA
- Symptoms (description – default)
- Diagnostic activities (this is the notes collection – default; or a custom new collection – see Designer)
- Status (default)
- Known errors associated with this Incident (by category, CI, CI type or keyword)
- CI (default)
- CI type (default)
- “Caused by change” – action to associate the underlying change to the records it causes
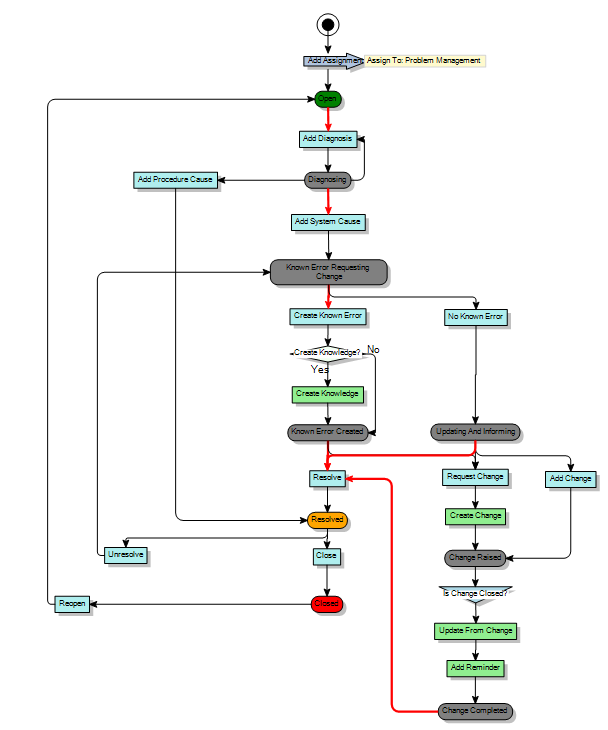
Actions available on the process
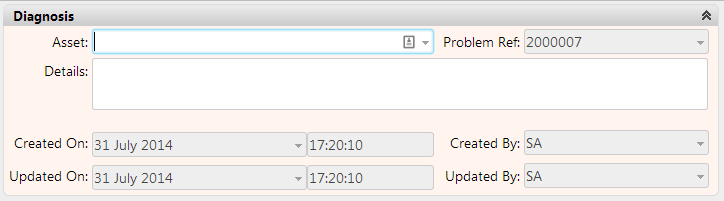
Add Diagnosis. The first action available on the problem process is used to add details of any diagnoses of the problem record.
Add Assignment. This action is used to pass responsibility for the problem to a different group or person.

Add Attachment. Use this action to associate any supporting files with the problem record.
Add Incident. Use this action to associate the problem record with incidents that already exist in the system.
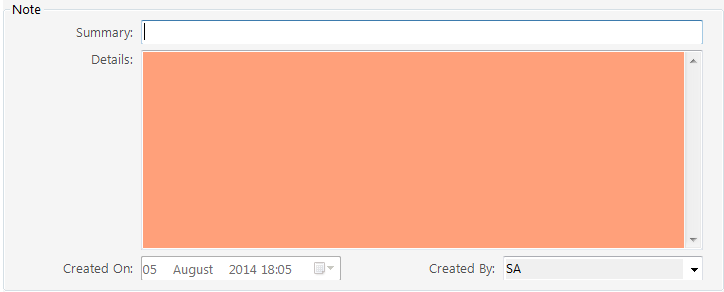
Add Note. The notes of a problem may detail information on the diagnostic steps already taken and can be used as an audit of what has happened so far.
Create Request. This action is used to create a request record from the problem record.
Detach Incident. Occasionally an incident may be attached to a problem that further investigation reveals to be an incorrect linkage. Use this action to remove the association between the incident and problem records.
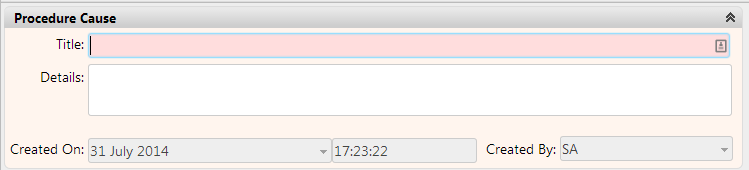
Add Procedure Cause. This action is used to add details of what the cause of the problem was if it is identified as a procedural issue.
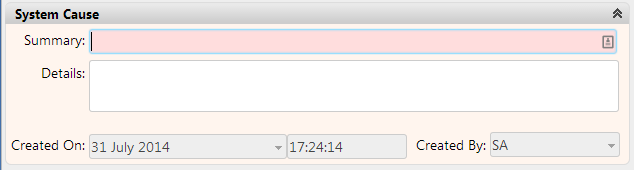
Add System Cause. This action is used to add details of what the cause of the problem was if it is identified as a problem caused by the system. This will often result in a change request being raised to rectify the underlying issue.
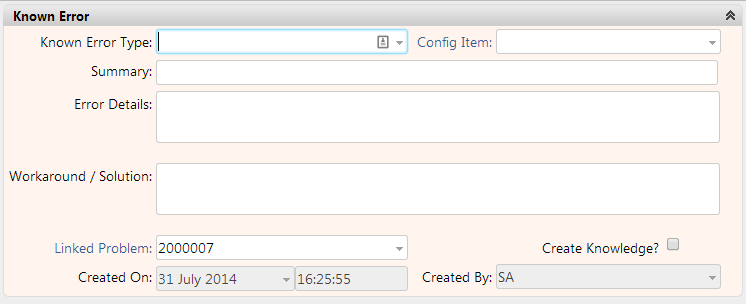
Create Known Error. A known error is created when a system cause is identified and a workaround has been identified. This is then published to the knowledge base for use when investigating incidents.
No Known Error. Use this action when no known error can be created for the problem.
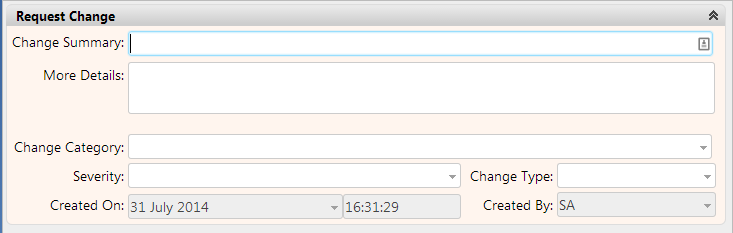
Request Change. If a problem has a system cause then an RFC should be logged to have an alteration made to the environment in order to resolve the root cause. The details of what needs to be changed and why should be identified on this action. A change category, severity and type should also be completed.
Resolve. When a problem has had the root cause addressed it can be resolved, details of the resolution should be logged and a category for the resolution added. If the problem requires a major problem review, it should be noted as part of this action.

Add Change. Sometimes the root cause of a problem may identify a change that needs to be made that is already logged and pending approval or implementation. Use this action to associate the problem to an existing change record.
Major Problem Review. This action is used to record the details of the major problem review, including any details of the lessons learnt and the recommendations for alterations to the processes or systems in the future.
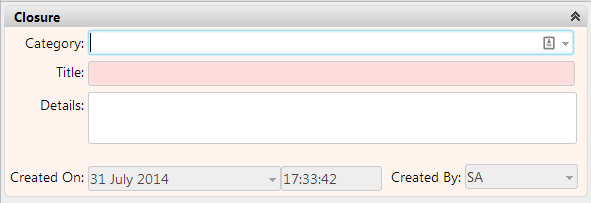
Close. The close action is used when a problem has been successfully completed. In addition to any further details, the closure category should be included to help identify and patterns.
Process Design
Change Management
Change Management is used to manage alterations to the systems in the IT environment while ensuring minimum disruption to the IT services.
In order to capture useful information about the change being logged to assist with deciding if to approve and when to schedule it the following information should be captured.
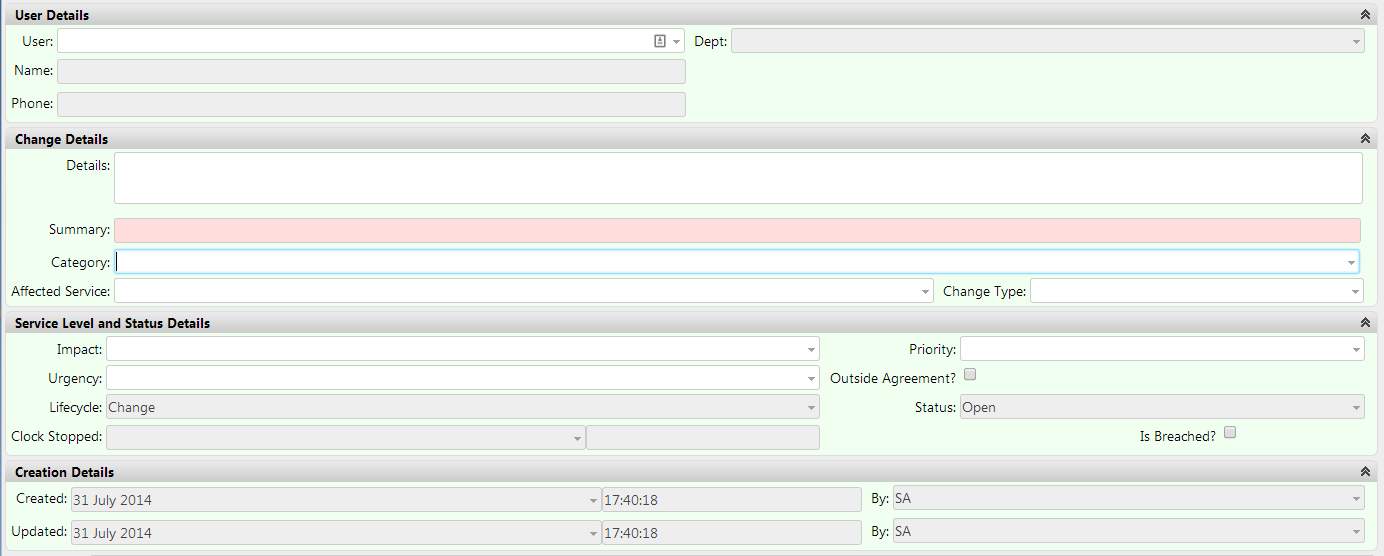
- Raise User (or source – Incident/Problem/Request)
- Their contact details
- Details of the Change to be raised
- Summary
- Category – this should include Major, Minor and Significant
- Affected Service
- Change type – these should be Normal, Standard & Emergency
- Impact
- Urgency
- Priority
- Status
- Lifecycle
- Created By
- Created Datetime
- Updated By
- Updated Datetime
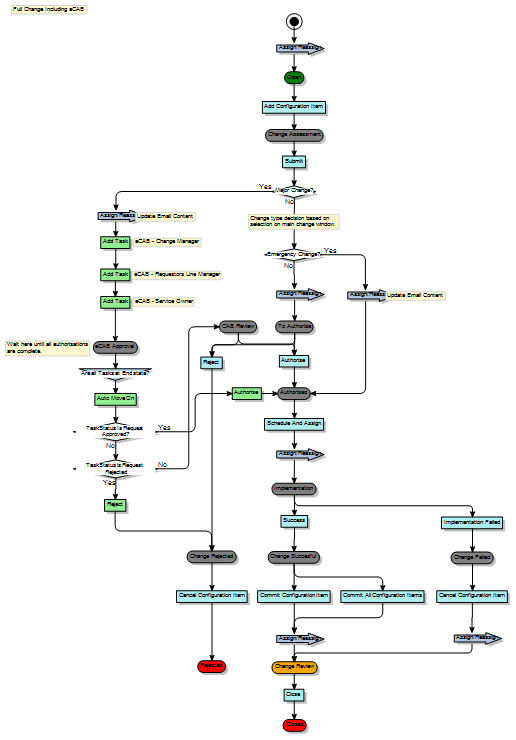
Actions available on the process
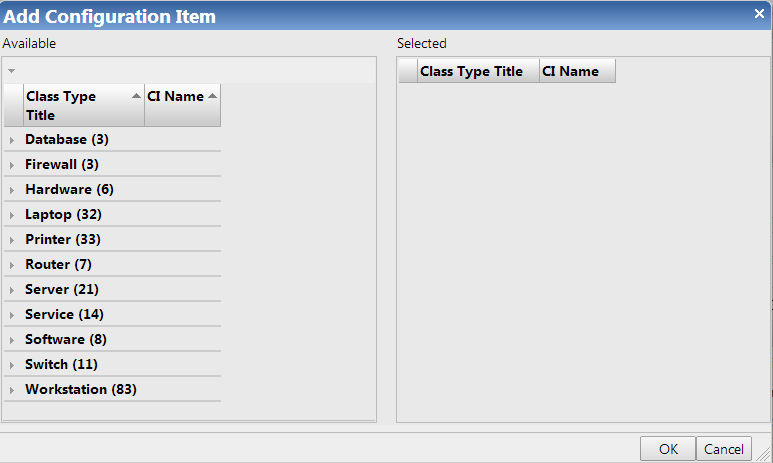
Add Configuration Item(s). This action is used to select the CIs that will be changed by the change.
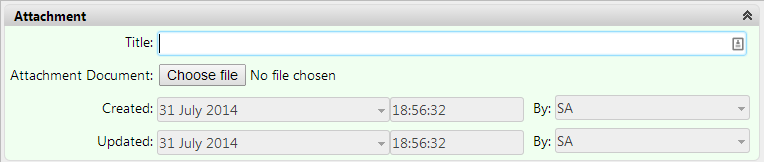
Add Attachment. This action can be used to include any supporting files or other documentation with the change record. This can include the business case, or risk and requirement documentation.
Add Incident. If the change pertains to an incident in some way, use this action to associate the records with each other.
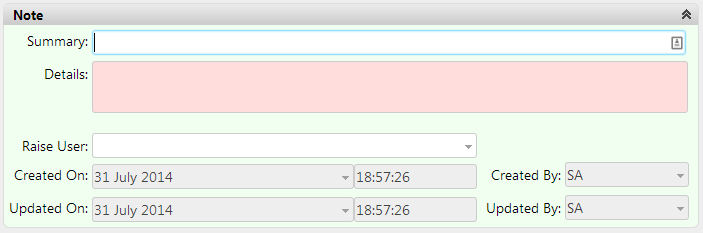
Add Note. The notes of a change are used to keep a record of any further information related to the change record.
Add Parent Change. If the change record is one of several changes in a larger change project then use this action to associate the related changes together.
Add Problem. This action is used to associate the change record with an existing problem record.
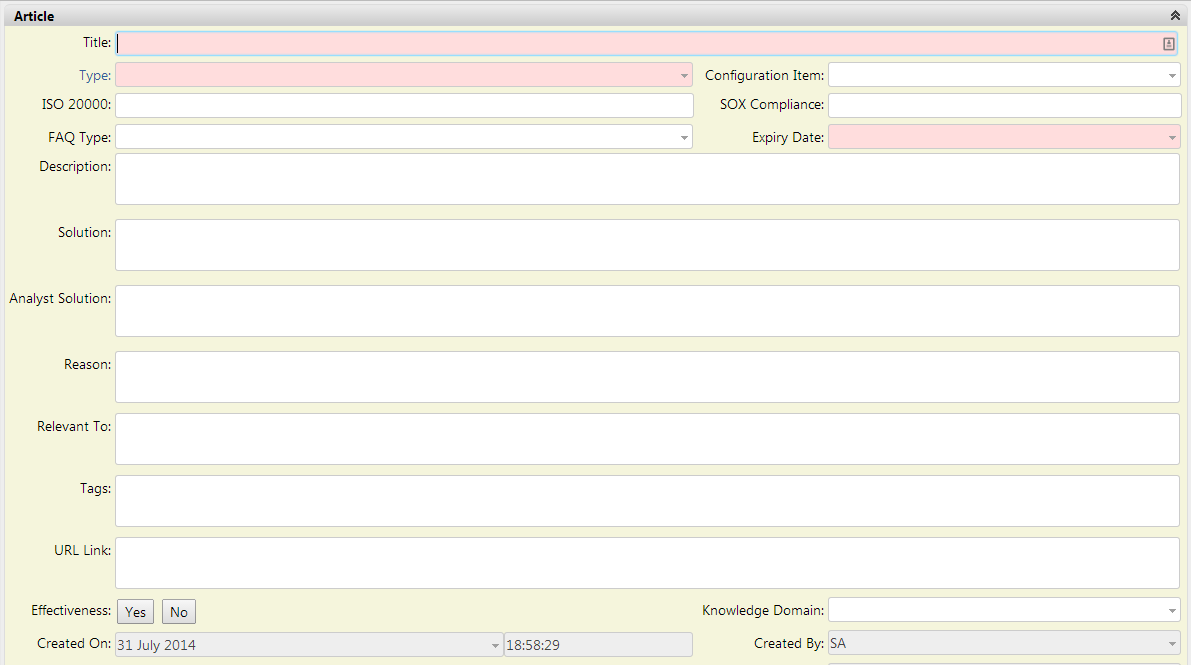
Create Knowledge. Use this action to create knowledge information about the change record to assist users with understanding why something works the way it does.
Submit. This action is used to submit the change to the review process. If it is of type ‘Emergency’ then it will be presented to the eCAB, if it is ‘Normal’ then it will be reviewed at the next CAB meeting and if it is ‘Standard’ then it will miss authorization completely.
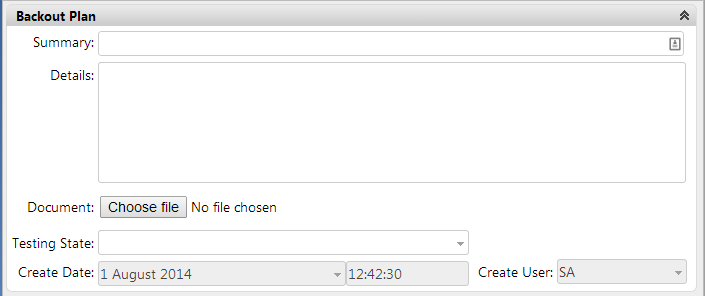
Add Backout plan. This action is used to add a Backout plan to the RFC as information that may be used when the change is being reviewed. This action is mandatory if the change is classified as being ‘Major’.
Add Change Proposal. If the change is categorized as being a major change then it cannot be submitted for authorization until it has had a change proposal added to it.
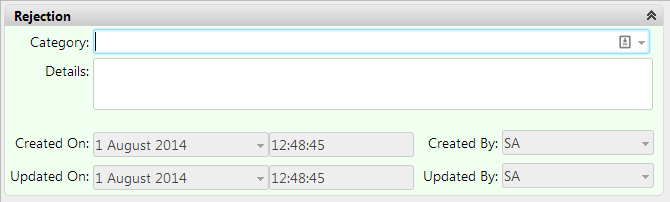
Reject. This action is used by the change manager or CAB representative to reject an RFC. The window requires a categorization of the rejection as well as details explaining why it is being rejected.
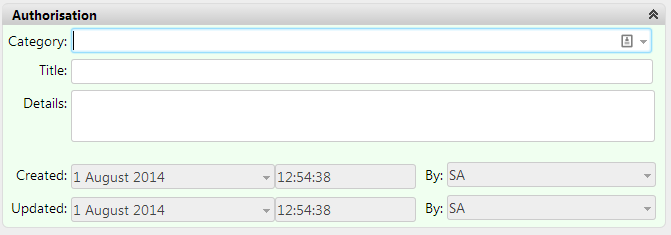
Authorize. If the CAB or eCAB is prepared to allow the change to go ahead then they should use this action to authorize it. The window includes the ability to categorize the authorization and add details of any further information.
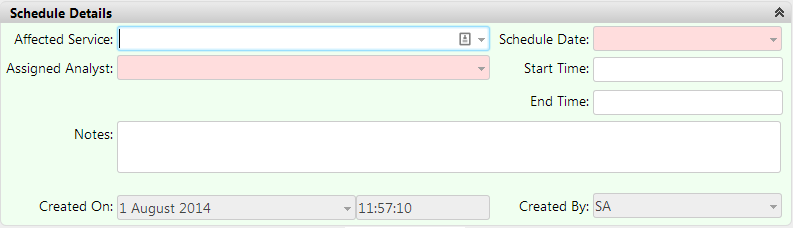
Schedule and Assign. Once a change is authorized it needs to be scheduled in to the change calendar and assigned to a group or individual to carry out the change. These details are captured as part of this action.
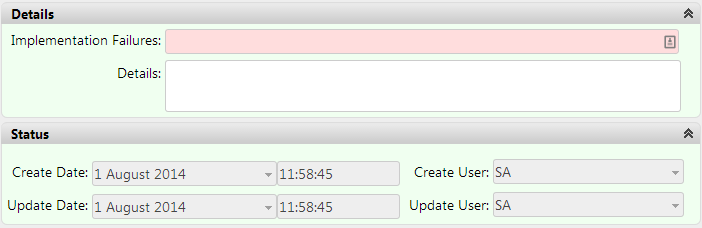
Implementation Failed. If the change was not successfully implemented in the scheduled time then it should be recorded as a failure. Details of what went wrong should be captured.
Success. This action is used to audit the fact that the change has been completed successfully.
Commit Configuration Item(s). Use this action to commit the changes to configuration items associated with the change record to the CMDB.
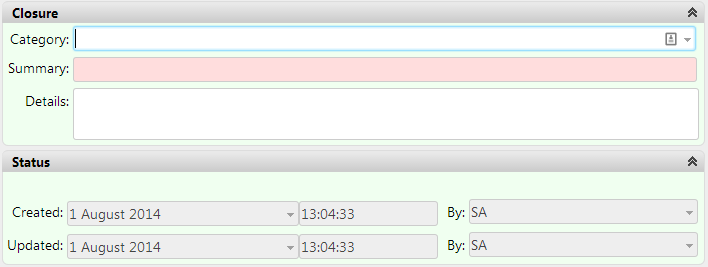
Close. Use this action to categorize the closure of the change and include any details from the change review.
Process Design
Request Fulfilment
The ITIL definition of request fulfilment is the process by which IT manages the lifecycle of service requests from their users.
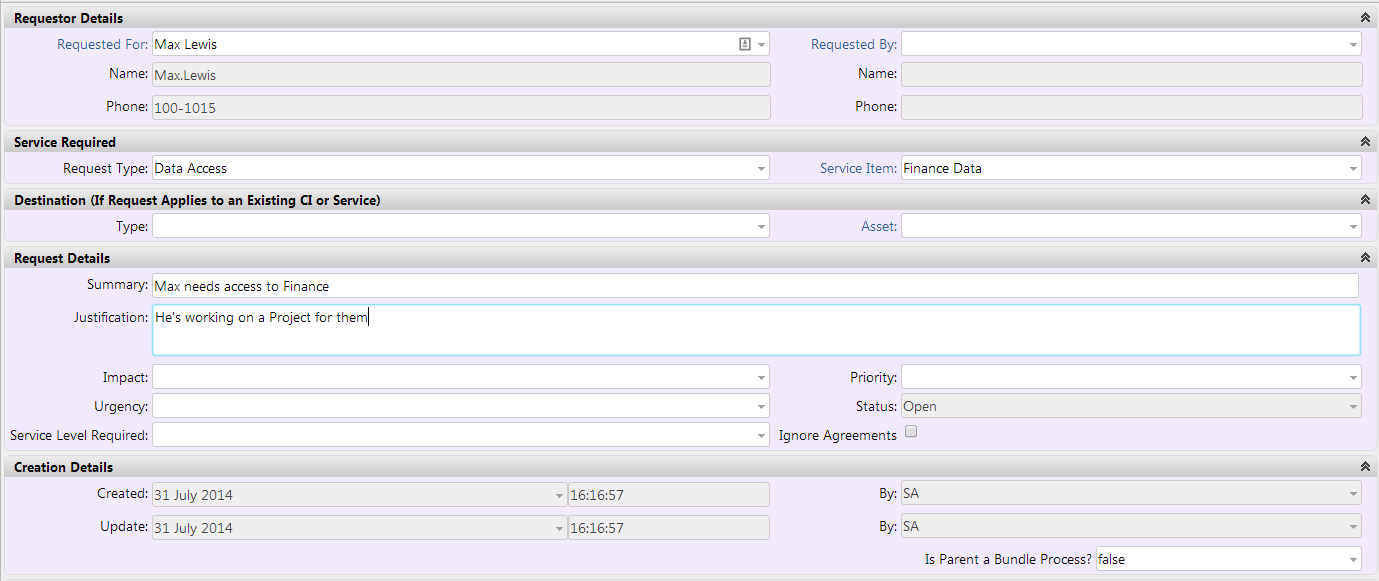
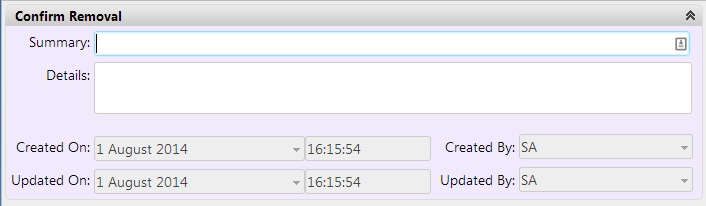
Depending on the request to be fulfilled there is information that should be captured. Below is a description of what is captured for a generic request.
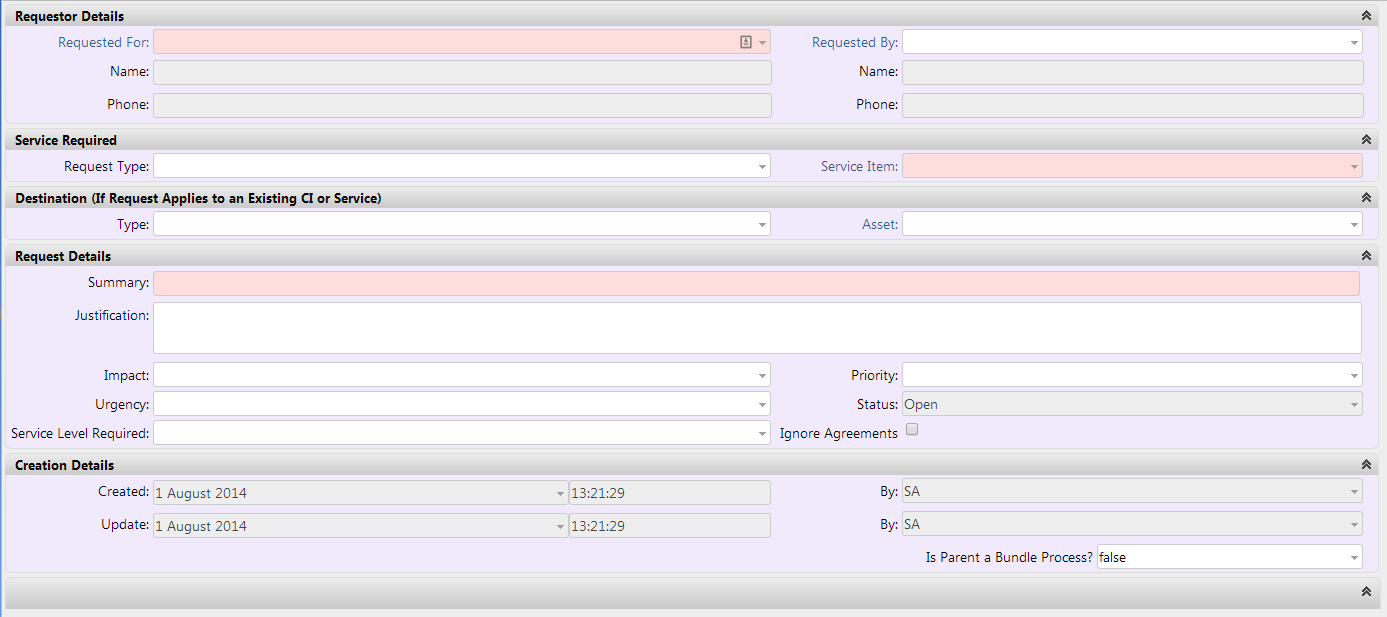
The fields that should be included on the window are:
- The requestor’s name
- The requestor’s contact details
- The service-CI being requested
- The CI to apply the service to (where appropriate)
- A summary of what is being requested
- A justification of why the user needs the service
- The Impact, Urgency and Priority of the request
- Details of who created and updated the request and when
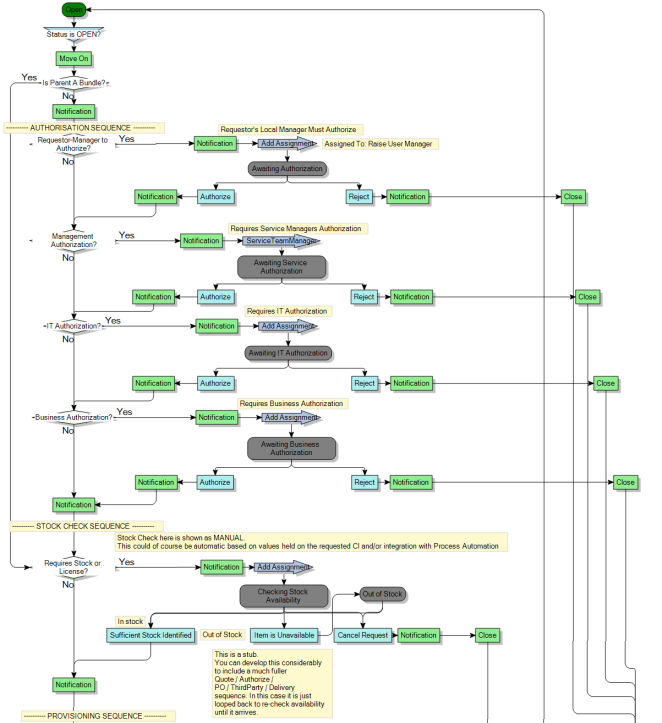
Actions available on the process
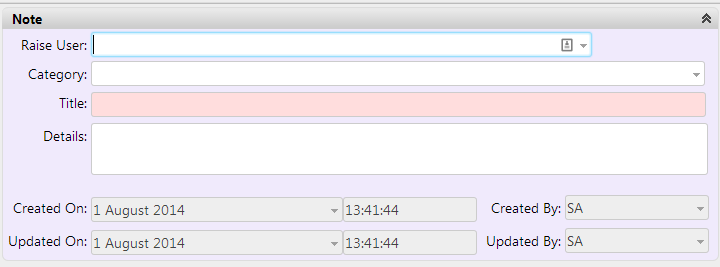
Add Note. This action is used to track any extra information about the request that isn’t logged on the main window or as part of any of the other actions required to progress through the process.
Attach Incident. Use this action to attach an existing incident to the request if they are related. Usually this will occur when an incident turns out to be a request.
Create Incident. Use this action to create an associated incident record.
Create Problem. Use this action to create an associated problem record.
Create Change. Use this action to associate the request with a new RFC.
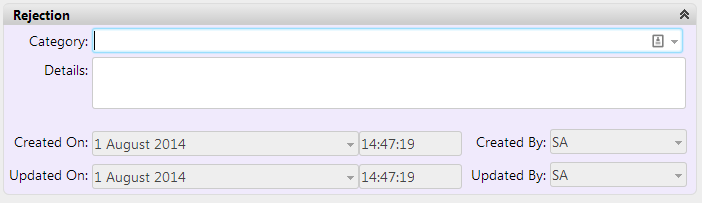
Reject. The process allows for several levels of authorization, including line manager, service manager, business and financial approval. If any of these parties want to reject the request they must use this action and provide a reason for the rejection as well as a categorization.
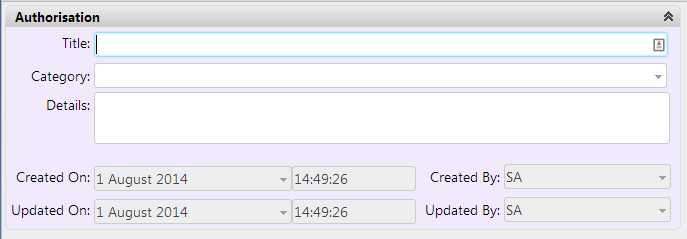
Authorize. If the authorizer is happy to authorize they must complete this step and both categorize and provide details of the authorization.
Cancel Request. This action is available for the request to be cancelled even after it has been authorized.
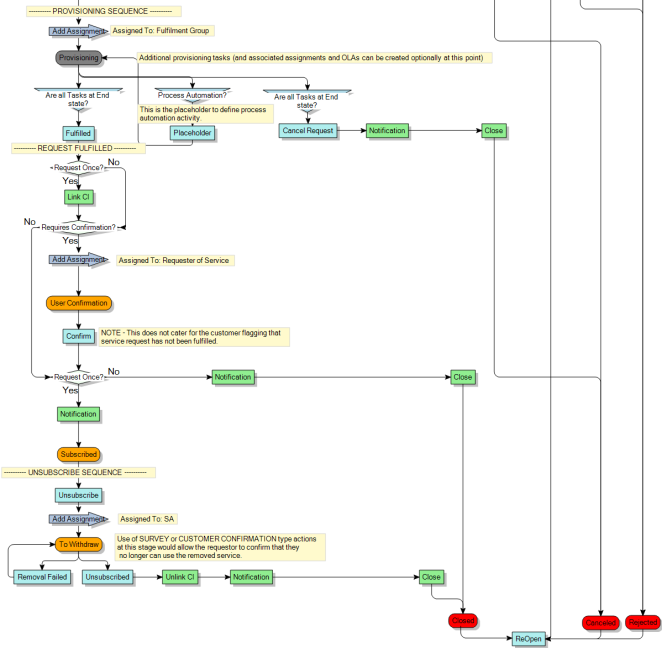
Fulfilled. This is used when the service has been fulfilled by IT, either by process automation or manually. The executor of this action should provide any extra details about this service.
Complete Request Survey. This action is used to allow the service requestor to provide feedback on their experience with the process.

Confirm. This action is used to confirm that the request has been fulfilled.

Raise Ticket. This action can be used by a user of a service to log an incident with the service desk about the service in question.
Unsubscribe. This action is used to remove the service from a user.
Removal Failed. This action can be used when the removal of a service from a user was unsuccessful. This should include details of what went wrong.
Confirm Removal. This action confirms that the service was successfully removed from the user.
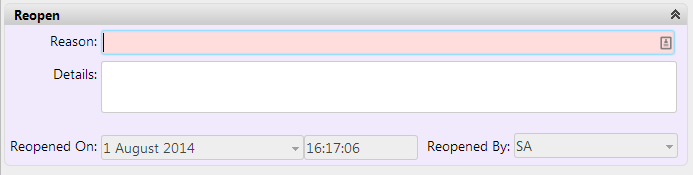
Reopen. This action can be performed to reopen the request. The user who performs the action must give a reason for it to be re-opened.
Process Design
Event Management
Events are usually detected automatically by appropriate monitoring software and logged in Service Desk if they meet requirements to require further investigation.
The details captured about an event should include the following items.
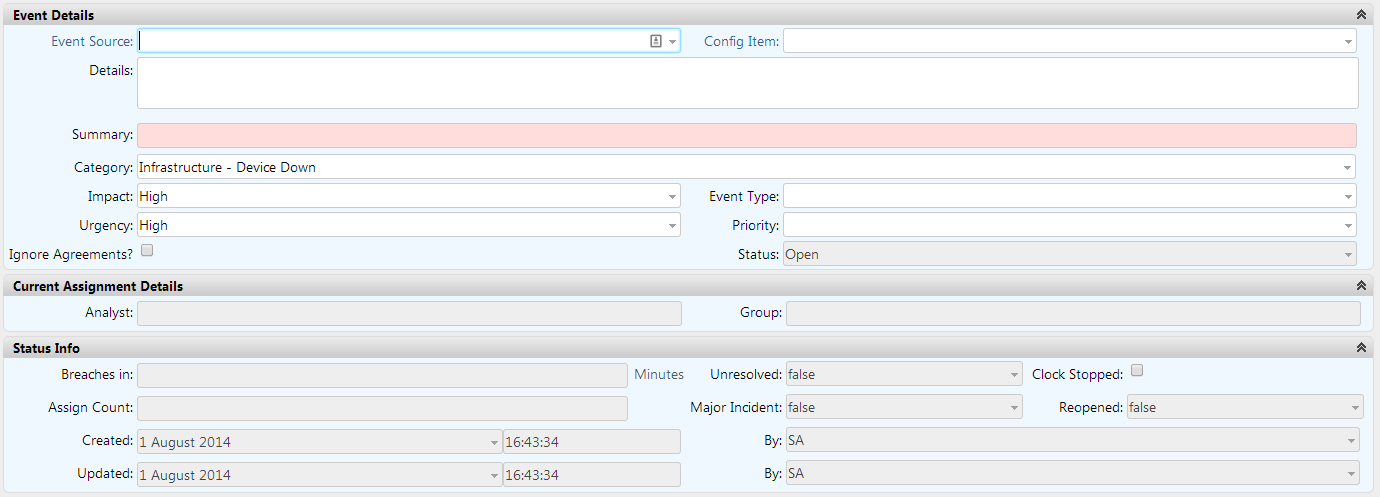
- The source of the event (usually the monitoring tool)
- The affected configuration item
- Any extra details about the event that the monitoring tool is able to provide
- The Impact and Urgency of the Event
- The priority of the event – as calculated from the impact and Urgency values
- The category of the event
- The type of event, this should be one of ‘failure’, ‘information’ or ‘warning’
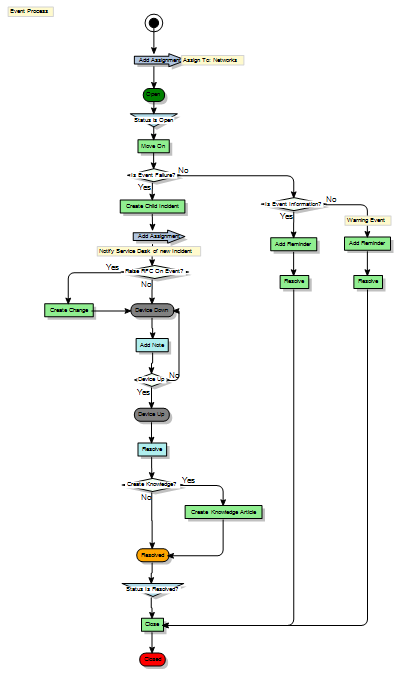
Actions available on the process
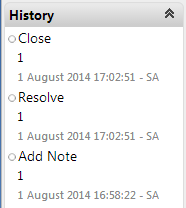
Add Note. This action is used by the monitoring tool to add further information about the event as it progresses, it is used to report the status of the device and until the device is reported as being “up” (operational) the process cannot move forward.
Resolve. Once the event is over, the process can be resolved. The resolver must categorize the resolution, provide any details of what was done and specify a change that caused the event if appropriate.
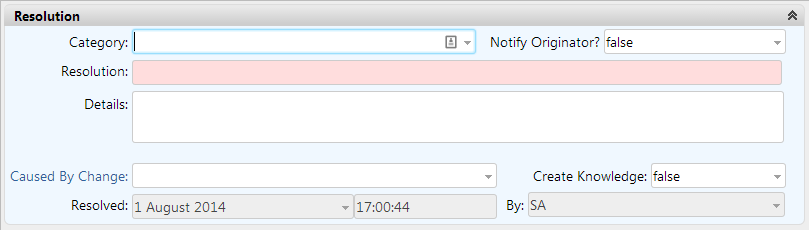
Having resolved the event, it is automatically closed. The details of these are seen in the audit history of the event
Process Design
Service Portfolio Management
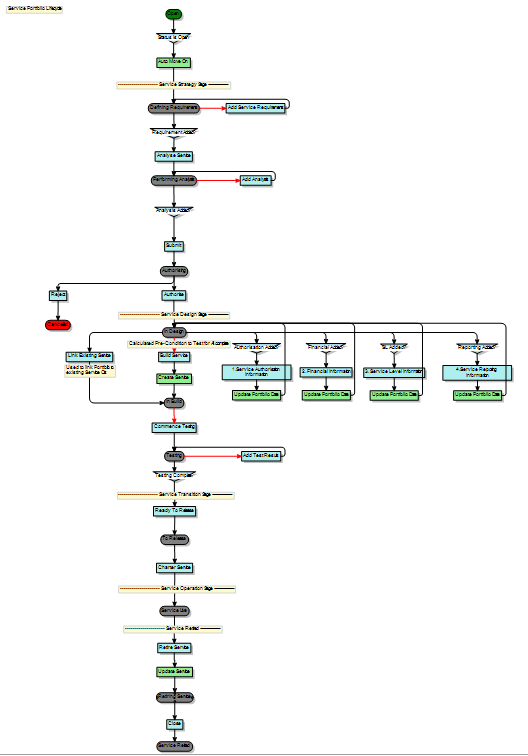
Service Portfolio Management is the over-arching process that manages Services from conception to retirement, including the design, testing, release, and decommission. As this process is central to so much of what IT does there’s lots of data that should be captured, including the fields described below.
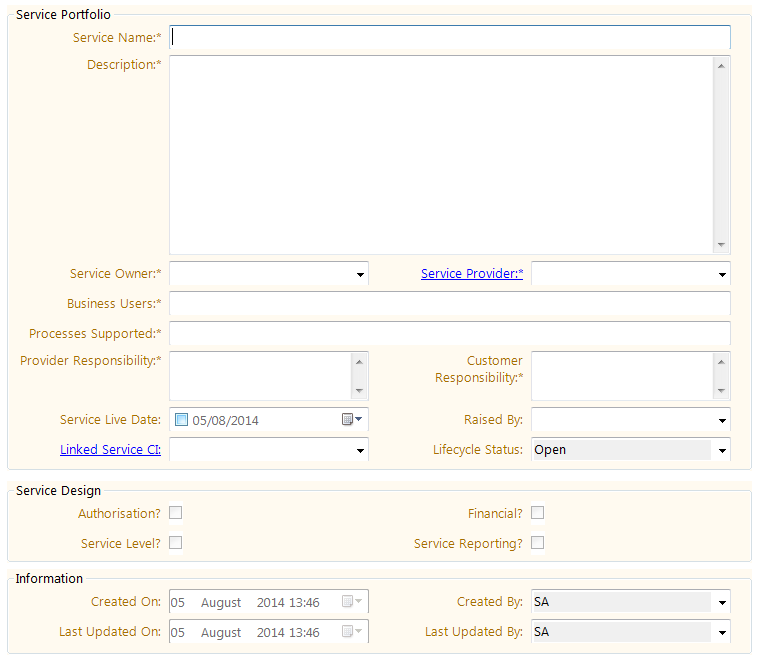
- Every Service must have a unique name
- Use the description field to describe exactly what the service is
- Service Owner
- Service Provider (if it’s a third part service)
- Business Users
- Provider responsibility (what IT is going to deliver)
- Customer responsibility (what users will be expected to do with this service and how they can report any issues)
On the associated Service record you may want to record some further information pertaining to the service itself, not its lifecycle.
- Cost (to IT)
- Charge (to the business)
- The various service level packages available
- The various time zones and locations this service will/won’t be supported in
Process Design
Configuration Item and Asset Management
Configuration Items are anything in the infrastructure that need to be managed for optimal business service continuity. As a result, any organization will hold data about many different types of CI, from servers and switches to software and services. Capturing the correct details about individual CIs is obviously done on a type by type basis.
Some fields common to most hardware-type CIs include:
- Name
- Display name
- Manufacturer
- Model (make this a string so that it can contain both letters and numbers)
- Serial number
- Asset Tag
- CPU
- Memory
- IP Address
- Hard disk size
Fields that should be included on software-type CIs include:
- Software title
- Status of the software item (a list of the different software statuses this could have – design, build, live, retired etc)
- Software provider
Other types of CIs, such as entire systems or individual workstations can have different sets of fields available to complete on them when CIs of these types are created.
Release and Deployment Management
Release management is very similar to change management in that it has a very clear set of steps that enable the authorization of the release. Releases are triggered by service portfolio activities however rather than normal IT operations or break-fix activity.
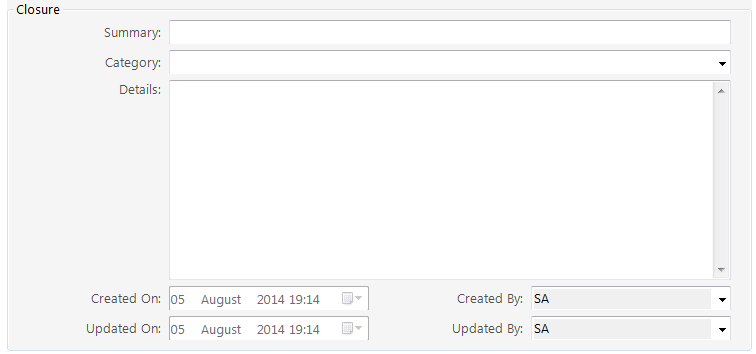
The main window used to create a Release contains the following information.
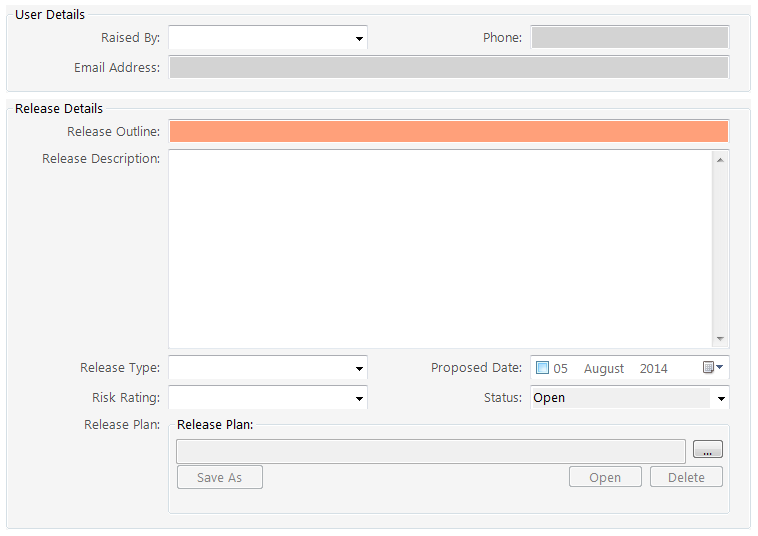
The fields that it’s important to include are:
- The person who has requested the release and their contact details
- A summary of what is to be released
- Some more detailed information on what is going to be released
- The type of release (Emergency, Major or Minor)
- The proposed date for the release
- The risk rating of the release (High, Medium, Low or None)
- The current status of the release
- The release plan should be attached as a document or hyperlink
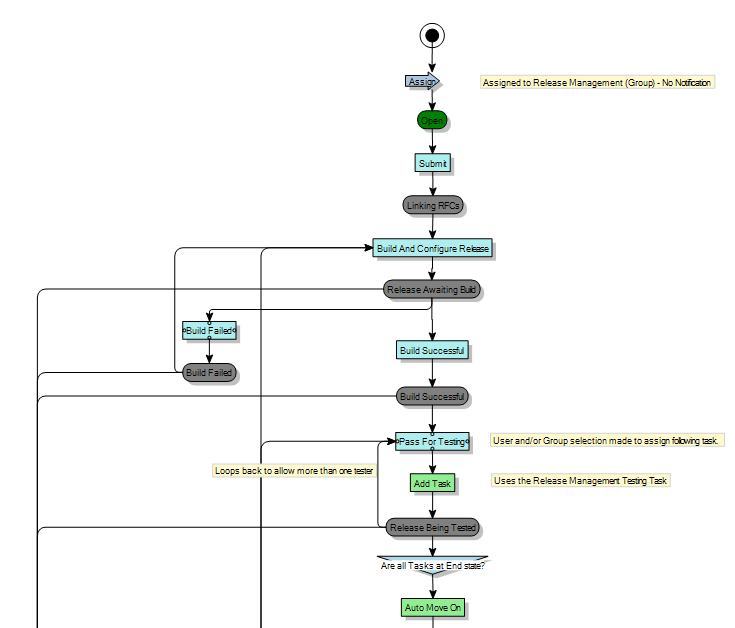
Actions available on the process
Submit – This is the first action available after the release process has been initiated. It confirms that the release plan has been added to the record along with any other pertinent data.
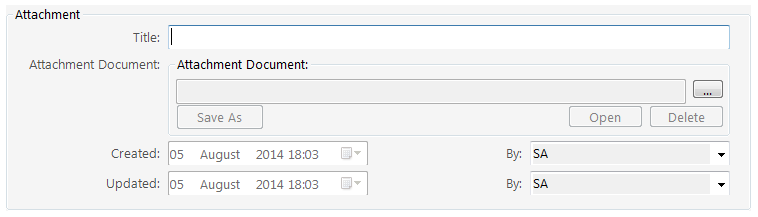
Add Attachment – This action is used to add other supporting documentation or files to the record.
Add Change – use this action to add the release record to an existing change record.
Add Note – Use this action to add any further information to the record that isn’t held in a separate document. This may include meeting minutes or summaries of other discussions or related information.
Assign/Reassign – Assigns the release to another group or set of users. This can also be used for notification purposes.
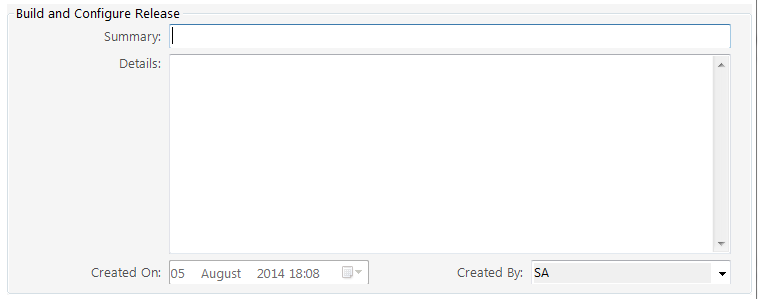
Build and Configure Release – Use this action when the release is ready to be built.
Build Failed – This action is used when a release build fails.
Build Successful – Use this action when the build and configuration of a release has been successful. This action is audited and privileged to ensure that only authorized personnel are able to view it.
Pass for Testing – This action is used when the release is ready to be tested. It is important to complete the fields on this action to ensure that all the correct details are captured.
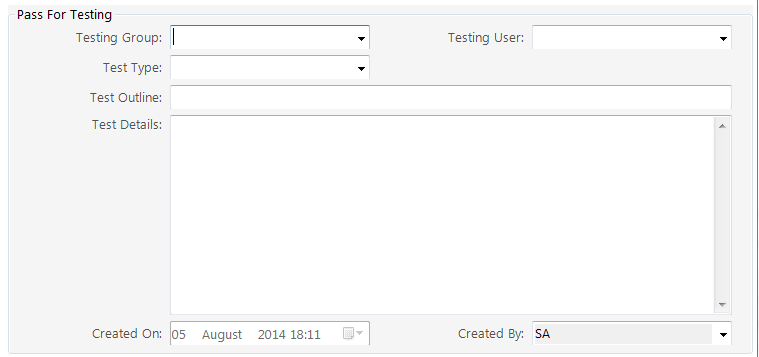
This action triggers a task process assigned to the specified user or group. The task process itself can ensure that correct test procedures are followed based on the type of testing to be executed. The process cannot move forward until all the task processes are finished.
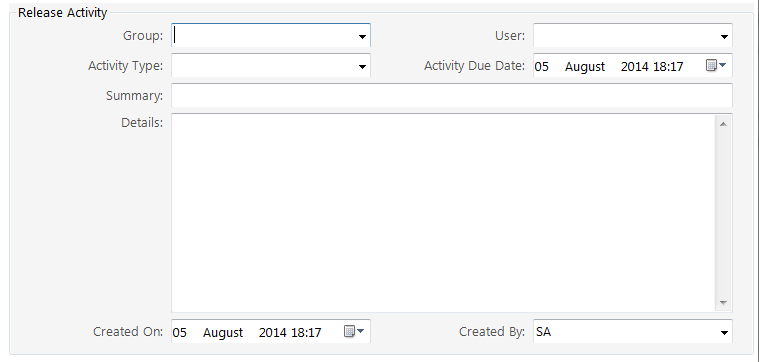
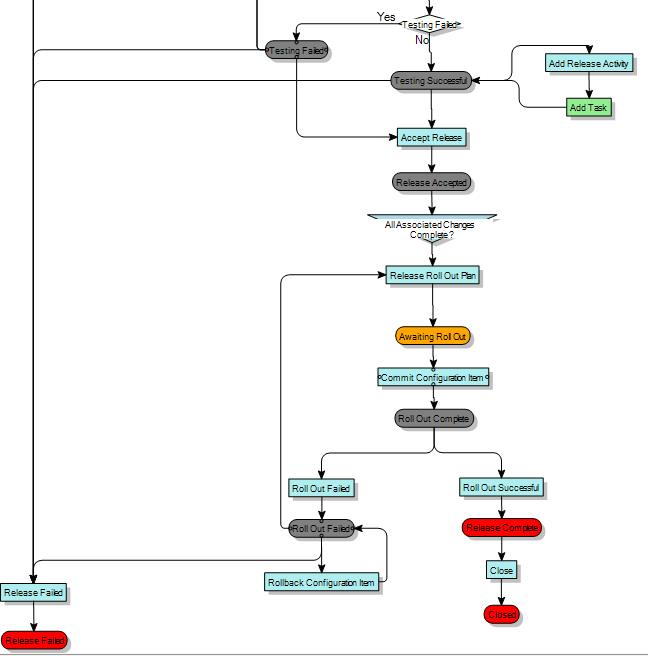
Add release activity – Once all the tasks have passed testing the record moves to a status of ‘Testing Successful’. At this status it is possible to add release activities before accepting the release to be rolled out.
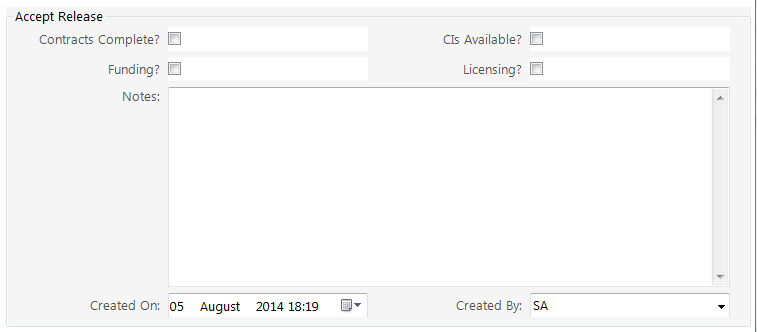
Accept Release – This action requires that the executor completes several fields to confirm that up to this point all due diligence has been performed.
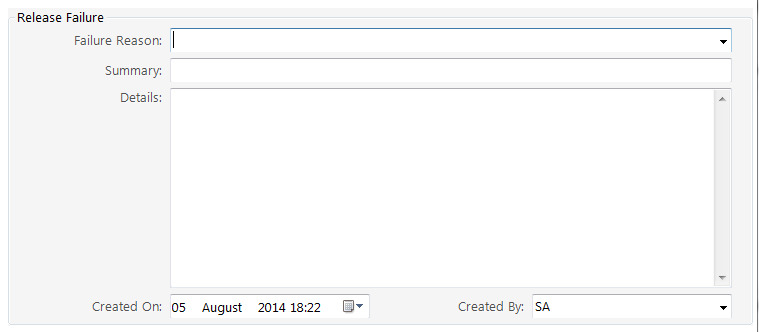
Release Failure – This action is available throughout the process to be used at any stage.
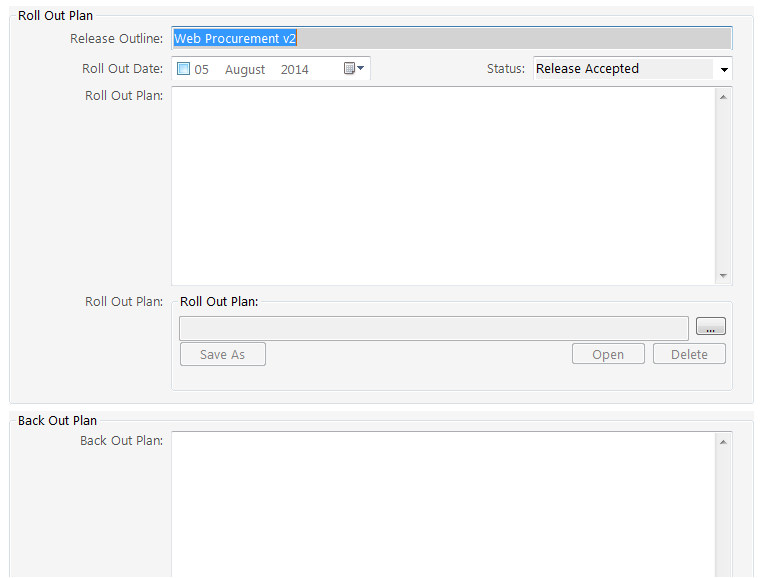
Release Roll-out plan – This action is only available when all associated changes have been completed. It requires that the details of the roll out and the Backout plan are detailed on this record.
Commit Configuration Items – This action is used to commit the alterations to all the associated CIs that were affected by the release. This may include the disposal of the CI as well as potential updates to the CI.
Rollout Failed – Use this action if the rollout of the release was not successful.
Rollout Successful – Use this action when the rollout is successful.
Close – Use this action to close off the release record when it has been successfully rolled out. Ensure the closure category is completed (these categories are the same as those for changes).
Process Design
Continued….
This process is very linear, ensuring that it cannot be moved forward until the relevant documentation has been provided at each stage. However, it can be copied, modified or started again from scratch to support the business requirements of the release processes.