Configuring UEM with Jamf in Ivanti Access
Ivanti Access integrates with Jamf (UEM vendor) to provide Zero Sign-on capability for desktops or laptops managed by them.
Before you begin
-
Verify that you provide the CA signer certificate from the 3rd party UEM used for the identity certificate in the managed desktops.
-
Verify that you have the Desktop Identity Certificate CA referenced in Certificate based Single Sign On (Profile >Federation).
-
Download the PKG file from Ivanti support site.
Procedure
-
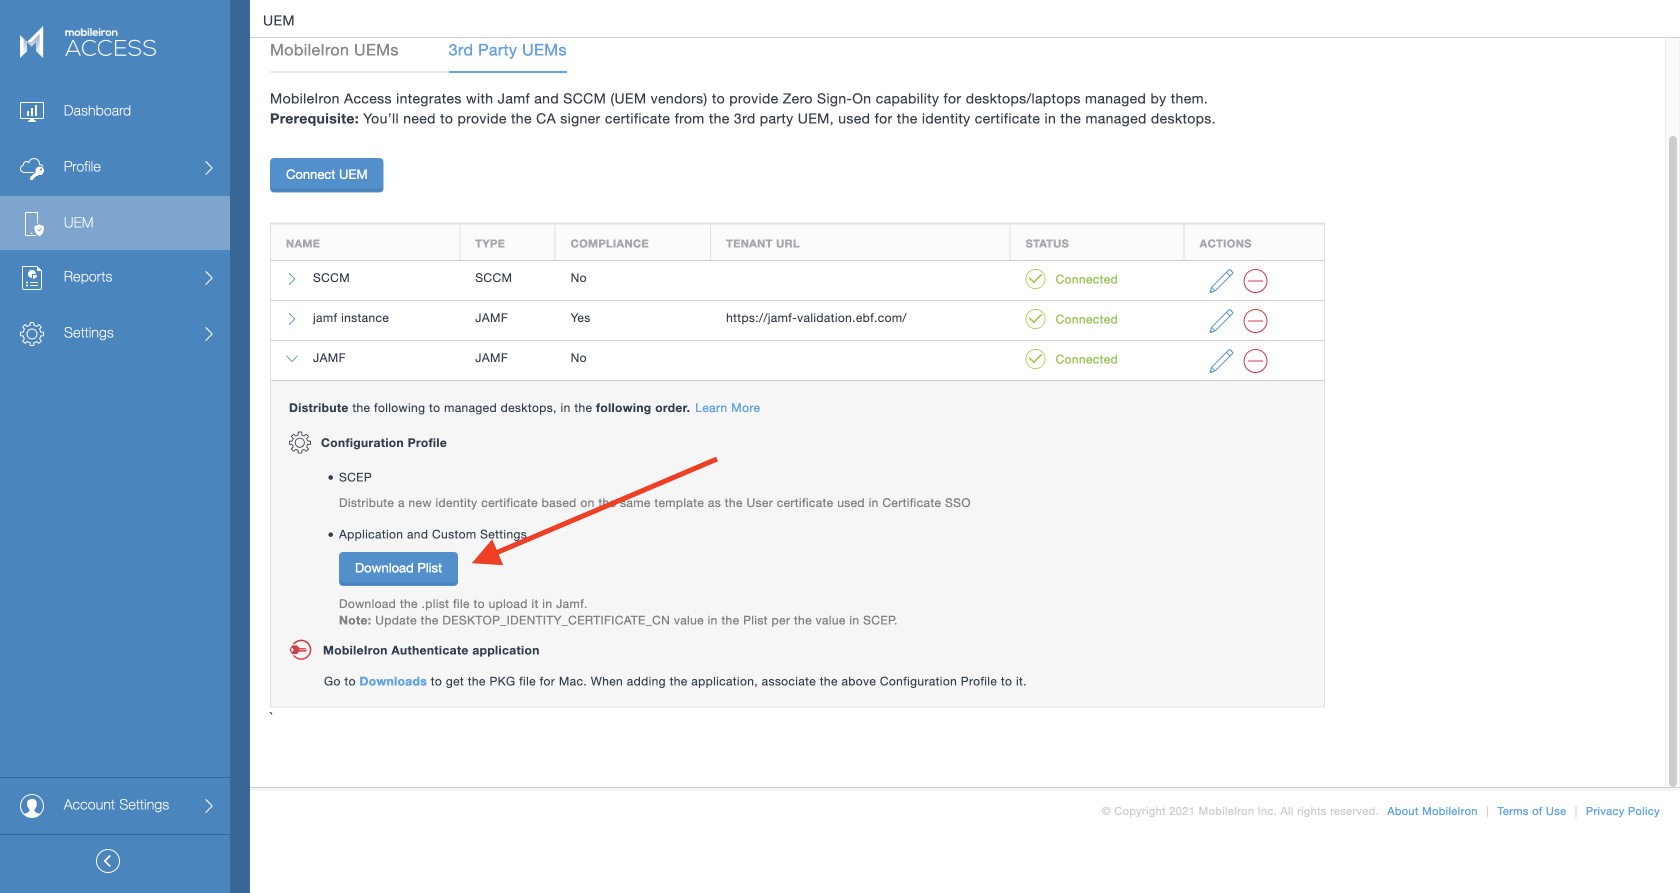
Login to Access > UEM > 3rd Party UEMs.
-
Click Connect UEM.
-
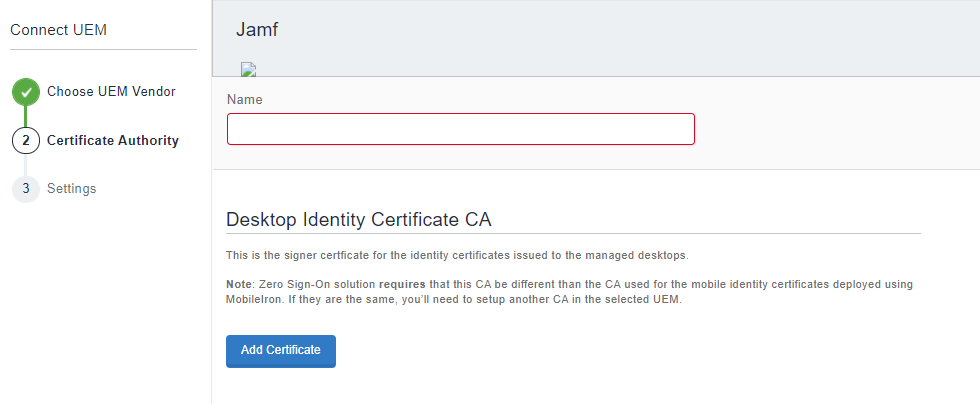
Select Jamf.
-
Enter the following details:
-
Enter a Name.
-
Click Add Certificate under Desktop Identity Certificate CA.
-
-
Enter the Certificate Name and add the certificate.
Or
Paste the certificate.
Only PEM and CER file types are allowed.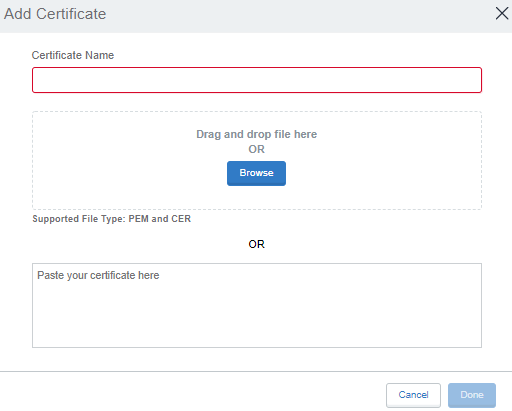
-
Click Done.
-
Click Next.
-
(Optional) Enter the Management Check details.
Check whether desktop is registered to Jamf and check compliance if smart group is provided.
-
Enable to toggle for "Verify desktop is managed by Jamf and limit access to only managed desktops".
Enabling this option performs a check during Authenticate registration and authentication to service providers.
-
Enter the Tenant URL.
-
Username
-
Password

-
-
(Optional) Enter the compliance criteria using Smart Group to enable restricted access to service providers.
Use the Zero Sign-on rule to enforce that only desktops compliant with this criteria are able to access the service providers governed by the policy. -
Click Done.
-
Under UEM > 3rd Party UEMs, the Jamf instance is created.
-
Click Download Plist and save the XML as a .plist file to upload in Jamf.
Next steps