Viewing and Exporting Events
Use the Events screen to track the events that have triggered alerts. To display the Events screen, go to Logs > Events.
Marking as Read or Unread
To enable tracking of which events have been noted and/or addressed by an administrator, you can mark an event as Read. Likewise, you can switch this flag back to Unread.
To set the Read/Unread flag:
- Select one or more events.
- Select Read or Unread or from the Actions menu.
Filtering events
You can display the events using the following filters:
|
Filter |
Description |
|
Read/Unread |
Select Read or Unread from the Show drop-down list. To resume displaying all events, select All. |
|
All |
Select All to resume displaying all events. |
|
Labels |
Select the preferred label from the Labels drop-down to filter based on the label specified in the event. |
|
User |
Enter a user ID and click the search icon to filter based on the user IDs specified in the event. |
|
Start Date/End Date |
Select dates in the Start Date and End Date fields to filter events by date range. |
|
Event Type |
Select an event type from the Type drop-down to filter by event type. |
|
Event Status |
Select an event status from the status drop-down to filter based on the event’s lifecycle state. |
Event lifecycle and status
Events go through the following lifecycle:
Created -> Dispatch Pending -> Dispatching -> Dispatched
The following two failure states may also occur:
- Dispatch Failed: The process of generating the alert failed. This is usually the result of an SMTP problem. Check the SMTP configuration in System Manager, as well as the health of your SMTP server.
- Expired: Another event occurred that makes the alert obsolete, resulting in expiration before dispatch.
Exporting event history
To export a CSV file containing the currently displayed events on the Logs > Events page, click the Export button.
Adding a note
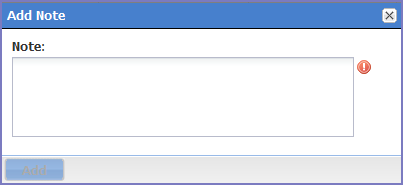
You can add a note to one or more events to help track the work that has been done in response. Each event can hold one note; adding another note replaces the existing note. To add a note:
- Select one or more events.
-
Click Actions > Add Note.

- Enter the text of the note.
- Click Add.
- Press F5 to refresh the screen and confirm that the note displays in the Note field for the selected events.