Before you configure real-time push notifications
Before you configure real-time push notifications;
- Configure, distribute, and install Email+ for iOS. \
Real time notification is supported for Email+ 2.4 0 for iOS through the most recently released version .
For information about installing Email+ for iOS, see Configuring Email+ for iOS.
- For information about the EWS push notification service see Microsoft’s documentation at
https://msdn.microsoft.com/en-us/library/office/dn458791%28v=exchg.150%29.aspx
- Open port 443, for outbound only HTTPS requests, on your firewall to allow Exchange to send notifications to MobileIron CNS. The URL for the CNS server is https://cns.mobileiron.com/PROD. Alternately, you can enter the following IP addresses:
- 13.56.49.23
- 34.253.2.239
Ivanti strongly recommends entering the URL for the notification server, as the IP addresses for the server might change.
- Set up your Exchange environment. See the following:
- Ensure that Go Daddy is available in the Exchange trust store as a trusted certificate authority (CA). The Cloud notification service uses the Go Daddy CA.
Configuring EWS to send push notifications
These steps are applicable for both Exchange 2010 and 2013 servers.
Before you begin
- You must have enabled EWS on the Exchange server.
Procedure
- On the Exchange server, launch IIS Manager.
- Go to Server > Sites > Default Web Site > EWS.
- EWS home authentication and authorization
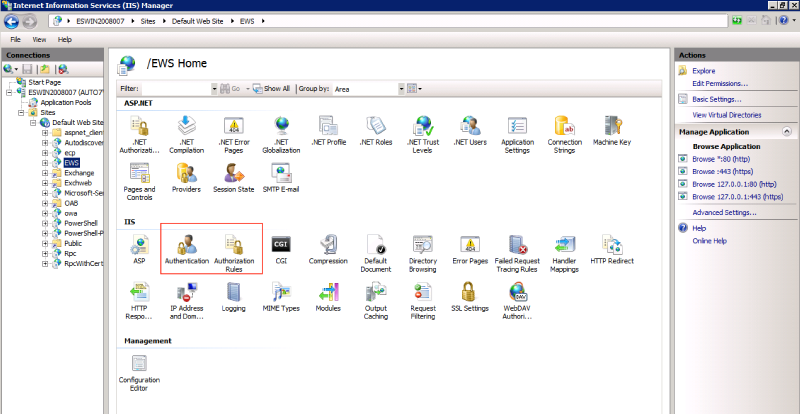
- Verify that the Authentication and Authorization Rules roles are added to IIS.
- Open Authentication and Enable Basic Authentication.
- Open Authorization Rules and add rule to Allow for All users if it was not added automatically.
Next steps
- If your setup uses Tunnel and identity certificates to authenticate with EWS and ActiveSync, do the additional setup on the Exchange server described in Configuring additional Exchange setup for identity certificates.
- Once you have set up your Exchange environment, go to Overview of configuration on Core.
Configuring additional Exchange setup for identity certificates
Perform these steps only if your setup uses Tunnel and identity certificates for authentication to EWS and ActiveSync.
Procedure
- On the Exchange server, launch IIS Manager.
- Go to Server > Sites > Default Web Site > EWS.
- Click on SSL Settings.
- Check Require SSL.
- For Client certificate, select Accept.
- In the EWS directory, click on Configuration Editor and browse to the clientCertificateMappingAuth option. Set the value for the option to True.
- In the EWS directory, click on Authentication and enable the Windows Authentication option. Disable all other authentication types.
Next steps
- Once you have set up your Exchange environment, go to Overview of configuration on Core.