Configuring LDAP servers
You can configure multiple LDAP servers, but each server must contain a unique LDAP configuration.
Procedure
-
Log on to the Admin Portal.
- For Connected Cloud, use https://<URL>/<customer_id>.
- For On-Premise Core, use https://<fully-qualified_domain_name>/admin.
- Select Services > LDAP.
- Click Add New to open the New LDAP Setting page.
-
Enter information in the following fields to set up a connection to the LDAP directory:
- Directory URL: Enter the URL to the LDAP server. Make sure to start with
“ldap://” or “ldaps.” You do not need to specify the ports when you use these default ports: 389 (LDAP) or 636 (LDAPS). - Directory Failover URL: Enter a secondary URL, if available.
-
Directory UserID: Enter the primary user ID, for example, [email protected].
NOTE: Make sure to include the domain, e.g., @local.domain, with the user ID. - Directory Password: Enter the password for the user ID set above.
- Search Results Timeout: Leave it at default of 30 seconds unless you get connection errors.
-
Chase Referrals:
- Select Enable if you are using a multi-forested domain. This indicates you want to use alternate domain controllers when the targeted domain controller does not have a copy of the requested object.
-
Select Disable if you do not use alternate domain controllers.
NOTE: Enabling the Chase Referrals option delays LDAP authentication.
-
Admin State: Select Enable to put the server to service.
NOTE: Make sure to enable the Admin state or the LDAP server will be invisible. -
Domain Options:
- Select Active Directory for the Microsoft Windows server platform.
- Select Domino for the IBM Lotus Domino server platform. The default DN and other LDAP search filters are automatically changed to the Domino server.
- Select Other for other platforms.
- Domain: Enter the domain name for the Active Directory. This information will automatically traverse all levels of the tree and use them to populate Base DN, parent entry.
- Directory URL: Enter the URL to the LDAP server. Make sure to start with
- Click View LDAP Browser to view the LDAP server directory tree structure.
- Click Test.
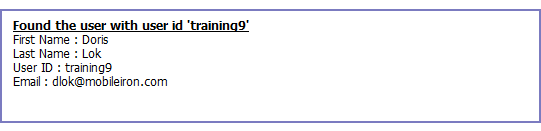
- Enter a user or group identifier in the appropriate field.
-
Click Submit to display a result page if the user was configured on the LDAP server.
-
Return to the LDAP page and click Save.
A dialog appears concerning traffic disruption and prompts you to confirm that you want to proceed.
-
Click Yes.
A dialog appears listing the status.
-
Click OK.
The server you created appears on the LDAP page.
| NOTE: | Core is unable to resolve multiple LDAP entries with the same identifier (SAMAccountName). MobileIron recommends you use globally unique identifiers for each entry across LDAP forests. |