Configuring Threat Management Console
The Threat Management Console Manage page provides a way for you, acting as the administrator, to configure privacy and VPN settings for the environment, as well as a view to the audit logs that collect all activity on the active devices.
General settings
The Manage > General tab provides basic information about the environment and an alternate location for modifying the selected language. It also provides the option to change the administrator password.
Figure 14. Threat Management Console > Manage > General tab
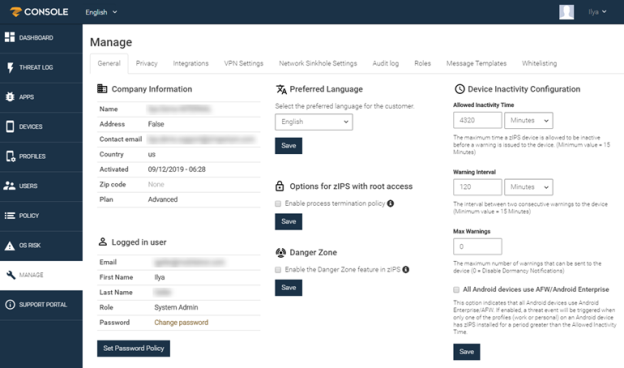
Here are specific configuration elements for the General tab:
|
Section |
Description and actions |
|---|---|
|
Company Information |
Enter your company information, including a contact email. Your plan type and activation date are populated automatically. |
|
Logged in user |
Enter the name, email address, system role, and password for the current user. Click Change password to open the Set Password menu. Click Save to retain your changes. |
|
Set Password Policy |
|
|
Preferred Language |
Choose the language for the Threat Management Console. The current options are English, Japanese or Hebrew. Click Save to retain your changes. |
|
Options for zIPS with root access |
This feature is not supported for MTD clients. |
|
Danger Zone |
When this option is enabled, it alerts the user that they have connected to a Wi-Fi network that is in the Danger Zone database of possibly malicious websites. This option is disabled by default. Click Save to retain your changes. |
|
Device Inactivity Configuration |
This configuration controls how long the system waits before determining that a device is dormant:
Click Save to retain your changes. |