Configuring UEM with SCCM in Access
Access integrates with SCCM (UEM vendor) to provide Zero Sign-on capability for desktops or laptops managed by them.
Before you begin
-
Verify that you provide the CA signer certificate from the 3rd party UEM used for the identity certificate in the managed desktops.
-
Verify that you have the Desktop Identity Certificate CA. See Desktop Identity Certificate.
-
Download the PKG file from support site.
Procedure
-
Login to Access > UEM > 3rd Party UEMs.
-
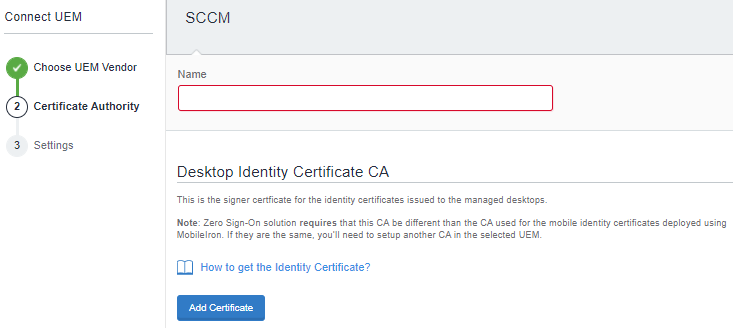
Click Connect UEM.
-
Select SCCM.
-
Click Add Certificate and enter the certificate name.
-
Click Browse to add the certificate.
To download the certificate, run the commandcertutil -ca.cert ca_name.ceron the same machine where the AD CS service is running.
For more information, see How to export Root Certification Authority Certificate. -
Click Done > Next.
-
(Optional) Enter the SCCM details. For more information, see Configuring certificate authority for SCCM and Configuring CMG application for compliance check.
Creating desktop identity certificate
-
On the AD CS machine, for the desktop identity certificate, click certificate templates.
-
Create a new tempate for provisioning certificates.
-
On the Subject Name tab, select Build from Active Directory information.
-
On the Request Handling tab, select Enroll subject without requiring any user input.
-
Add custom SAN attributes to Desktop Identity Certificate.
For more information, see Microsoft Certificate Authority Template.
Next steps
Configuring certificate authority for SCCM
Configuring certificate authority for SCCM
Before you begin
-
Ensure that you have ve set up Certificate Authority (AD CS) running on Microsoft Server.
-
Ensure to export the Root certification authority certificate.
Procedure
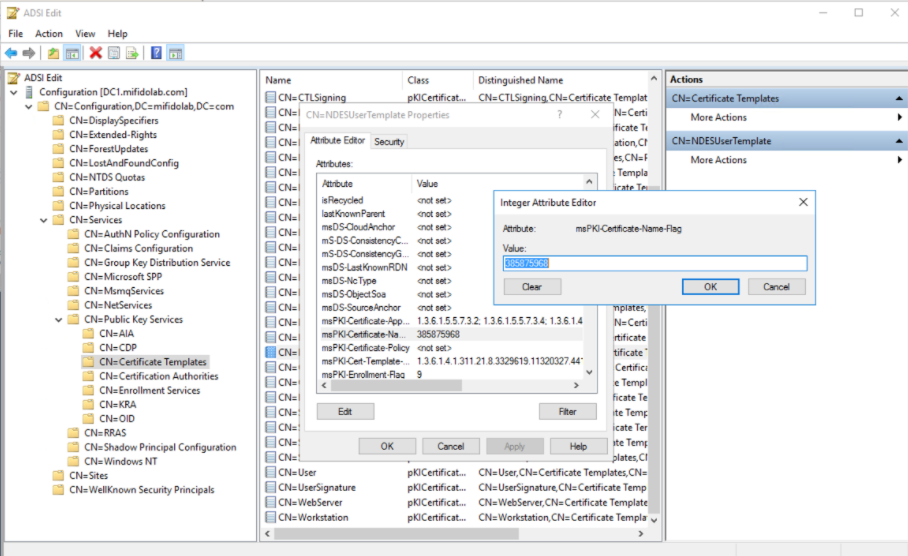
| 1. | On Certificate Authority, run adsiedit.msc. |
| 2. | Click Configuration > Services > Public Key Services > Certificate Templates. |
| 3. | Select the template and enter the value of msPKI-Certificate-Name-Flag field after converting hexadecimal to decimal and adding the value. For more information, see Certificate Name Flag Attribute. For example: To add the following names to the Subject Alternative Name extension in certificates: DS Object Guid, Email, and UPN. |
Domain Names (DNS and NETBIOS): 4194304
UPN: 33554432
Email: 67108864
DS Guid: 285212672
SPN: 8388608
Add all the numbers together and replace the msPKI-Certificate-Name-Flag with that value. To include UPN, Email, and DS Guide, replace the value with 385875968.
| 4. | Request Certificate on Client using the template. |
Configuring CMG application for compliance check
In SCCM, you can configure the CMG application that allows to access SCCM services from the internet.
For more information on how to set up CMG application for SCCM, see Microsoft docs.
Before you begin
To enable Access CMG coomunication, in the Advanced Settings, set the option Allow public client flow to yes for compliance check by Access to SCCM.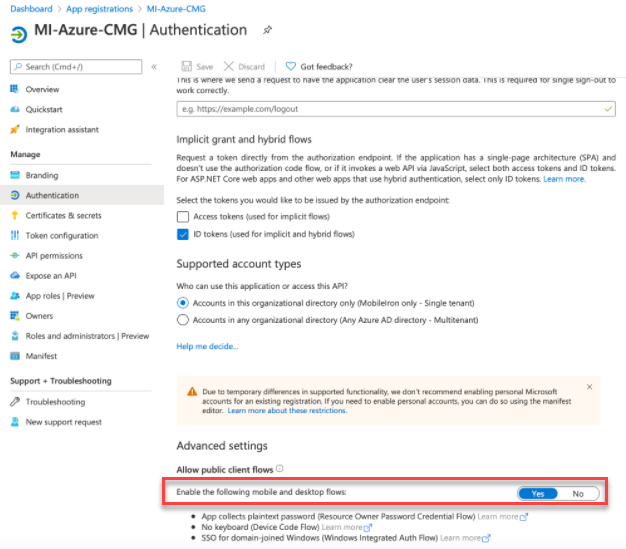
Procedure
-
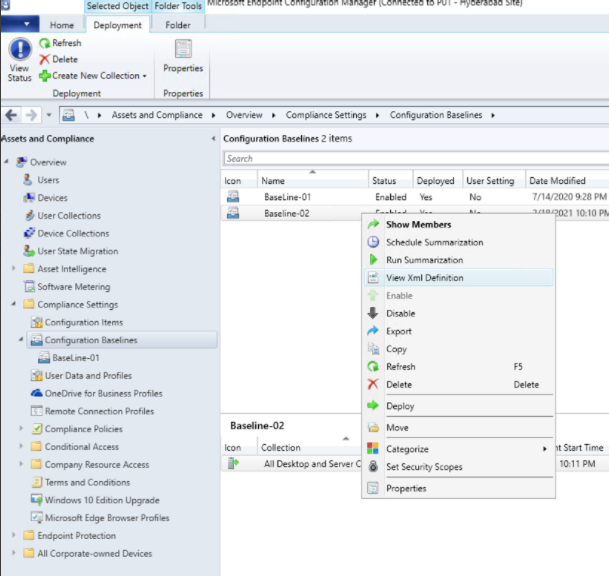
In Configuration Manager, click Compliance Settings.
-
To fetch the Baseline XML files, right-click and select View XML definition.
-
Note the LogicalName and AuthoringScopeID from the XML.
Copy the XML or download and save the XML.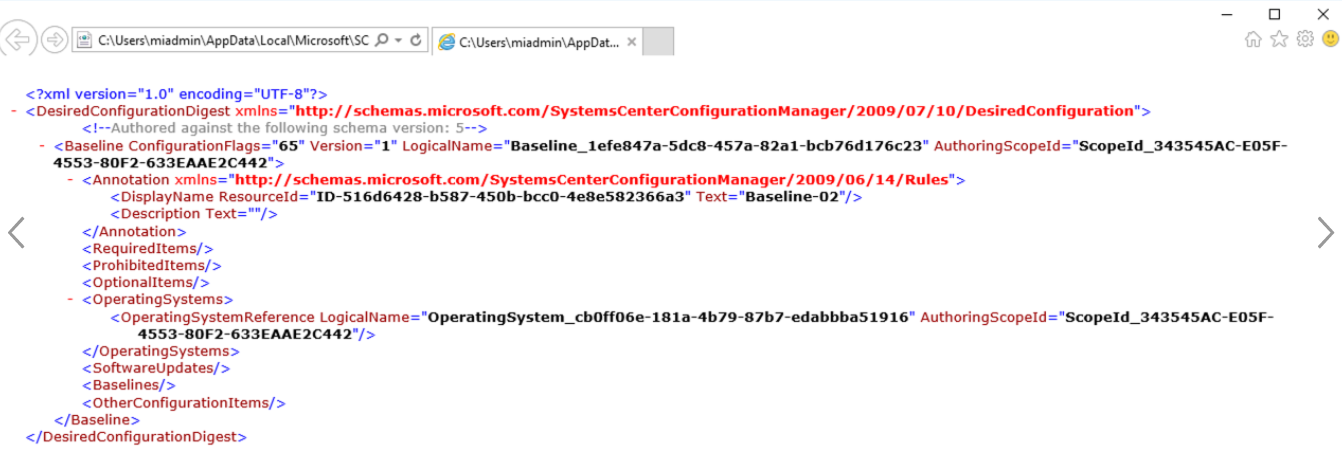
-
To fetch the CMG URL for admin service.
-
Click Start > Run > Regedit to open the registry editor.
-
Expand to open HKEY_LOCAL_MACHINE\SOFTWARE\Microsoft\SMS\SMS_CLOUD_PROXYCONNECTOR\UrlMappings.
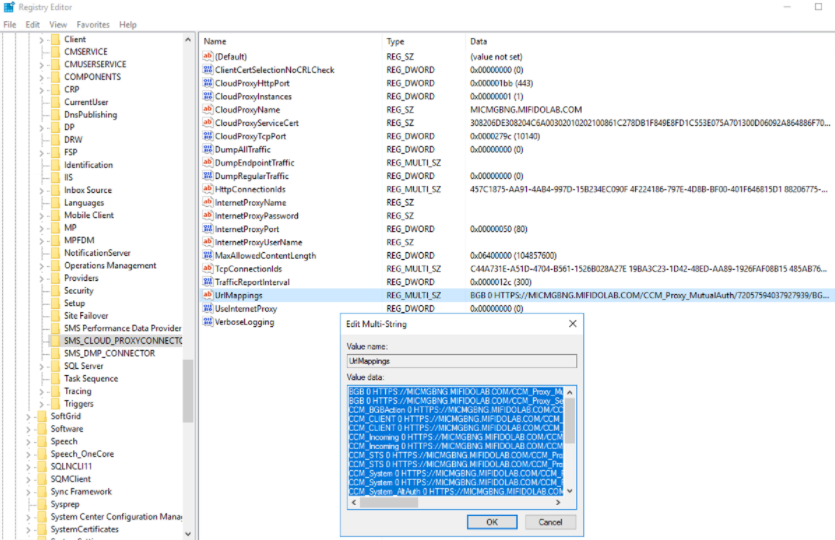
-
Copy the text to notepad and locate the URL for AdminService.
Append '/wmi/SMS_G_System_DCMDeploymentState' to the URL. So the final URL is HTTPS://MICMGBNG.MIFIDOLAB.COM/CCM_Proxy_ServerAuth/72057594037927941/AdminService/wmi/SMS_G_System_DCMDeploymentState.
For example: https://micmgbng.mifidolab.com/CCM_Proxy_ServerAuth/72057594037927941/AdminService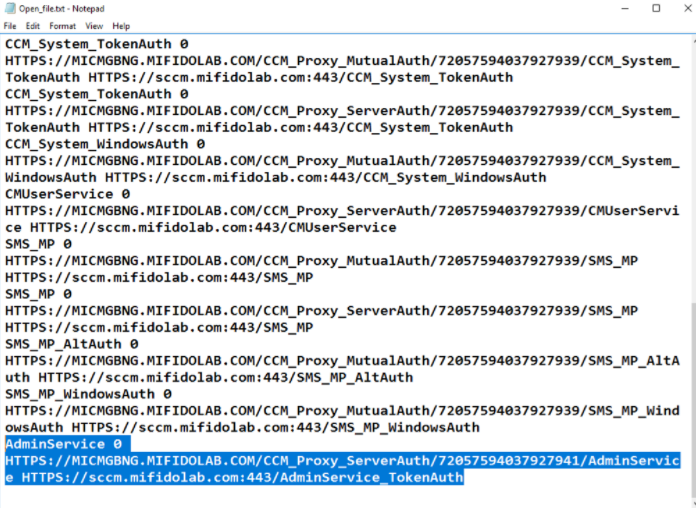
-
-
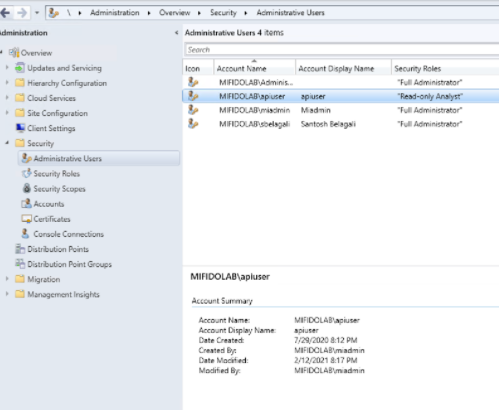
To fetch credentials to authenticate to CMG, open Configuration Manager.
-
In Configuration Manager, add a user from the domain with Read-Only access.
-
-
Fetch the Client ID, Secret ID, and Tenant ID from Azure portal.
-
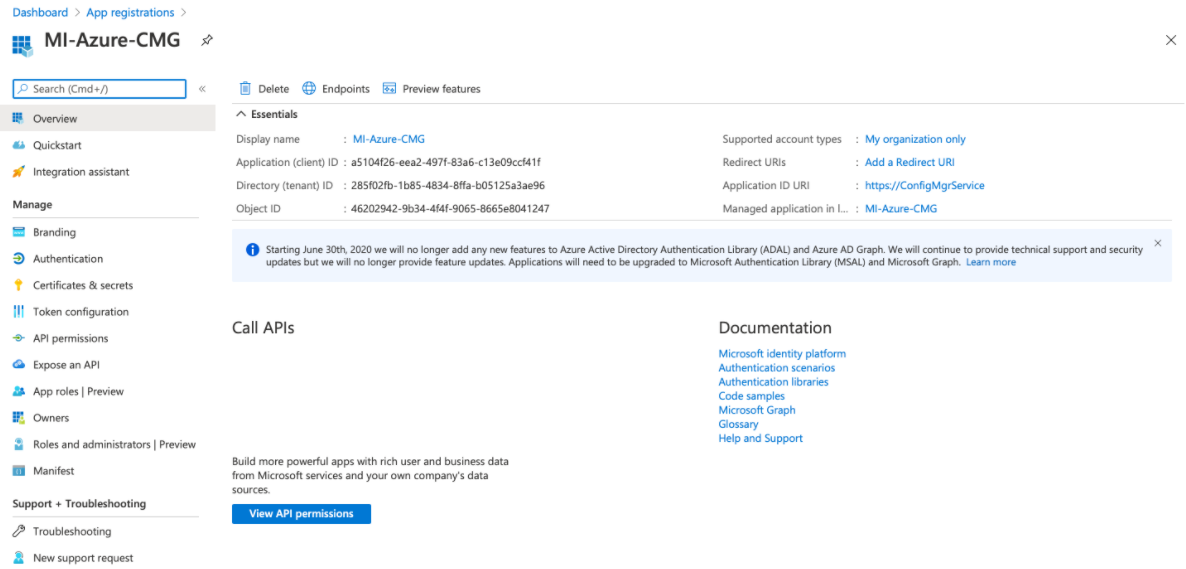
Login to Azure Portal > App Registration.
-
Click the CMG application created.
-
Copy the Client ID, Tenant ID, and the Application ID URI.
-
(Optional) Click Certificates & secrets and add a new Client secret.
Note the ID and Value of this secret.
-
Configruing SCCM to distribute Authenticate and user environment variable
Before you begin
-
Download the MSI file for Authenticate from Ivanti support site.
-
Copy the values of command line from Access.
-
Configure the client for user environment variable to use in command line.
-
On your client, create a new GPO or edit the existing user setting.
-
Click User config > Preferences > Windows Settings > Environment.
-
Create a new environment variable:
-
Action: Update
-
Select: User Variable
-
Name: UPN
-
Value: %UPN%
-
-
Click the Commontab.
-
Enter a description: Create an environment variable called UPN and populate it with the UserPrincipalName attribute for the user, as held in Active Directory.
-
Tick "Item-level Targeting" and click Targeting.
-
Select New Item > LDAP Query.
-
Filter: (&(objectClass=user)(sAMAccountName=%USERNAME%))
-
Binding: LDAP:
-
Attribute: userPrincipalName
-
Environment variable name: _UPN
-
-
Click Ok.
-
Procedure
-
Admin must update DESKTOP_IDENTITY_CERTIFICATE_CN and DESKTOP_IDENTITY_CERTIFICATE_ISSUER_CN based on their environment DESKTOP_IDENTITY_CERTIFICATE_ISSUER_CN = the subject of the CA used. This is used to upload to SCCM configuration in Access.
DESKTOP_IDENTITY_CERTIFICATE_CN-
If it is a static, then use the string.
-
If it is an environment variable as defined, use %env_var%
DESKTOP_IDENTITY_CERTIFICATE_CN=DesktopIdentity DESKTOP_IDENTITY_CERTIFICATE_ISSUER_CN=DesktopIdentityCA
ACCESS_URL=https://16188152107641848098929.miaccessqa.com/MobileIron WEBSOCKET_API_URL=wss://ws-access.miaccessqa.com/ws BOOTSTRAP_URL=https://access.miaccessqa.com/MobileIron/efa/api/v1/setManaged
-
-
Create Application on SCCM
-
On the Configuration Manager, click Software Library> Overview > Application Management > Applications > Create Application.
The Create Application Wizard opens. -
On the General tab, select "Automatically detect information about this application from installation files".
-
Click Browse in the Location filed and share the file on the appropriate SCCM network.
-
Click Next > Next.
-
On the General Information tab, enter the Name.
-
In the Installation program path, paste the Access URL after the existing path /q.
-
On the Install behavior drop down, select Install for user as enviroment user variable is used.
-
Click Next > Next.
-
Right-click the Authenticate application > Properties.
-
On Content tab, select Download content from distribution point and run locally.
-
-
Deploy the application to preferred user or device collection.
-
Right-click the application in the Applications folder and click Deploy.
-
On the Deploy Software Wizard General tab, click Browse to select the Collection.
-
Select User Collections or Device Collections appropriately and click Ok.
-