Configuring multi-factor authentication in Ivanti Access
The following describes the multi-factor authentication configuration in Ivanti Access.
Procedure: Overview of steps
- Configuring multi-factor authentication.
See Configuring user ID for multi-factor authentication. - Add a conditional rule in Ivanti Access for enabling multi-factor authentication, which triggers authentication using the UEM client.
See Adding a conditional rule for multi-factor authentication. - Configure your company branding. Users see the branding on the messages on the device from which they attempt to access cloud services.
See Configuring branding for multi-factor authentication in Ivanti Access. - Publish the changes.
See Publishing the changes.
Configuring user ID for multi-factor authentication
Enable multi-factor authentication in Ivanti Access in Profile > Client Registration Settings. You will also map the fields from which the UEM client gets user identifying information.
Before you begin
Upload a sample Ivanti Tunnel certificate in Profile > User Certificates. For more information, see User Certificates.
Procedure
- In Ivanti Access, go to Profile > Client Registration Settings.
- For User Certificate, select the user certificate from which to get the user identification information.
The user certificate is the Ivanti Tunnel sample certificate you uploaded to Ivanti Access.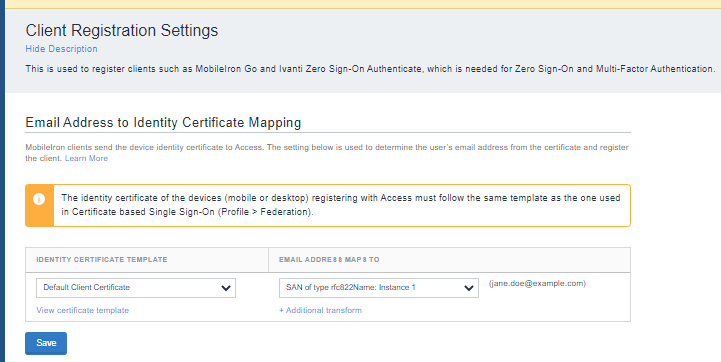
- For Field Name, select the field from which the UEM client gets user identifying information.
- (Optional) For Additional transforms, enter a MiTra expression.
Configure a MiTra expression if the value in the certificate does not map directly to the user identifying information.
Example: select:X509:SubjectAltName:rfc822Name - Click Save.
One time pass code (OTP) is enabled by default.
Next steps
Add a conditional rule for multi-factor authentication. See Adding a conditional rule for multi-factor authentication.
For information about MiTra expressions, see Language to generate values from certificate fields.
Adding a conditional rule for multi-factor authentication
In the default policy in Ivanti Access, add a Multi-Factor Authentication conditional rule. The rule triggers multi-factor authentication.
Procedure
- In Ivanti Access, go to Profile > Conditional Access.
- Expand Default Policy.
- Click +Add Rule > Multi-Factor Authentication to add the conditional rule.
-
Complete the requested fields.
Item
Description
Name
Enter a name for the multi-factor authentication rule.
Description
Enter a descriptive text for the rule.
Map the Identity Provider (IDP) user ID to Authenticator user ID
Select one of the following:
•SAML Subject (Default)
•SAML Attribute
Additional transforms
(Optional) Enter a MiTra expression.
Configure a MiTra expression, if the value in the federation response does not map directly to the user identifying information.
Example: The certificate contains the base-64 representation of the user ID, however you need the hex representation. Enter the following:
decode:Base64
Rule Action
From the drop down menu, select Allow.
- Click Done to save the policy and rule.
The rule appears at top of the list in the policy. - Ensure that the Trusted App and Device rule is enabled and the rule is moved to the top of the list.
- Edit the General Bypass rule, and set the Action for the rule to Block.
You can create additional conditional rules to further define how multi-factor authentication is triggered. For example, you can create an User Info Rule to trigger multi-factor authentication for only a certain set of users or groups
Next steps
Configure branding. See Configuring branding for multi-factor authentication in Ivanti Access.
For information about MiTra expressions, see Language to generate values from certificate fields.
Configuring branding for multi-factor authentication in Ivanti Access
Customize the user experience for your enterprise users by uploading your company logo to Access. The user notification screens are customized to display your company logo.
Ensure that your company logo is no more than 260 pixels wide by 30 pixels high. Supported file types are: PNG, JPG, JPEG, and SVG.
Procedure
| 1. | In Ivanti Access, go to Profile > Branding. |
| 2. | In the Company Logo section, drag and drop your company logo or click Choose to navigate to the location of the file and add. |
Next steps
Publish the updates. See Publishing the changes.
Publishing the changes
Publish the changes to make the updates available.
Procedure
| 1. | In the Ivanti Access administrative portal, go to Profile > Overview. |
| 2. | Click Publish. |
Publish is only available if a federated pair has been created.
| 3. | Click OK. |
Next steps
Configure SasS sign-on in UEM.