Managing events
The tasks that are common to all event types are:
- Creating an event
- Editing an event
- Deleting an event
- Ensuring the alert is sent to the correct recipients
- Applying the event to a label
- Setting alert retries
Creating an event
Procedure
To create an event, in the Admin Portal:
- Go to Logs > Event Settings.
- Click Add New.
- Select the type of event from the drop-down.
-
Complete the information for the selected event.
Each event type has settings specific to the event type. See Event settings for information on the settings.
- Click Save.
Editing an event
Procedure
To edit an event, in the Admin Portal:
- Go to Logs > Event Settings.
- Select the event you want to edit.
- Click Edit.
- Make your changes.
- Click Save.
Deleting an event
Procedure
To delete an event, in the Admin Portal:
- Go to Logs > Event Settings.
- Select the event you want to delete.
- Click Delete.
Ensuring the alert is sent to the correct recipients
When you create an event, you designate recipients for the resulting alert. Each event type includes the alert configuration section shown in the following figure.
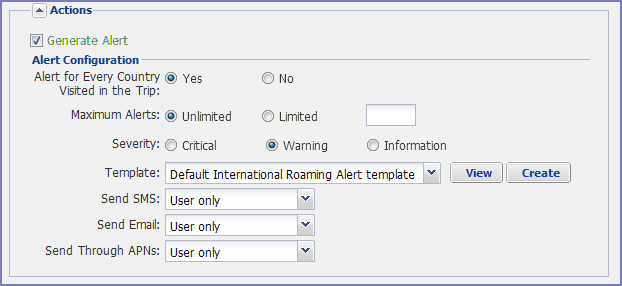
For each type of alert (i.e. SMS
- None
- User only
- User + Admin
- Admin only
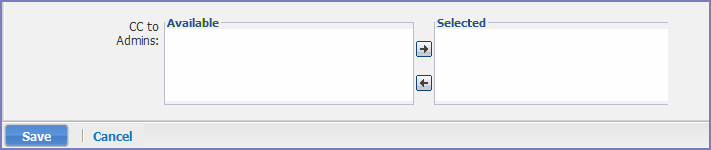
If you select one of the Admin options, a CC to Admins section is displayed in the dialog box. This section displays a list of devices. Under the Available heading , select a device (or devices), that is associated with an email address that you want to notify, other than the device user. Core will send a notification to the email address associated with the device or devices that appear under the Selected heading.
Figure 1. CC to Admins
Only users who have registered devices can appear in the Apply to Users list.
Applying the event to a label
To specify the devices to which the event should apply, you select one or more labels when you create the event. The amount of time it takes to apply an event to a label depends on the number of devices identified by the label. Therefore, it may take some time for the label name to display as selected for the event.
Setting alert retries
You can specify the number of times Core attempts to send an SMS alert or registration email.
Procedure
-
Enter the number of retries for SMS and registration email.
Reminders are sent at 48-hour intervals until the number of reminders specified are sent, or the device is registered.
For example, if you use the default for Number of Retries for Email (which is 2), an email is sent immediately after registration. If the device is not registered within 48 hours, a second email is sent. No other reminders are sent because you specified two reminders.
- Click Save.
Setting Core SMS, email, and push notifications
You can designate specific hours for the sending of SMS, email, and push notifications. The default notification time is 0300 (3 a.m.), which can be disruptive.
Procedure
To override the default notification schedule:
- From the Admin Portal, go to Settings > System Settings > General > Alert.
- Select the Override Default Schedule SMS, Email, Push notification check box. The section expands.
- Enter the notification start time and end time, in UTC hours.
- Select the days of the week when sending notifications are allowed.
- Click Save.