Certificate Management
Use the Certificate Management feature in the Sentry System Manager in Security > Certificate Mgmt to manage the certificate required for browsers to access the Ivanti Standalone Sentry System Manager.
You can perform the following tasks from the Certificate Management screen:
•Generate a self-signed certificate
•Generate a certificate signing request (CSR) for a certificate authority (CA)
•Upload a certificate.
When you update a certificate, you are prompted to confirm that you want to proceed because the HTTP service needs to be restarted, resulting in service disruption.
Generating a self-signed certificate for the Ivanti Standalone Sentry portal
If you use a self-signed certificate, a browser that is connecting to the Sentry System Manager is warned that the Sentry certificate is not from a trusted source. Therefore, Ivanti recommends that you use a certificate from a trusted Certificate Authority (CA).
To generate a self-signed certificate, in the Sentry System Manager go to Security > Certificate Mgmt.
Procedure
| 1. | Click the Manage Certificate link for Portal HTTPS. |
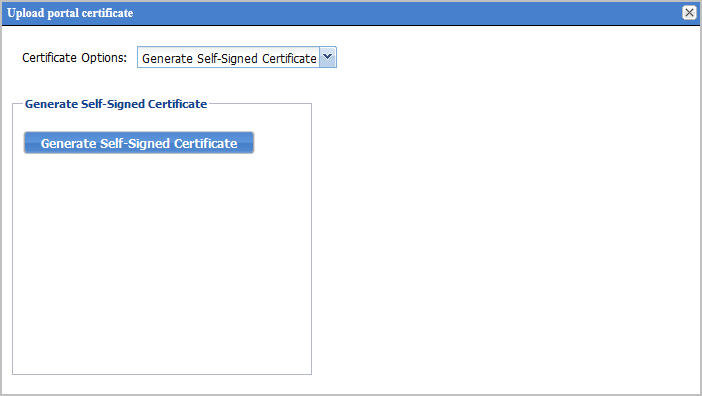
| 2. | For Certificate Options, select Generate Self-Signed Certificate from the dropdown list. |
Figure 1. Generate self-signed certificate

| 3. | Click the Generate Self Signed Certificate button. |
Generating a certificate signing request (CSR)
To get a certificate from a trusted Certificate Authority (CA), use the Security > Certificate Mgmt page to generate a certificate signing request (CSR) to the CA. Once you receive the signed certificate, you can use the same page to upload it to Sentry.
Procedure
| 1. | Click the Manage Certificate link for Portal HTTPS. |
| 2. | For Certificate Options, select Generate CSR from the dropdown list. |
| 3. | Use the following guidelines to complete the displayed form: |
|
Field |
Description |
|
Common Name |
Enter the server host name. |
|
|
Enter the email address of the contact person in your organization who should receive the resulting certificate. |
|
Company |
Enter the name of the company requesting the certificate. |
|
Department |
Enter the department requesting the certificate. |
|
City |
Enter the city in which the company is located. |
|
State |
Enter the state in which the company is located. |
|
Country |
Enter the two-character abbreviation for the country in which the company is located. |
|
Key Length |
Select 2048 or 3072 to specify the length of each key in the pair. Longer keys provide stronger security, but may impact performance. |
| 4. | Click Generate. |
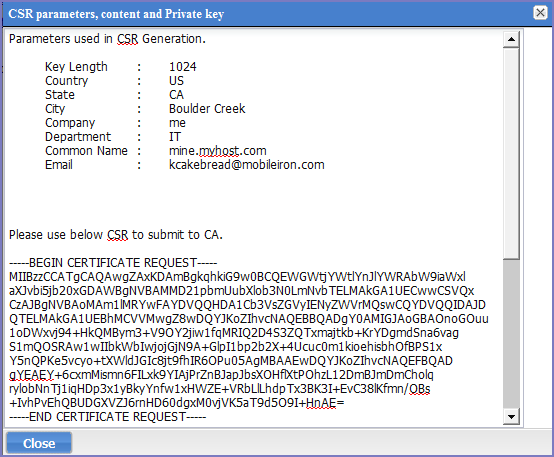
A message similar to the following displays.
Figure 2. Certificate request

| 5. | Copy the content between BEGIN RSA PRIVATE KEY and END RSA PRIVATE KEY to another text file. |
| 6. | Click Close. |
| 7. | Submit the file you created in step 5 to the certifying authority. |
Uploading certificates
To upload the CA certificate from the certifying authority in the Ivanti Standalone Sentry System Manager go to Security > Certificate Mgmt.
Procedure
| 1. | Click the Manage Certificate link for Portal HTTPS. |
| 2. | For Certificate Options, select Upload Certificate. |
| 3. | Select the certificates as indicated in the following table: |
|
Certificate |
File to Select |
|
Key file |
The file created in Generating a certificate signing request (CSR). |
|
Server certificate |
The CA certificate file you received from the certifying authority. |
|
CA certificate |
The generic CA certificate file. |
| 4. | Click the Upload Certificate button. |
Viewing certificates
To view a certificate, in the Ivanti Standalone Sentry System Manager go to Security > Certificate Mgmt and click the View Certificate link for Portal HTTPS.