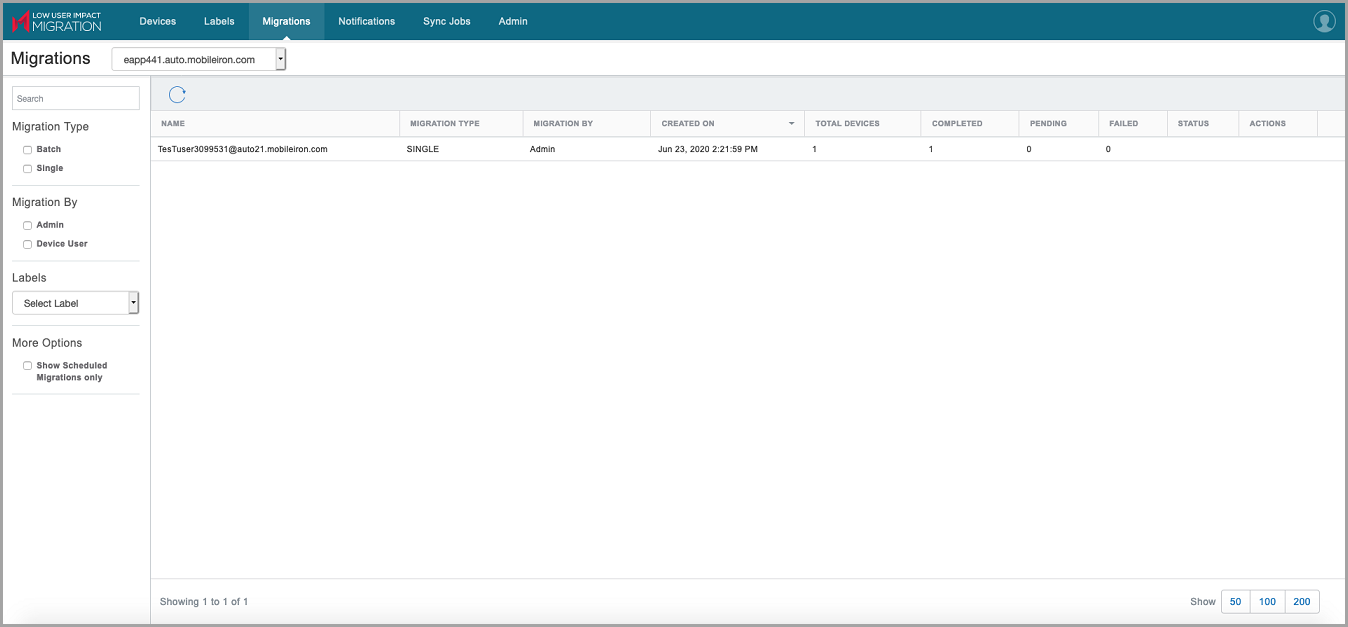
Migrations
The Migrations page displays all the device migrations created in the selected Core instance as paginated lists. Use the drop-down box to switch between Core instances. This switch to a different Core instance reflects on other pages of the Migration Portal as well.
For information and procedures related to scheduled migrations, see the Labels topic.
Migration Portal supports migrations with Device Registration Settings enabled in the User Settings page of Cloud (see Cloud product documentation). Device registration information that are used during Cloud device registration (such as Manufacturer Whitelisting/Blacklisting, Security Patch Level, Device Owner, and OS version) are retrieved from Core to prevent migration of devices not meeting the registration settings criteria set on the Cloud tenant. Note that iOS Minimum Version and Minimum SafetyNet Certification are not supported.
In case of any errors, a message such as the following statement might be displayed:
"Device doesn't meet the requirements for bulk registration, please check with your admin."
To find the previous migration requests quickly, use the search box and the following filters:
- Migration Type - Batch, Single
- Migration By - Admin, Device User
- Labels - Select one of the existing labels
- More Options - Show Scheduled Migrations only
The numbers for a migration may get updated with some delay depending on the load on the system.
Managing the migrations
In the Migrations page, click the links for total, completed, and failed labels (based on migration requests) to go to the Devices page.
In the Actions column, click Cancel Migration if required. This option is applicable only to User Controlled migrations triggered at the label level. A confirmation window will display the number of device(s) in a label that are not migrated yet. Click Confirm to cancel migration.
If migration is cancelled:
- Device(s) that are already migrated will not be affected or rolled back.
- Device(s) that are in the process of migration will continue to migrate.
- In the Device Migration Portal, the option to migrate any unmigrated device will be disabled.
Migration of Android Enterprise devices
Core to Cloud migration supports all Android Enterprise modes. In Cloud, click Admin > Android > Android enterprise to view a list of enterprise service accounts (ESA) migrated from Core servers.
Prerequisites
-
Migration Portal R10
- Cloud 73
- Migrator Component 10.8.0.0
-
Mobile@Work for Android 10.8.0.0
Before you begin
- Android Enterprise should be enabled in both Core and Cloud.
- Migration of Android Enterprise devices is supported only if Core and Cloud are bound with Managed Google Play Account only.
-
Android Work ESA should be enabled in the Admin page.
Overview
For more information about Android Enterprise modes, see Android Enterprise overview in Core the Device Management Guide.
- A device registered in Work Profile mode in Core will retire from Core and register in Cloud after migration. After migration, the Work Profile policy or configuration is applied in Cloud provided the configuration already exists in Cloud.
- A device registered in Work Managed Device mode in Core will retire from Core and register in Cloud after migration. The device should not be wiped at the time of migration.
- A device registered in Corporate Owned Personal Enabled (COPE) mode or a Managed Device with Work Profile in Core will retire from Core and register in Cloud after migration. The device should not be wiped at the time of migration.
-
Device Admin mode to Work Profile mode conversion is supported on a migrated client in Cloud.
-
During the migration process, direct conversion from Device Admin mode in Core to Work Profile mode in Cloud is not supported.
Migrating Work Managed Devices in Kiosk mode
Before migrating the Work Managed Devices that are in Kiosk mode, perform the following procedure to ensure that the device enters the Kiosk mode automatically post migration:
- Log in to Cloud.
- Go to Configurations.
- Click + Add and select Lockdown & Kiosk: Android enterprise to add a new configuration. You can also edit an existing configuration.
- Enter a configuration name and description.
- In the Choose a Lockdown type section, click Work Managed Devices (Device Owner).
- In the Kiosk Mode Settings, select Enable Kiosk Mode.
- Select the Enter Kiosk automatically (on initial setup only) option.
- Click Next.
- Select a distribution level for the configuration.
- Click Done.
For more information about setting up this configuration, see the "Using Device Owner" section of the Cloud Administrator Guide.
Managed Devices with Work Profile (COPE devices)
For Android Enterprise devices using Corporate Owned Personal Enabled (COPE) or the Managed Devices with Work Profile migrating from Core to Cloud, the apps will not be uninstalled from the migrated devices if the same apps were not available in Cloud after migration. This is also applicable to in-house apps moved to profile space.
Workaround: Import and distribute the same apps to the migrated COPE devices. Then, you can un-distribute or delete the apps from Cloud. This would uninstall the apps from the migrated COPE devices.
If an Android Enterprise device has queued the app installations, and the device gets migrated before the apps are installed, the apps will be installed after device migration. These apps will not be uninstalled even if they are not available in Cloud.