AppStore TestFlight
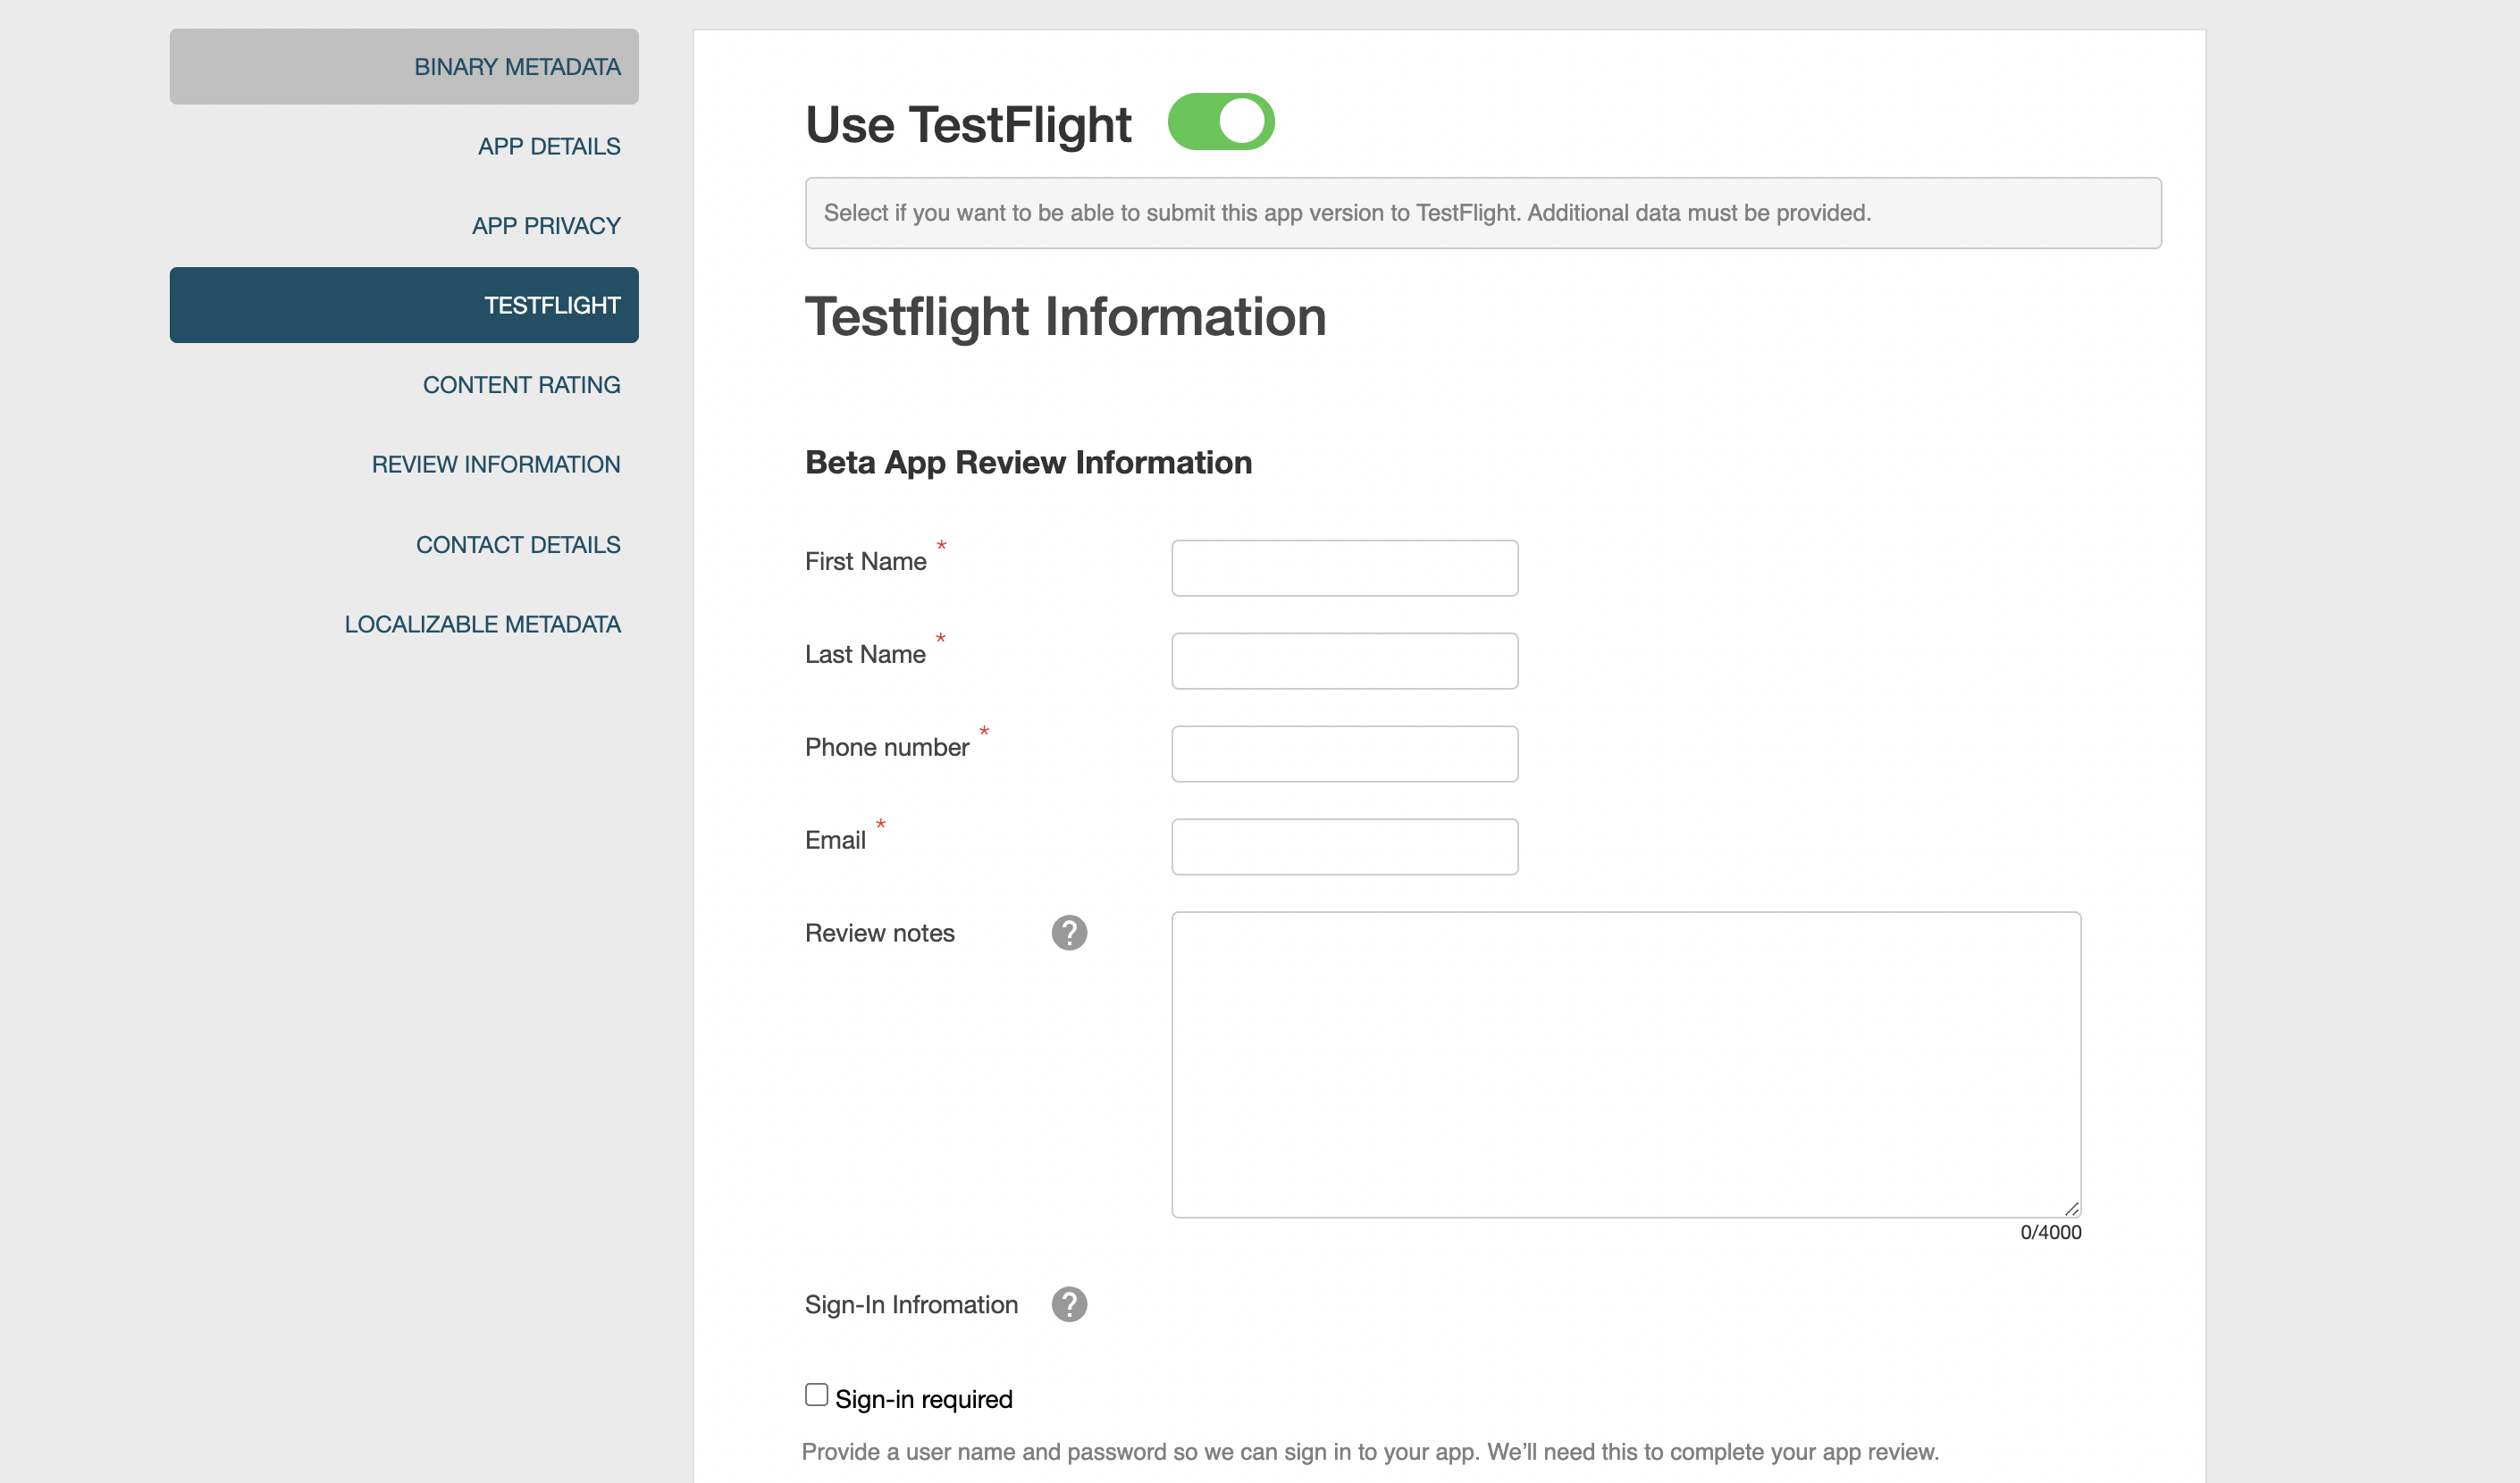
The Ivanti incapptic portal lets you publish iOS apps on TestFlight. Only iOS apps that have AppStore as their Target can use this functionality. This section describes how to use the TestFlight tab to enable or disable the Appstore TestFlight feature. If you would like to do a beta test and collect feedback, you can upload the application to TestFlight. Alternatively, you can upload the application to App Store Connect.
- The TestFlight button is enabled only after you submit the metadata for signing in. The Upload to TestFlight button is visible when you have successfully signed in.
Enabling or disabling TestFlight
- Log in to the Ivanti incapptic Connect.
-
Create a New App or upload a new version.
- Upload the binary and fill out all the form details.
- Select the TestFlight tab.
- Click the TestFlight toggle button to enable TestFlight mode.
-
Fill out all mandatory details in the TestFlight Information form.
- Click Upload to TestFlight. The upload process starts.
.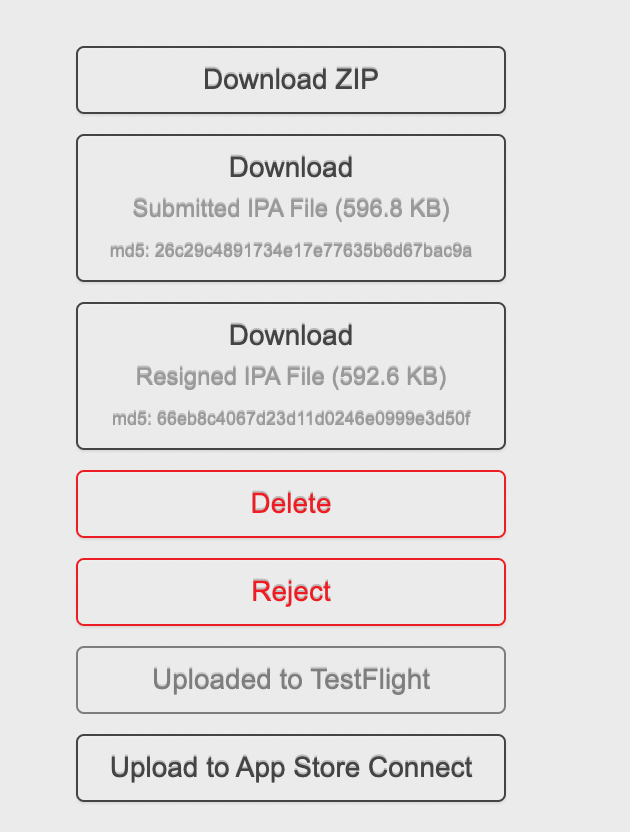
Consider the following conditions:- If the binary or meta data is not uploaded, the Re-Upload to TestFlight button is enabled.
- If the binary and meta data is successfully uploaded, the status is changed to Uploaded to TestFlight button and this button is disabled.
- If the binary and meta data is successfully uploaded directly to the Upload to App Store Connect without uploading to TestFlight, the status is changed to Uploaded to App Store Connect and both uploads to TestFlight and Target is disabled.
- If the binary and meta data is uploaded directly to Target without uploading to TestFlight, and if it fails, then both Upload to TestFlight and Upload to App Store Connect buttons are activated, and the binary meta data can be uploaded to either TestFlight or Target.
-
By default, TestFlight toggle button is disabled.
The Use TestFlight button is not visible.