AppStore TestFlight
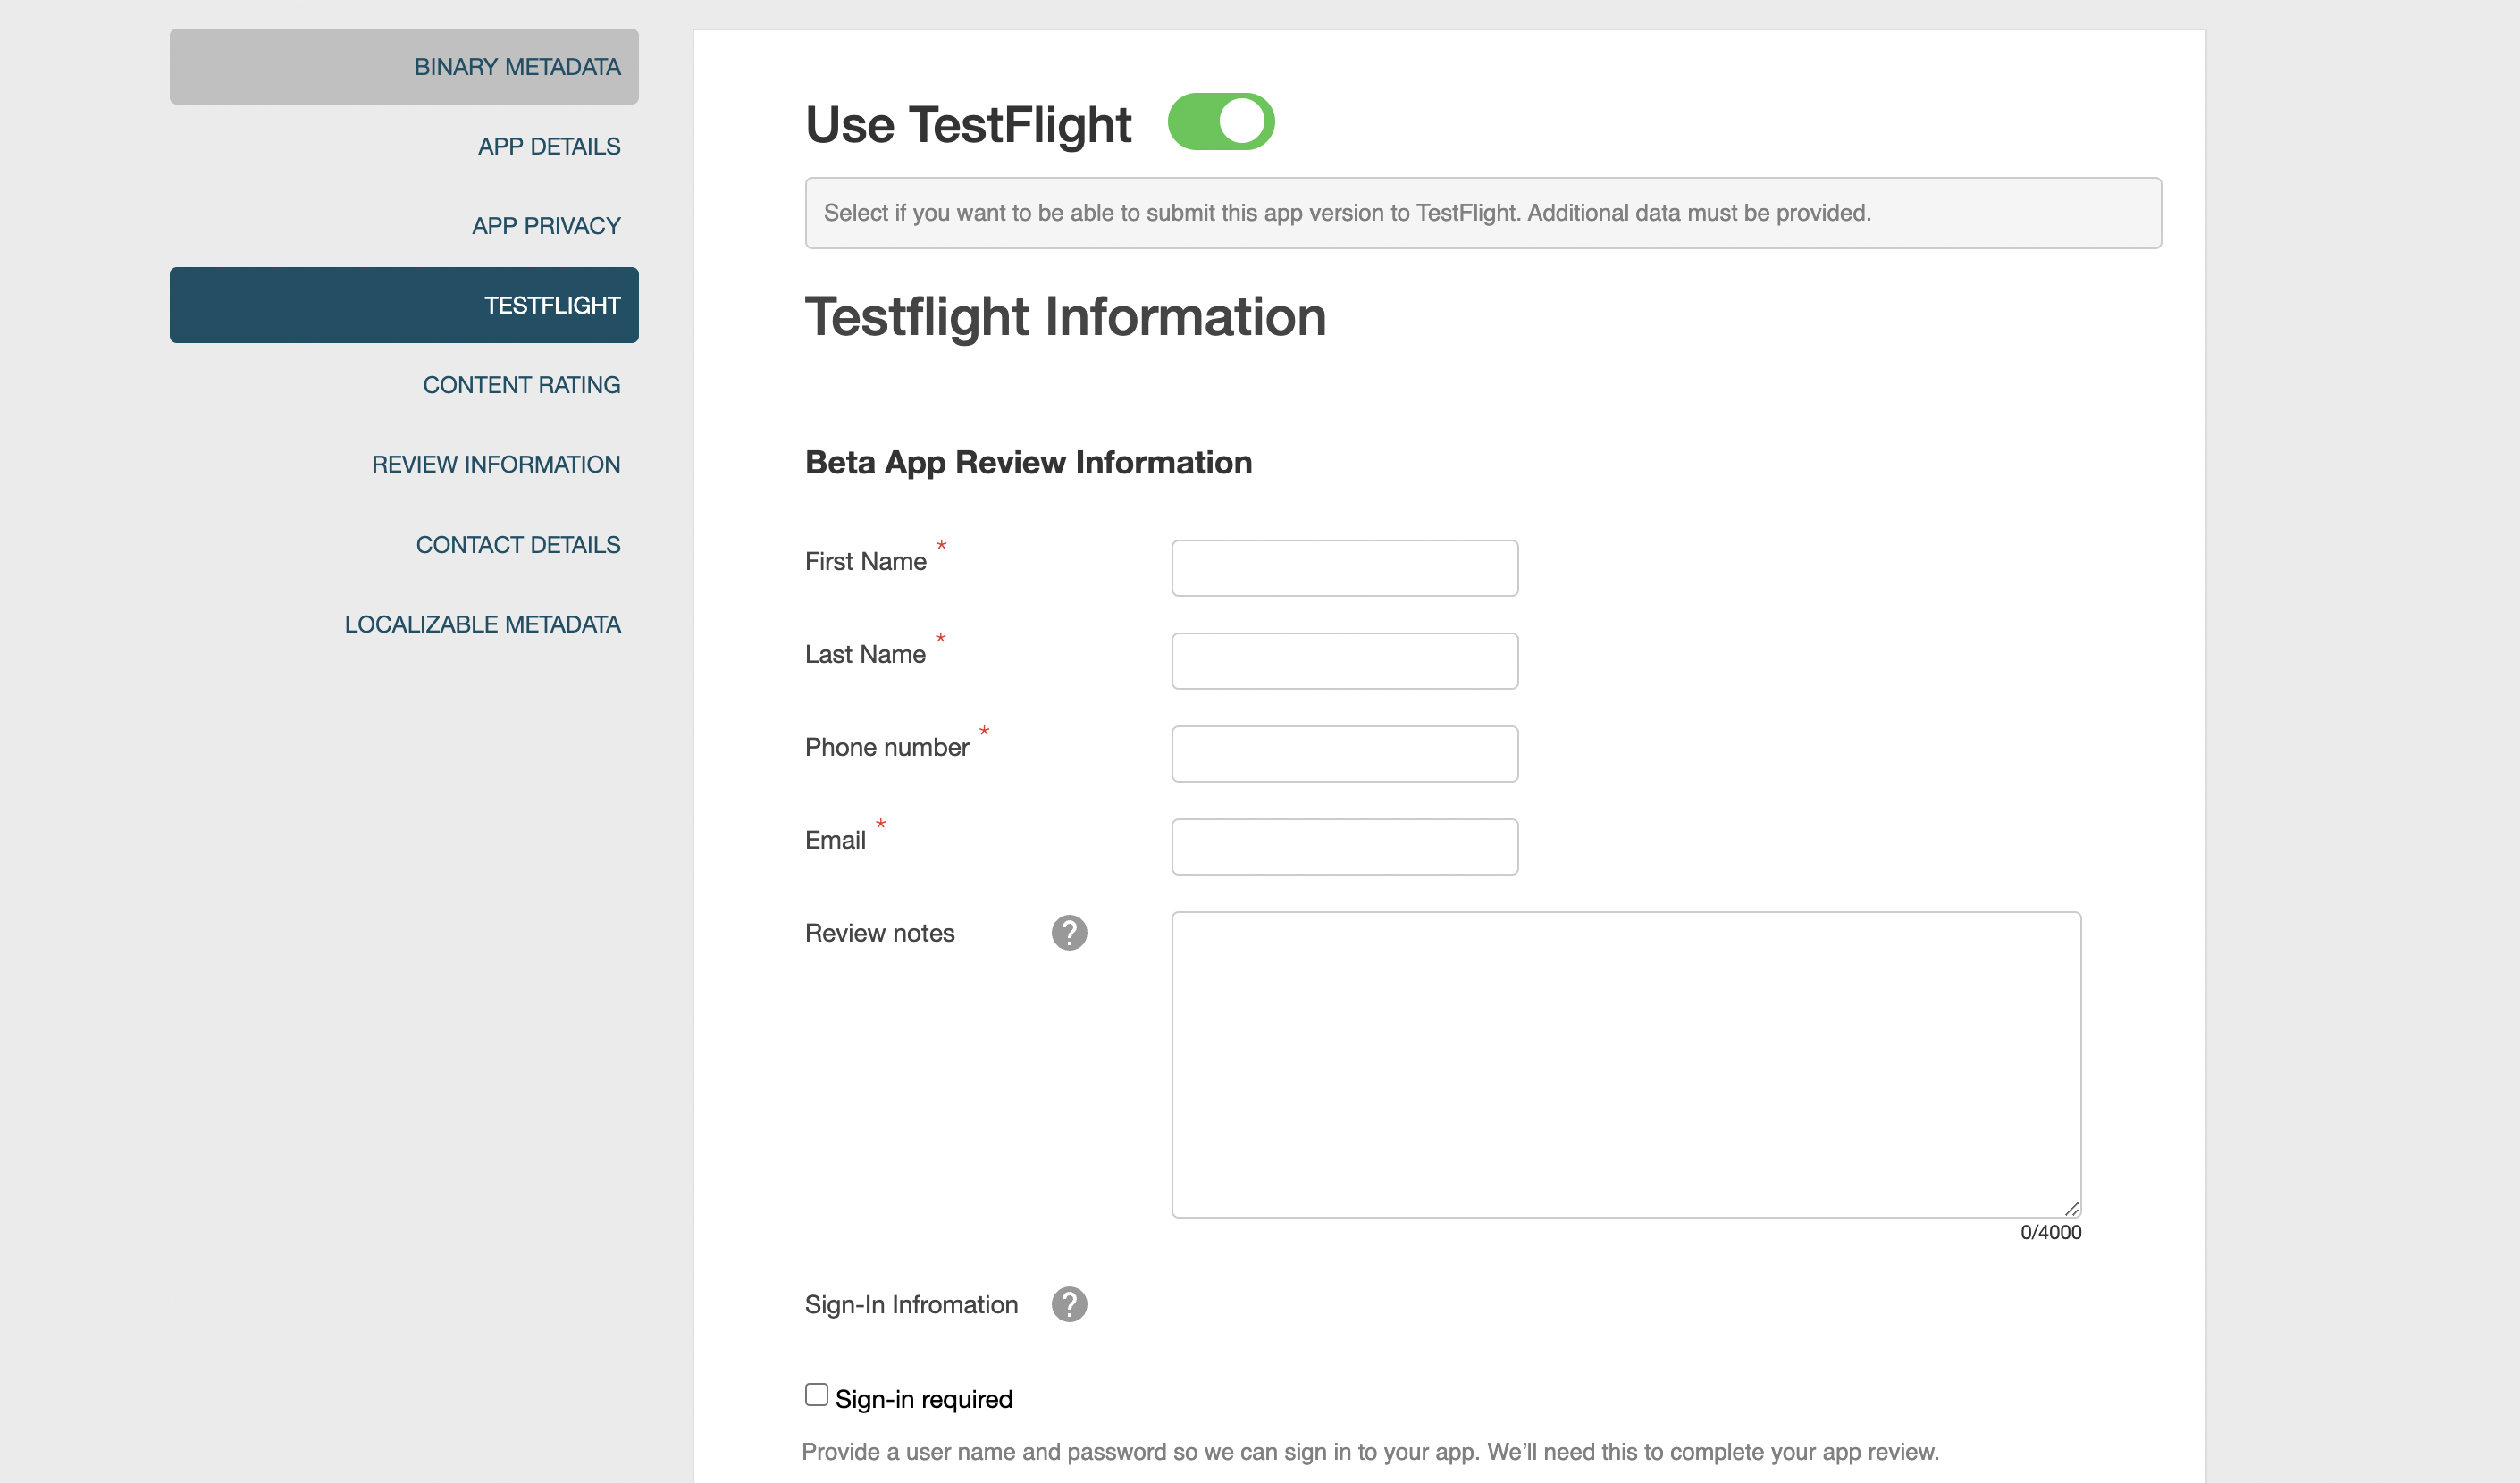
Starting from the incapptic Connect 1.46 release, the incapptic portal lets you publish iOS apps on TestFlight. Only iOS apps that have AppStore as their Target can use this functionality. This section describes how to use the TestFlight tab to enable or disable the Appstore TestFlight feature. If you would like to do a beta test and collect feedback, you can upload the application to TestFlight. Alternatively, you can upload the application to App Store Connect.
- The TestFlight button is enabled only after you submit the metadata for signing in. The Upload to TestFlight button is visible when you have successfully signed in.
Enabling or disabling TestFlight
- Log in to the incapptic portal.
-
Create a New App or upload a new version.
- Upload the binary and fill out all the form details.
- Select the TestFlight tab.
- Click the TestFlight toggle button to enable TestFlight mode.
-
Fill out all mandatory details in the TestFlight Information form.
- Click Upload to TestFlight. The upload process starts.
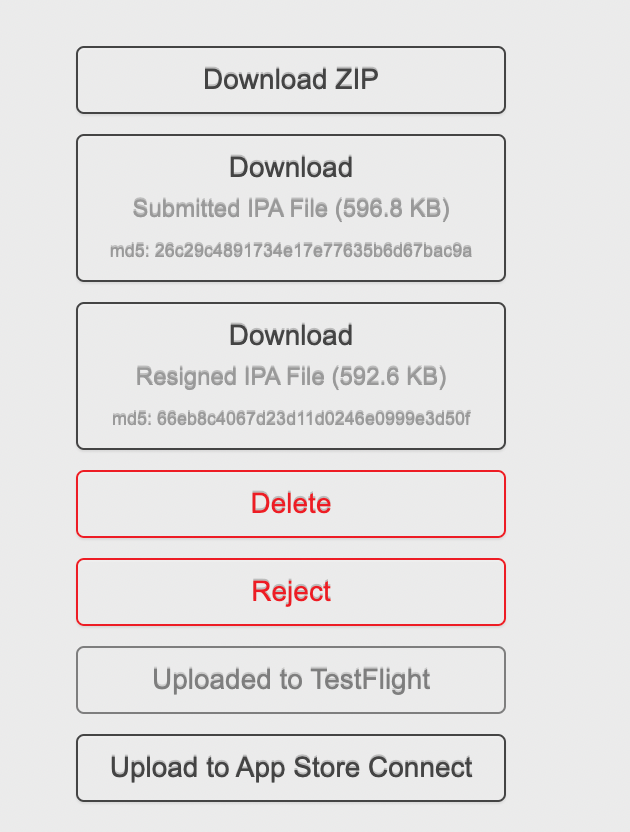
Consider the following conditions:- If the binary or meta data is not uploaded, the Re-Upload to TestFlight button is enabled.
- If the binary and meta data is successfully uploaded, the status is changed to Uploaded to TestFlight button and this button is disabled.
- If the binary and meta data is successfully uploaded directly to the Upload to App Store Connect without uploading to TestFlight, the status is changed to Uploaded to App Store Connect and both uploads to TestFlight and Target is disabled.
- If the binary and meta data is uploaded directly to Target without uploading to TestFlight, and if it fails, then both Upload to TestFlight and Upload to App Store Connect buttons are activated, and the binary meta data can be uploaded to either TestFlight or Target.
-
By default, TestFlight toggle button is disabled.
The Use TestFlight button is not visible.
Data Safety
Starting from the incapptic Connect 1.47 release, we’ve updated the Google Play Target data safety form with new questions and changed the CSV download feature. Updated form as per the Google Data Safety Form.
The data safety form is updated and applies only to Google Play applications.
-
You can upload any Google Play application.
-
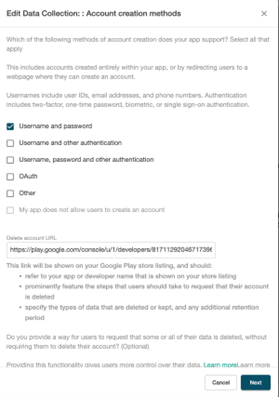
Go to the app version page > Data Safety > Edit Data Collection.
-
Fill out the form and click Save.

-
Click Download CSV.
-
When submitting the app, fill out the data safety form, download it (using the download csv option), and upload it to the Google Play Console using Import from CSV.
-
Browse the file and click Upload. After upload, you can view a message CSV file successfully uploaded.
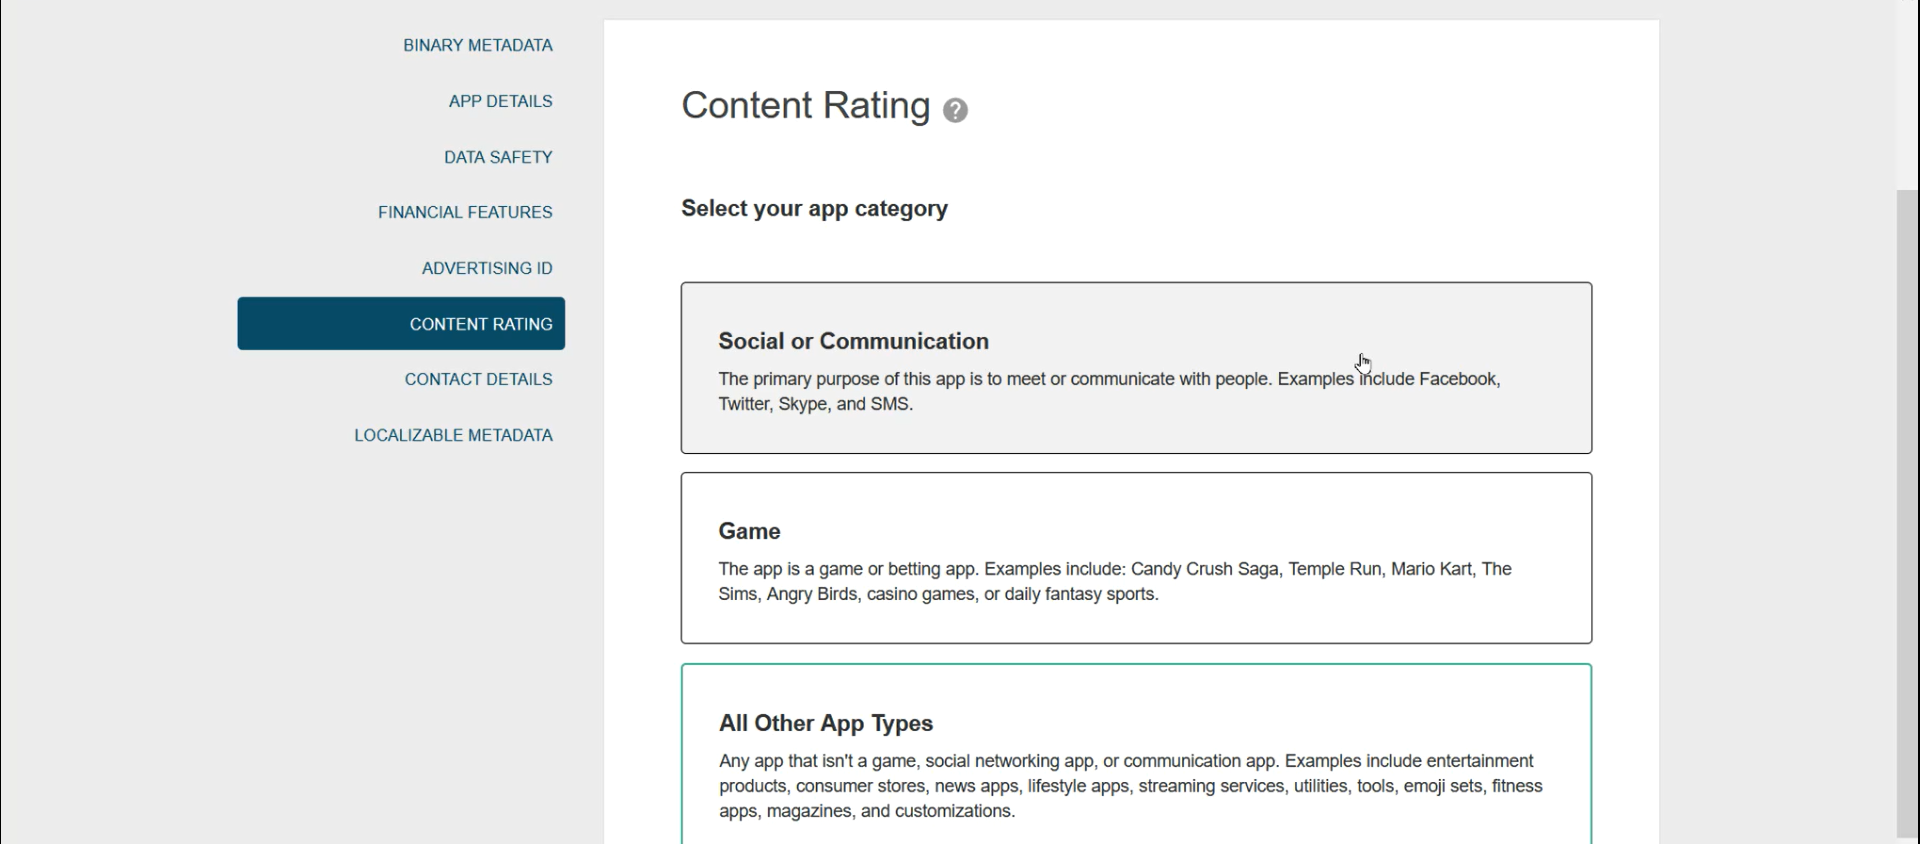
Content Rating
Starting with the incapptic Connect 1.47 release, we are aligned with the new changes to the Google Play content rating declaration and related forms.
|
Apps Category |
Description |
|---|---|
|
Social or Communication |
The primary purpose of this app is to enable users to share content or communicate with large groups of people. For example: Facebook, Twitter, Skype, and SMS. |
|
Game |
The app is a game or betting app, usually undertaken for entertainment or fun. For example: Candy Crush Saga, Temple Run, Mario Kart, The Sims, Angry Birds, casino games, or daily fantasy sports. |
|
All Other App Types |
Any app that isn't a game, social networking app, or communication app. The app is to present factual information, sell physical goods, and provide services. For example: entertainment products, consumer stores, news apps, lifestyle apps, streaming services, utilities, tools, emoji sets, fitness apps, magazines, and customizations. |