Managing LDAP users
Once you have configured one or more LDAP servers, the associated LDAP entities can be displayed in the Devices & Users > Users screen. LDAP entities are useful for assigning roles that are inherited by the members of an entity. LDAP users are immediately available for device registration.
For each LDAP server you configured, you specified the set of LDAP groups that Core gets from the LDAP server. Specifying this set improves Core performance when you use the Admin Portal to access LDAP groups. Because Core has already stored all necessary LDAP group information, no immediate communication with the LDAP server is necessary to complete a task involving LDAP groups.
Note The Following:
If you want an LDAP user to have access to the user portal, then you must assign the User Portal role. Likewise, access to features in the Admin Portal requires the appropriate roles.
Avoid creating user IDs that include _MIxx, where xx is a number. This sequence is reserved for user IDs requiring special processing, which includes stripping the _MI sequence and all characters following it.
Core supports Apple User Enrollment for LDAP Users and LDAP Groups. See "User Enrollment" in the Core Device Management Guide for iOS and macOS Devices.
Configuring the set of LDAP groups
During Core installation, you configure the set of LDAP groups that you can reference in Core.
Procedure
- From the Admin Portal, go to Services > LDAP.
- Select an LDAP server and click the Edit icon.
- In the Modifying LDAP Setting page, scroll down to the LDAP Groups setting.
- In the Search By LDAP Groups field, enter the first characters of an LDAP Group you want to select.
-
Click the search icon.
The LDAP Groups in the LDAP server that match the search request appear in the Available section.
- Click the right arrow to move one or more LDAP groups to the Selected section.
- Repeat steps 4 through 6 for other LDAP Groups.
- Click Save.
Displaying available LDAP users
Procedure
-
From the Admin Portal, go to Devices & Users > Users.
-
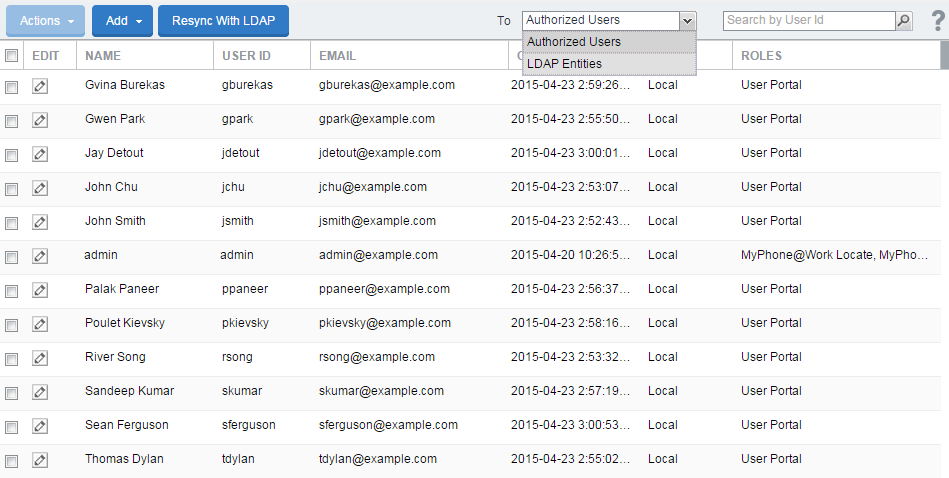
Select LDAP Entities from the To drop-down list.
-
In the Search by Name field, enter text that will match an LDAP user entry in the selected category, based on first name, last name, or account name.
You may use % as a wildcard. For example, to search for all users having “smith” at the end of the user ID, you would enter %smith.
-
Click the search icon. The matching user records display.
LDAP does not report members for a group that is also the Primary Group for those members. If you do not see the users you expect, examine your LDAP configuration. Consider using organizational units (OUs), instead.
Deleting LDAP entities without roles
Core displays all LDAP entities, by default, whether or not they have a role assigned or if the role has been revoked. However, you can group all LDAP entities together that do not have roles and delete them at one time.
Procedure
Viewing LDAP user and group associations
The Users screen includes links for displaying associations between users and groups. For example, if you have assigned a role to the Engineering group, you can display the users associated with that group.
Figure 1. Viewing LDAP associations

Synchronizing with the LDAP server
LDAP Sync returns all Lightweight Directory Access Protocol (LDAP) Organizational Unit (OU) information. This information is used to correlate users in the Core to their OUs. It syncs only the OU information itself, not all the OU user information, which would affect performance. Core synchronizes user data from the LDAP server every 24 hours, by default.
Note The Following:
When syncing LDAP records with Core, if any data integrity errors occur within the batch, only the failed record is discarded.
For LDAP groups, each synchronization syncs only the LDAP groups you specified in the Services > LDAP > LDAP Setting page.
Procedure
To synchronize with the LDAP server:
-
From Core Devices & Users > Users page, select LDAP Entities from the To drop-down menu.
-
Click Resync With LDAP. A confirmation message displays.
Figure 2. Synchronizing with the LDAP server
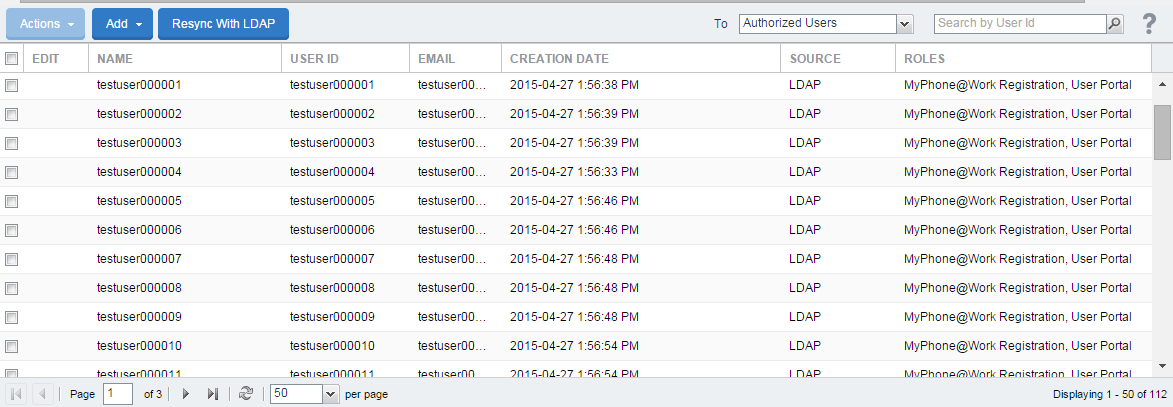
If no LDAP servers are configured, the Resync with LDAP button does not appear.
Changing the LDAP Sync Interval
You can configure the amount of time you want between each synchronization with LDAP servers.
Procedure
- From the Admin Portal, go to Services > LDAP > Preferences.
- Select the preferred interval from the drop-down.
- Click Save.
Suspending scheduled LDAP synchronization globally
You can stop scheduled LDAP synchronization globally in your Core instance. Suspending LDAP synchronization helps prevent losing label associations with devices during maintenance actions such as:
- Core maintenance
- AD or LDAP server maintenance
Any users added to your Core deployment during the time LDAP synchronization is suspended are not added to Core until scheduled LDAP synchronization is resumed.
Procedure
- From the Admin Portal, go to Services > LDAP.
-
In Preferences, uncheck Enable LDAP Sync with Core.
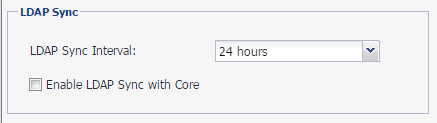
- Click Save.
- Click OK when the confirmation message displays.
Core enables you to manually synchronize LDAP servers while LDAP synchronization is suspended (see Synchronizing your LDAP server manually)
Resuming scheduled LDAP synchronization
Use the LDAP option on the Services menu to resume scheduled LDAP synchronization.
Procedure
- From the Admin Portal, go to Services > LDAP.
-
In Preferences, check Enable LDAP Sync with Core.
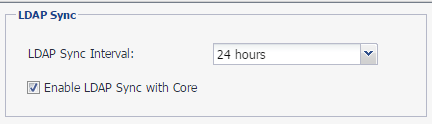
- Click Save.
- Click OK when the confirmation message displays.
Synchronizing your LDAP server manually
You can synchronize your LDAP server manually.
Procedure
- From the Admin Portal, go to Devices & Users > Users.
- Click Resync With LDAP.
Setting the LDAP sync discard option
The LDAP sync discard option under LDAP preferences provides control over:
- whether to apply the discard policy to individual LDAP Groups as well as global, or global only.
- whether to discard the LDAP sync data if the reloaded data set declines significantly. Discarding the sync data means that no LDAP data additions, changes, or deletions are made on Core.
-
at what point the decline is considered significant. You can specify the decline of users as a percentage or a number. The percentage or number is compared against the following:
- the total number of LDAP users in Core
- the number of users in each top-level LDAP group. A top-level LDAP group is one of the LDAP groups that you selected in the LDAP setting at Services > LDAP in the Admin Portal.
The LDAP sync discard option is enabled by default and set to 25%.
Using this option ensures that removing a number of users on the LDAP system in excess of the configured percentage or number does not result in the deletion of users in the Core database. Consider changing or disabling this setting if you are going to make major changes to your LDAP system.
Note The Following:
- Core discards the sync data only if the net decrease of users is greater than the specified percentage or number.
- For example, if 999 users had been removed from a group, and 1000 different users had been added to the same group, Core does not discard the LDAP sync data. The sync data is not discarded because the net change was 1 user. Therefore, Core will remove the 999 users.
- Changes on the LDAP server of information associated with a user (such as LDAP attributes, distinguished name, email, or country of origin) do not impact whether Core discards the LDAP sync data. However, changes in group membership can impact whether Core discards LDAP sync data.
- For example, if 1000 users were moved from one LDAP group to another, and the threshold number is 500, Core will discard the LDAP sync data, and no changes are made on Core.
- However, if only 400 users were moved from one LDAP group to another, and the threshold number is 500, Core does not discard the LDAP sync data. Therefore, if you had assigned a different set of roles or labels to each of the LDAP groups, users that were moved from one group to another would be associated with a different set of roles or labels. Depending on the change, users could no longer have the configurations, profiles, or policies that they require to access email, apps, or content critical to their job.
Important. Be sure to confirm that the changes are acceptable before disabling this feature. Leaving it disabled can allow an LDAP server configuration change to remove every LDAP user from the Core database. That removal can cause catastrophic changes affecting a user’s labels which impacts capabilities such as access to email and apps.
Procedure
- From the Admin Portal, go to Services > LDAP.
-
In preferences, go to Enable sync Discard.
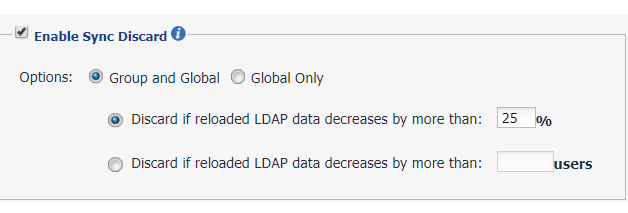
- The default choice is Group and Global, which allows you to enable sync discard for individual LDAP Groups, as well as global (top-level group).
- If you select Discard if reloaded LDAP data decreases by more than <25>%, LDAP sync data will be discarded if reloaded LDAP data decreases by more than the threshold percentage.
- If you select Discard if reloaded LDAP data decreases by more than <value> users, LDAP sync data will be discarded if reloaded LDAP data decreases by more than the threshold number of users.
- Click Save.
See also Impacts of Making LDAP Changes, Configuring LDAP servers
When the LDAP sync declines
Typical reasons for a significant decline in the LDAP sync include:
- changes in the LDAP environment
- slow response from the LDAP server
- network congestion
LDAP sync history is available in the System Manager under Troubleshooting > Service Diagnosis. Click LDAP Sync History.
Consider the following steps when the sync fails because of discarding the LDAP sync data:
-
Did the issue first start at about the same time as a major change to the LDAP environment?
This would suggest that a valid change in the LDAP environment triggered the discard.
-
Has the sync failed once or multiple times?
If sync has failed once, try a manual sync. If the LDAP sync continues to fail, check with the LDAP administrator for changes in the LDAP environment that could cause:
- groups being removed
- users being removed from referenced groups or groups within those groups (child groups)
-
Determine whether these LDAP changes were expected. Assuming the changes were expected, do the following:
- Modify the LDAP sync discard percentage to allow Core to apply (not discard) the LDAP sync.
- Run a manual LDAP sync. Make sure it succeeds.
- Modify the LDAP sync discard percentage or number back to your previously determined safe level.
Impacts of Making LDAP Changes
Making changes in your LDAP implementation can result in removal of devices from Core labels, which also removes Core policies, configurations, and apps applied using those labels. This results when the information stored in the database on Core differs from the information returned by Core’s LDAP sync process. For example, if your Core implementation uses labels based on LDAP group membership, then removing all configurations in your LDAP implementation would cause the LDAP sync process to determine that those associations no longer exist. Because the Enable Sync Discard option is based on a percentage or specified number change of the total number of users or the users in each top-level group, if this option is also unchecked, then the magnitude of the change does not prevent Core from making sweeping changes to your managed devices.
If you intend to make major changes to your LDAP implementation, consider the following precautions:
- Temporarily turn off the Enable LDAP Sync with Core option.
- Temporarily turn on the Enable Sync Discard option.
Deleting LDAP data from the Core database
| WARNING: | Typically, you delete all LDAP data from the Core database only on a test environment. The reason is that deleting all LDAP data leads to the following: |
- All labels populated by LDAP group membership will be removed from users and devices, because the users will no longer be associated with any groups.
- All policies, configurations, and apps dependent on those labels to be applied to a device will be removed.
- LDAP group and user role assignments will still be present on Core, even though, with the LDAP setting disabled, the user will not be able to login.
Therefore, use the following process to delete LDAP data from the Core database only if you understand the above impact.
Procedure
-
Disable or delete all existing LDAP settings.
These can be disabled by editing an LDAP setting under Services > LDAP and changing the Admin State from Enabled to Disabled.
- Uncheck Enable Sync Discard under Services > LDAP > Preferences.
- Either trigger a manual LDAP sync or wait for a regular LDAP sync.
- After the LDAP sync has completed successfully, confirm device label association changes have completed.
Deleting LDAP users
You can delete an LDAP user if that user is not associated with a registered device.
Procedure
- Log into the Admin Portal.
- Go to Devices & Users > Users.
- Click the check box for the user you want to delete.
- Select Actions > Delete User.
Moving between the LDAP entity display and the local user view
To see the list of local users and LDAP users on the Devices & Users > Users page, select Authorized Users from the To: drop-down list. To see the LDAP entities, select LDAP Entities.