Configuring LDAP servers
You can configure multiple LDAP servers, but each server must contain a unique LDAP configuration.
Procedure
- Log on to the Admin Portal: https://<fully-qualified_domain_name>/admin.
- Select Services > LDAP.
- Click Add New to open the New LDAP Setting page.
-
Enter information in the following fields to set up a connection to the LDAP directory:
- Directory URL: Enter the URL to the LDAP server. Make sure to start with
“ldap://” or “ldaps.” You do not need to specify the ports when you use these default ports: 389 (LDAP) or 636 (LDAPS). - Directory Failover URL: Enter a secondary URL, if available.
-
Directory UserID: Enter the primary user ID, for example, [email protected].
Make sure to include the domain, e.g., @local.domain, with the user ID.
- Directory Password: Enter the password for the user ID set above.
- Search Results Timeout: Leave it at the default of 30 seconds; unless you get connection errors.
- Connect Timeout: Leave it at the default of 30 seconds; after 30 seconds, it looks for other LDAP servers.
-
Chase Referrals:
- Select Enable if you are using a multi-forested domain. This indicates you want to use alternate domain controllers when the targeted domain controller does not have a copy of the requested object.
-
Select Disable if you do not use alternate domain controllers.
Enabling the Chase Referrals option delays LDAP authentication.
-
Admin State: Select Enable to put the server to service.
Make sure you enable the Admin State or the LDAP server will be invisible.
-
Directory Type:
- Select Active Directory for the Microsoft Windows server platform.
- Select Domino for the IBM Lotus Domino server platform. The default DN and other LDAP search filters are automatically changed to the Domino server.
- Select Other for other platforms.
- Domain: Enter the domain name for the Active Directory. This information will automatically traverse all levels of the tree and use them to populate Base DN, parent entry.
- Directory URL: Enter the URL to the LDAP server. Make sure to start with
-
Enter information in the following fields to set up a connection to the Directory Configuration Domain Components:
-
DC Base DN: Enter a DN that is high enough in the directory's structure to show domain components.
-
DC Search Filter: Enter your search criteria.
-
-
Enter information in the following fields to set up a connection to the Directory Configuration Organizational Unit:
-
OU Base DN: Enter a DN that contains the appropriate organizational units.
-
OU Search Filter: Enter your search criteria.
-
- Enter information in the following fields to set up a connection to the Directory Configuration Users:
- User Base DN: Enter user base distinguished name, if available.
- Search Filter: Enter your search criteria.
- Search Scope: Select All Levels from the drop down.
- First Name: Enter the first name.
- Last Name: Enter the last name.
- User ID: Enter the user id.
- Email: Enter the email address.
- Enter the information in the following fields (Display Name, Distinguished Name, User Principal Name, and Locale)
- User Security Identifier: Enter objectSid to read the objectSID value from the LDAP user. Only when Active Directory is selected.
- Click View LDAP Browser to view the LDAP server directory tree structure.
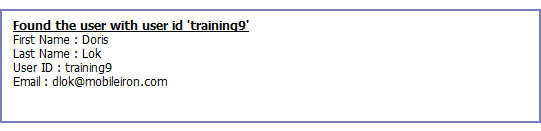
- Click Test.
- Enter a user or group identifier in the appropriate field.
-
Click Submit to display a result page if the user was configured on the LDAP server.
-
Return to the LDAP page and click Save. A dialog appears concerning traffic disruption and prompts you to confirm that you want to proceed.
-
Click Yes. A dialog appears listing the status.
-
Click OK. The server you created appears on the LDAP page.
Ivanti EPMM is unable to resolve multiple LDAP entries with the same identifier (SAMAccountName). We recommend you use globally unique identifiers for each entry across LDAP forests.
After implementing the channel-binding LDAP signing requirements, you now have two options:
- LDAP -- Select this option for standard LDAP security. This is the Connector default. Go to Services > Trusted Certificates > Select/Show Untrusted certificate. From the Actions menu, mark the certificate as trusted.
- LDAPS -- Select this option for Strict SSL security. From the LDAP preference section, upload the CA certificate into the connector.