Standalone Sentry Email+ Notification Service for MobileIron Cloud
You must configure Standalone Sentry on MobileIron Cloud and key-value pairs of the Email+ application to receive email notifications on the device. The configuration is required for Standalone Sentry to act as a Email+ Notification Service to deliver notifications. This feature is available only when it is used with Email+ 3.13.0.
Before you begin
Procedure
|
1.
|
On MobileIron Cloud, click Admin |
|
2.
|
Under Infrastructure, click Sentry >  |
|
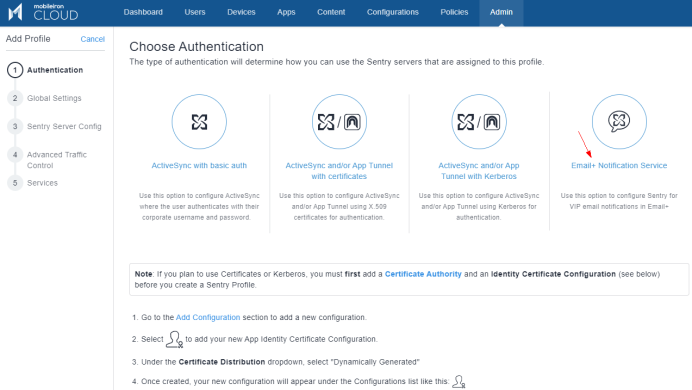
3.
|
Select Email+ Notification Service and click Next. |
|
4.
|
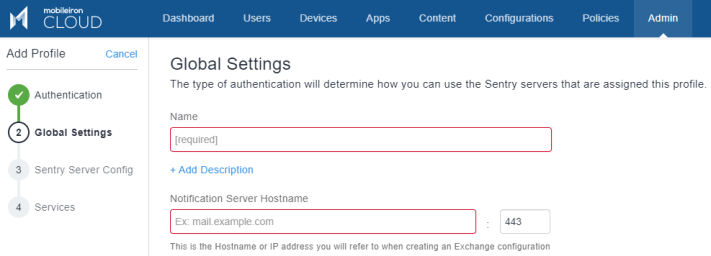
In Global Settings, enter a profile Name and Notification Server Hostname (Sentry hostname).
The port is set at 443.
|
|
5.
|
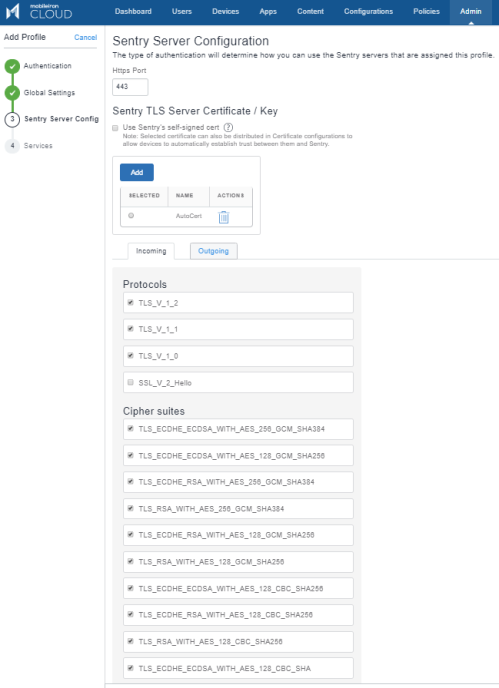
Verify the Sentry Server Configuration and click Next.
|
|
NOTE:
|
These fields are at default values. Ensure that the TLS certificate is a third party trusted certificate.
|
|
6.
|
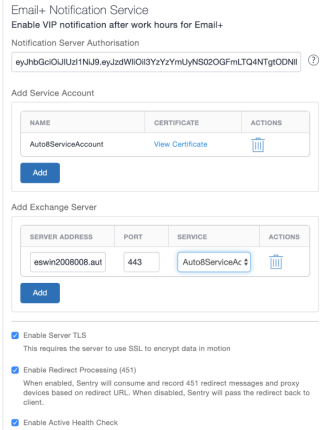
Under Services > Manage Services, click Email+ Notification Service.

|
|
7.
|
Enter the following details: |
- Notification Server Authorization: The token received after registering for the Cloud Notification Service.
- Add the Service Account: Click Add to upload the Exchange Service account certificate.
- Add the Exchange Server: Click Add to add the desired Exchange Server. The port is set at 443.
- Retain the other fields at default values.
|
8.
|
On Standalone Sentry, register Sentry to MobileIron Cloud using CLI.
"registration tenantadminuser". |
|
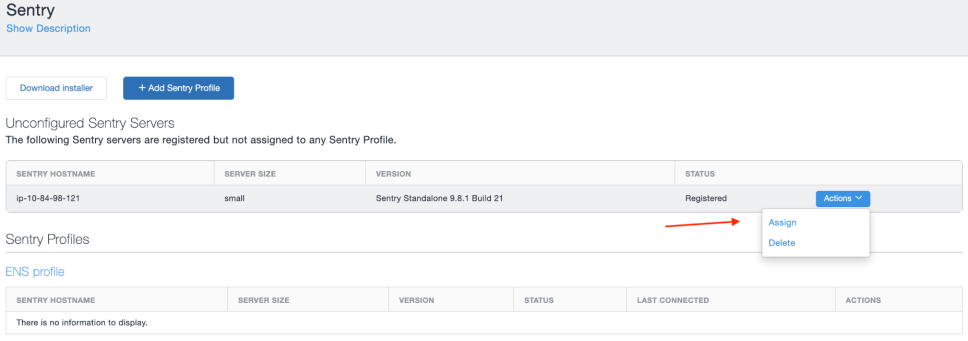
9.
|
Under Sentry > Sentry Profiles, click Actions to assign the registered Sentry to the ENS profile created above.
 |
|
10.
|
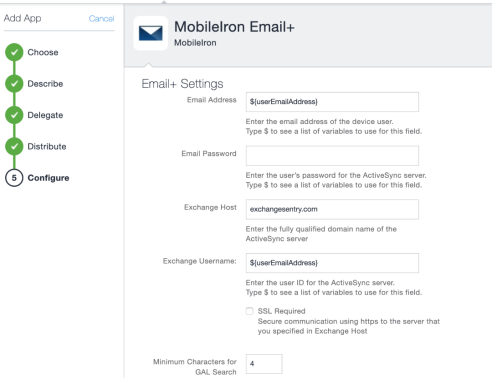
On MobileIron Cloud, click Apps > App Catalog > Add to add the Email+ configuration.
Select the appropriate configuration for the Email+ application and under Apps Configurations, enter the following details.
|
Next steps
You must configure the key-value pairs for Email+ notification services. For more information, see "Additional configurations using key-value pairs" in the MobileIron Email+ Guide.