Deploying ICS using Terraform Template
This section describes how to install terraform template and deploy ICS on GCP with 2 NICs and 3 NICs.
1.Copy variables, base_setup_tf and ics_deploy scripts to a linux m/c installed with terraform. Go to the Terraform website to install Terraform on a Linux VM of your choice at usr/local/bin.
2.Create base_setup directory and copy base_setup.tf and variables.tf to it. Customize and set the variables in variables.tf file based on the requirement.
Example: Region, AMI-id, VPC name, subnet IP address details, instance name etc.
3.cd to base_setup directory and run terraform apply.
linux# terraform apply
4.Create ics_deploy directory and copy ics_deploy and variables.tf to it
5.Run following command:
terraform apply -input=false -auto-approve -var "instance_name=gcp-test-instance-1" -var "image_name=icsgcp386"
Before running the script, user has to create an image in the GCP cloud in the name of icsgcp386 (as shown above)
Adding ICS Gateway to nSA
To add ICS Gateway, perform the following steps:
1.From the Ivanti Connect Secure menu, click the Gateways icon, then select Gateways > Gateways List.
The All Gateways page is displayed.
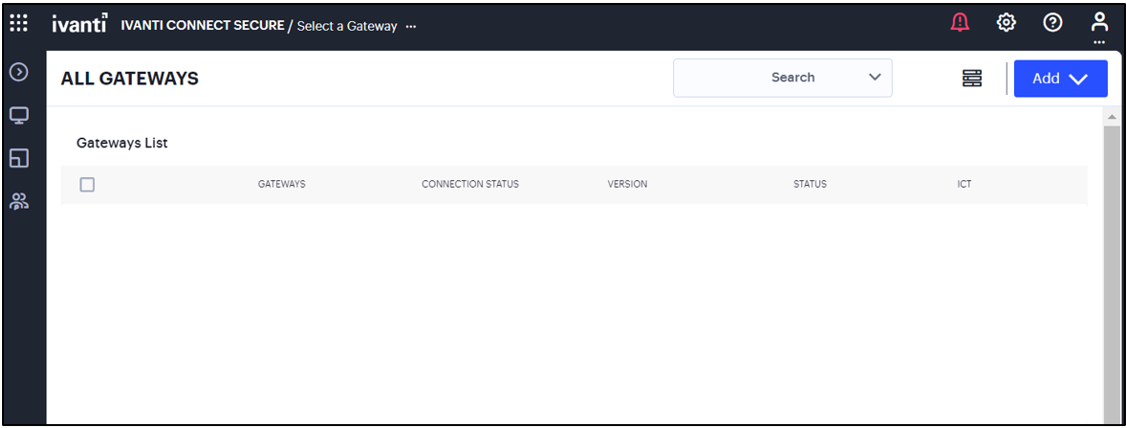
2.In the All Gateways page, click the Add drop-down list.

3.From the Gateway types list, select ICS Gateway.
The Register ICS Gateway page is displayed.
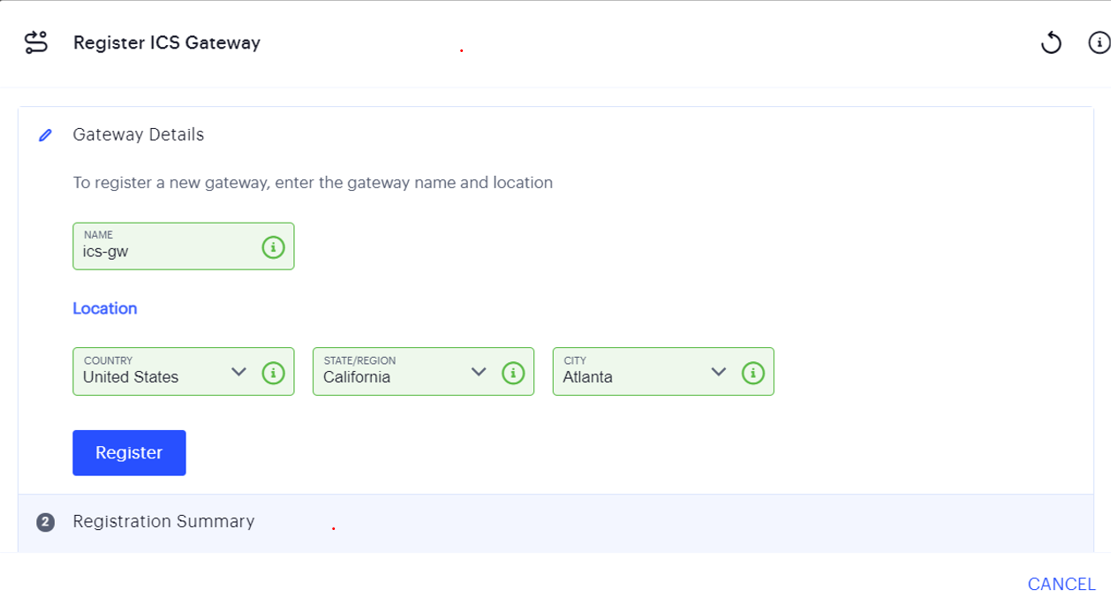
4.Enter a unique name for ICS gateway.
5.Enter your Location details such as Country, State/Region, City, and then click Register.
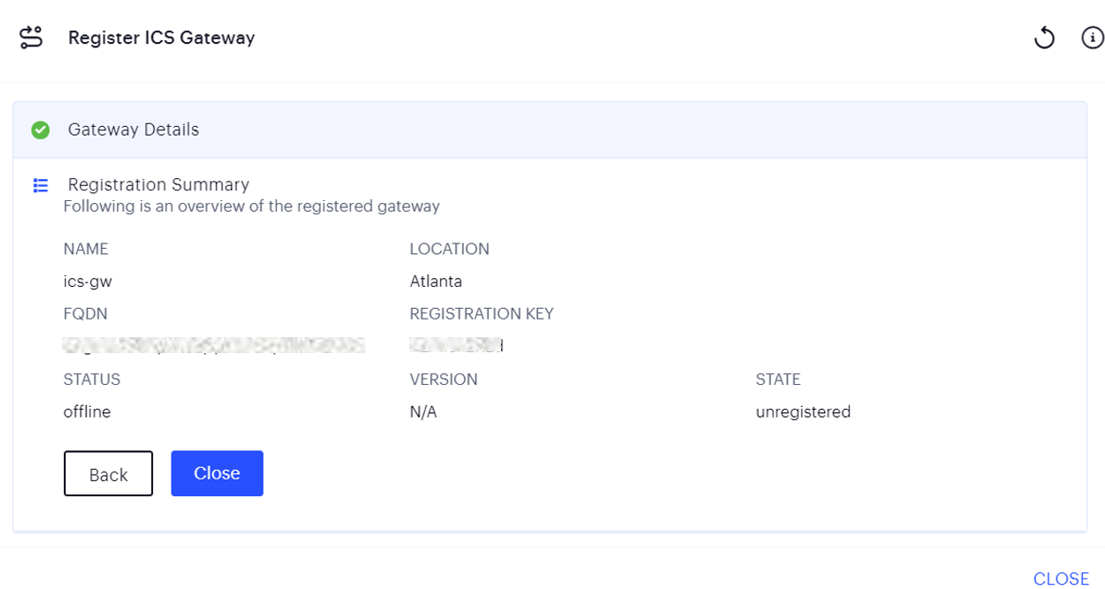
The Registration Summary page contains the FQDN URL and Registration Key, which you need to enter in the ICS Gateway to complete the registration. See Completing Registration of a ICS Appliance.
6.Click Close.
The newly added ICS Gateway gets listed as “Unregistered” under ICS Gateways list.
Completing Registration with ICS
We recommend you use NTP server to ensure the clocks are synchronized and features on Ivanti Neurons for Secure Access work properly.
To complete registration with ICS:
1.Log in to the ICS as an Admin.
2.Select the System > Configuration > Ivanti Neurons for Secure Access > Settings tab.
3.Enter the Registration FQDN and Registration Code.
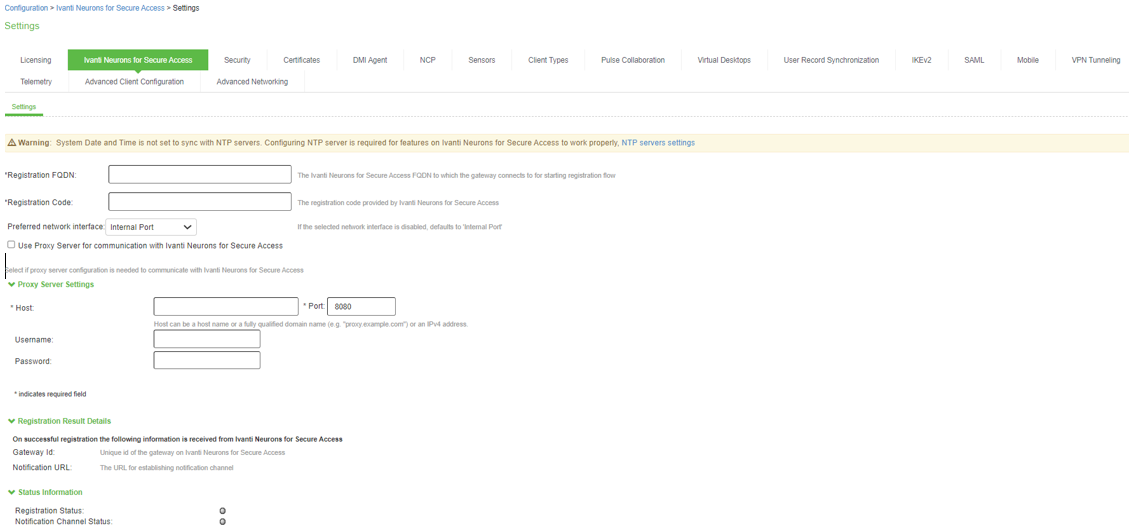
4.Click Save Changes.
The Status Information displays the Registration Status in green.
Checking a Current Gateway Version
To check the current version for a Gateway, and to apply an update:
1.Log into the nSA Controller as a Tenant Admin.
2.From the Ivanti Connect Secure menu, click the Gateways icon, then select Gateways > Gateway List.
The All Gateways page appears, showing the full list of Gateway Groups and standalone Gateways currently configured on the Controller.
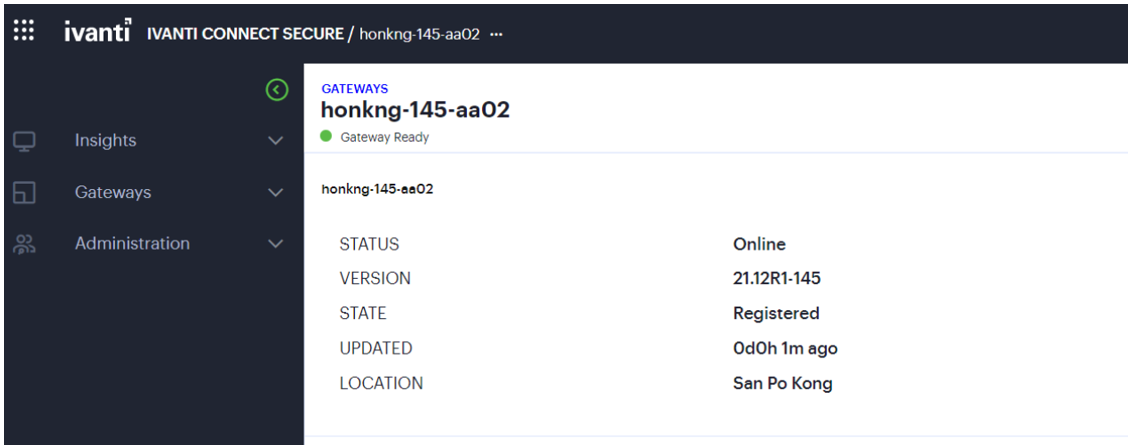
3.Select the required Gateway from the list.
The Gateways Overview page appears. The summary at the top of the page displays details pertaining to this Gateway, including the current version:
4.Click the context menu icon at the top-right to access the Edit options applicable to the selected Gateway:
FAQ
Q: I am unable to connect to my backend resources through L3 VPN.
Solution: SNAT these packets to the Internal interface IP which belongs to a subnet within the VPC.
To NAT endpoint tunnel IP to Internal interface IP, do the following:
1.Log in to Ivanti Connect Secure admin console.
2.Navigate to System > Network > VPN Tunneling.
3.Enable Source NATTING. By default, Source NATTING is disabled.

Q: User not able to access ICS after installation.
Solution: Ensure that the port 443 is opened for ICS