Downloading the GCP Virtual Machine Image
Download ICS image which is in zip format from Pulse support site and unzip the file.
Uploading the GCP Virtual Machine Image onto the Google Cloud Platform
To upload a GCP Gateway virtual machine image into Google Cloud Platform:
1.Access the Google Cloud Platform Management Portal, either from a client or a web browser, and log in using your Google Cloud Platform credentials.
2. In the Google Cloud Platform console, select your required project from the pull-down list on the title bar. For example:

3.Click the Navigation menu, and then select Cloud Storage > Browser.
A list of GCP storage buckets appears.
4.Select the bucket into which you wish to place the GCP image.
A page listing the current contents of the bucket appears.
5.(Optional) Navigate to the required folder within the bucket.
6.Click Upload Files. For example:
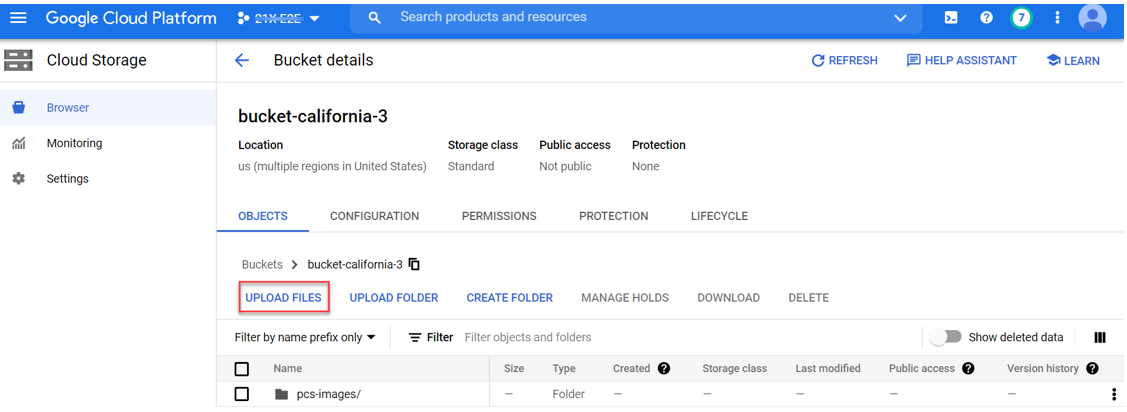
An upload dialog appears.
7.Select the ICS Gateway GCP virtual machine image .tar file from your local workstation (see Before you begin), and click Open.
If you want to use the provided YAML templates to automate the creation of your VM instance (see Creating a VM Instance of the Uploaded GCP Image Using a Script/Template), select these in addition to the image archive.
The image archive and any selected template files are added to the bucket.
8.Wait until the upload completes. This may take several minutes.
9.Start a command line session from the title bar. For example:

A command line session starts.
10.Navigate to the project folder.
11.Create an image using the following command using GCP CLI:
12.gcloud compute images create <image_name> --source-uri=gs://<bucket_name>/<optional_path>/<image_name>.tar.gz --guest-os-features MULTI_IP_SUBNET
For example:
gcloud compute images create pcs109 --source-uri=gs://bucket-california/pcs_images/ICS-21.12R1-21.12R1-145.1.tar.gz --guest-os-features MULTI_IP_SUBNET
You can now create a VM instance of the uploaded GCP image. To do this, either:
•Perform the task manually, see Creating a VM Instance of the Uploaded GCP Image Manually.
•Perform the task with a script/template, see Creating a VM Instance of the Uploaded GCP Image Using a Script/Template.
Creating a VM Instance of the Uploaded GCP Image Manually
This section describes how to manually create a virtual machine instance of the ICS Gateway image inside Google Cloud Platform. You can also perform this process automatically using a script/template, see Creating a VM Instance of the Uploaded GCP Image Using a Script/Template.
1.Click the Navigation menu, and then select Compute Engine > Images.
The Images page appears. For example:
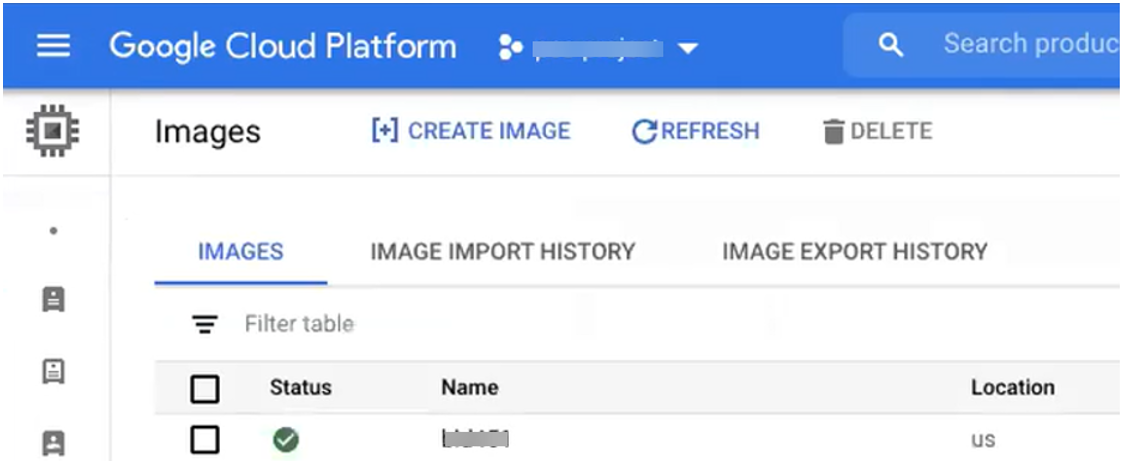
2.Locate the new image in the list of images.
3.At the end of the image entry, click the action menu and select Create Instance.
The Create Instance page appears. For example:
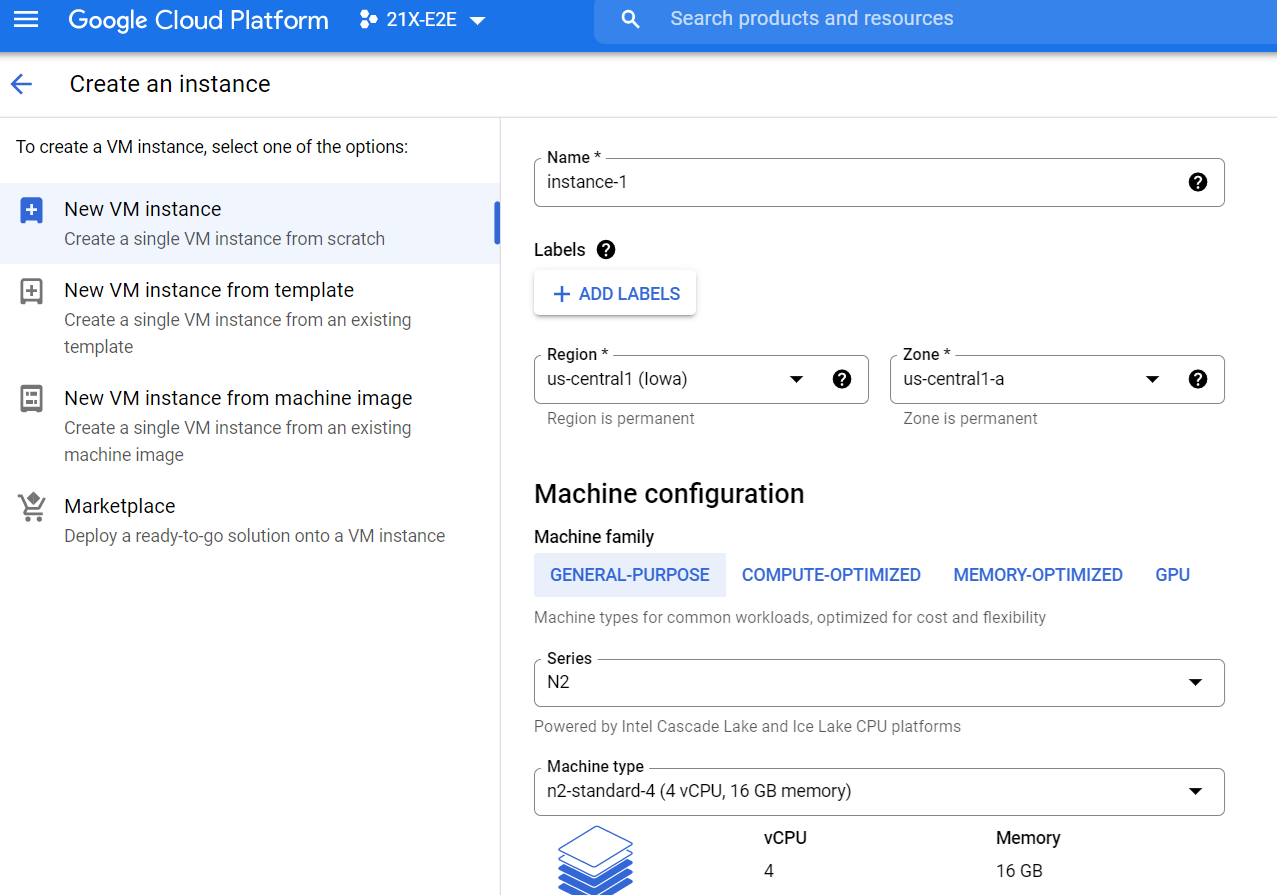
4.On the Create Instance page:
For more information, see table below.
|
General-Purpose |
CPUs / Memory |
ISA Model |
|---|---|---|
|
N2-Series (Intel Cascade Lake) |
n2-standard-4 ( 4 vCPU 16 GB) |
ISA 4000V |
|
n2-standard-8 ( 8 vCPU 32 GB) |
ISA 6000V |
|
|
n2-standard-16 ( 16 vCPU 64 GB) |
ISA 8000V |
|
| OR |
||
|
N1-Series (Intel Skylake) |
n1-standard-4 ( 4 vCPU 15GB) |
ISA 4000V |
|
n1-standard-8 ( 8 vCPU 30 GB) |
ISA 6000V |
|
|
n1-standard-16 ( 16 vCPU 60 GB) |
ISA 8000V |
|
•Enter a Name for the new instance.
•Select a Region and Zone.
•Under Machine configuration:
•For Series, select n1-standard-4.
•For Machine Type, select a minimum of n2-standard-4.
•For Boot Disk, confirm that the correct image is already selected.
•For Firewall, select the required HTTP/HTTPS options.
•Expand the Management, security, disks, networking, sole tenancy options.
•Select the Management tab.
•Under Metadata:
•For Key, enter pulse-config.
•For Value, paste the text of the metadata file you downloaded earlier.
•Select the Networking tab.
•Under Network interfaces, click the Edit icon to change the default network interface selection.
The Network interface options appear.
•Under Network interface, specify a private (internal) network interface:
•For Network, select the required private VPC.
•For Subnetwork, select the required subnetwork.
•Click Done to confirm the settings for the private network interface.
•Under Network interfaces, click Add network interface.
The Network interface options appear.
•Under Network interface, specify a public (external) network interface:
•For Network, select the required public VPC.
•For Subnetwork, select the required subnetwork.
•Click Done to confirm the settings for the public network interface.
•(Optional) Click Add network interface and specify a management network interface.
•Click Create to confirm the settings and instantiate a VM instance of the image.
The VM Instances page appears. This page shows the new VM instance of the image. For example:

5.On the VM Instances page, wait until the creation of the VM instance completes. This may take several minutes.
6.After the VM instance is created, click on it in the list of VM instances.
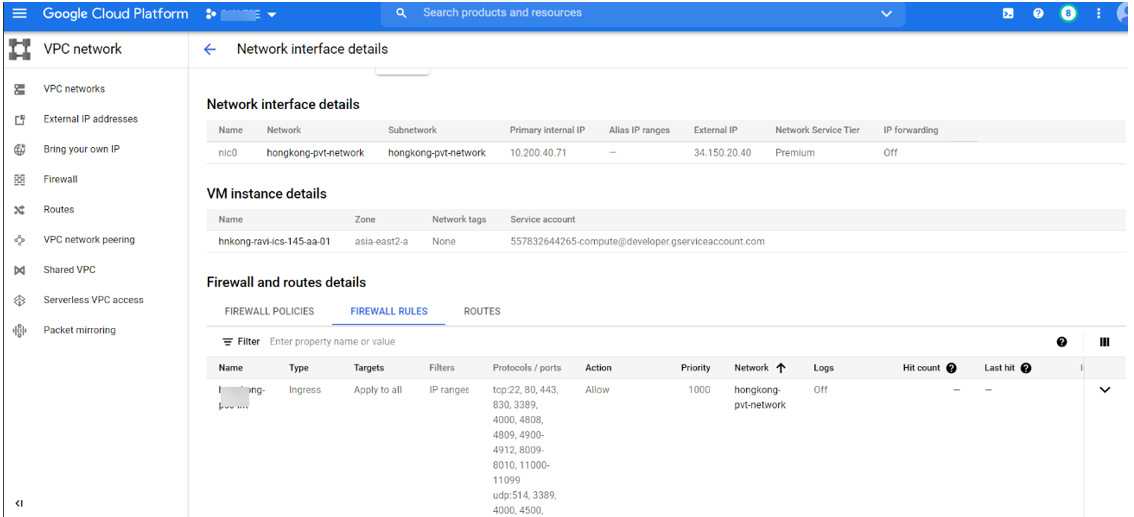
The VM instance details page appears for the instance.
7.Confirm the details for the VM instance, including the number of network interfaces.
8.Make a note of the public IP address of the EXT interface (typically, this is nic1. This is required inside nSA.
9.Under Network interfaces, confirm that the firewall settings from your VPCs are present for your specified network interfaces:
•Click nic0. A summary page for this network interface appears.
Under Firewall and route details, click the Firewall Rules tab and confirm that the following firewall rules are defined.
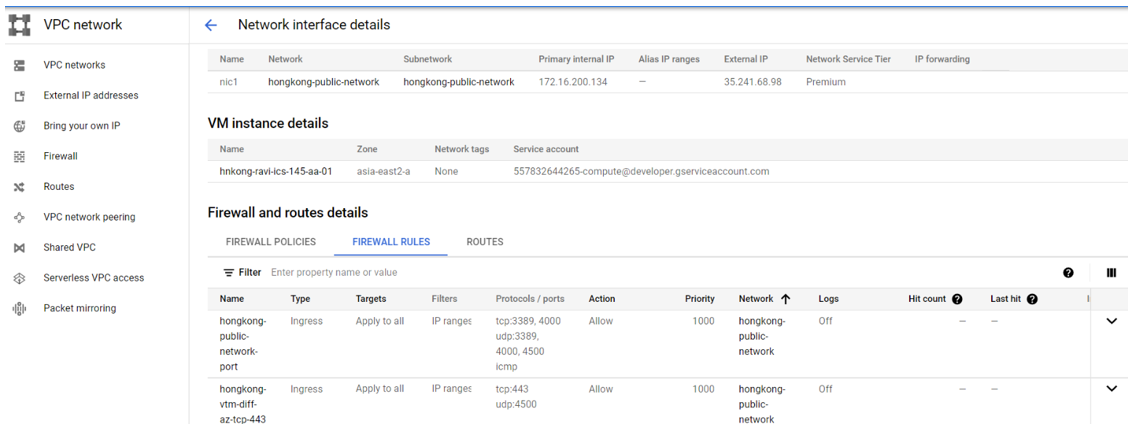
•Click nic1. A summary page for this network interface appears.
Under Firewall and route details, click the Firewall Rules tab and confirm that the following firewall rules are defined.
•(Optional) Click nic2. A summary page for this optional network interface appears.
Under Firewall and route details, click the Firewall Rules tab and confirm that the following firewall rules are defined.
10.The VM instance details* page, click Connect to serial console
A console monitor view (in a separate browser tab) shows the ongoing boot-up process for the instance.
11.Wait until the instance boot up is complete, and shows a screen similar to the following:

You can then complete this process by updating the Gateway details on the nSA Controller, see Completing the Configuration of the nSA Controller.