Example: Creating an Active/Passive Cluster that Supports IPv6 Client Access
This example describes the tasks involved in creating a cluster that supports IPv6 client access.
Overview
Access management framework supports an IPv6 configuration for active/passive clusters. The previous intracluster communication mechanism is preserved. The intracluster communication occurs over the IPv4 corporate network through the internal interfaces.
If a device belongs to an active/passive cluster, you can enable IPv6 on its ports. If a device has IPv6 enabled on its ports, it can be added to an active/passive cluster.
If you attempt to change the IP address of a node while it belongs to a cluster, you might experience unpredictable results. Whenever you change the IP address configuration for a cluster, you must re-create the cluster.
When using active/passive clustering, the members of a cluster pair must be in the same subnet because the VIP address must be shared by both members.
Before You Begin
We recommend that you deploy a cluster in a staging environment first and then move to a production environment after testing the authentication realm, user role, and resource policy configurations, as well as any applications your end users might access.
Before you begin a cluster configuration:
Note that state synchronization occurs only through the internal network interface card (NIC).
Ensure that all intended nodes use the same hardware platform (for example, all are ISA-8000 Appliances).
Ensure that all intended nodes have been initially configured (for example, the system hostname is specified, and the internal and external IP addresses are assigned), and that they are running the same service package version.
Designate one node as the primary node. On the primary node, configure system and user settings. When other nodes join the cluster, the primary node propagates its configuration to the new cluster member during the join cluster operation.
Configuring IPv6 on an existing IPv4 active/passive cluster on an external port can be done seamlessly. However, if you are configuring on an internal port, you must wait for cluster synchronization completion and then do the next configuration for the remaining node. Therefore, we recommended that you complete the IPv6 configurations before creating a cluster on an internal port.
Defining and Initializing a Cluster
You use the primary node admin GUI to create the cluster and add members. The primary node is added as part of the cluster creation operation. When you add members, you are prompted for settings unique to the member, such as the name and IP address configuration for the internal and external interfaces. A few additional settings are also unique, namely the management port and VLAN port settings, so you add these manually after the add node procedure that follows, but before the join cluster operation.
To create a cluster and add members:
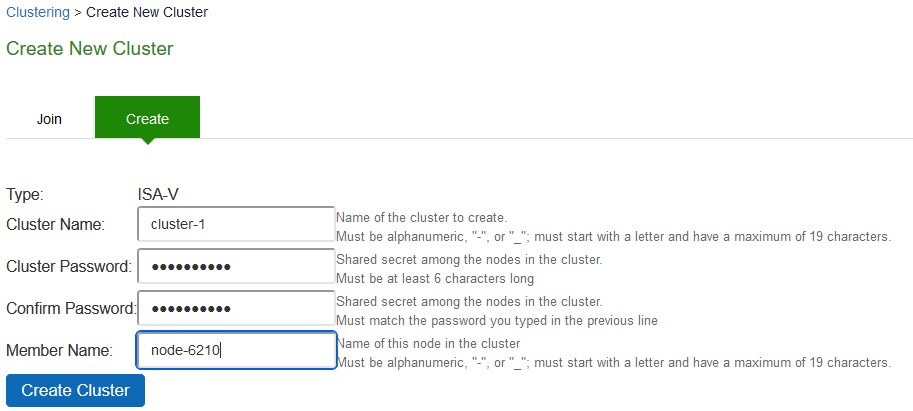
1.Select System > Clustering > Create Cluster and enter a name for the cluster, a cluster password, and a name for this node, such as Node-X.
You need to enter the password again when specifying additional nodes to join the cluster. All nodes in the cluster use this password to communicate.
The following figure shows the Create New Cluster page.
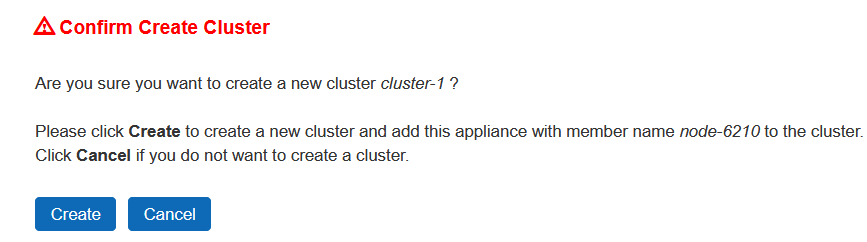
2.Click Create Cluster when prompted to confirm the cluster creation, click Create. After Connect Secure initializes the cluster, the Clustering page displays the Status and Properties tabs.
3.Click Properties.
The following figure shows the Clustering page with active/passive configuration.
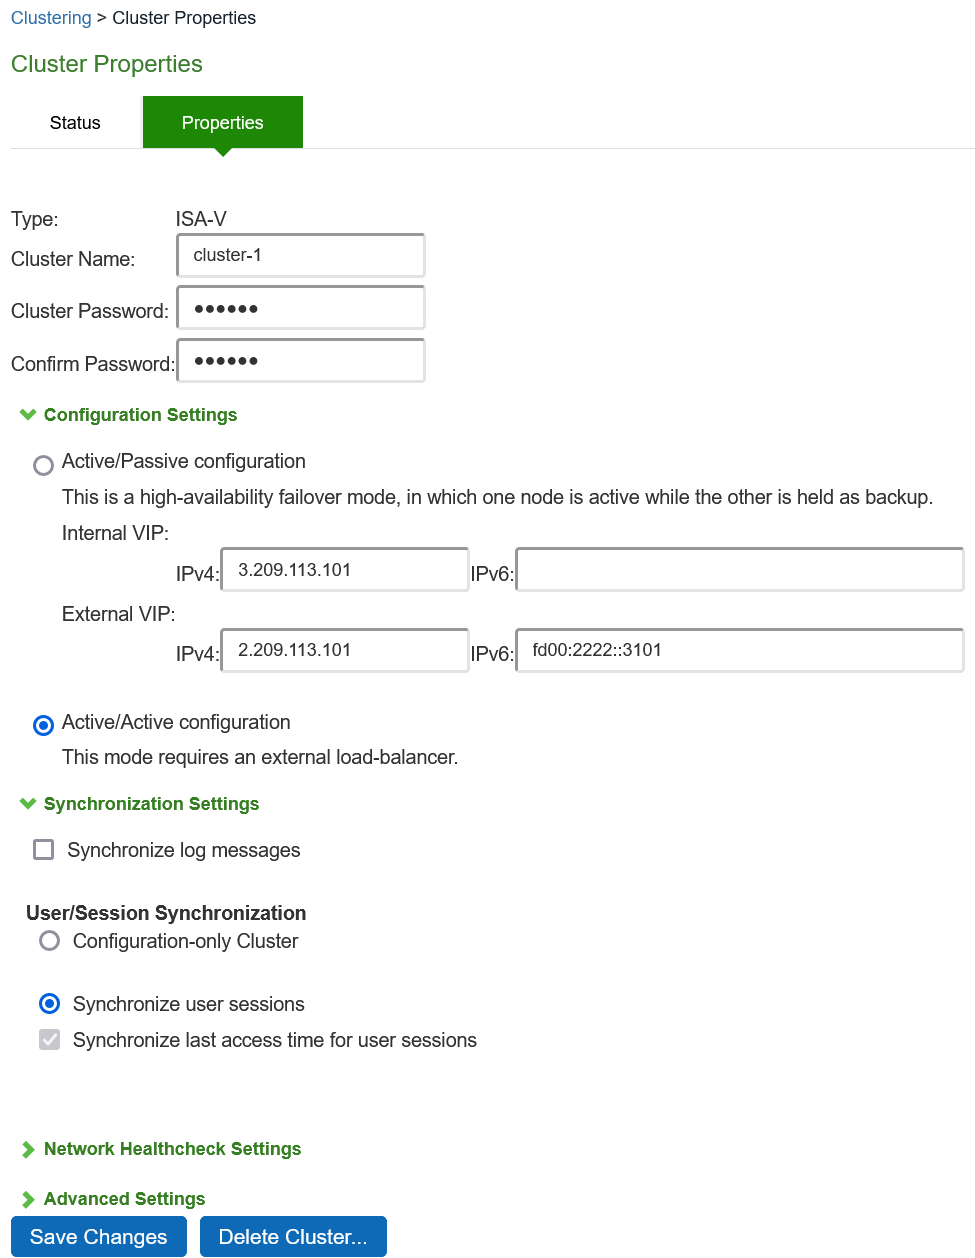
4.Under Configuration Settings, select Active/Passive Configuration, then specify the IPv4 and IPv6 addresses for the VIP address on the internal and external ports, depending on what is enabled for IPv4/IPv6 at Network > Internal Port and Network > External Port.
5.Click Save Changes. After the system initializes the active/passive cluster, the Clustering page displays the Status and Properties tabs.
6.Click Add Members to specify additional cluster nodes:
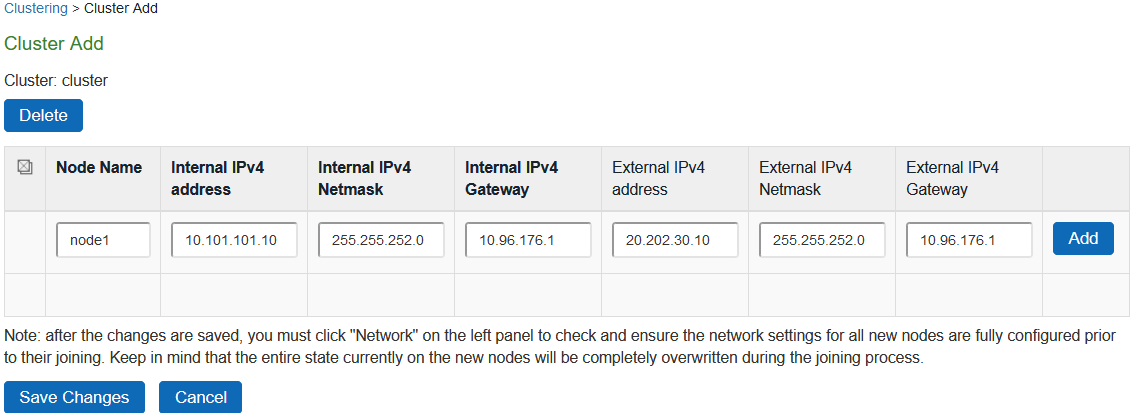
7.Enter a name for the member; for example, Node-Y.
8.Enter the internal IP address. If both IPv4 and IPv6 are enabled on the internal port on Node-X, the system prompts for both IPv4 and IPv6 settings for the internal port for Node-X. Note, however, that intracluster communication uses the IPv4 corporate network.
9.Enter the external IP address. If both IPv4 and IPv6 are enabled on the external port on Node-X, the system prompts for both IPv4 and IPv6 settings for the external port for Node-Y.
10.(Optional) Change the netmask, prefix-length, and gateway settings for the node if necessary.
11.Click Add Node. When prompted to confirm adding the new member, click Add and then click Save Changes.
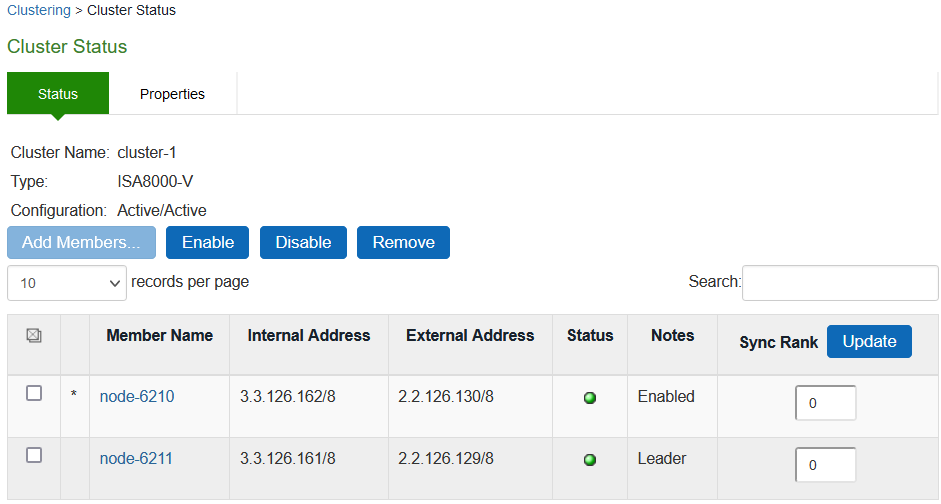
12.After the completion of add node operation, Node-Y is shown as an unreachable member of the cluster.
13.Verify the configuration on System > Clustering > Cluster Status page.

The add node procedure does not prompt you to configure management port or VLAN port settings. As needed, go to the node port configuration page and configure these settings. For example, after the add node operation has completed for Node-Y, go to its System > Network > Port > Settings page and configure its management port.
Only two nodes can be present in an active/passive cluster.
Joining Nodes to the Cluster
The primary node joins the cluster as part of the creation process.
To join additional nodes to the cluster:
1.From an existing cluster member, select the System > Clustering > Cluster Status tab and specify the Connect Secure you want to add to the cluster.
2.From the admin GUI of the access management framework that you want to join to a cluster:
•Select the System > Clustering > Join tab and enter:
•The name of the cluster to join
•The cluster password you specified when defining the cluster
•The IPv4 address for the internal port of an active cluster member
•Click Join Cluster. When prompted to confirm joining the cluster, click Join.
The join cluster operation validates IPv4 and IPv6 settings for all the physical ports (internal, external, and management) against those present in the existing cluster. For example, the external port IPv6 settings present on Node-Y are compared against external port IPv6 settings that were specified for the Node-Y add member operation entered on the primary node (Node-X). If there is a mismatch, the join operation fails with an appropriate error message.
While the new node synchronizes its state with the existing cluster member, each node's status indicates Enabled, Enabled, Transitioning, or Enabled, Unreachable.
When the node finishes joining the cluster, its Clustering page shows the Status and Properties tabs.
After the node joins the cluster, you might need to sign in again.
Configuring IPv6 on an Existing IPv4 Active/Passive Cluster
We recommend as a best practice that you configure IPv6 host and network settings on individual nodes before you create a cluster. In some cases, such as routine upgrade, you have already created a cluster configuration and only want to add IPv6 addresses to the existing interface configuration. If so, follow the procedures in this section precisely.
You must leave IPv6 disabled until the last step of the procedures shown below.
To modify the internal port configuration for the cluster:
1.Select System > Network > Internal Port > Settings.
2.Under Settings for, select Entire cluster.
3.Complete the configuration for the IPv6 prefix and the IPv6 gateway, but do not enable IPv6.
4.Verify that all the nodes are up and running, are in sync, and are in reachable state. Complete synchronization of the cluster pair might take a few minutes.
5.Under Settings for, select Node 1.
6.Configure the IPv6 address, but do not enable IPv6.
7.Verify both the nodes are up and running and in reachable state.
8.Repeat steps 6-8 for Node 2.
9.Select System > Network > Internal Port > Virtual Ports.
10.Update the cluster virtual port configuration to add the IPv6 address.
11.Select System > Network > Internal Port > Settings.
12.Under Settings for, select Entire cluster.
13.Select Enable IPv6.
To modify the external port configuration for the cluster:
1.Select System > Network > External Port > Settings.
2.Under Settings for, select Entire cluster.
3.Complete the configuration for the IPv6 prefix and the IPv6 gateway, but do not enable IPv6.
4.Verify that all the nodes are up and running, are in sync, and are in reachable state. Complete synchronization of the cluster pair might take a few minutes.
5.Under Settings for, select Node 1.
6.Configure the IPv6 address, but do not enable IPv6.
7.Verify both the nodes are up and running and in reachable state.
8.Repeat steps 6-8 for Node 2.
9.Select System > Network > External Port > Virtual Ports.
10.Update the cluster virtual port configuration to add the IPv6 address.
11.Select System > Network > External Port > Settings.
12.Under Settings for, select Entire cluster.
13.Select Enable IPv6.
Advanced Configuration
Table summarizes advanced configuration guidelines.
Connect Secure Clusters: Advanced Configuration Guidelines
|
Settings |
Guideline |
|
If you are creating a cluster of FIPS devices, manually update the security word on each of the nodes. |