JITC (DoDIN APL) Mode
Overview
If JITC (DoDIN APL) Mode is enabled, then the following changes are applied to ICS/IPS:
•Log Support for detection and prevention of SMURF/SYN Flood/SSL Replay Attack.
•Disable ICMPv6 echo response for multicast echo request.
•Disable ICMPv6 destination unreachable response.
•DSCP Support.
•Password Strengthening.
•Notification for unsuccessful admin login attempts.
•Re-authentication of admin users.
•Notification on admin status change
Prerequisites for enabling JITC (DoDIN APL) Mode
Before enabling the JITC (DoDIN APL) Mode, admin must make sure to import the Trusted Server CAs. If not done yet, perform the following steps before enabling the JITC (DoDIN APL) mode.
-
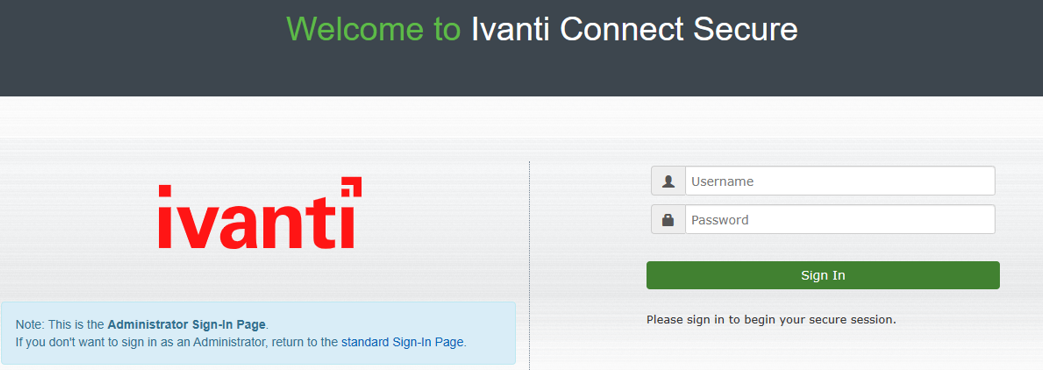
Login to ICS/IPS from any Browser: https://a.b.c.d/admin using admin credentials.
-
Import Trusted Server CA. For this, on the administrator web console:
-
Import Device Certificate
The admin credentials are configured during the initial setup via console.
1.Navigate to System > Configuration > Certificates > Trusted Server CAs.
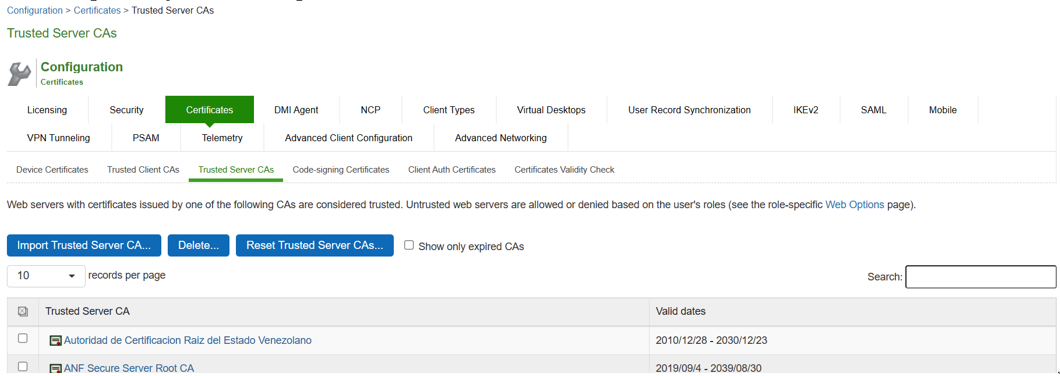
2.Click on Import Trusted Server CA.
3.On the Import Trusted Server CA screen, click on Browser, import the root CA certificate file.
To import CA Chain, all Sub CAs must be imported one by one.
4.Once CA or CA Chain is imported, click Done.
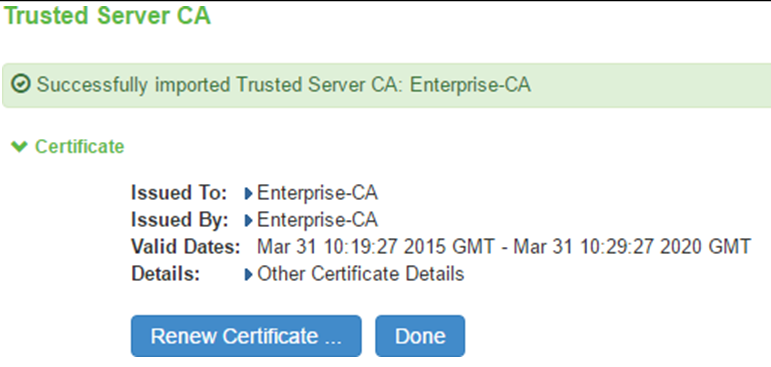
5.The CA Common Name of the imported trusted server CA should be shown in the Trusted Server CA table on screen System > Configuration > Certificates > Trusted Server CAs.
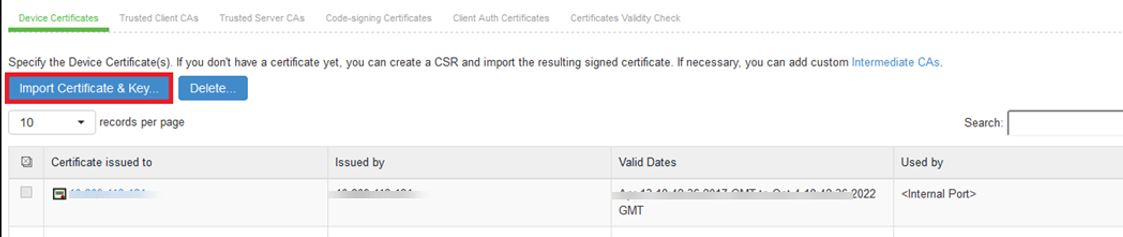
1.Navigate to System > Configuration > Certificates > Device Certificate.

2.Click on Import Certificate & Key.
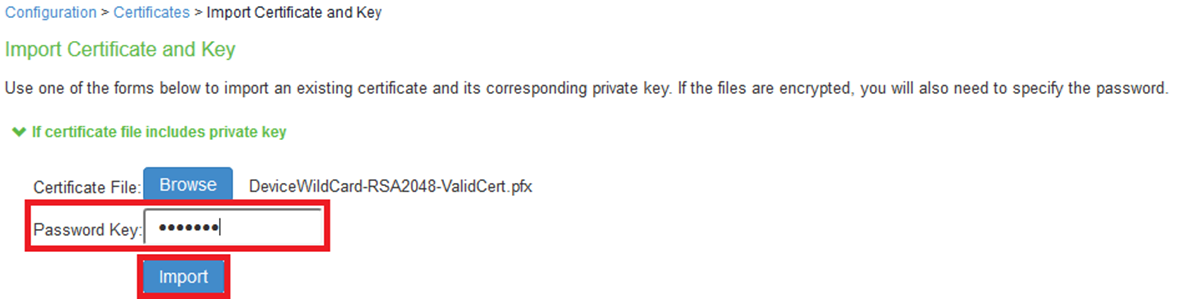
3.On the Import Certificate & Key Page, click on Browse to select the device certificate file having extendedKeyUsage field set for Server Authentication purpose.

4.Enter private key protected password in Password Key Textbox and click Import.
5.The new certificate is shown in System > Configuration > Certificates > Device Certificates.
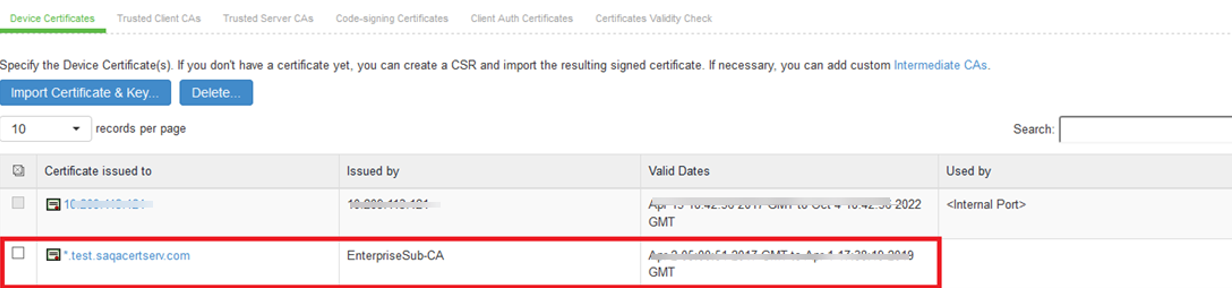
6.Click on the certificate name that was created
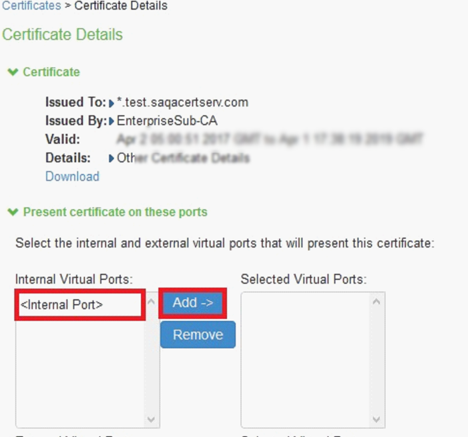
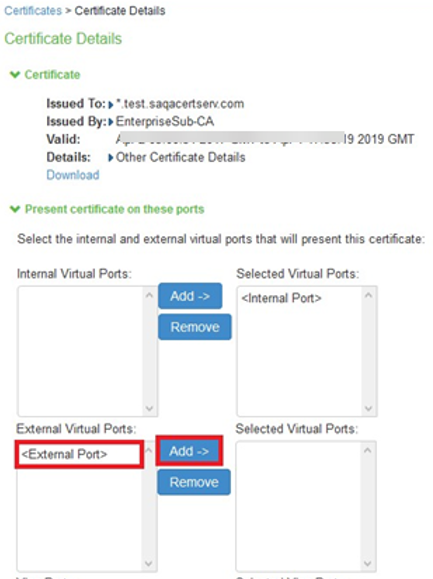
7.The Certificate Details screen is shown, in the expanded Present certificate on these ports section, select <Internal Port> in the left panel that is labelled Internal Virtual Ports, click on Add > to map it to the new device certificate.
If the <Internal Port> is not available in the left panel that is labelled Internal Virtual Ports, then the internal port is already mapped to a different device certificate, see NOTE on instructions to remove the internal port from the currently mapped device certificate.
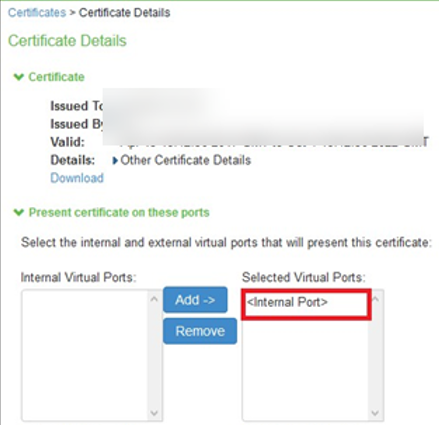
8.Click on Save Changes, the selected port in step 11 is shown in the Used by field for the new certificate.
9.The Certificate Details screen is shown, in the expanded Present certificate on these ports section, select <External Port> in the left panel that is labelled External Virtual Ports, click on Add > to map it to the new device certificate.
10.Click on Save Changes, the selected port in step 6 is shown in the Used by field for the new certificate.
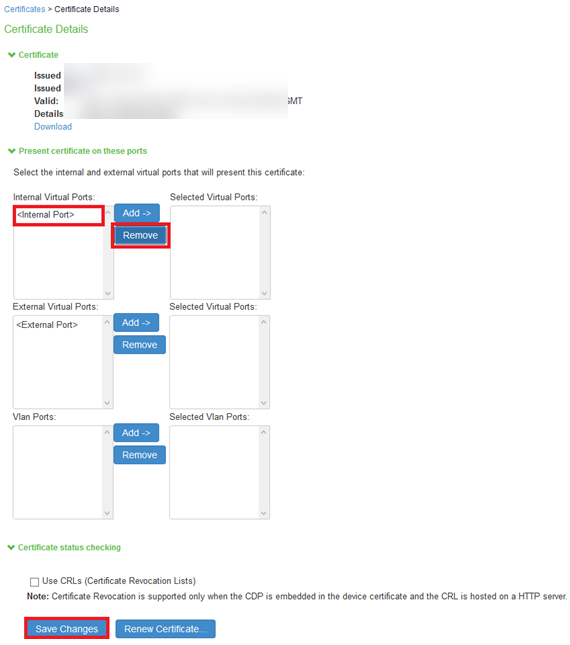
If the internal port is already mapped to a different device certificate, do the following:
11.Click the device certificate that is mapped to the internal port and select <Internal Port> from Selected Virtual Ports box
12.Click on Remove to unmap the device certificate from the Internal port and Save Changes.
Enabling JITC (DoDIN APL) Mode
-
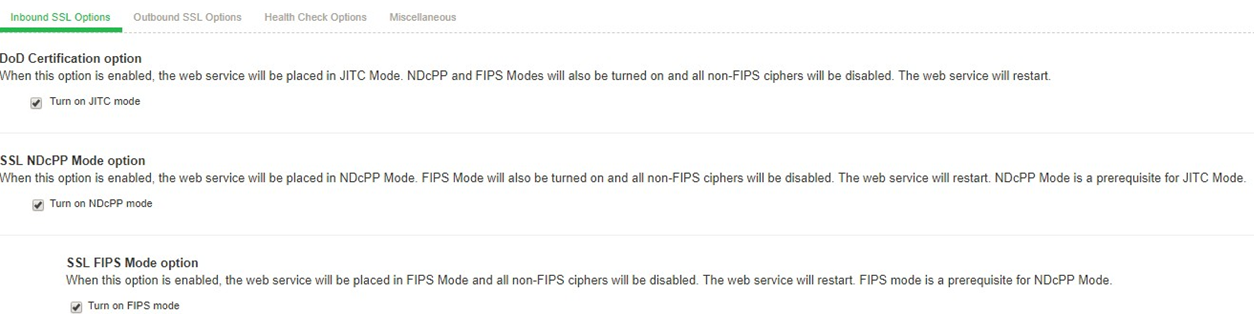
On the ICS/IPS web console, navigate to System > Configuration > Security > Inbound SSL Options.
-
Click on Turn on JITC mode checkbox highlighted to make the ICS/IPS common criteria compliant.
-
Once Turn on JITC mode is enabled, Turn on NDcPP mode and Turn on FIPS mode is also automatically enabled.
-
Enable Use 2048 bit Diffie-Hellman key exchange checkbox.
-
Uncheck SSL Legacy Renegotiation Support option.
-
Click on Save Changes.
-
At this point, the Turn on JITC mode is enabled for both Inbound SSL Options and Outbound SSL Options and the following is shown:


1.Accept only TLS1.0 and later and Accept SSL V3 and TLS (maximize compatibility) are disabled in the JITC (DoDIN APL) mode. Accept only TLS 1.1 and later is selected by default.

2.Custom SSL Cipher Selection Allowed Encryption Strength are automatically selected. Click on Show Selected Ciphers displays below 16 Ciphers in the right panel labelled Selected Cipher.
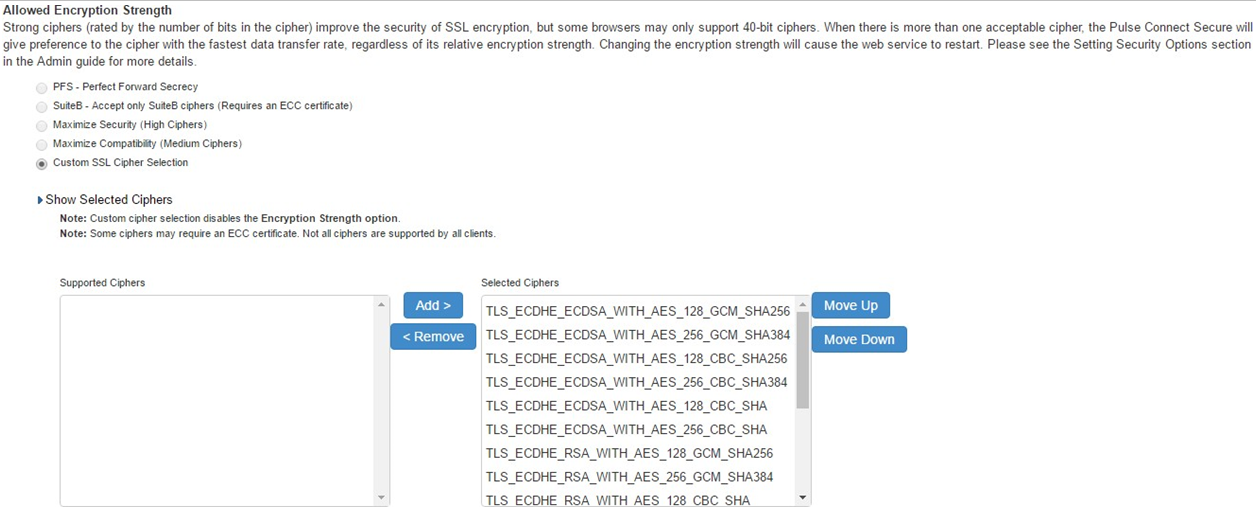
3. Select TLS_DHE_RSA_WITH_AES_128_CBC_SHA and TLS_DHE_RSA_WITH_AES_256_CBC_SHA on the right panel, and click “Remove” button to remove it from the “Selected Ciphers”.
4.Navigate to System > Configuration > Security > outbound SSL Options.
5.Custom SSL Cipher Selection Allowed Encryption Strength are automatically selected. Click on Show Selected Ciphers displays below 16 Ciphers in the right panel labelled Selected Cipher.
6.Select TLS_DHE_RSA_WITH_AES_128_CBC_SHA and TLS_DHE_RSA_WITH_AES_256_CBC_SHA on the right panel, and click “Remove” button to remove it from the “Selected Ciphers”.
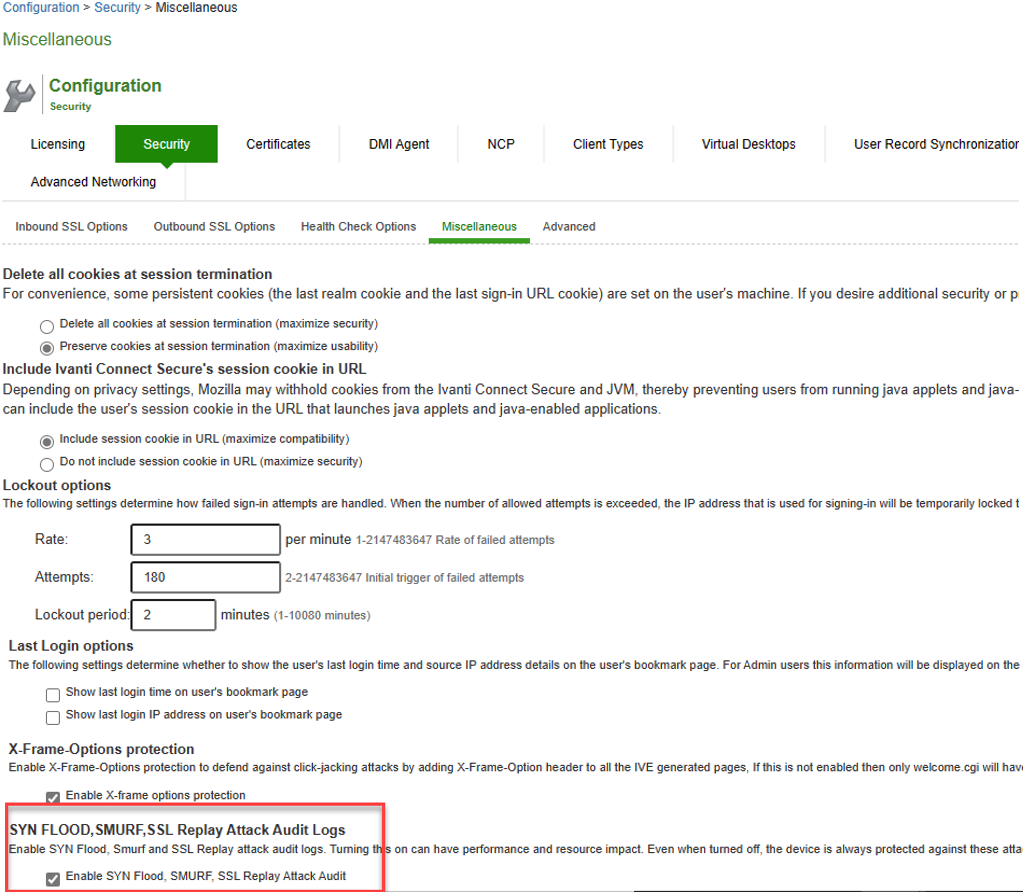
7.Navigate to System > Configuration > Security > Miscellaneous.
8.Enable SYN Flood, SMURF, SSL Replay Attack Audit checkbox will be automatically enabled.
Configuring JITC (DoDIN APL) IPv6 Settings
To enable IPv6 settings and to configure DSCP value:
1.Navigate to system >network >overview and scroll down to see IPv6 settings.
2.Select both the check boxes under IPv6 settings.
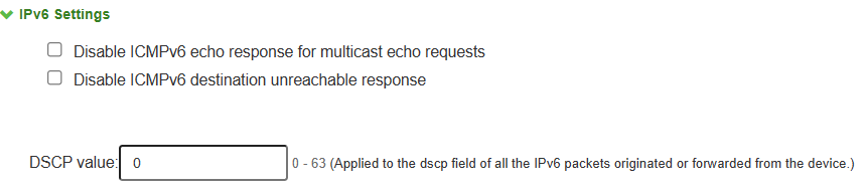
3.Configure the DSCP value by entering the value in the space provided below the check boxes.
4.Click on save changes.
IPv6 Settings
|
Disable ICMPv6 echo response for multicast echo |
Used to enable/disable echo reply. If the check box is enabled, the multicast echo request will be dropped in the ICS/IPS. |
|
Disable ICMPv6 destination unreachable response |
Used to enable/disable destination unreachable message. If the check box is enabled, a destination unreachable message is dropped in the ICS/IPS. |
|
DSCP Value |
Specify the value from 0-63 for the traffic sourced by the device. When applied, all traffic from the ICS/IPS will be using same DSCP value. The specified value is applied to every IPV6 packets originated from the ICS/IPS to the destination. |
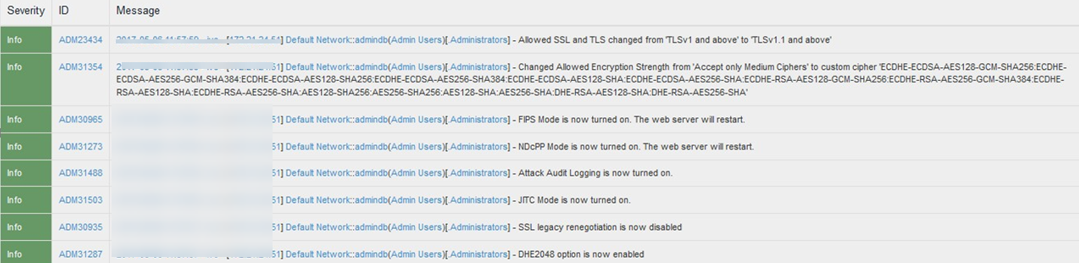
Audit Logs For JITC (DoDIN APL) Mode
JITC (DoDIN APL) Mode Enable Configuration Admin Logs
Navigate to System > Log/Monitoring > Admin Access > Logs and Check for the logs mentioned in Audit logs
IPv6 Settings to be Verified in Admin Logs

Detection and Prevention of SMURF Attack IPv4 Event Logs

Detection and Prevention of SMURF Attack IPv6 Event Logs

Detection and Prevention of SYN Flood Attack IPv4 Event Logs

Detection and Prevention of SYN Flood Attack IPv6 Event Logs

Detection and Prevention of SSL Replay Attack IPv4 Event Logs:

Detection and Prevention of SSL Replay Attack IPv6 Event Logs:

Password Strengthening
To change the password Settings:
1.Select Authentication > Auth Servers > Administrators > Settings.
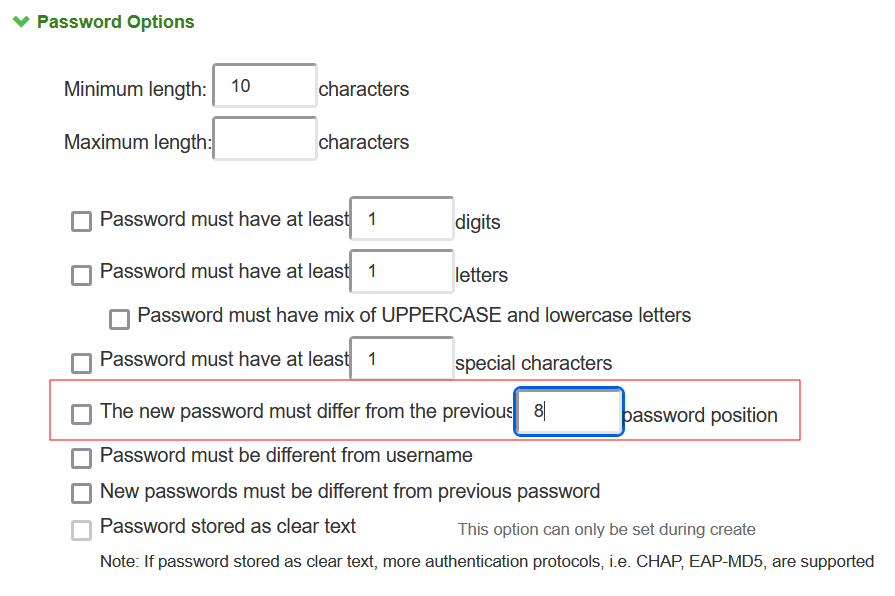
2.Under Password Options, complete the configuration as described in the following table.
3.Enable Password Position option for JITC mode. This option validates new password with old password based on password position.
4.Save the configuration
|
Password Options |
|
|
Minimum length |
Specify a number of characters. The valid range is 0-99. 6 is the default. |
|
Maximum length |
Specify a number of characters. The valid range is 0-99. 8 is the default. The maximum length cannot be less than the minimum length. |
|
Minimum digits |
Specify the number of digits required in a password. Do not require more digits than the value of the maximum length option. |
|
Minimum letters |
Specify the number of letters required in a password. Do not require more letters than the value of the maximum length option. If you enable the previous option, the combined total of the two options cannot exceed that of the value specified in the maximum length option. |
|
Uppercase and lowercase required |
Select this option if you want all passwords to contain a mixture of uppercase and lowercase letters. Require passwords to contain at least two letters if you also require a mix of uppercase and lowercase letters. |
|
Special Characters |
Select this option if you want password should contain any special characters |
|
Password Position |
Select this option to validate the new password with old password based on password position. Default is 8 positions, example: If previous password is test12345678, then change password cannot be aeph2345. The matched characters based on position are highlighted. |
|
Different from username |
Select this option if the password cannot equal the username. |
|
Different from previous password |
Select this option if a new password cannot equal the previous password. |
|
Stored as cleartext |
Select this option if you are using open authentication protocol sets. CHAP and EAP-MD5-Challenge work with local authentication servers only if you select this option. Be aware of the security implications of storing passwords as cleartext. |
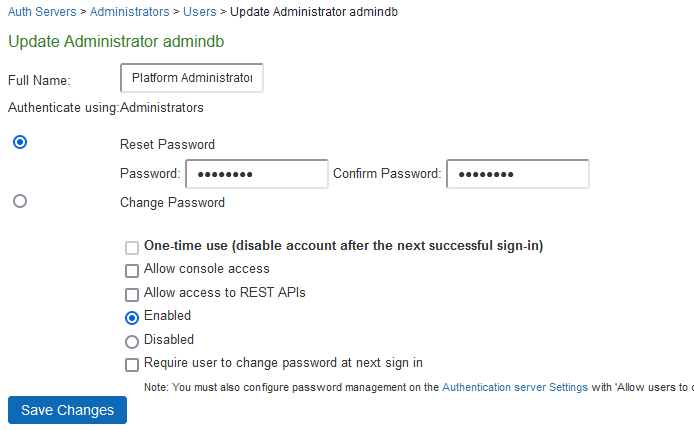
Changing or Resetting Password for Local Authentication Account
To change or reset the Local Authentication Account (User/Admin) password:
1.Select Auth Servers > Administrators > Users > <User/Admin name>
2.Select Reset Password, Enter new Password and Confirm new password.
3.Select Change Password, Enter Old Password. Enter new Password and Confirm new password.
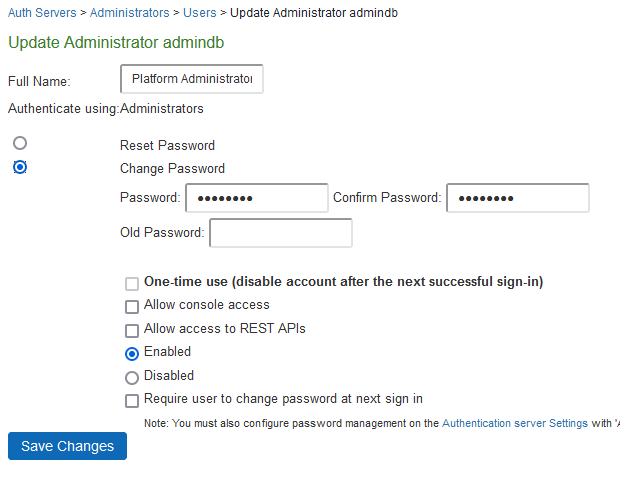
4.Click Save Changes.
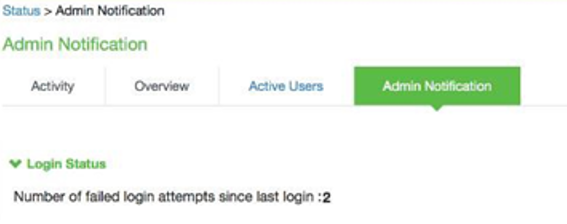
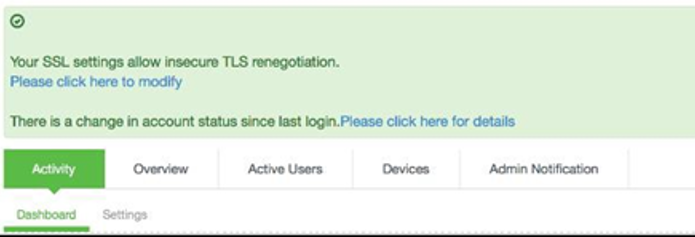
Notification for Unsuccessful Admin Login Attempts
With JITC (DoDIN APL) Mode on, ICS/IPS shows a banner with the count of unsuccessful login attempt. This includes any change in the admin status that has happened since the last successful login.
Upon clicking the banner, the administrator is directed to the status page, which provides more details about the status or configuration change since last the log-in.
These configuration changes will be cleared before the next login, so that the admin can see different set of configurations changes, if anything has happened from the last login.
Banner for Unsuccessful Admin Login Attempts:
Admin Notification for Unsuccessful Admin Login attempts