Creating a File Rewriting Resource Profile
To create a file rewriting resource profile:
1.In the admin console, choose Users > Resource Profiles > Files.
2.Click New Profile.
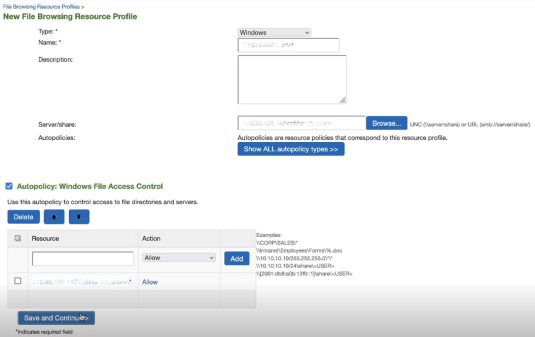
3.From the Type list, select Windows.
4.Enter a unique name and optionally a description for the resource profile. (This name becomes the default bookmark's name.)
5.Enter the resource to which you want to control access. Note that the format of the resource varies depending on which type of resource profile you are creating:
•IPv4- Enter the server name or IP address, share name, and optionally the path that you want to control access to in the Server/share field. When entering the resource, use the format: \\server[\share[\path]].
• IPv6 - Enter IP address, share name, and optionally the path that you want to control access to in the Server/share field. When entering the resource, use the format: \\server[\share[\path]].
In 22.4R2 release, if file server/share is configured with hostname, hostname is not resolved to IPv6 address. This is because getaddrinfo API is not supporting IPv6 resolution.
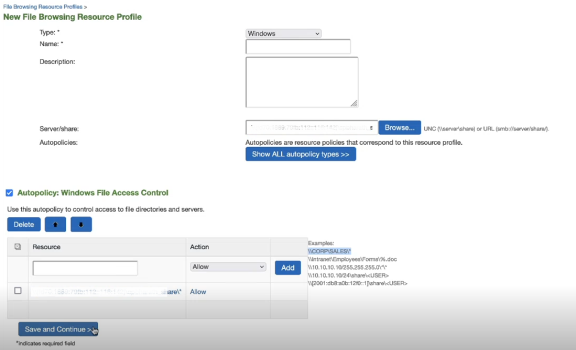
6.In the Autopolicy: Windows File Access Control section, create a policy that allows or denies users access to the resource specified the previous step. At minimum, you need to click Add in order to use the access control policy that is automatically created for you. This policy allows access to the specified directory and all of its sub-directories.
7.(Optional) Click Show ALL autopolicy types to create additional autopolicies that fine-tune access to the resource. Then, create the autopolicies.
8.Click Save and Continue.
9.In the Roles tab, select the roles to which the resource profile applies and click Add.
The selected roles inherit the autopolicies and bookmarks created by the resource profile. If it is not already enabled, the system automatically enables the Files, Windows option or the Files, option in the Users > User Roles > Select Role > General > Overview page of the admin console for all of the roles you select.
10.Click Save Changes.
11.(Optional) In the Bookmarks tab, modify the default bookmark and/or create new ones. (By default, the system creates a bookmark to the resource defined in the Windows field and displays it to all users assigned to the role specified in the Roles tab.)