Migration from PSA to ISA
On the existing PSA platform. Log in to the standalone device or the primary node of the cluster (where the cluster was first formed) and export its binary configs (system.cfg and user.cfg), and the XML Network settings configurations.
Refer to Prerequisites for Migration and Supported Configuration Migration Path before starting the migration.
Migration procedure explained in this document applies to both ISA and ISA-V Appliance.
Exporting Configurations
Ivanti recommends that you export the System and User binary config and the entire XML configuration. This provides you with the greatest possibilities for restoring or migrating the configuration. However, using the binary exports in the first instance is recommended when importing.
To export the binary configurations from the PSA Appliance:
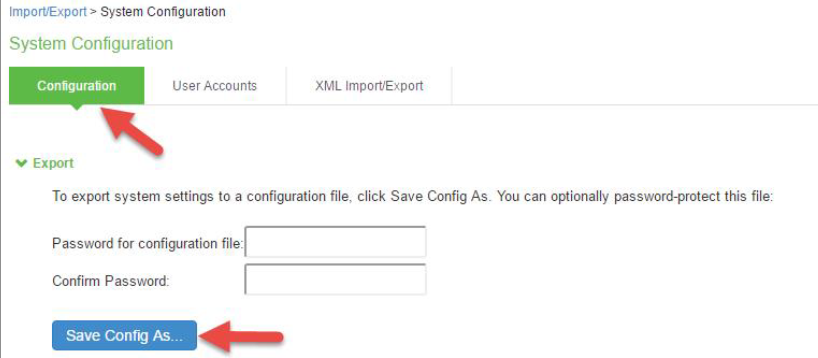
1.From the PSA Appliance Admin UI, select Maintenance > Import/Export > Configuration.
2.Under Export, enter a password if you’d like to password-protect the configuration file.
3.Click Save Config As to save the file. The default filename is system.cfg.
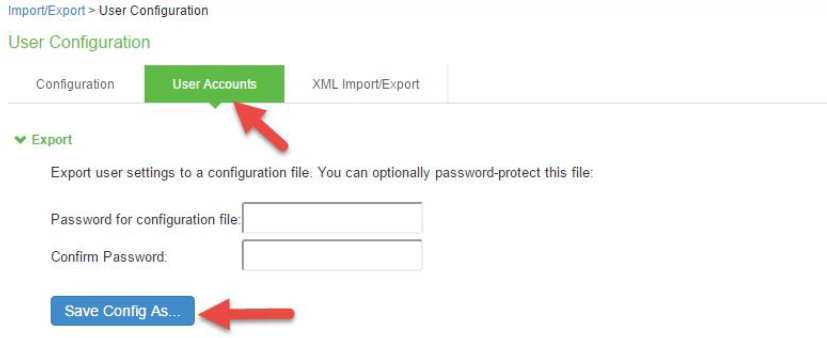
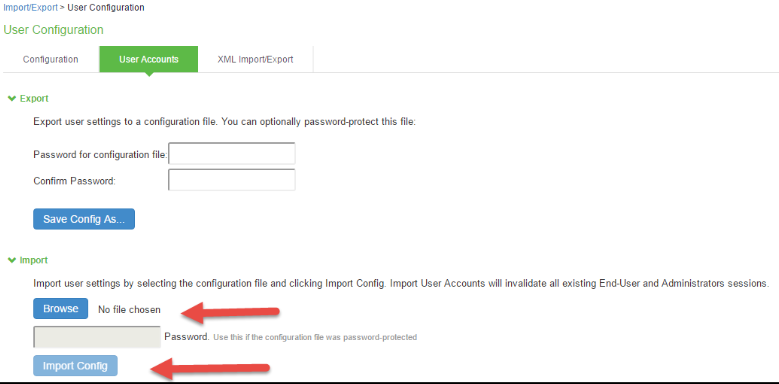
4.Select Maintenance > Import/Export > User Accounts.
5.Under Export, enter a password if you would like to password-protect the configuration file.
•If you choose to password-protect the file, ensure that the password is stored in a long-term sustainable location. There is no way to recover the password or decrypt the file if the password is lost.
6.Click Save Config As to save the file. The default filename is users.cfg.
To export the XML Network configuration:
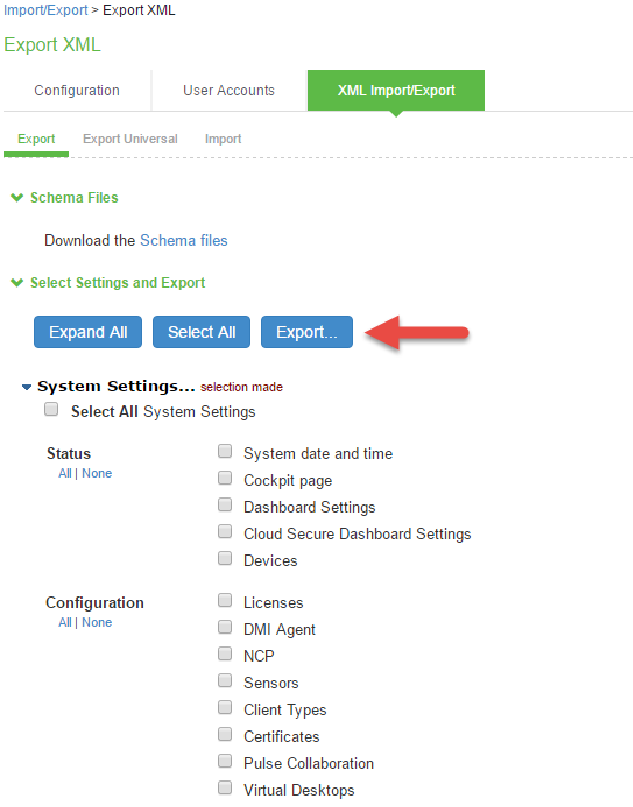
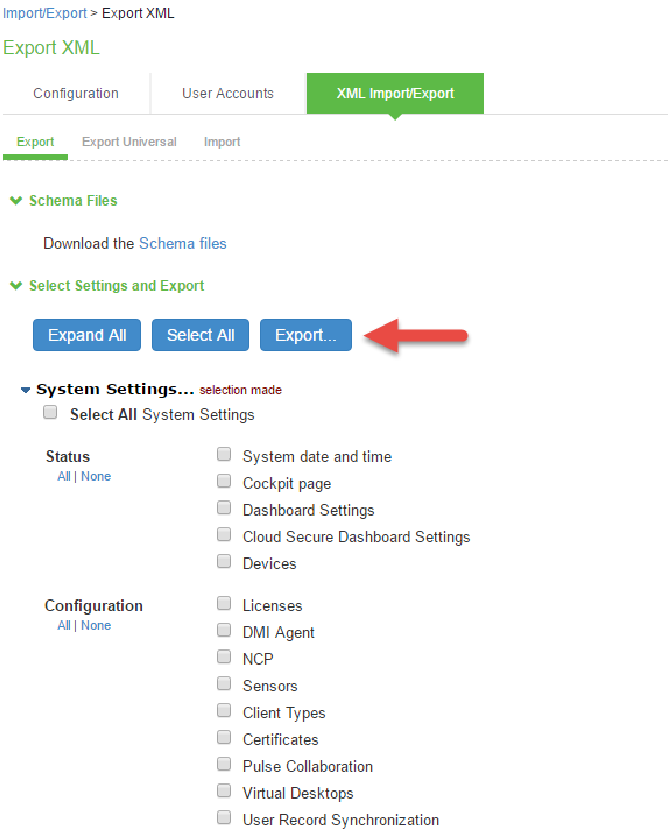
1.Select Maintenance > Import/Export > XML Import/Export.
2.Under Export, expand System Settings and select Select All System Settings.
3.Click Export and save the XML file.
Active Directory Legacy Mode configuration is not supported in 22.x. If you have an existing Active Directory authentication server using Legacy Mode, first migrate to Standard Mode and then upgrade appliance. For the detailed Active Directory migration procedure, refer KB4043.
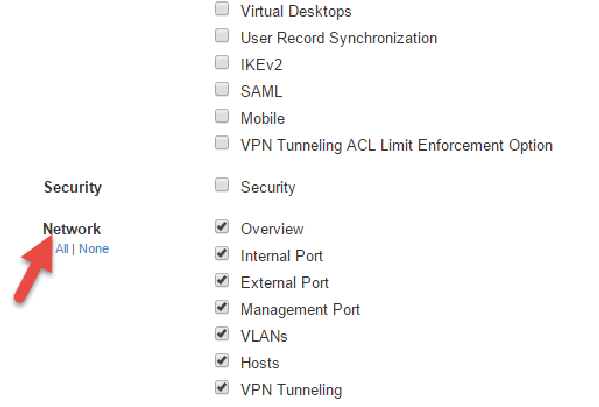
Make notes of all the local settings for both nodes (if not yet done during preparation stage): IP information, clustering, virtual ports, VLANs, hosts, routes, DNS settings, SNMP (if configured) and Syslog settings.
Configuring ISA
1.Configure the new ISA devices with the network settings identified in the Prerequisites section.
The settings to configure are:
•Internal Virtual Ports
•External Virtual Ports
•Management Ports
•VLANs
•Static Routes
•Port settings
2.Apply the entitled/purchased licenses to the individual GW or Cluster or connect to the license server through Gateway licensing Mode.
•Apply the appropriate licenses for the new ISA Appliances. Licenses issued for PSA Appliances are not compatible with ISA appliances. After completing your purchasing process, you will have been issued new licenses. If you do not have your licenses to hand, contact your Ivanti account owner for assistance. Alternatively, you may log into the Ivanti Success Portal at https://success.ivanti.com and log a case with our licensing team through the Get Help > Licensing Assistance.
•If the PSA appliance is a member of an Enterprise License Server, you must manually recreate the client and re-establish connection to the license server later at the end of migration.
If you are migrating a non-clustered PSA device, skip next 4 steps and proceed.
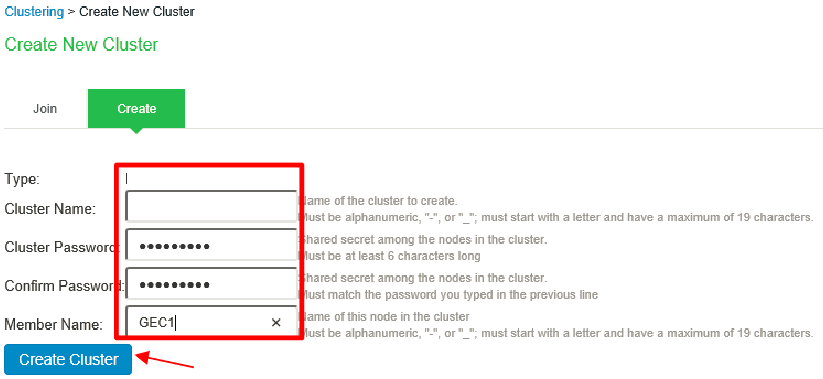
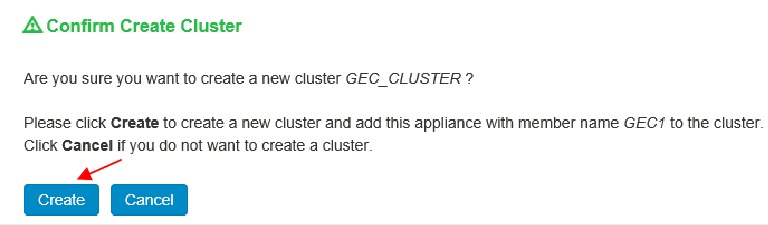
3.In the new ISA device (first device), manually create a new cluster and ensure that this does not conflict in settings or naming with your existing production cluster.
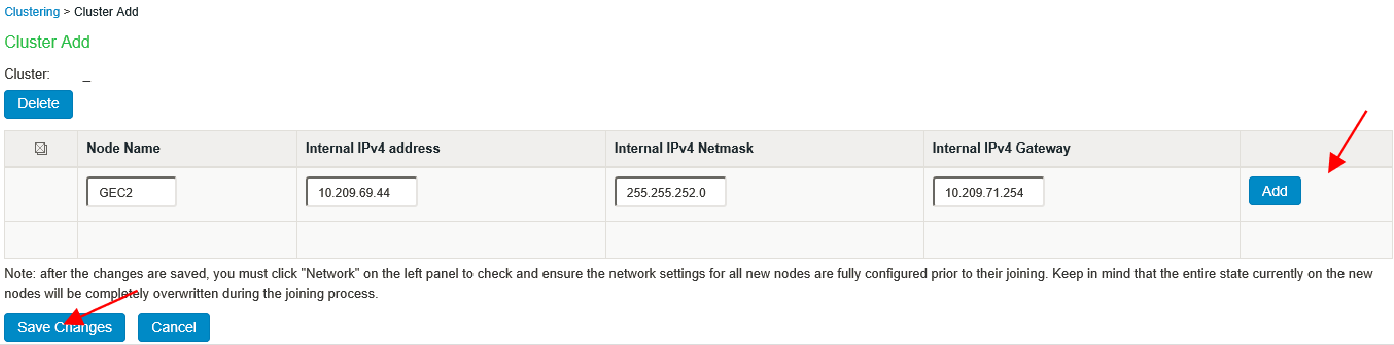
4.Add the second device to the cluster in the primary node cluster configuration and save the settings.
a. Click Add Members to add a member.
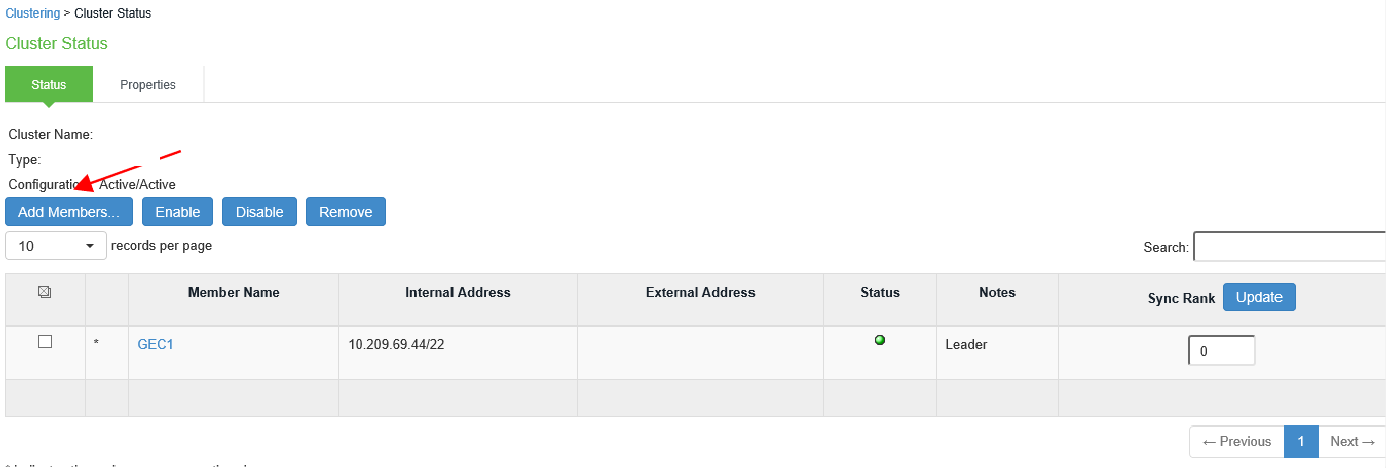
b. Enter member node name and IP and check netmask and gateway, then click Add.
c. Click Save Changes.
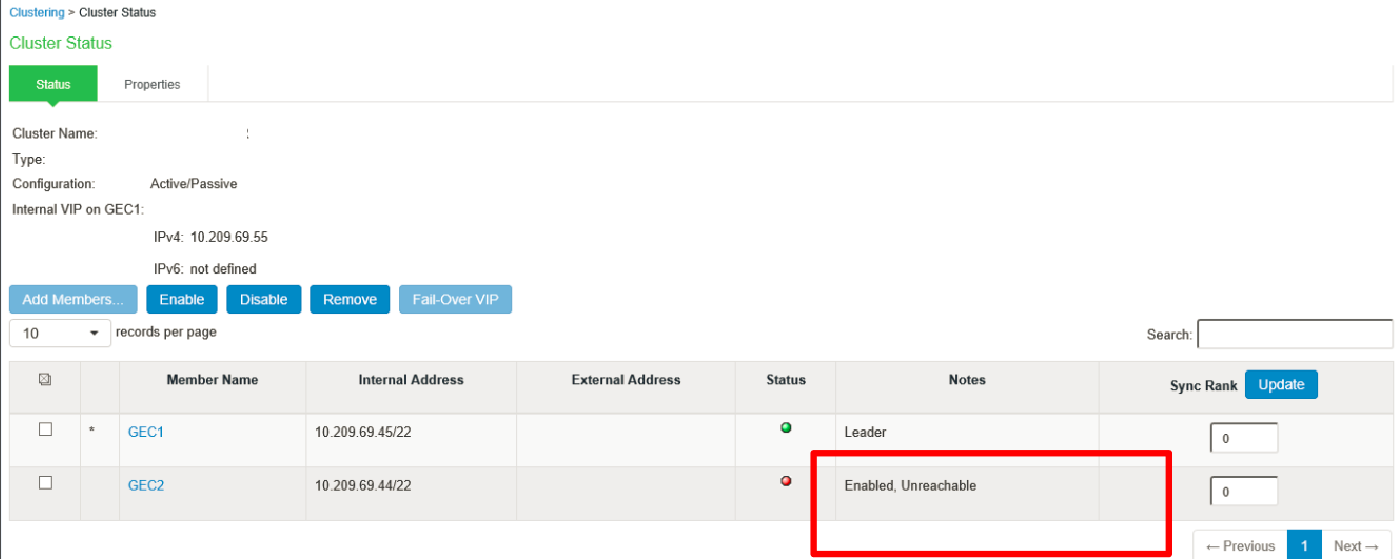
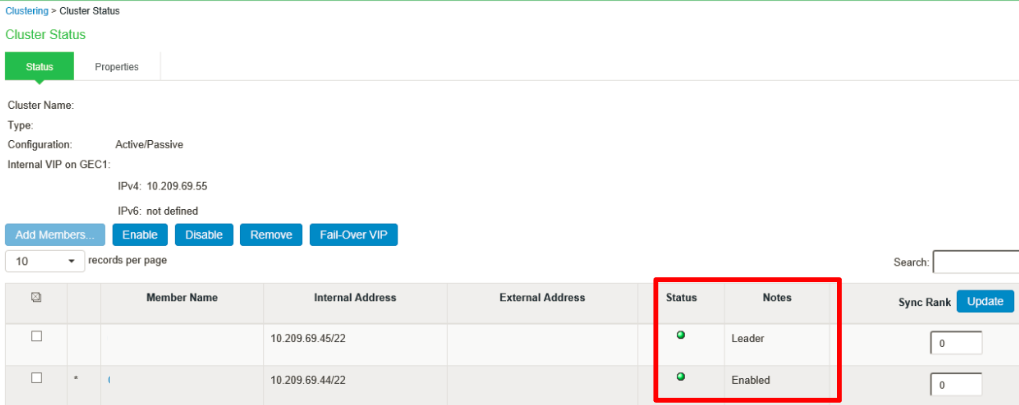
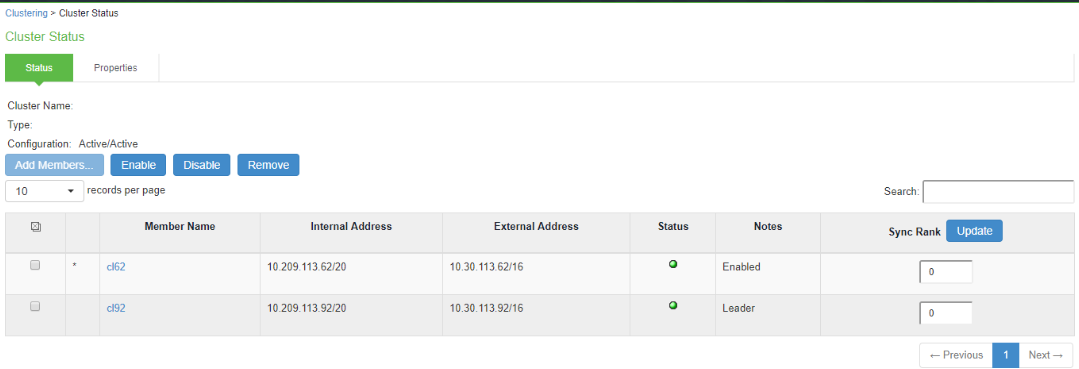
d. Check cluster status.
The status turns transitioning for short period, then the first node becomes enabled, and the status turns as Leader. The second node remains Enabled, Unreachable until it joins the cluster.
For full clustering guidance, please refer to the Clustering Configuration Guide which handles this topic in-depth.
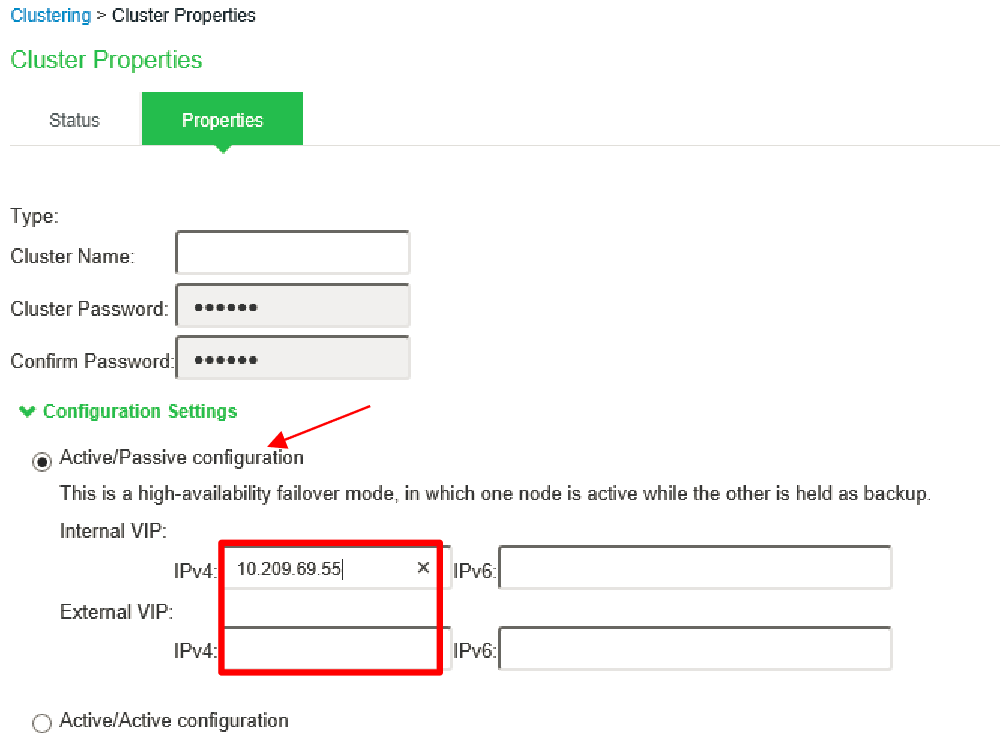
5.If the XML config is exported from an Active/Passive Cluster, following needs to be done prior to XML Import:
a. Configure External Port for the Cluster Members (if external ports are configured in cluster).
b. Go to Clustering > Cluster Properties page. Change the Cluster Type from Active/Active to Active/Passive and add the cluster VIP address/es (the example here does not use external port
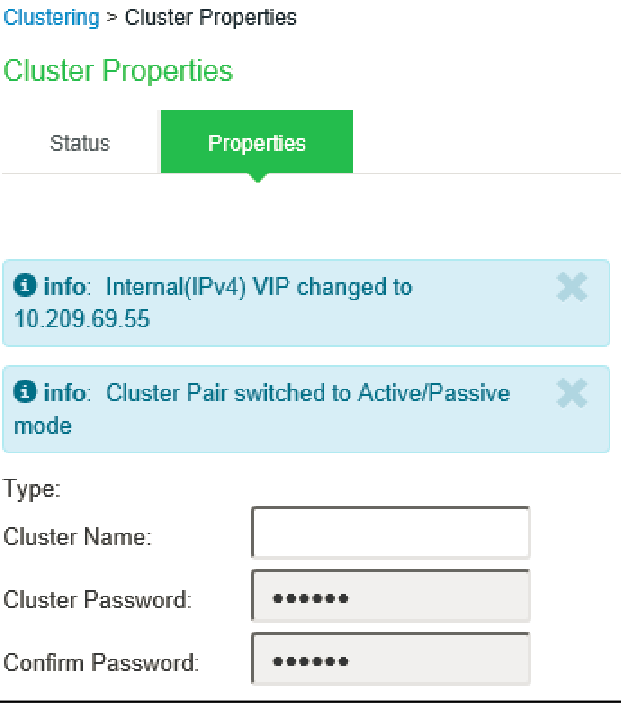
c. Save the cluster configuration settings.
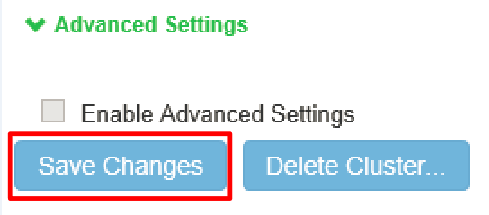
d. Change confirmation will appear confirming change from Active/Active to Active/Passive.
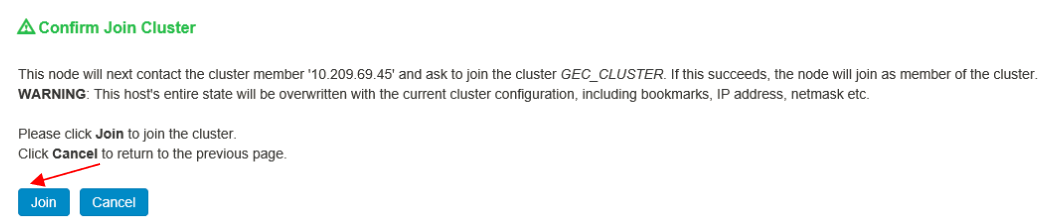
e. Log in to the second PSA device and join this node to the cluster by Clustering > Join Cluster.
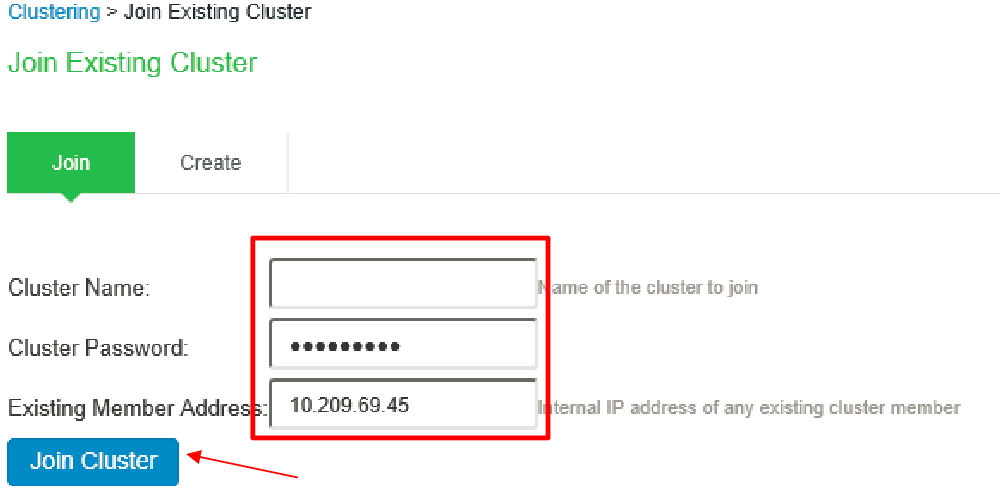
f. Click Join.
6.Log in to primary node and check cluster status and it should stabilize in a few minutes.
Importing existing PSA configurations to ISA
To import the configurations to ISA Appliance:
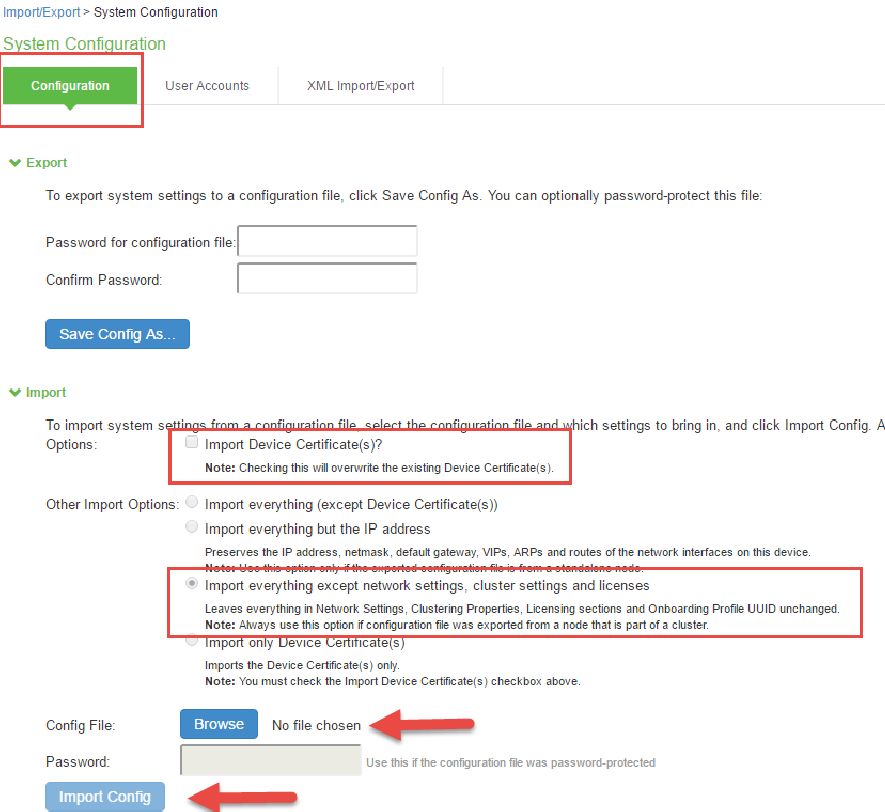
1.From the ISA Appliance Admin UI, select Maintenance > Import/Export > Configuration.
2.Select Import Everything except network settings, cluster settings, and licenses to import all configurations except network, cluster and license settings.
3.Browse to the configuration file, system.cfg. Enter the password if specified.
4.Click Import Config.
When importing the PSA configurations to ISA all the system configurations will be imported. (Configurations related to ICS deprecated features and IPS deprecated features will be removed).
5.Select Maintenance > Import/Export > User Accounts and browse to the users.cfg file.
6.Click Import Config.
When importing the PSA configurations to ISA all the user configurations user configs like realms, sign-in policies, host checker, policies, roles, devices, users will be imported. (Configurations related to ICS deprecated features and IPS deprecated features will be removed).
7.Check cluster status (if clustered) and test operation by logging in to the cluster VIPs (or the standalone PSA device IP).
Profiler Configuration Migration
To export the Profiler configuration:
1.Select Maintenance > Import/Export > Import/Export Configuration > Profiler
2.Under Export, select the required option to export device data to backup file (CSV/binary) or profile modification to a backup file.
3.Click Export Data and save the file.
To import the IPS Profiler configurations:
1.Select Maintenance > Import/Export > Import/Export Configuration > Profiler.
2.Under Export, select the required option to import device data from backup file (CSV/binary) or profile modification from a backup file.
3.Click Browse, select the device data file and click Import Data.