Configuration on the OAuth Provider (OP)
Configuring Google
- Sign in to the Google portal with your Google credentials.
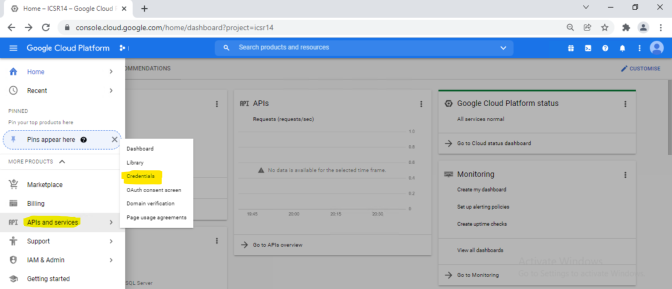
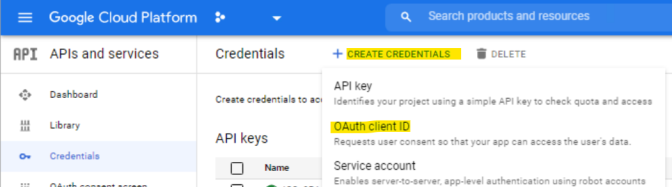
- Under project, navigate to the left menu and click APIs and Services > Credentials.
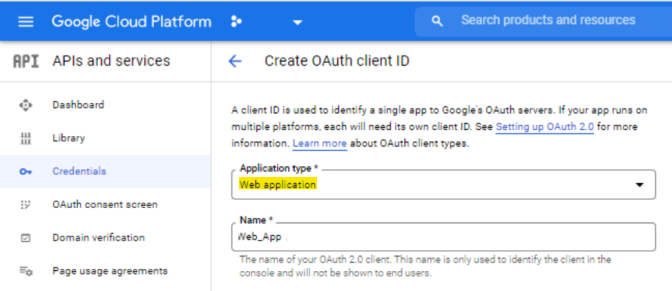
- Click Create Credentials > Select OAuth Client ID.
- Enter the required information like Name and make sure to select Application Type as the Web Application from the drop down, and save the changes.
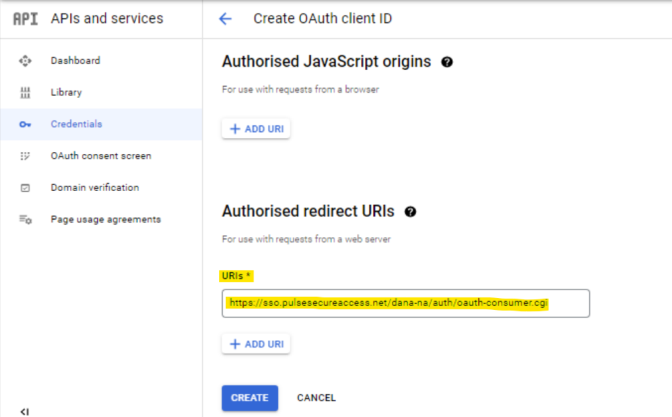
- Enter the ICS FQDN URI under Authorised Redirect URIs.
- A pop up message appears with the Client ID and Client Secret. Use these in the ICS Admin console for OAuth Server configurations.
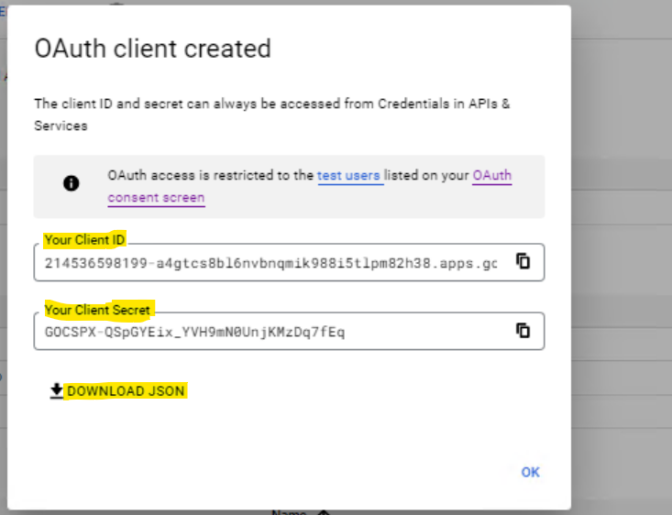
- Click the download icon to download a JSON file with the required information, or download from Google OP URL: https://accounts.google.com/.well-known/openid-configuration
Configuring Okta
- Sign in to the Okta Portal with admin credentials that provide an option to create Applications.
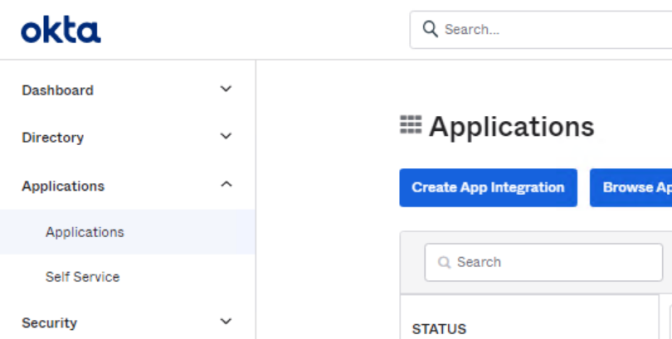
- Click Create App Integration to a Add new OAuth App.
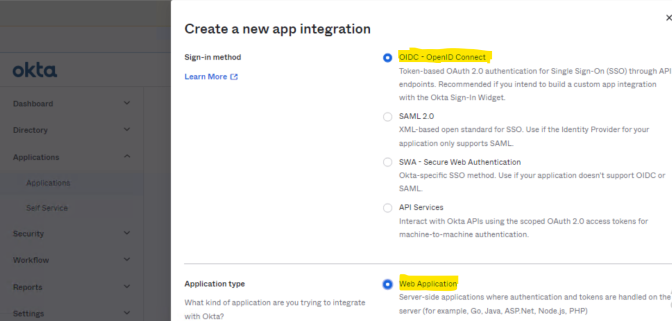
- A pop up window appears. Select OIDC - OpenID Connect for Sign-in method type and Select Web Application for Application type, then click Next.
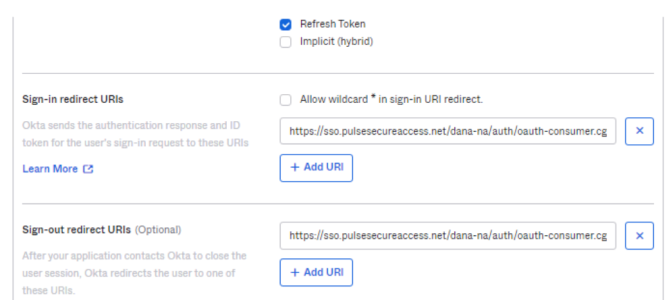
- Enter the basic information like Name and other details. Under Redirect URI, enter the ICS FQDN and click Save to create the application:
- The page displays the created application Client ID and Client Secret:
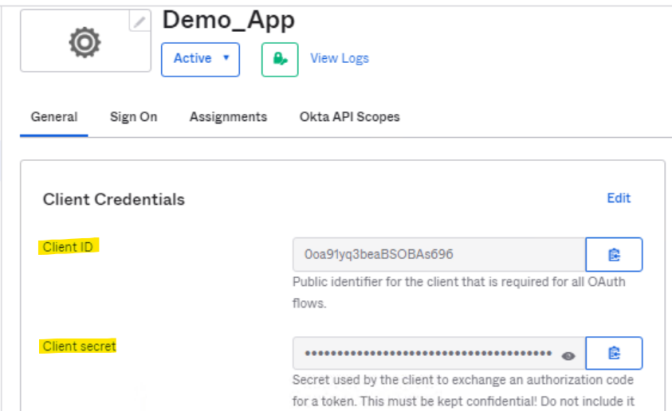
Use this Client ID and Client Secret in the ICS Admin console for OAuth Server configurations.
To download the JSON file, browse to: https://your-domain.okta.com/.well-known/openid-configuration. Save the information in a text file - provide a JSON extension when you save this text file. Upload this file in the Admin console for the OAuth Server configuration.
The admin can customize this application and change the logo, user/group assignments to various users, scope and so on.
Configuring Ping
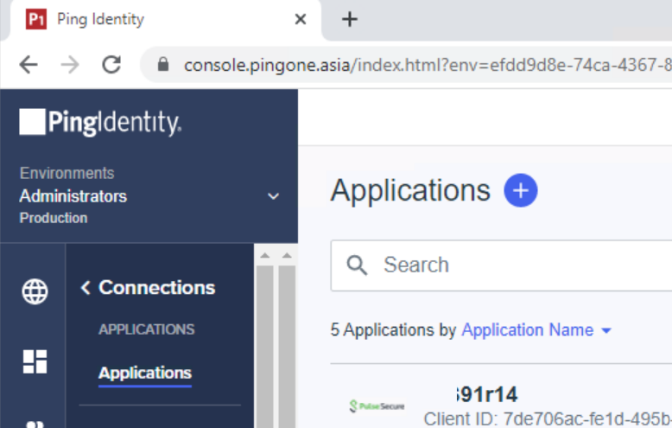
- Sign in to the Ping console using admin credentials to configure the application. Example: https://console.pingone.asia/.
- On the left navigation pane go to Connections - Applications:
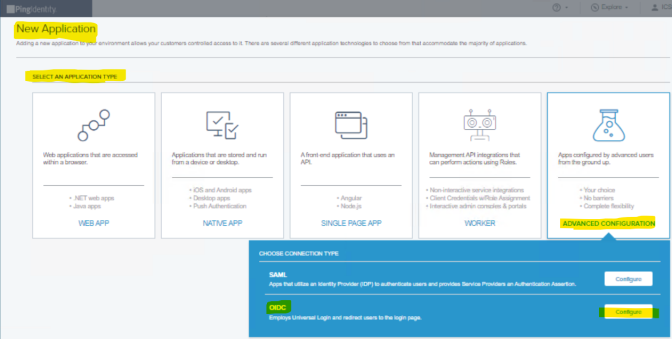
- Click + to Add a New Application. A window appears, select Advanced Configuration > OIDC - Configure:
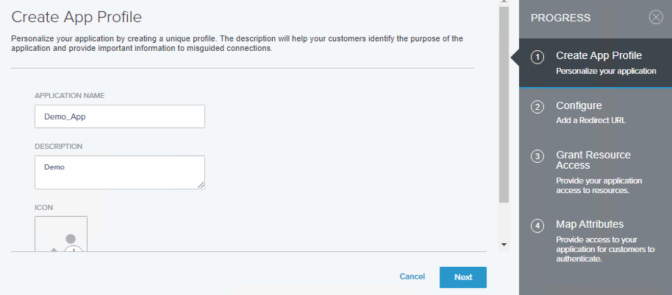
- Enter information like Name and then click Next.
- Enter the ICS FQDN URL under Redirect URL. Click Save and Continue.
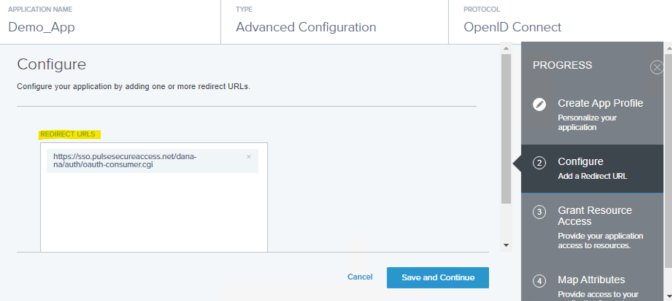
- Configure the following pages as required and click Save Changes to create the application.
The application information displays: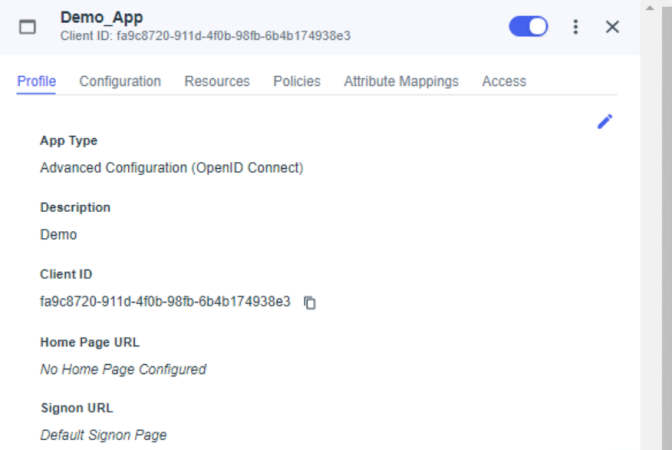
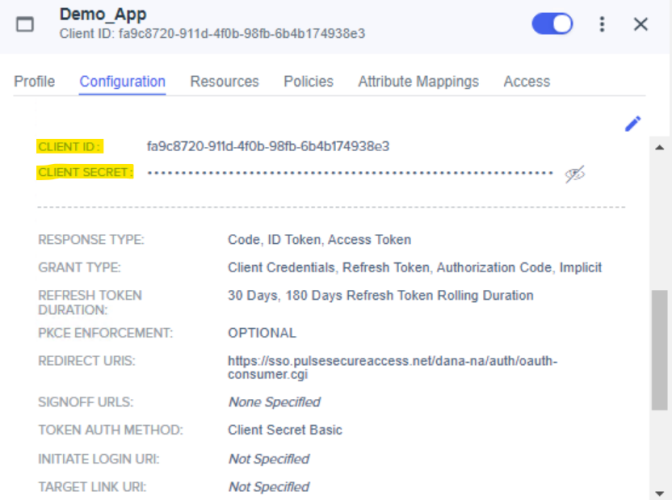
- The Configuration tab shows the Client ID and Client Secret. Use this Client ID and Client Secret in the ICS Admin console for OAuth Server configurations.
To download the JSON file, browse to: https://auth.pingone.asia/<Your ID>/as/.well- known/openid-configuration. Save the information in a text file - provide a JSON extension when you save this text file. Upload this file in the ICS Admin console for the OAuth Server configuration.
The admin can customize this application and change the logo, user/group assignments to various users, scope and so on.
Configuring Microsoft Azure Active Directory
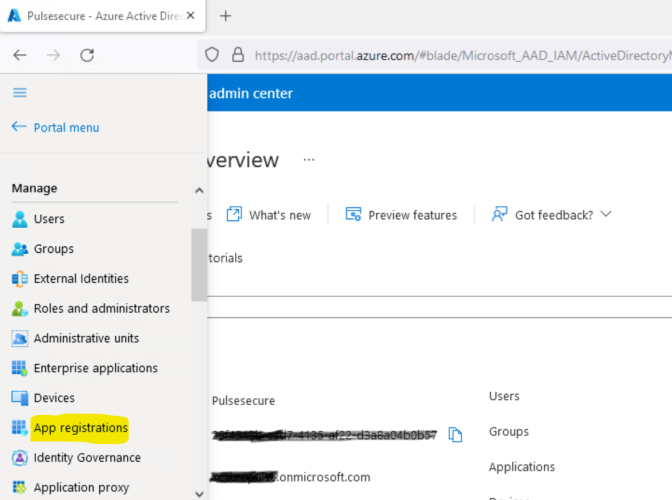
- Sign in to the Azure AD portal using admin credentials to configure the application.
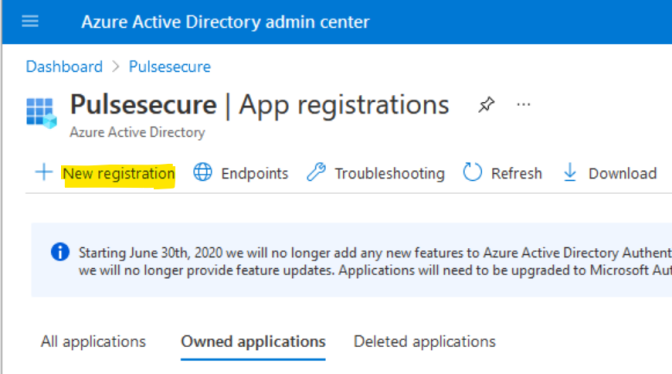
- In the left navigation pane go to - Manage > App registrations.
- Click New registration to create a new application.
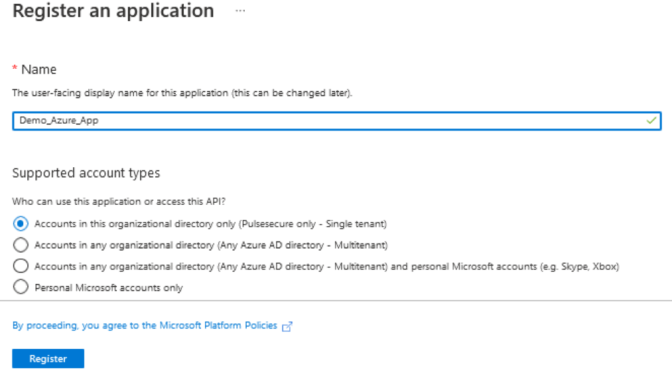
- Provide the required information like Name, supported account types and click Register.
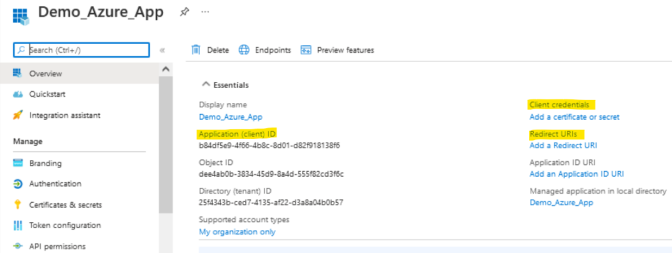
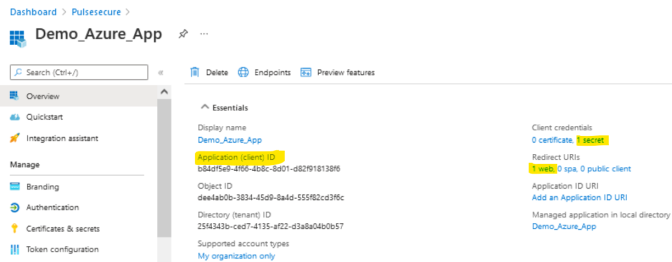
- On creating the application, the Overview tab displays with details:
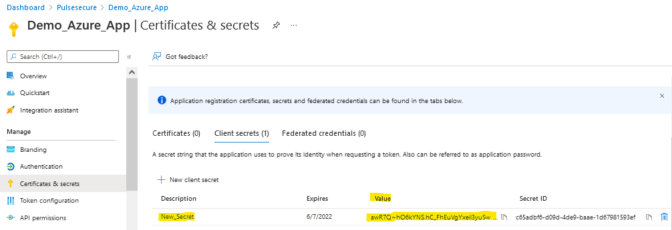
- On the left pane, select Manage > Certificates & secrets. Click New client secret, and add details:
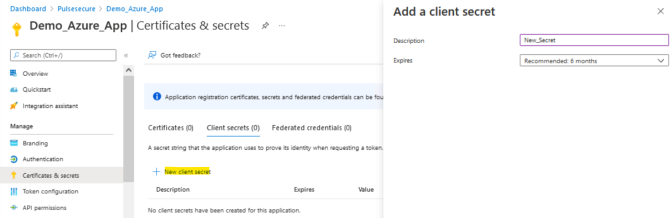
- Copy the Client Secret to use for OAuth server configuration on ICS:
- On the Overview tab click Add a Redirect URIs. Click Add a platform, Configure Web, add the ICS FQDN URL. Click Configure.

- The Overview page displays all the information. Copy the Client ID and Client Secret to use in the ICS admin console for the OAuth Server configuration.
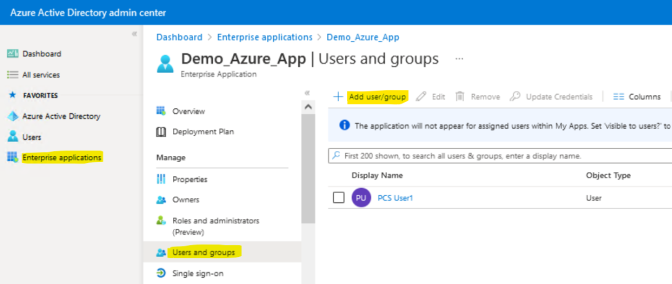
- To assign the user/groups to this application, select the newly created application under the Enterprise Applications > Select this App . Click the Users and Groups, Add user/group, to assign the users as required:
To download the JSON file, browse to URL: https://login.microsoftonline.com/<UID>/v2.0/.well-known/openid-configuration. Save the information to a text file and save with JSON extension. Use this file to upload in the ICS Admin console for the OAuth Server configuration.