Appendix A: Setting Up Prerequisites
Creating Required Flavors of ISA-V
In OpenStack, a flavor is a hardware configuration of a server that defines vCPU, memory and storage capacity of computing instances.
To create flavor in OpenStack:
1.Log in to OpenStack.
2.In the OpenStack dashboard displayed, select Admin > Compute > Flavors. The Flavors page contains a list of existing flavors if already available.
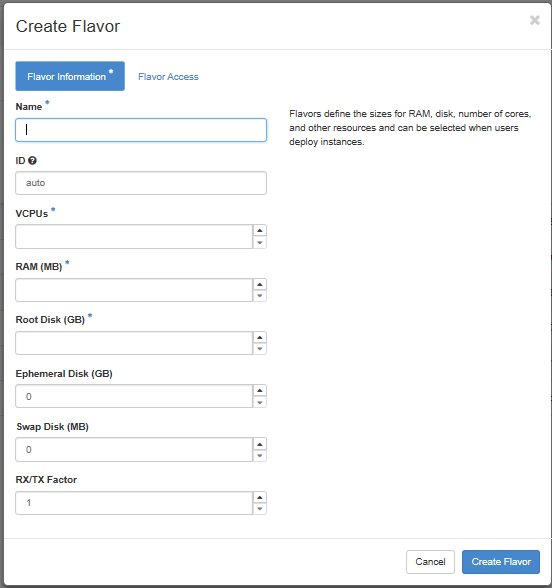
3.Click on the Create Flavor button. The Create Flavor dialog box appears.
4.Enter a name in the Name box.
5.Enter the appropriate value in the vCPUs box.
6.Enter the appropriate value in the RAM box.
7.Enter the appropriate value in the Root Disk box.
8.Click Create Flavor.
The following figure depicts the Create Flavor screen:
The flavor is created and is listed in the Flavors page.
Uploading Required Image to OpenStack
To upload ICS KVM image to OpenStack:
1.Log in to OpenStack.
2.In the OpenStack dashboard displayed, select Project > Compute > Images. The Images page contains a list of existing images if already available.
3.Click on the Create Image button.
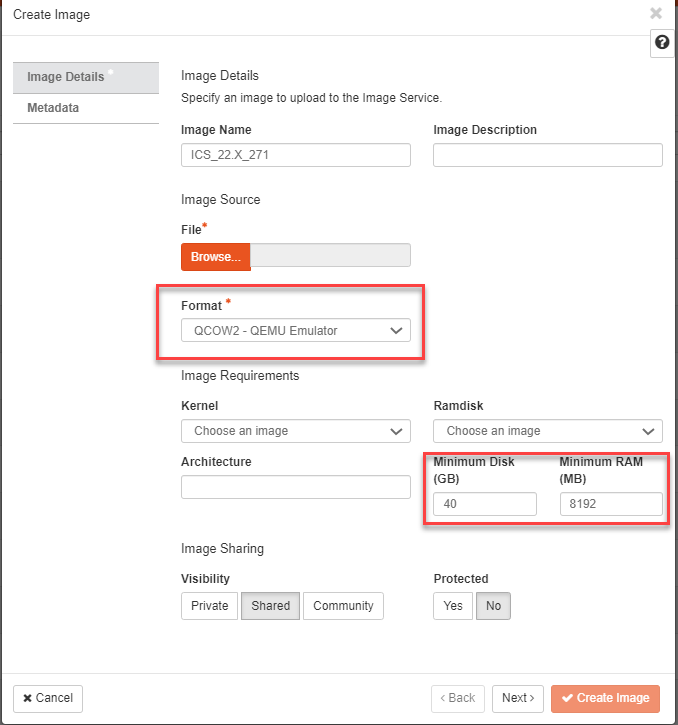
4.Enter a name in the Image Name box.
5.Enter a suitable description in the Image Description box.
6.Click Browse and select the downloaded ICS KVM image file from your local drive.
7.Select Format as QCOW2 - QEMU Emulator.
8.Enter Minimum Disk in GB required for the deployment. Recommended is 40 GB.
9.Enter Minimum RAM in MB required for the deployment. Recommended is 8192 MB.
10.Click on the Create Image button.
The following figure depicts the Create Image screen:
The image is created and is listed in the Images page.
Creating Snapshot Image
A snapshot image is an image template or a logical copy of the image. It uses minimal storage space.
To create a snapshot image:
1.Log in to OpenStack.
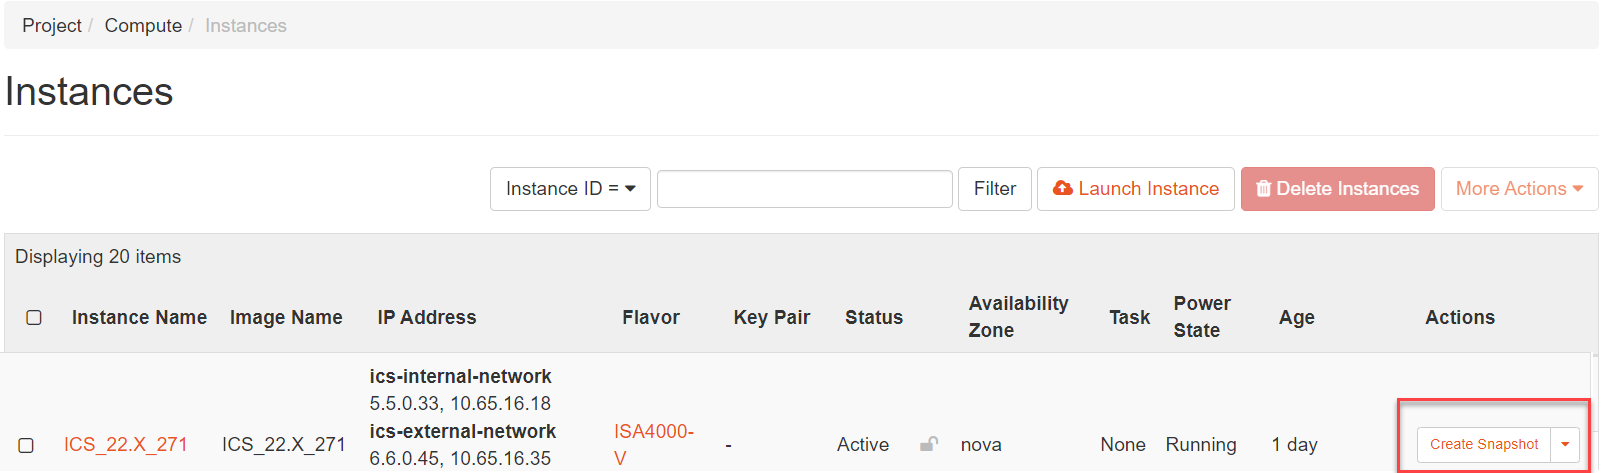
2.In the OpenStack dashboard displayed, select Project > Compute > Instances. The Instances page contains a list of existing instances already available.
3.Click on the Create Snapshot button corresponding to the instance created.
The following figure depicts the Create Snapshot button screen:
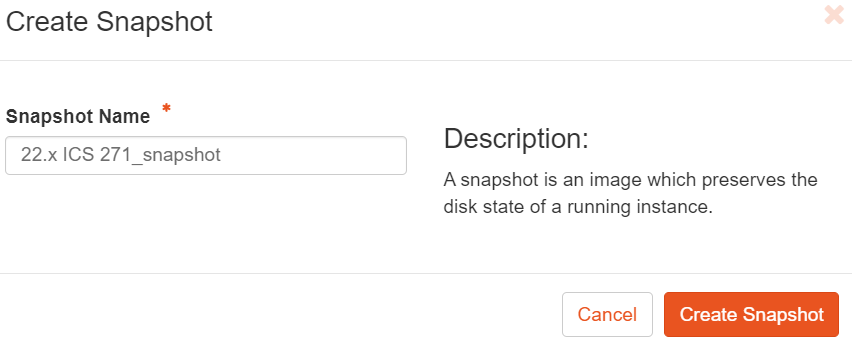
4.In the Create Snapshot dialog box, enter a name in the Snapshot Name box.
The following figure depicts the Create Snapshot dialog box screen:
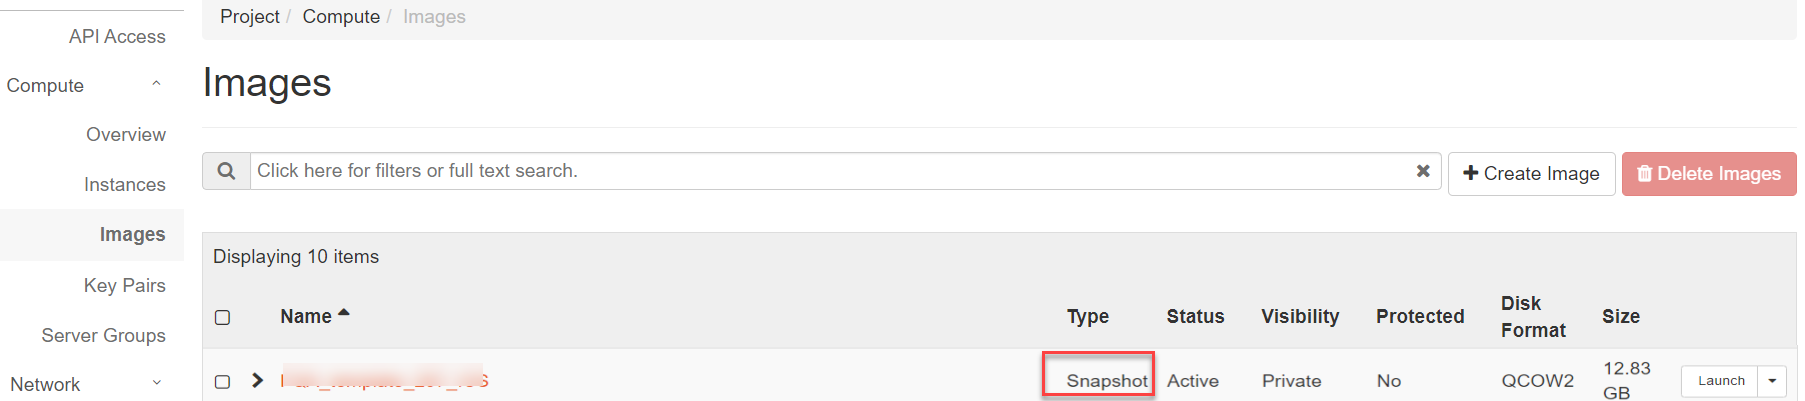
5.Select Project > Compute> Images. The snapshot image is listed in the Images page. The Type of the image indicates that it is a Snapshot. Image.
The following figure depicts the Snapshot Image screen:
Creating Internal, External and Management Networks on OpenStack
To create Internal, External and Management networks in OpenStack:
1.Log in to OpenStack.
2.In the OpenStack dashboard displayed, select Admin > Network > Networks. The Networks page contains a list of existing networks if already available.
3.Click on the Create Network button.
4.In the Networks page, provide the required configuration details for Internal network and click Create Network.
The Internal network is created and is listed in the Networks page.
5.Follow the same procedure to create External and Management networks.
Creating Required Security Groups for Internal, External and Management Ports
The Security Groups is a type of firewall provided by OpenStack to assign to Internal, External and Management ports.
To create Security Groups in OpenStack:
1.Log in to OpenStack.
2.In the OpenStack dashboard displayed, select Project > Network > Security Groups. The Security Groups page contains a list of existing Security Groups if already available.
3.Click on the Create Security Group button. The Create Security Group dialog box appears.
The following figure depicts the Create Security Group dialog box screen:
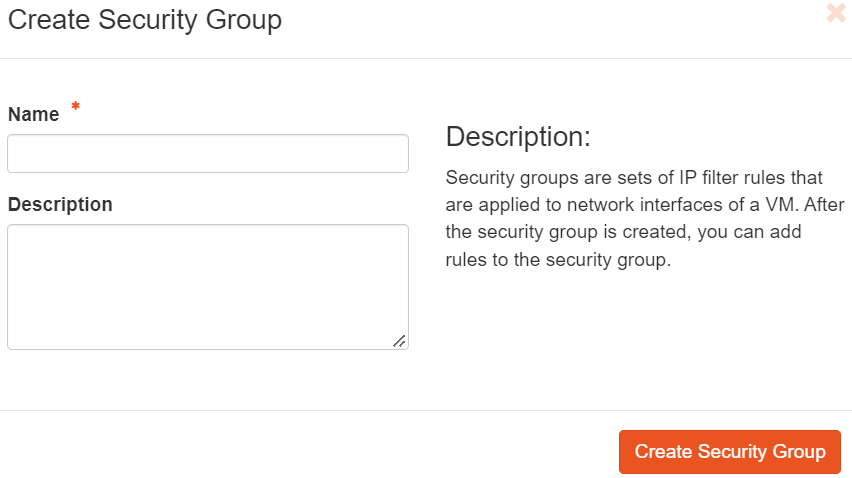
4.Enter a name for the Security Group to assign to Internal port in the Name box.
5.Enter a suitable description in the Description box.
6.Click the Create Security Group button.
The Security Group is created and is listed in the Security Groups page.
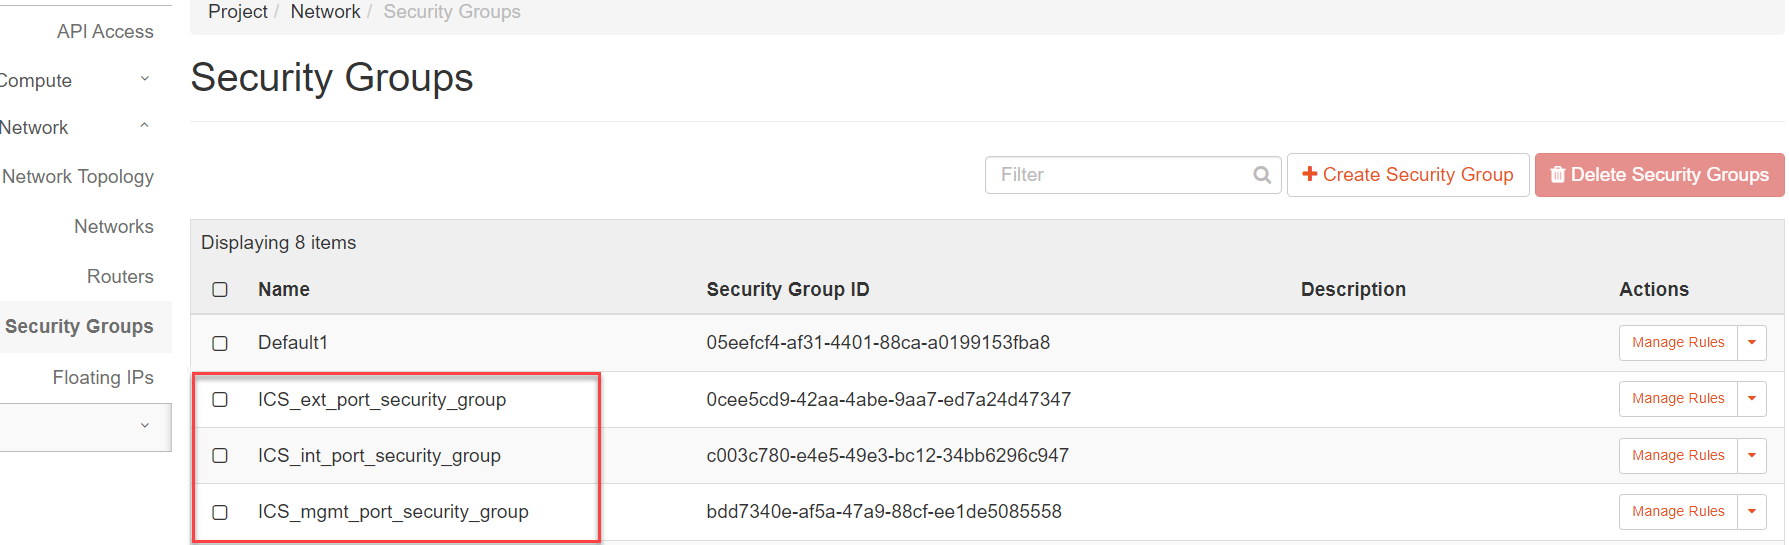
7.Follow the same procedure to create Security Groups to assign to External and Management ports.
The Security Groups are created and are listed in the Security Groups page.
The following figure depicts the Security Groups page screen:
Creating Rules
Once the Security Groups are created, rules have to be set to the assigned Internal, External and Management ports for allowing/disallowing the traffic.
To create rules to a Security Group:
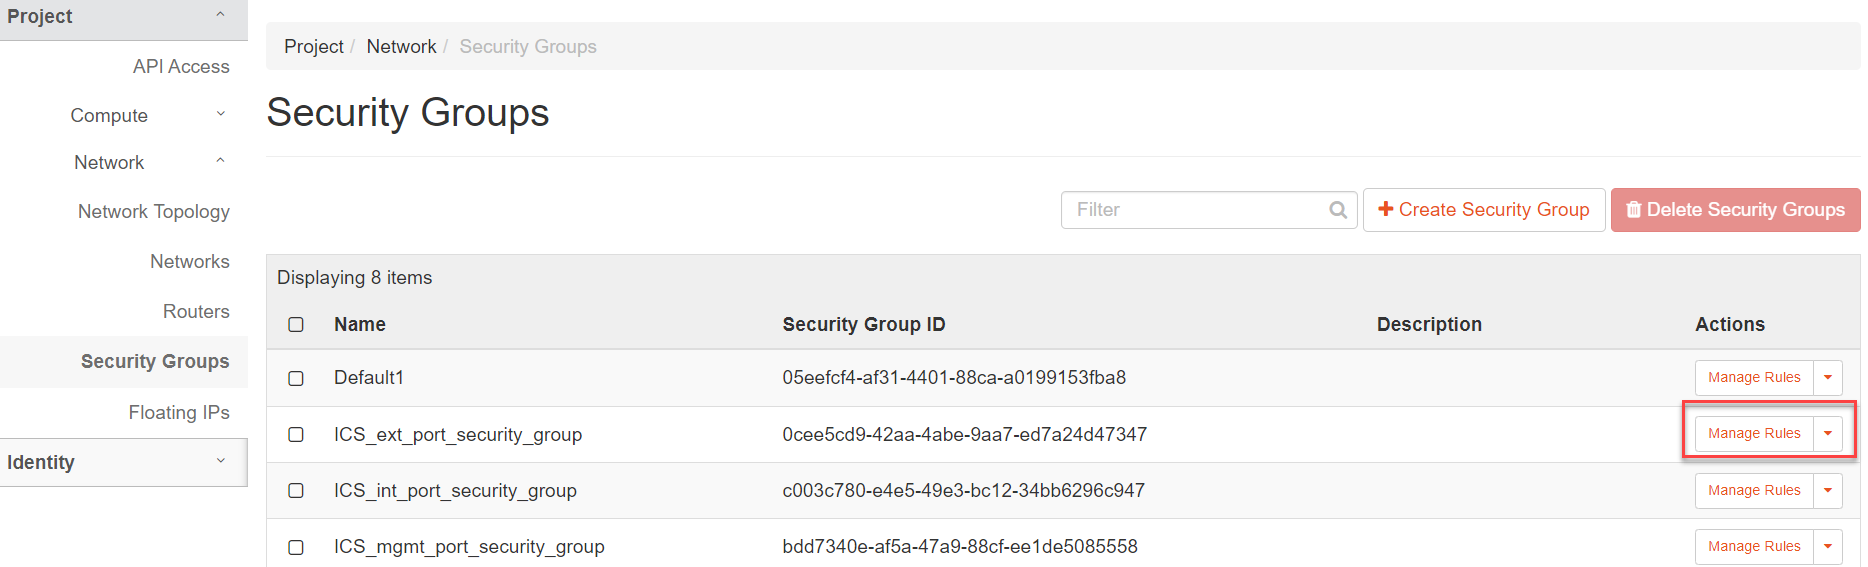
1.In the Security Groups page, click on Manage Rules associated with the required Security Group.
The following figure depicts the Security Groups page – Manage Rules screen:
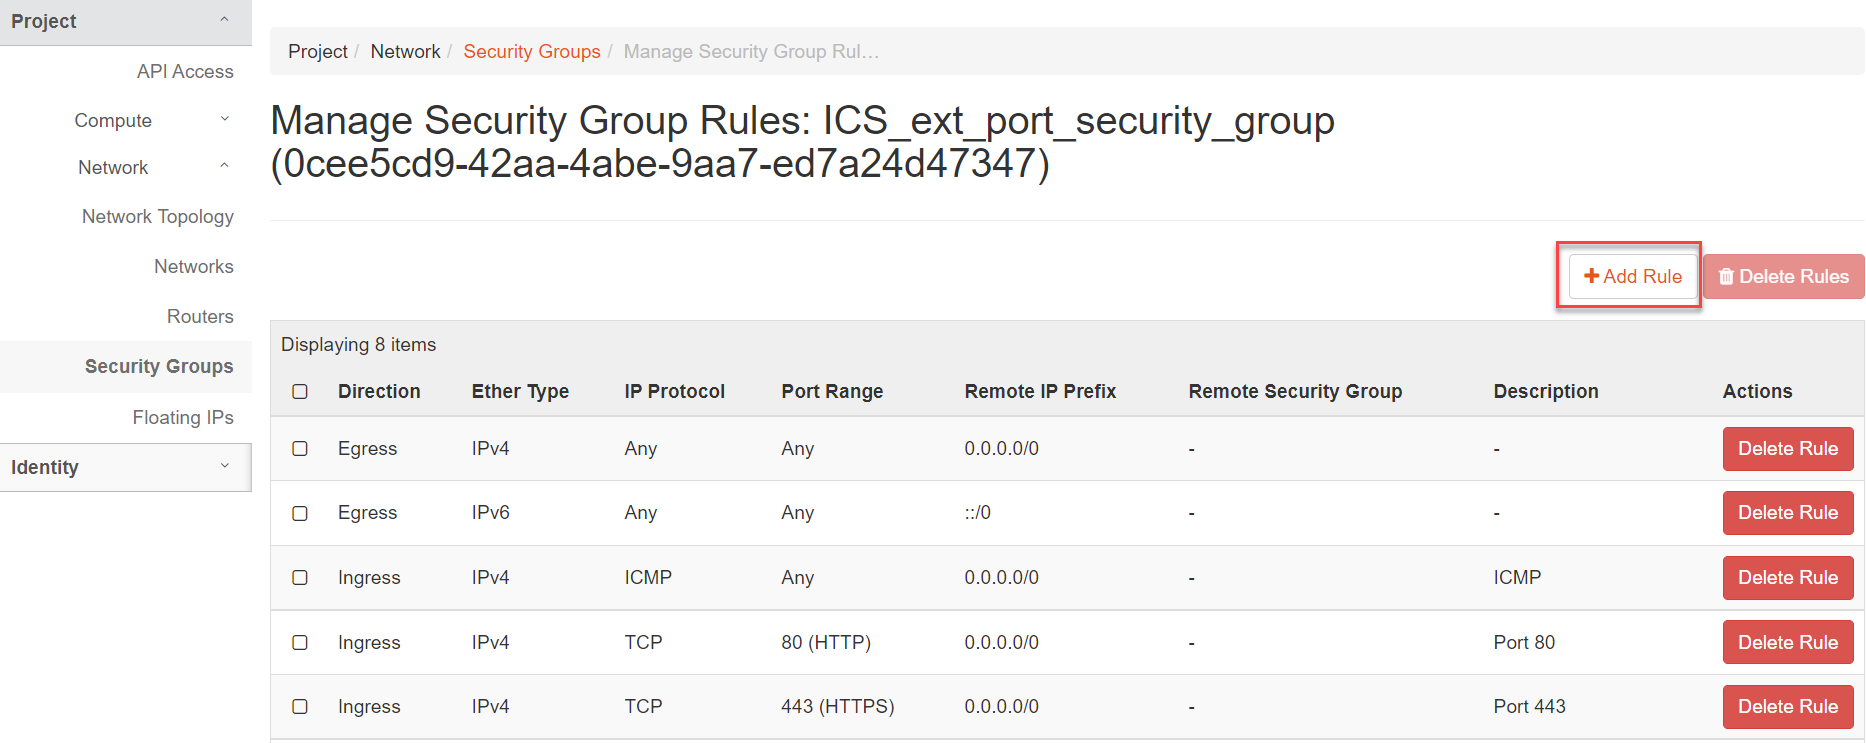
2.In the Manage Security Group Rules page that appears, click on the Add Rule button.
The following figure depicts the Add Rule button screen:
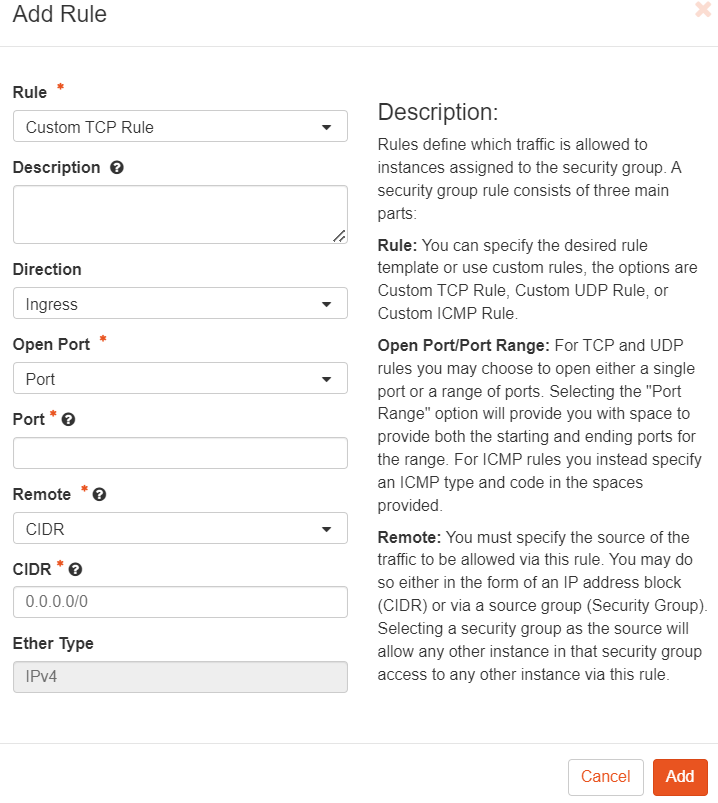
3.In the Add Rule window that appears, provide the required configuration details and Add the rule.
The following figure depicts the Add Rule dialog box screen:
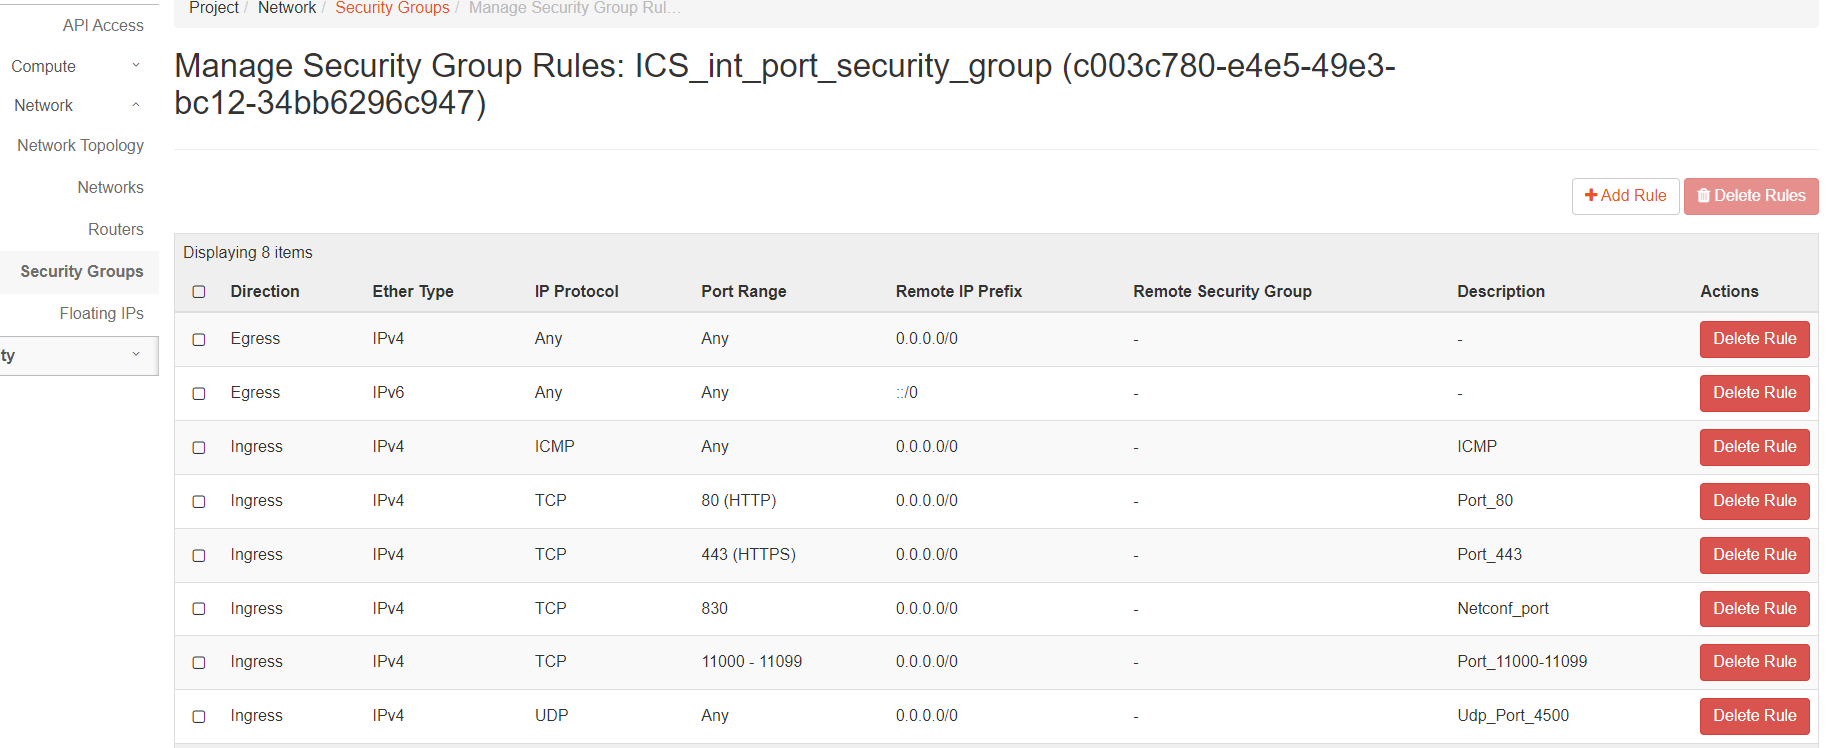
Follow the same procedure to add rules to External and Management ports.
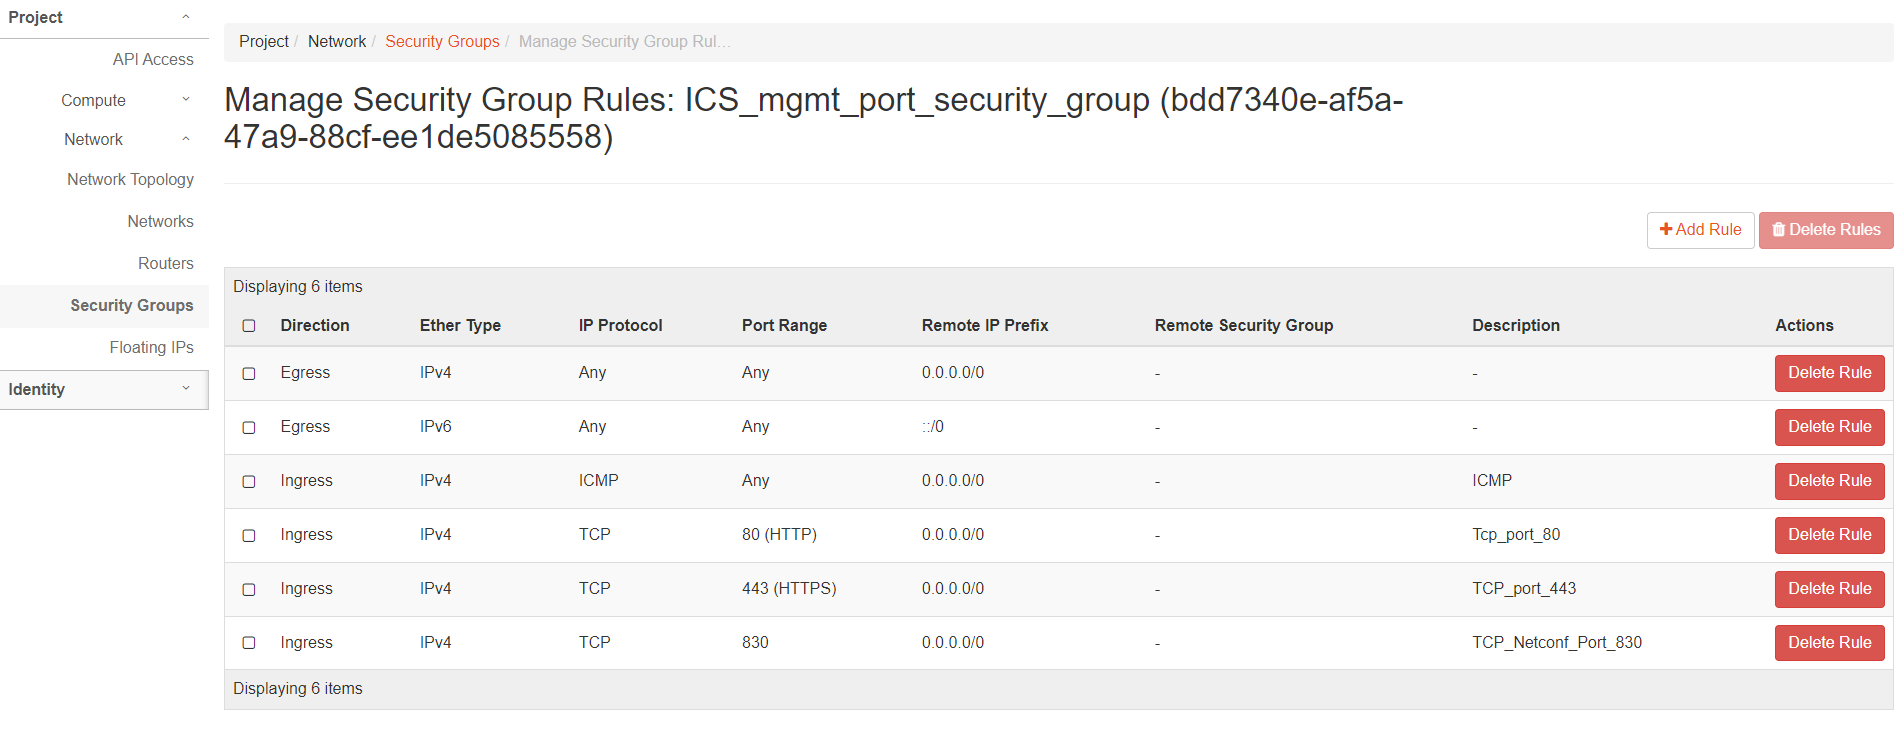
The following figure depicts the Manage Security Group Rules page – Internal port screen:
The following figure depicts the Manage Security Group Rules page – External port screen:
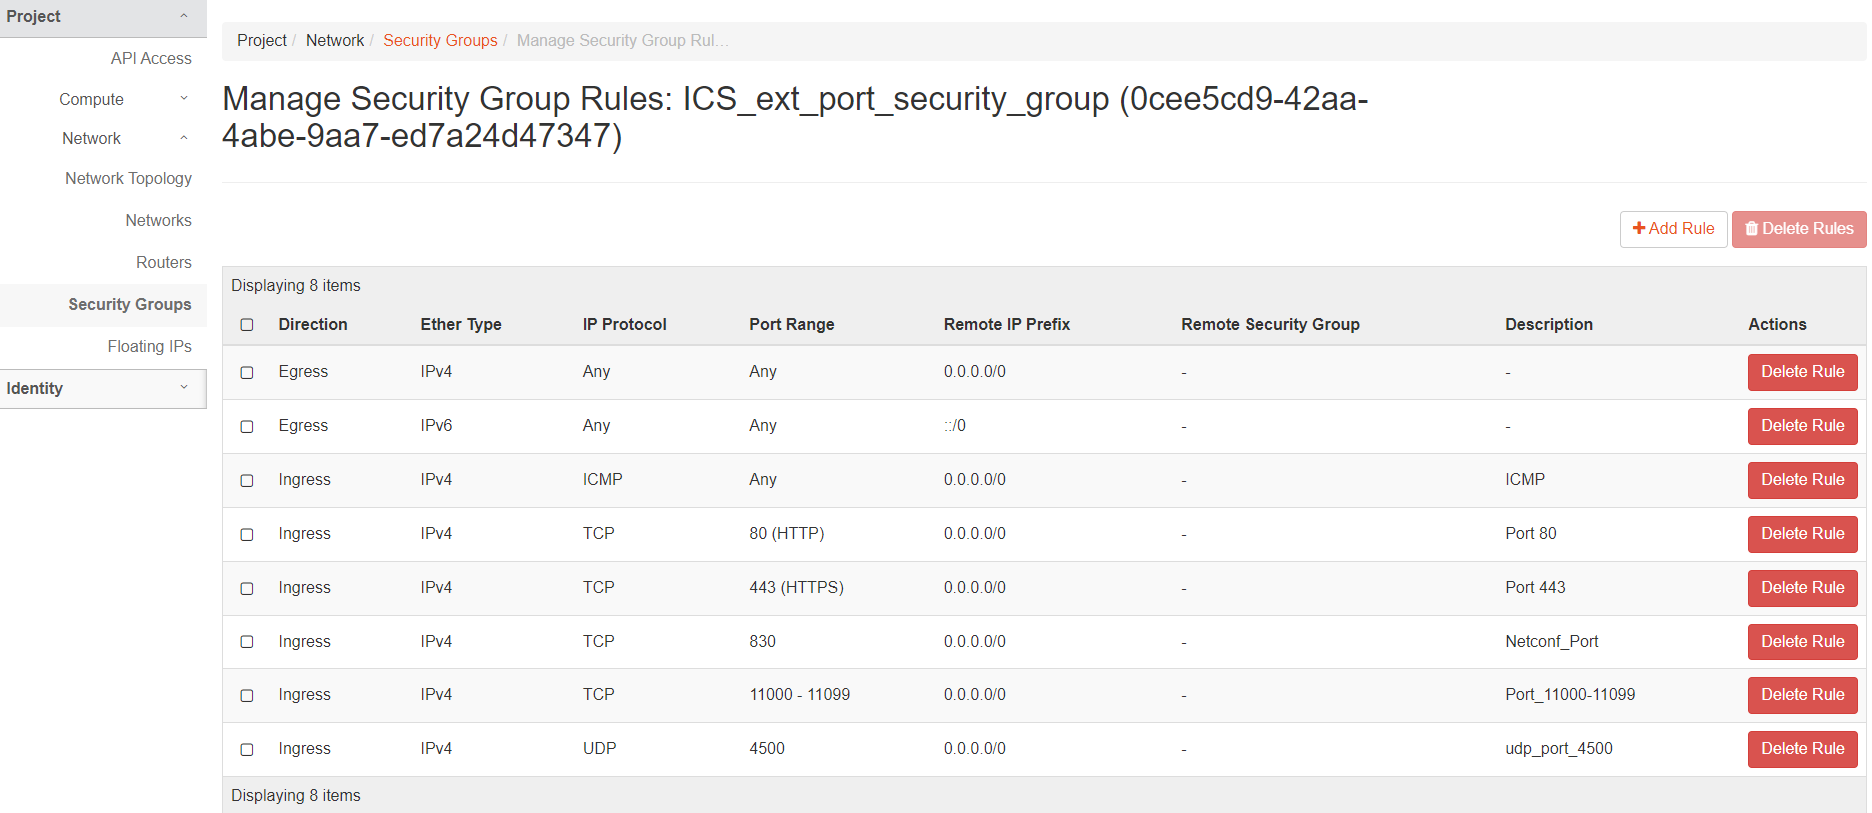
The following figure depicts the Manage Security Group Rules page – Management port screen: