Connect Secure 22.8R2 Release
The upgrade process for hardware appliances involves uploading the 22.8R2 package, importing logs and configurations, converting MBR to GPT partitions, and transitioning from Legacy BIOS to UEFI.
|
Note |
|
Upgrading from Non-Secure Boot to Secure Boot
To upgrade from non-Secure Boot 22.x release to Secure Boot newer 22.8R2 release:
1.Log into the Admin portal.
2.Upload the 22.8R2 package using standard upgrade process. For details, see ICS Administration Guide.
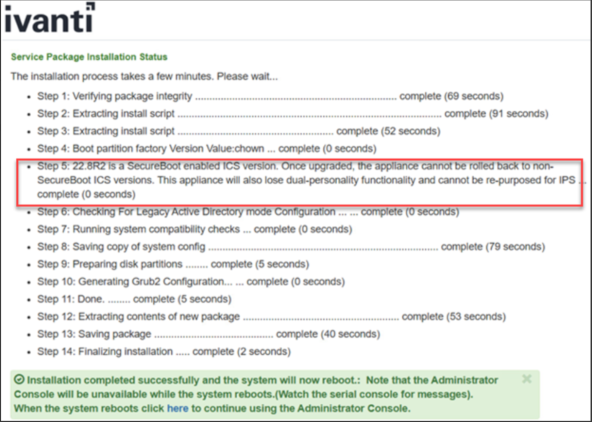
The system performs the following actions, which requires multiple reboots as part of the upgrade.
•All the logs, configs are imported from previous non-Secure Boot to Secure Boot supported 22.8R2 release builds.
•Converts MBR to GPT partitions.
•Legacy BIOS is converted to UEFI
•For ISA6000, 2-stage UEFI upgrade process. Admin can expect at least two additional reboots in this case.
•For ISA8000, single-stage UEFI upgrade process. Admin can expect one additional reboot in this case.
•Factory Reset partition will be upgraded from previous 22.x release build to the Secure Boot 22.8R2 release build.
After the upgrade to the Secure Boot build (detailed above) is complete, the images on an ICS would look like the following:

If you decide NOT to upgrade to the first Secure Boot release, i.e. 22.8R2, but wait till the next available release, then you need to upgrade in the following order:
- First upgrade to 22.8R2 Secure Boot release as described above.
- Next upgrade to the newer version.
Deploying Virtual ICS from OVF
ICS 22.8R2 needs vTPM to be enabled at the ESXi infrastructure. To enable vTPM, you need VMware vSphere and a key provider, such as Native Key Provider. vTPM and Native Key Provider are licensed for use in all vSphere versions. Supported ESXi versions are 7.0.x and 8.0.x.
vTPM is a VMware component, and for the latest documentation please refer to VMware product documentation.
To deploy Virtual ICS (vICS) from OVF:
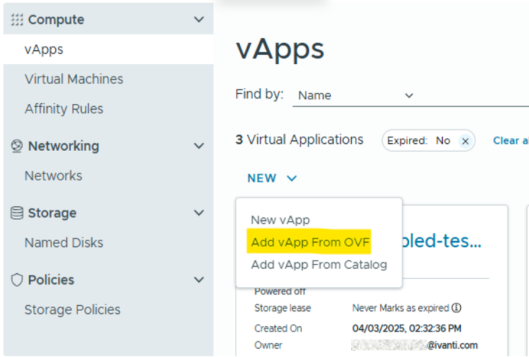
1.Select Compute > vApps > New, and then select the Add vAPP From OVF option.
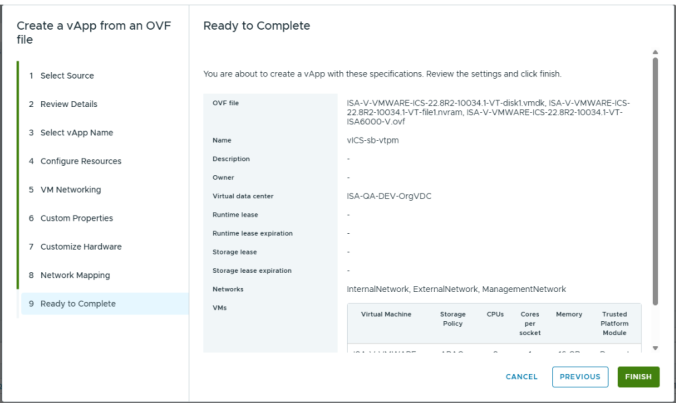
2.Select all three files required for deployment of vICS:
•OVF file - example: ISA-V-VMWARE-ICS-22.8R2-<build-number>-VT-ISA8000-V.ovf
•NVRAM file - example: ISA-V-VMWARE-ICS-22.8R2-<build-number>-VT-file1.nvram
•VMDK file - example: ISA-V-VMWARE-ICS-22.8R2-<build-number>-VT-disk1.vmdk
3.Follow the wizard and configure the necessary details as per your requirement. Click Finish.
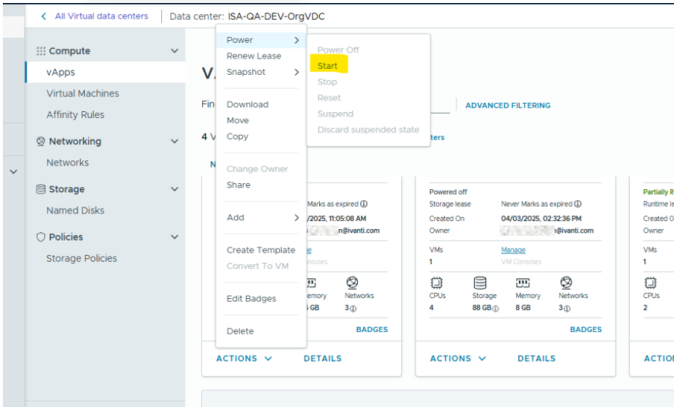
4.Click Start to power on vICS.
vTPM on ESXi 8.0.x
No additional steps are required to add vTPM when the ESXi itself is enabled with vTPM support.
Prerequisites
•vCenter license
•ESXi license
•Key Management Server on vCenter
•vTPM requirements as specified by Broadcom: vTPM Requirements
vTPM on ESXi 7.x
If ESXi 7.2 is used as hypervisor, then vTPM does not get attached automatically on deploying virtual ICS. Attach vTPM by selecting Settings > ADD NEW DEVICE > Trusted Platform Module.
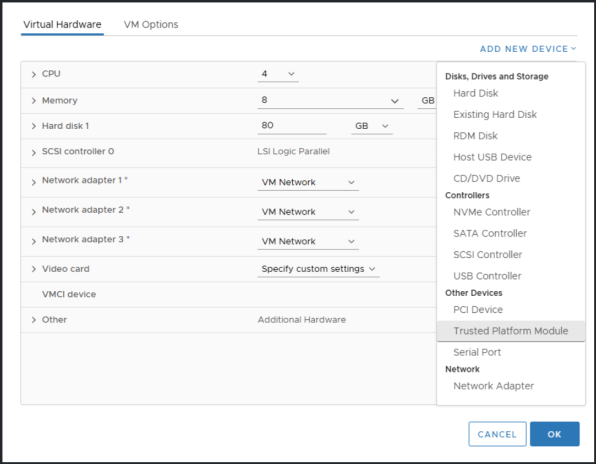
Due to VMware limitations, sometimes Trusted Platform Module is not visible in ADD NEW DEVICE option. In such scenario, follow the below steps.
1.Navigate to Settings > VM Options > General Options.
2.Change Guest OS Family from Other to Linux.
3.Change Guest OS Version from Other (64-bit) to TPM supported version like Ubuntu Linux (64-bit).
4.Click OK.
5.Attach vTPM by selecting Settings > ADD NEW DEVICE > Trusted Platform Module.
6.Revert Guest OS Family from Linux to Other.
7.Revert Guest OS Version from TPM supported version like Ubuntu Linux (64-bit) to Other (64-bit).
Limitations
•Upgrade from older 22.7R2.x release to rel-22.8R2 release is not supported for virtual ICS on VMware platform.
•Removing vTPM from virtual ICS can make virtual ICS non recoverable.
•Cloning virtual ICS with replace TPM option is not supported.
•Exporting virtual ICS with vTPM to template is not supported by VMware.