Azure configuration on Intune
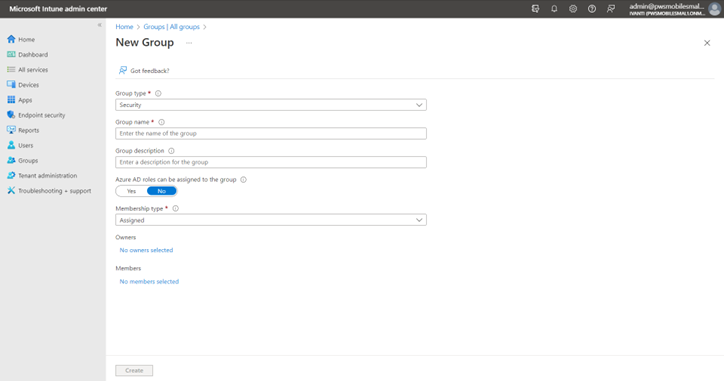
- Create Group: Navigate to Home --> Groups and create a group. Enter the name, description, select group type as security, membership type as assigned.
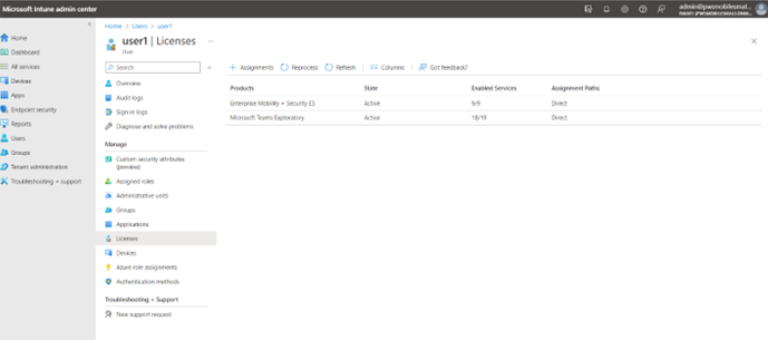
- Ensure On-Prem AD users are synced with Azure AD and licenses are available for the users synchronized from on-prem AD.
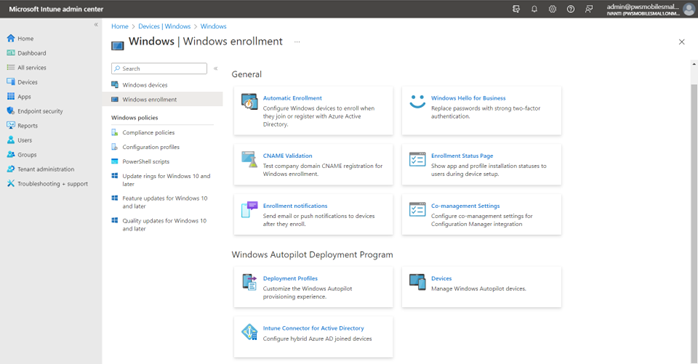
- Auto-enrolment: Navigate to Home -->Devices -->Windows -->Windows enrollment.
-
Select Automatic Enrollment. Change MDM user scope and MAM user group to ALL and save.

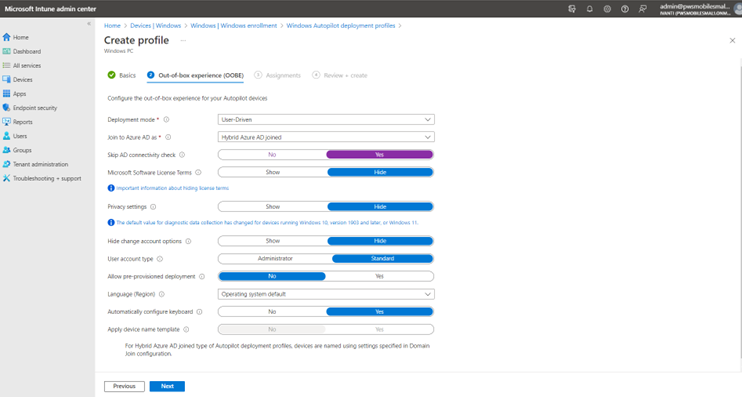
- Navigate to Home --> Devices -->Windows --> Windows enrollment -->Deployment Profile. Under Deployment Profile, create profile, and select Windows PC.
- Deployment mode: User-Driven
- Join to Azure AD: Hybrid Azure AD joined
- Skip AD connectivity check: Yes
- Language (Region): Operating system default
- Automatically configure keyboard: No
- Microsoft Software License Terms: Hide
- Privacy settings: Hide
- Change account options: Hide
- User account type: Standard
- Allow pre-provisioned deployment: Yes
- Apply device name template: No
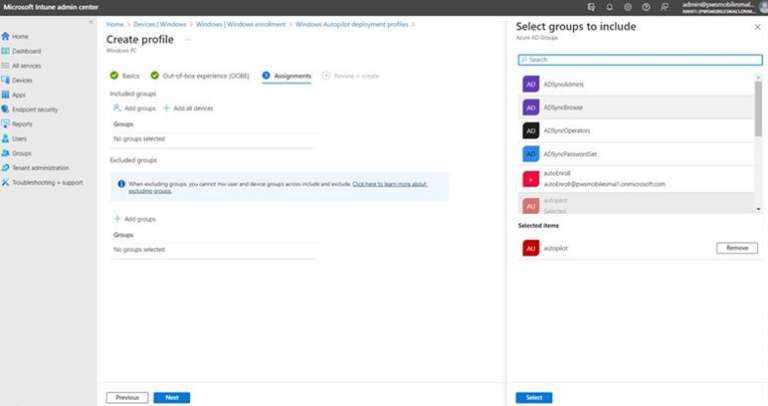
- Associate to the group created for Auto-pilot.
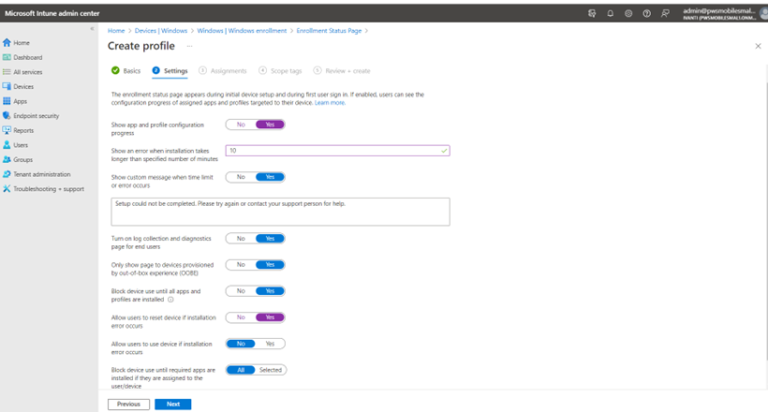
- Select Enrollment status and create the policy. Enter the details for the policy as required. Under settings, set the Show app and profile configuration progress to YES, Allow users to reset device if installation error occurs to YES and associate with Auto-pilot group.
- Compliance Policies: Navigate to Home -->Devices -->Windows -->Compliance Policies -->Create policy. Select Windows 10 and later in the dialog box and create. Enter the details for the policy as required and associate it with the auto-pilot group.
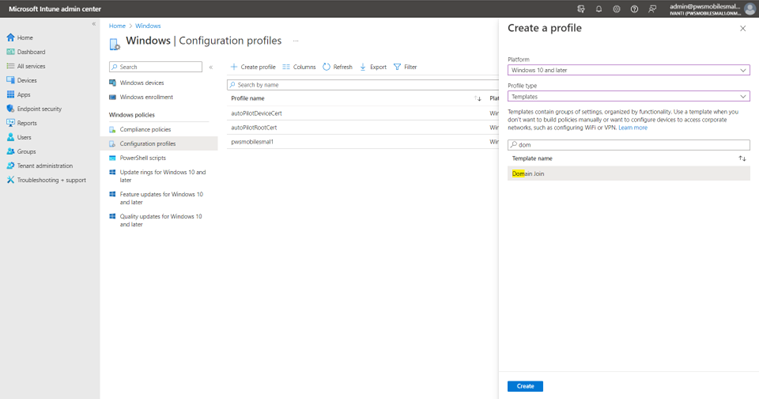
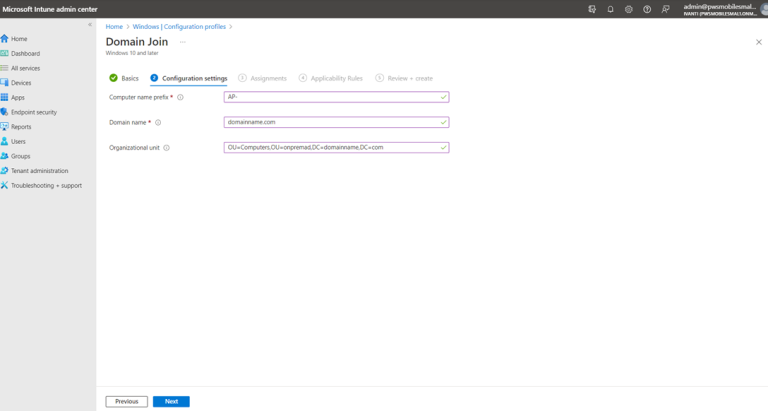
- Configuration profiles: Navigate to Home -->Devices -->Windows --> Configuration Profile.
On the Create a profile dialog, select Platform Windows 10 or later, Profile Type as Templates, and select Template name as Domain Join. Click Create. - Provide the name. Under Configuration Settings, provide Computer name prefix, Domain name must be FQDN of the on-prem AD, and Organizational unit must be OU= Computers, OU=<group-name>, DC=<FQDN of on-Prem AD> DC=<extension>. Associate to the auto-pilot group.
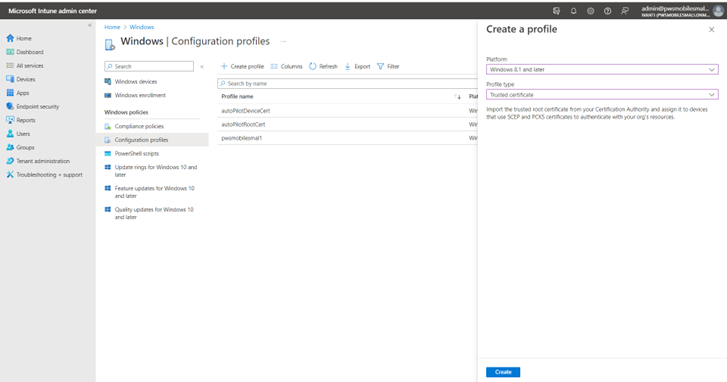
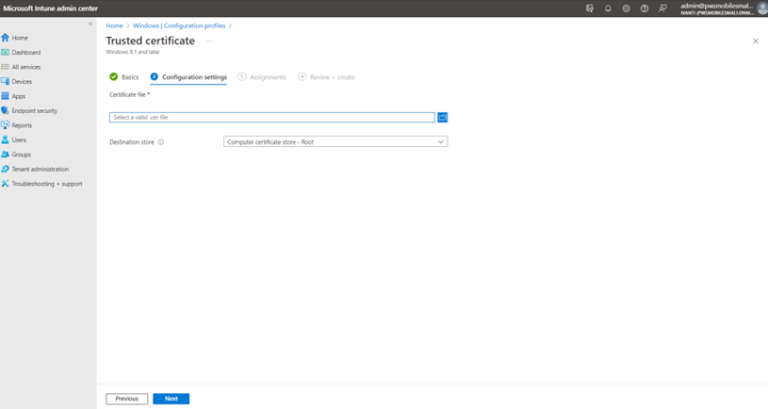
- Root Certificate: Navigate to Home -->Devices -->Windows --> Configuration Profile. On the Create a profile dialog, select Platform Windows 8.1 and later, Profile type as Trusted Certificate. Click Create.
- Under Configuration settings, upload the root certificate file and then select the required destination store. Associate to the auto-pilot group.
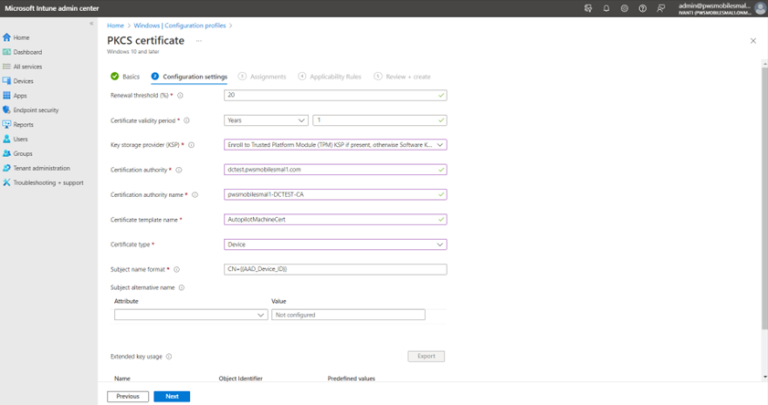
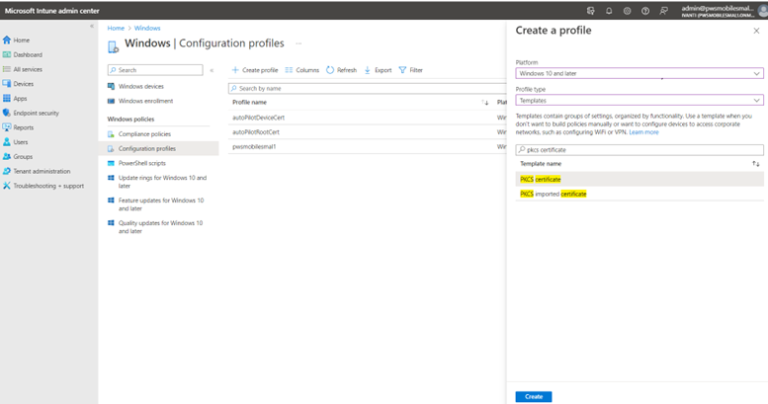
- Device certificate: Navigate to Home --> Devices --> Windows --> Configuration Profile. On the Create a profile dialog, select Platform Windows 10 and later, Profile Type as Templates and Template name as PKCS certificate. Click Create.
- Renewal threshold (%): 20
- Certificate validity period: 1 Years
- Select Key storage provider (KSP) Enroll to Trusted Platform Module (TPM) KSP if present, otherwise Software KSP
- Certification authority: <cert-server domain name>
- Certification authority name: <certificate name as provided by cert provider>
- Certificate template name: <custom name for certificate template>
- Certificate type: Device
- Associate to the auto-pilot group.
Under Basic, provide the name. Under Out-of-Box Experience (OOBE), enter the following values for the fields as shown:
Under Configuration settings enter the values in the following format.