Deploying Ivanti Connect Secure on AWS using AWS Portal
Once the access to the AMI file and CloudFormation template is obtained as mentioned in the above section, proceed with the Ivanti Connect Secure deployment.
Deploying ICS on New Virtual Private Cloud
This section describes ICS deployment with Deployment on VM with Three NIC Cards and Deployment on VM with Two NIC Cards.
Deployment on VM with Three NIC Cards
To deploy Ivanti Connect Secure on AWS using the AWS portal, do the following:
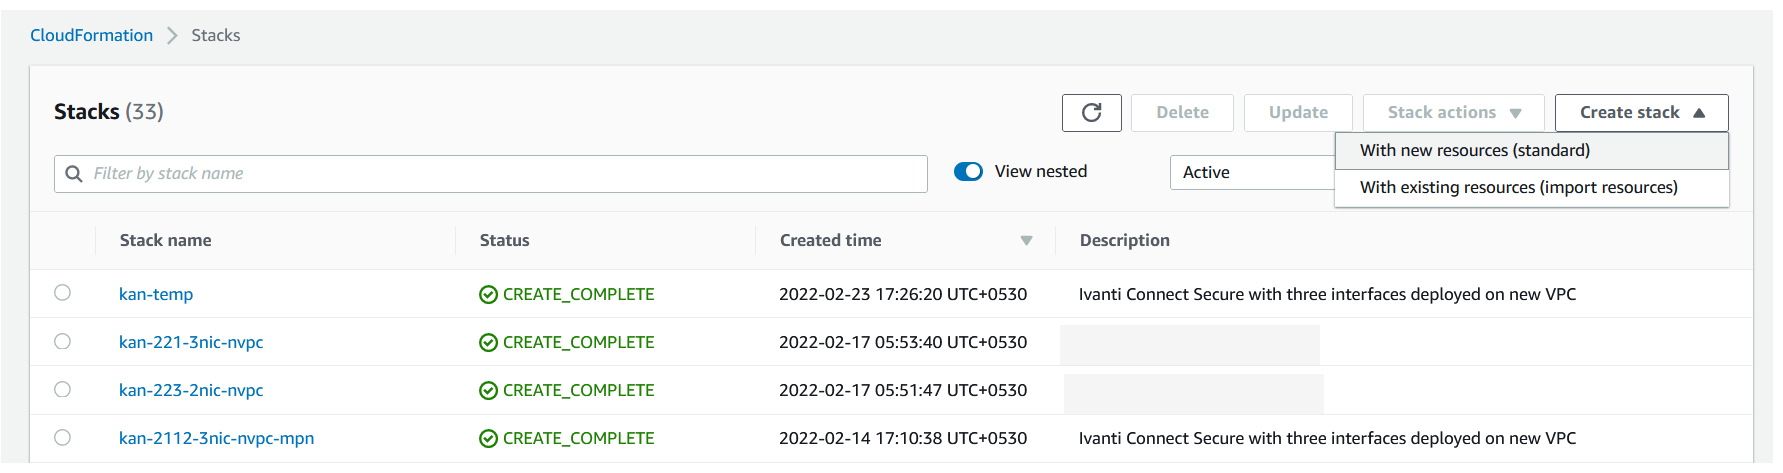
1.Select AWS Services > CloudFormation and click Create new stack.
2.Select With New Resources from drop down.
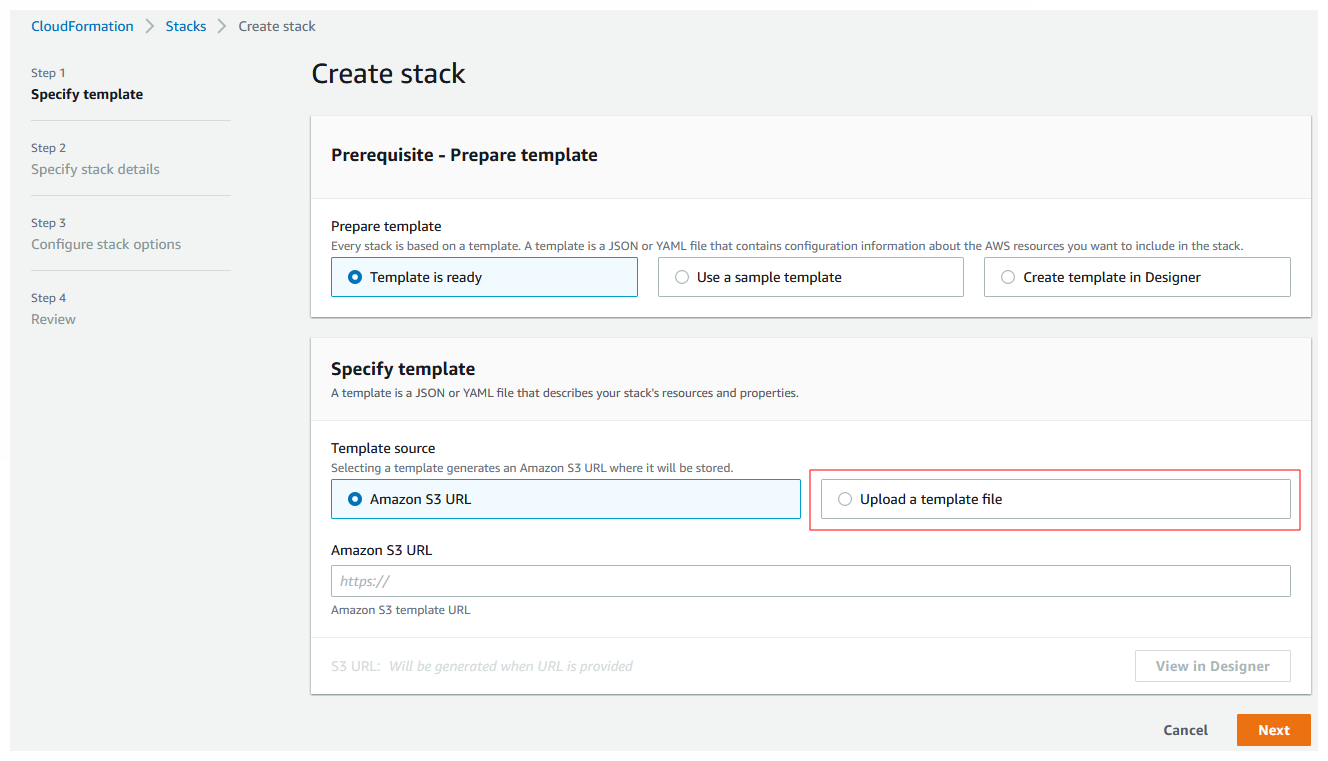
3.Select Upload a template to Amazon S3. Click Browse and select “AWS-template-3-nics-new-network.json” template file for the new VPC. Then click Next.
4.In the Specify Details page, fill or modify the following parameters.

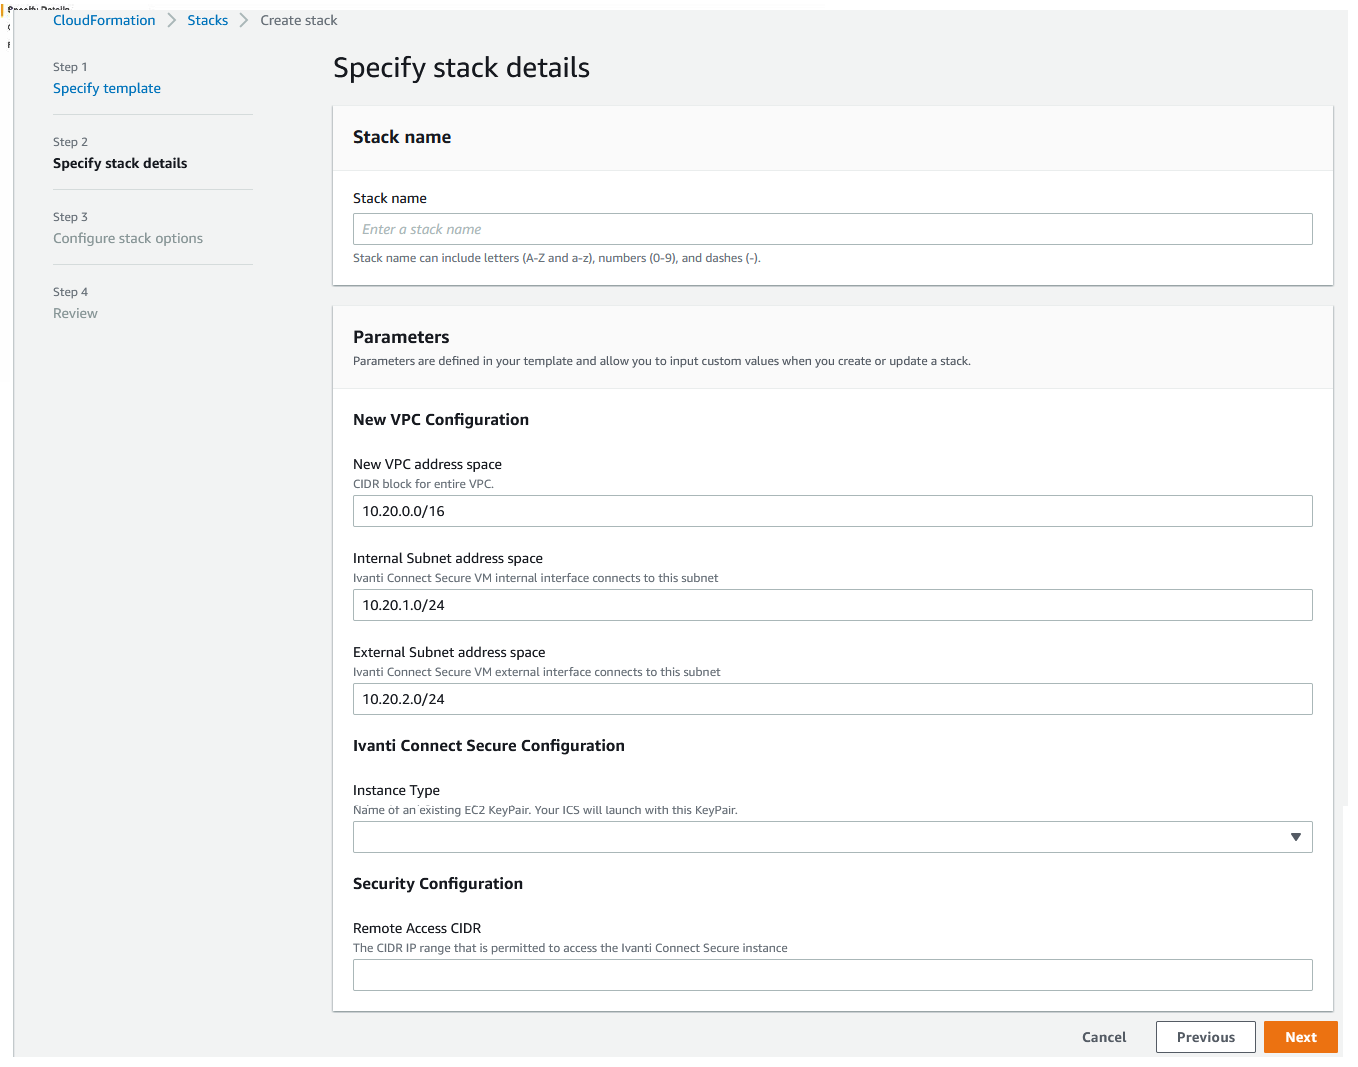
•Stack name: Specify the stack name in which Ivanti Connect Secure needs to be deployed
•New VPC address space: Virtual private cloud address space
•Internal Subnet address space: Subnet from which Ivanti Connect Secure internal interface needs to lease IP
•External Subnet address space: Subnet from which Ivanti Connect Secure external interface needs to lease IP
•Management Subnet address space: Subnet from which Ivanti Connect Secure management interface needs to lease IP
•Tunnel Subnet address space: Subnet which will be configured as tunnel IP pool in the Ivanti Connect Secure VPN Profile
•ICS AMI ID: ID of the uploaded AMI file
•Instance Type: Size of the instance – t2.medium or t2.large
•ICS Config Data: Provisioning parameters in an XML format. For details, see Ivanti Connect Secure Provisioning Parameters.
•SSH Key Name: This key is used to access ICS via SSH. The SSH keys are generated using ssh-keygen on Linux and OS X, or PuTTyGen on Windows. For details about generating the SSH key pairs, refer http://docs.aws.amazon.com/AWSEC2/latest/UserGuide/ec2-key-pairs.html.
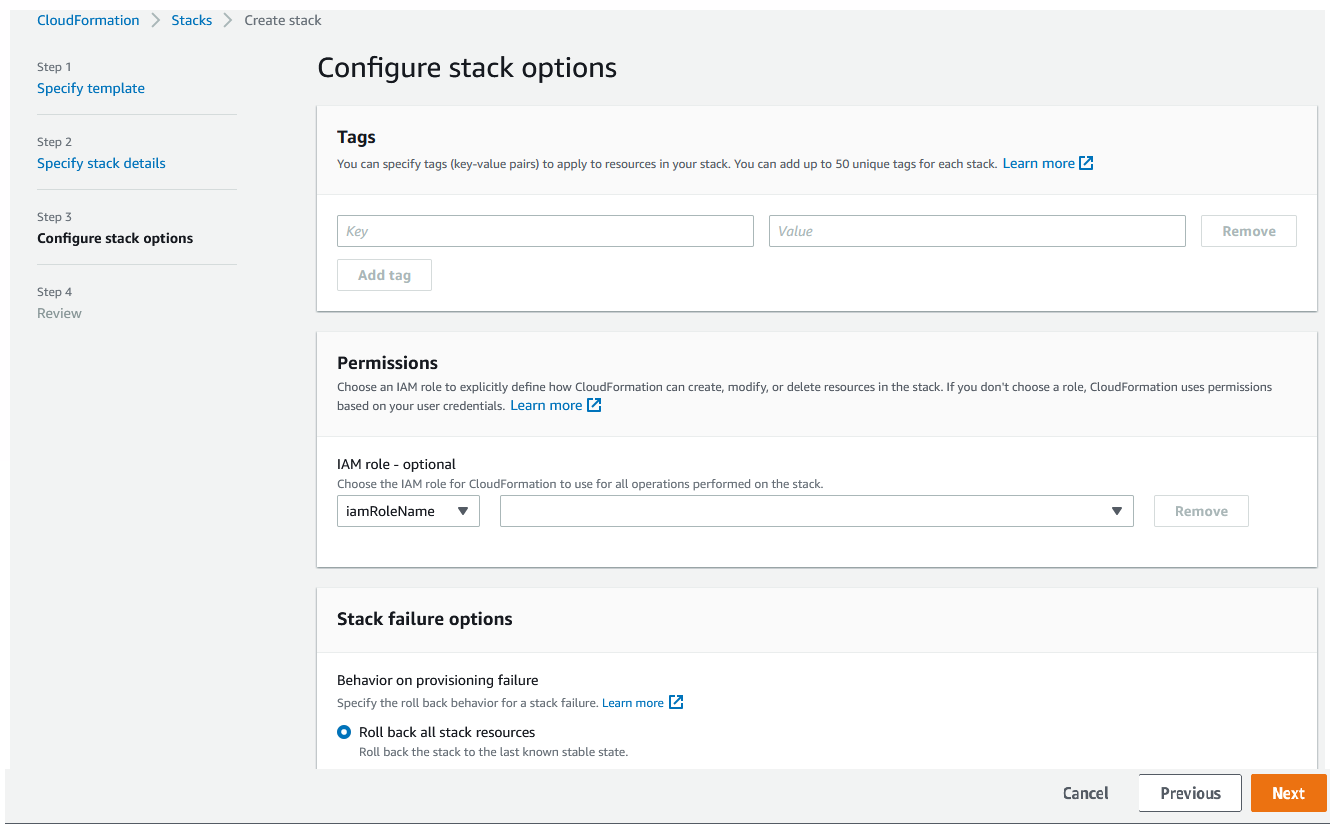
5.If Required fill or modify in the Configure Stack options page, fill or modify the following parameters, then click Next.
6.Review the specified details and click Create. Observe the deployed ICS in a few minutes.
Deployment on VM with Two NIC Cards
To deploy Ivanti Connect Secure on AWS using the AWS portal, do the following:
1.Select AWS Services > CloudFormation and click Create new stack.

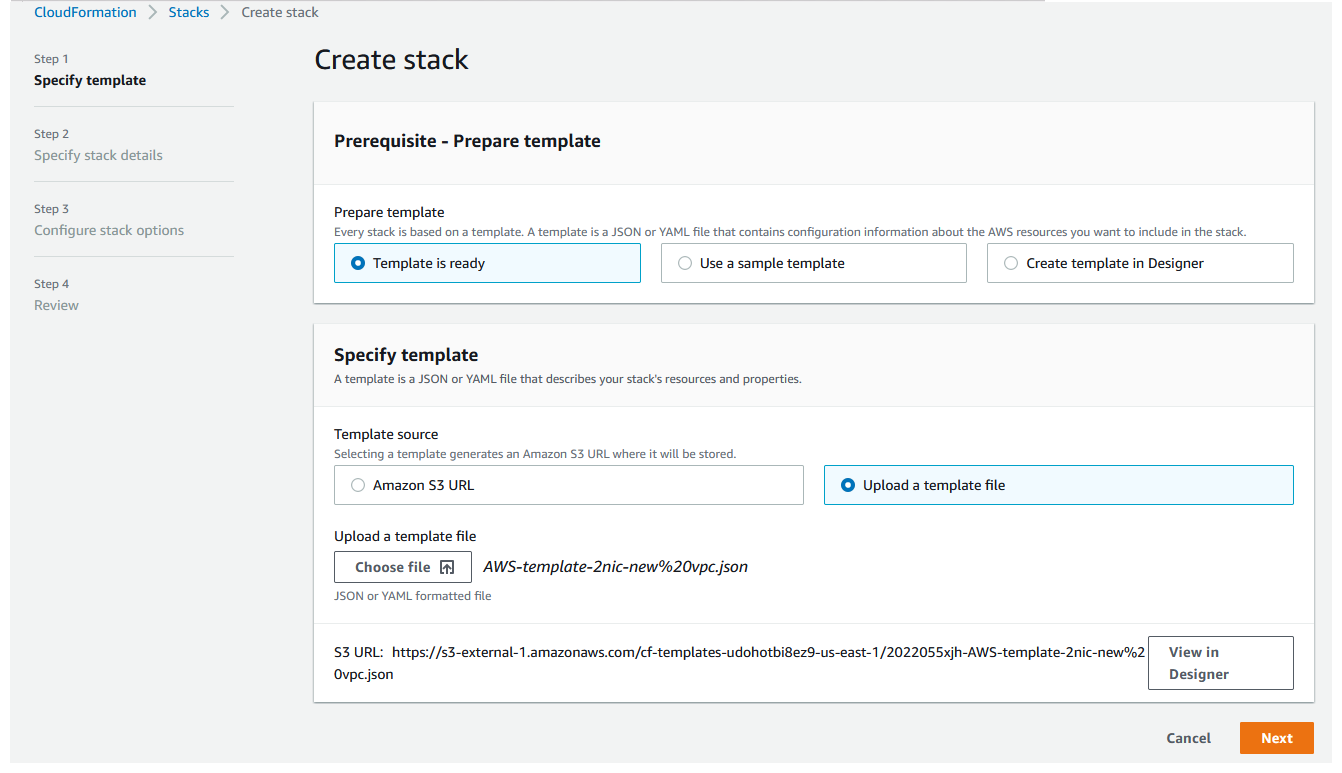
2.Select Upload a template to Amazon S3. Click Browse and select “AWS-template-2nic-new vpc.json” template file for the new VPC. Then click Next.
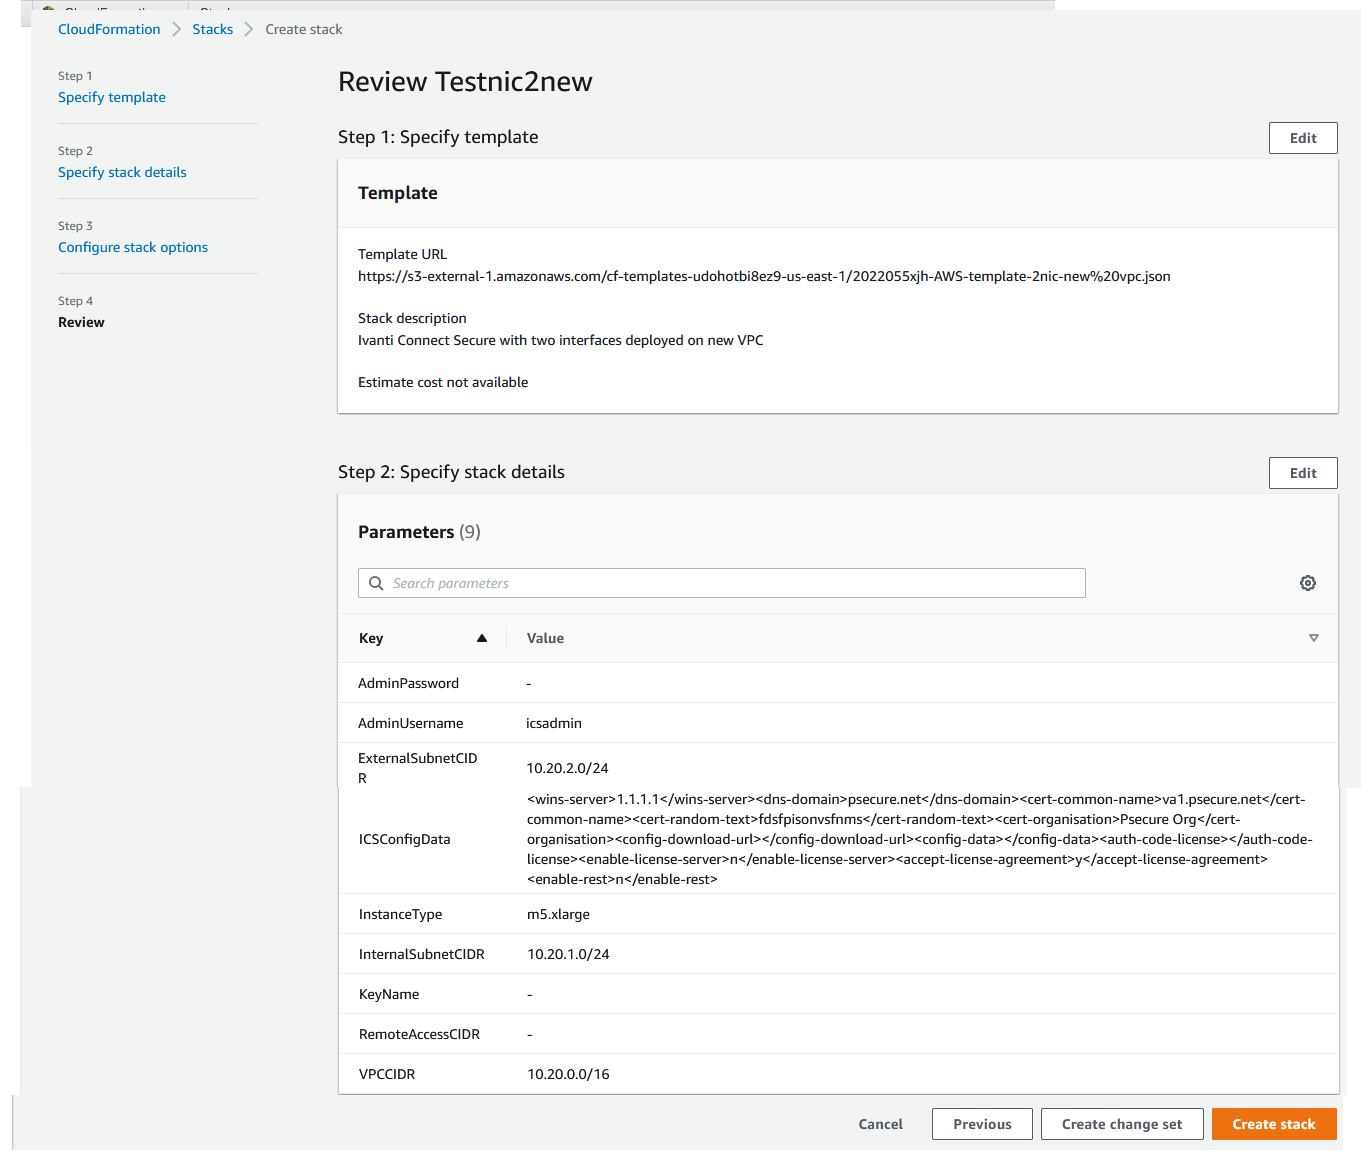
3.In the Specify Stack Details page, fill or modify the following parameters.
•Stack name: Specify the stack name in which Ivanti Connect Secure needs to be deployed
•New VPC address space: Virtual private cloud address space
•Internal Subnet address space: Subnet from which Ivanti Connect Secure internal interface needs to lease IP
•External Subnet address space: Subnet from which Ivanti Connect Secure external interface needs to lease IP
•Tunnel Subnet address space: Subnet which will be configured as tunnel IP pool in the Ivanti Connect Secure VPN Profile
•ICS AMI ID: ID of the uploaded AMI file
•Instance Type: Size of the instance – t2.medium or t2.large
•ICS Config Data: Provisioning parameters in an XML format. For details, see Ivanti Connect Secure Provisioning Parameters.
•SSH Key Name: This key is used to access ICS via SSH. The SSH keys are generated using ssh-keygen on Linux and OS X, or PuTTyGen on Windows. For details about generating the SSH key pairs, refer http://docs.aws.amazon.com/AWSEC2/latest/UserGuide/ec2-key-pairs.html.
4.If Required fill or modify in the Configure Stack options page, fill or modify the following parameters, then click Next.
5.Review the specified Stack details and click Create. Observe the deployed ICS in a few minutes.
Deploying ICS on an Existing Virtual Private Cloud
This section describes ICS deployment with Deployment on VM with Three NIC Cards and Deployment on VM with Two NIC Cards.
Deployment on VM with Three NIC Cards
To deploy Ivanti Connect Secure on AWS using the AWS portal, do the following:
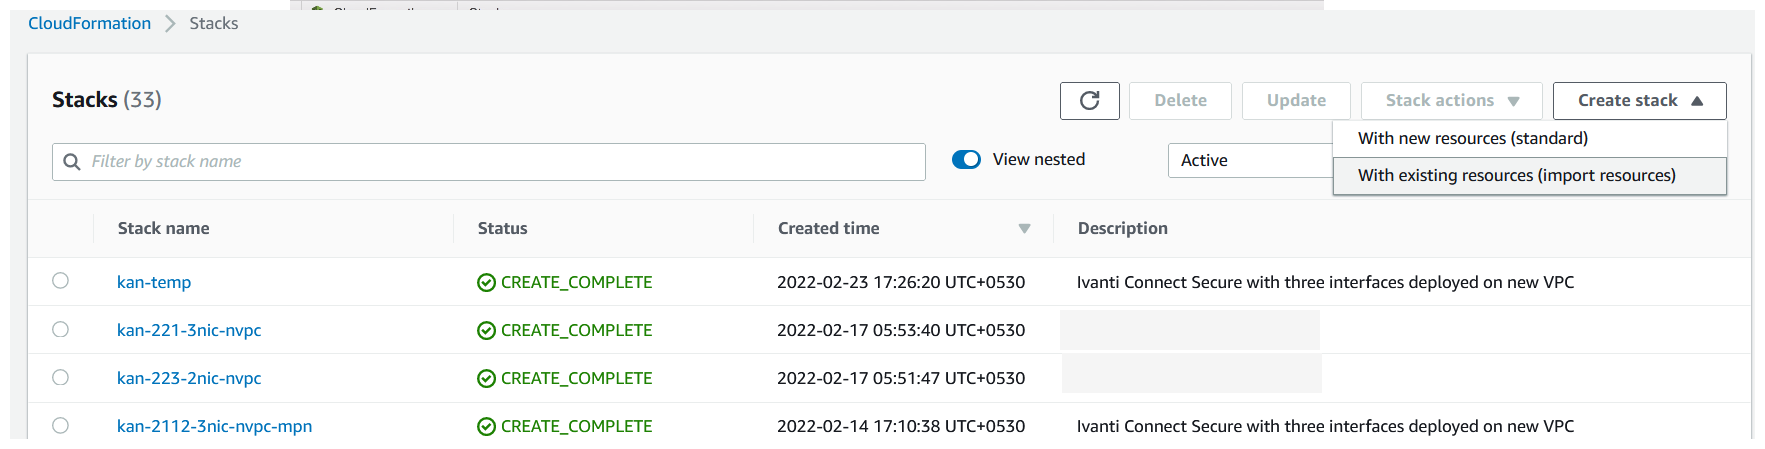
1.Select AWS Services > CloudFormation and click Create new stack.
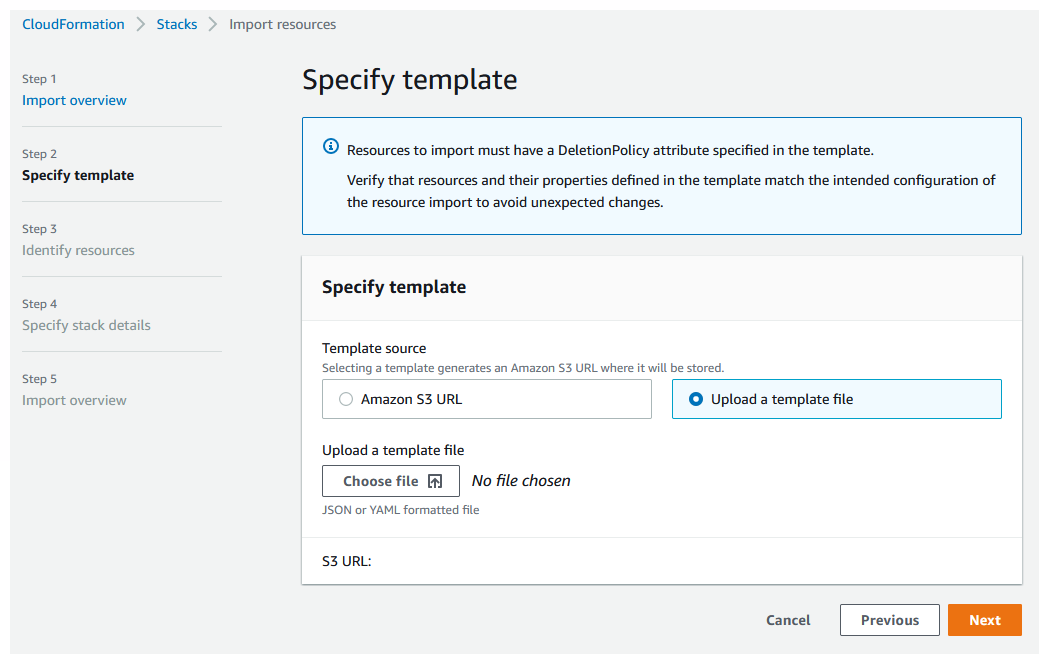
2.Select With Existing Resources from drop down and then click Next. In Import overview page click Next.
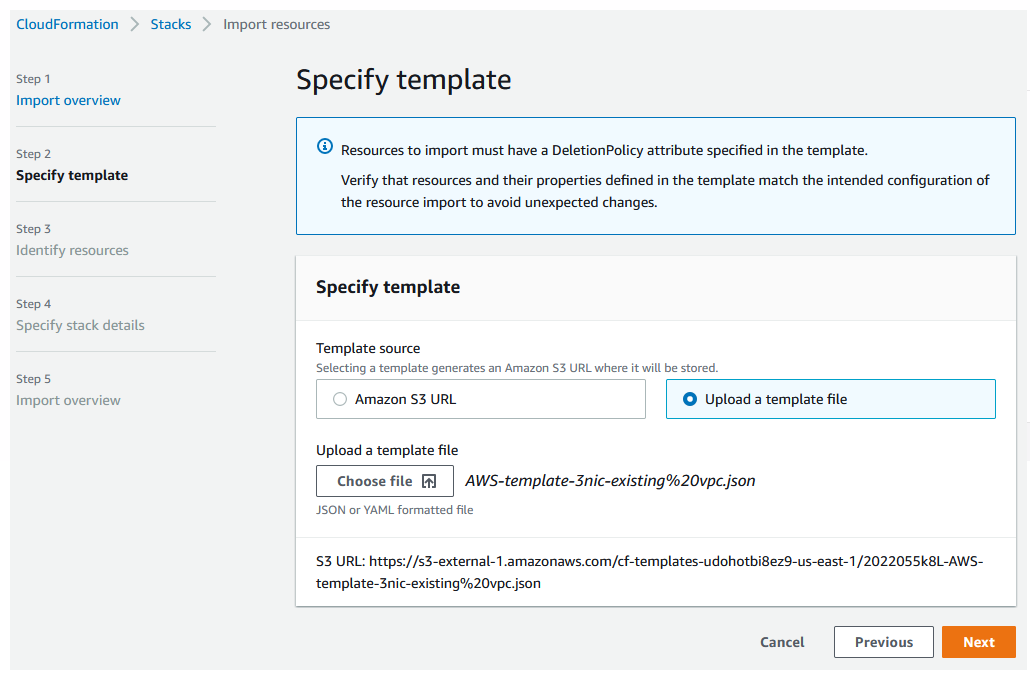
3.Select Upload a template to Amazon S3. Click Browse and select “AWS-template-3nic-existingvpc.json” template file for existing VPC. Then click Next.
4.In the Specify Details page, fill or modify the following parameters.
•Stack name: Specify the stack name in which Ivanti Connect Secure needs to be deployed
•Existing VPC ID: Virtual private cloud ID
•Internal Subnet ID: Subnet from which Ivanti Connect Secure internal interface needs to lease IP
•External Subnet ID: Subnet from which Ivanti Connect Secure external interface needs to lease IP
•Management Subnet ID: Subnet from which Ivanti Connect Secure management interface needs to lease IP
•Tunnel Subnet ID: Subnet which will be configured as tunnel IP pool in the Ivanti Connect Secure VPN Profile
•ICS AMI ID: ID of the uploaded AMI file
•Instance Type: Size of the instance – t2.medium or t2.large
•ICS Config Data: Provisioning parameters in an XML format. For details, see Ivanti Connect Secure Provisioning Parameters.
•SSH Key Name: This key is used to access ICS via SSH. The SSH keys are generated using ssh-keygen on Linux and OS X, or PuTTyGen on Windows. For details about generating the SSH key pairs, refer http://docs.aws.amazon.com/AWSEC2/latest/UserGuide/ec2-key-pairs.html
5.Review the specified details and click Create. Observe the deployed ICS in a few minutes.
Deployment on VM with Two NIC Cards
To deploy Ivanti Connect Secure on AWS using the AWS portal, do the following:
1.Select AWS Services > CloudFormation and click Create new stack. In Import overview page click Next.
2.Select With Existing Resources from drop down and then click Next
3.Select Upload a template to Amazon S3. Click Browse and select “AWS-template-2nic-existingvpc” template file for existing VPC. Then click Next.
4.In the Specify Details page, fill or modify the following parameters.
•Stack name: Specify the stack name in which Ivanti Connect Secure needs to be deployed
•Existing VPC ID: Virtual private cloud ID
•Internal Subnet ID: Subnet from which Ivanti Connect Secure internal interface needs to lease IP
•External Subnet ID: Subnet from which Ivanti Connect Secure external interface needs to lease IP
•Tunnel Subnet ID: Subnet which will be configured as tunnel IP pool in the Ivanti Connect Secure VPN Profile
•ICS AMI ID: ID of the uploaded AMI file
•Instance Type: Size of the instance – t2.medium or t2.large
•ICS Config Data: Provisioning parameters in an XML format. For details, see Ivanti Connect Secure Provisioning Parameters.
•SSH Key Name: This key is used to access ICS via SSH. The SSH keys are generated using ssh-keygen on Linux and OS X, or PuTTyGen on Windows. For details about generating the SSH key pairs, refer http://docs.aws.amazon.com/AWSEC2/latest/UserGuide/ec2-key-pairs.html
5.Review the specified details and click Create. Observe the deployed ICS in a few minutes.
Deploying ICS as a License Server
To deploy Ivanti Connect Secure on AWS as a license server, do the following:
1.Select AWS Services > CloudFormation and click Create stack.
1.Select With Existing Resources from drop down and then click Next. In Import overview page click Next.
2.Select Upload a template to Amazon S3. Click Browse and select “AWS-template-3nic-existingvpc.json” template file for existing VPC. Then click Next.
3.In the Specify Details page, edit the ICS Config Data text box to enable ICS as license server by setting the enable-license-server attribute to y as follows.
<enable-license-server>y</enable-license-server>