Configuring Aruba Instant Access Point
To configure Aruba Instant Access Point:
- Login to the Aruba Instant Access portal. The Aruba Instant page appears.
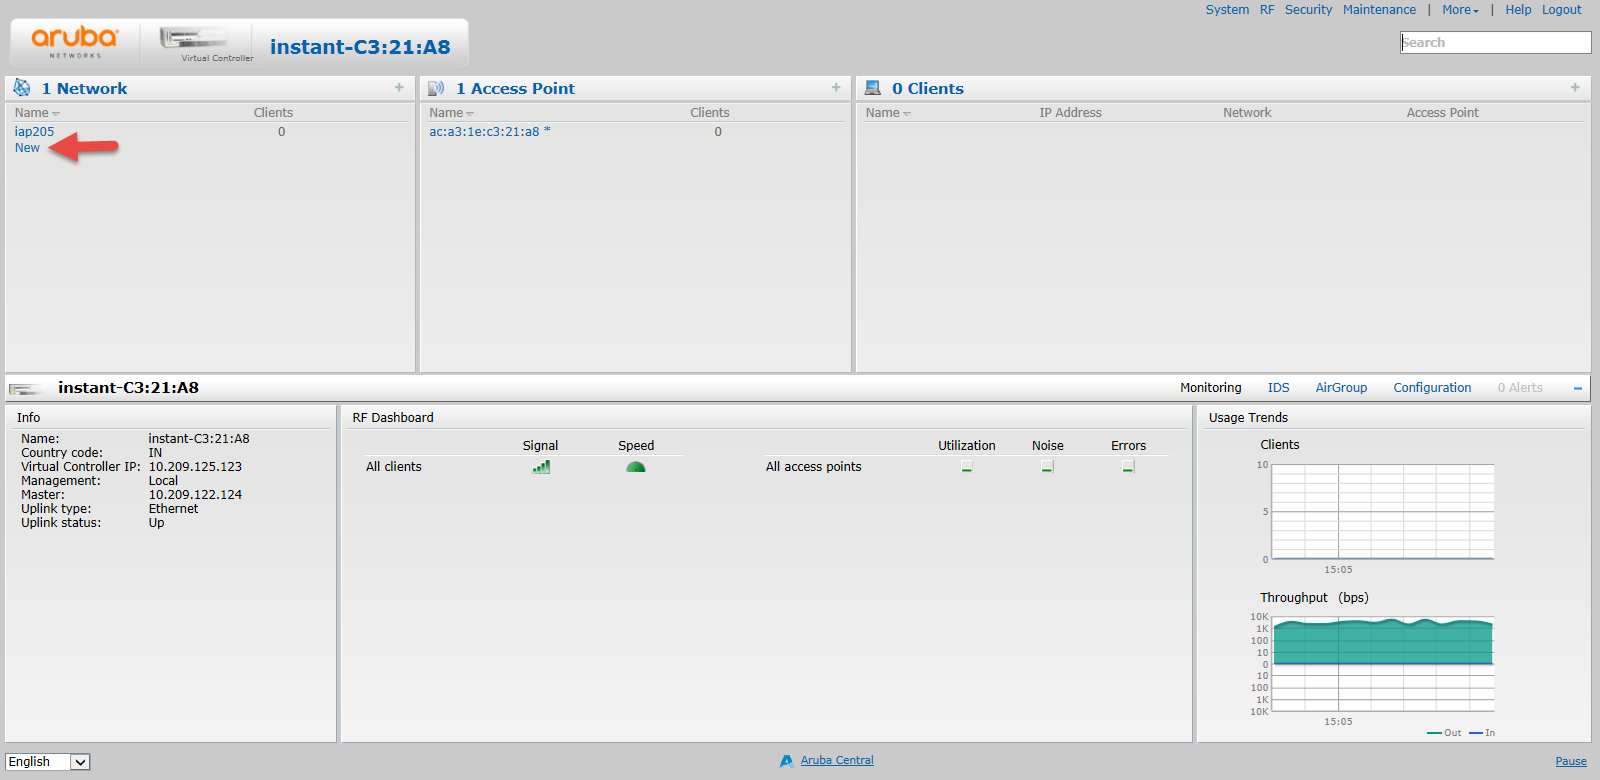
- Click New to create a new SSID. The New WLAN window appears.
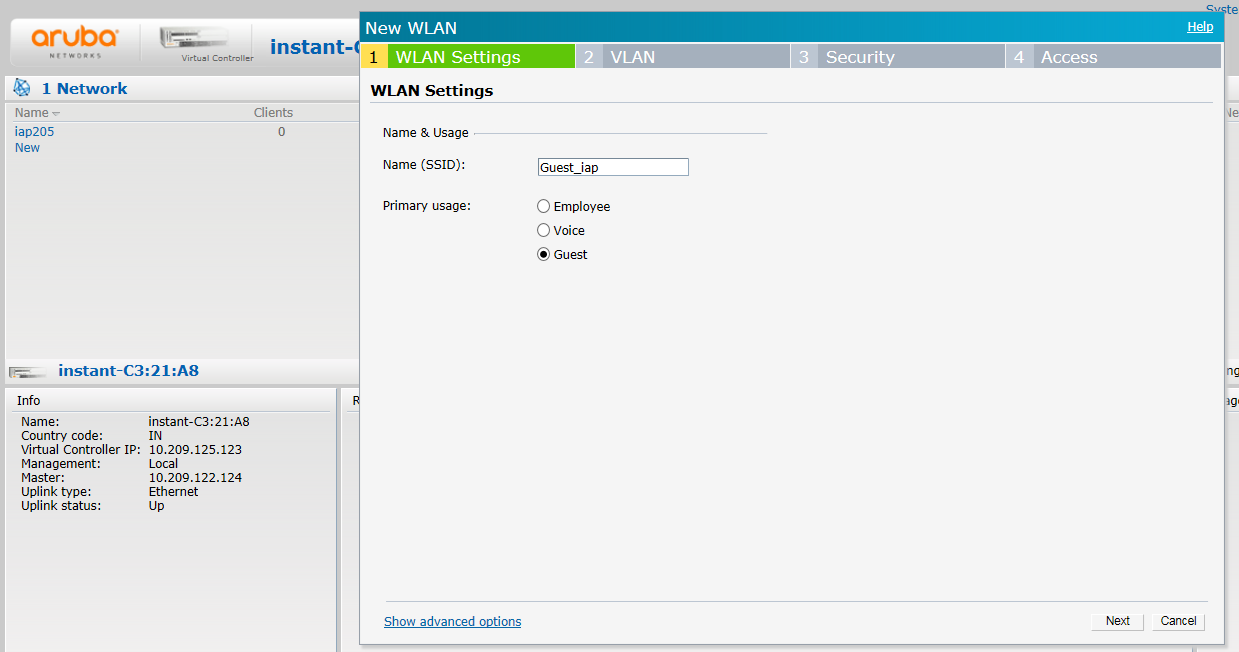
- In the WLAN Settings tab:
- In the New (SSID) field enter a name for the SSID.
- In the Primary usage options select Guest.
- Click Next.
- The VLAN tab options appears.
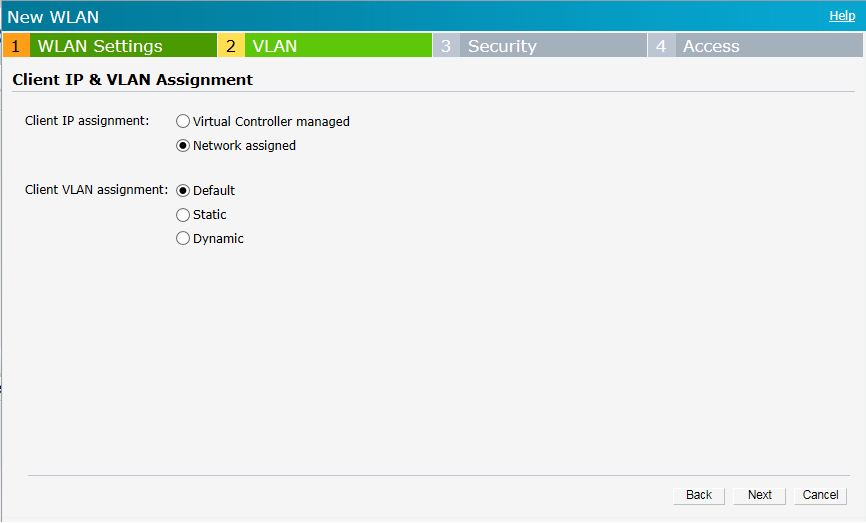
- Keep the DHCP setting as per your network design.
- Client IP assignment here Network Assigned is chosen.
- For Client VLAN assignment here Default. is chosen
- Click Next.
- The Security tab options appear.
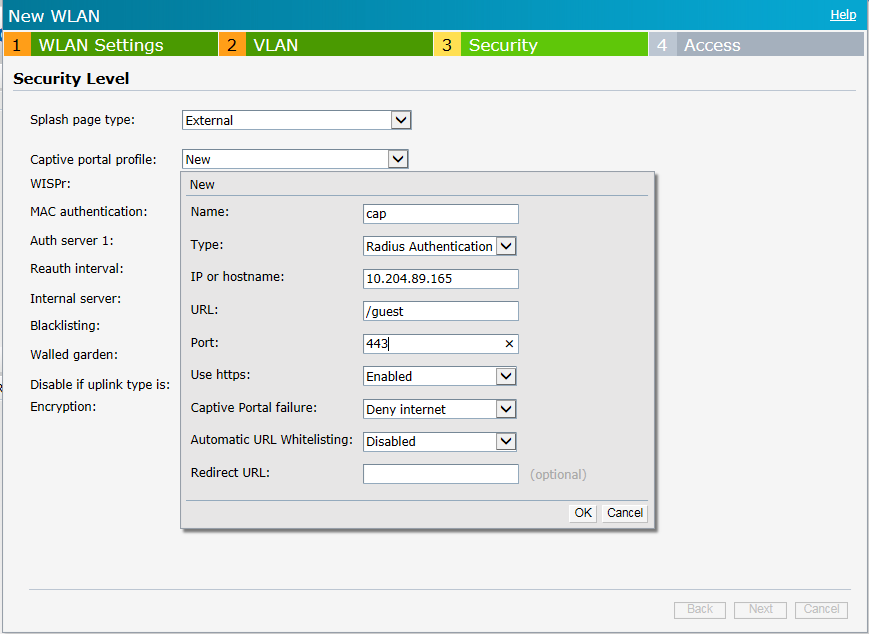
In the Security Level section do the following:
- From the Security page type, drop-down list select External.
- From the Captive portal profile, drop-down list select New
- The New screen appears.
- Enter the details as shown in the above figure and then click OK.
- The newly created captive portal appears in the Captive portal profile drop-down list.
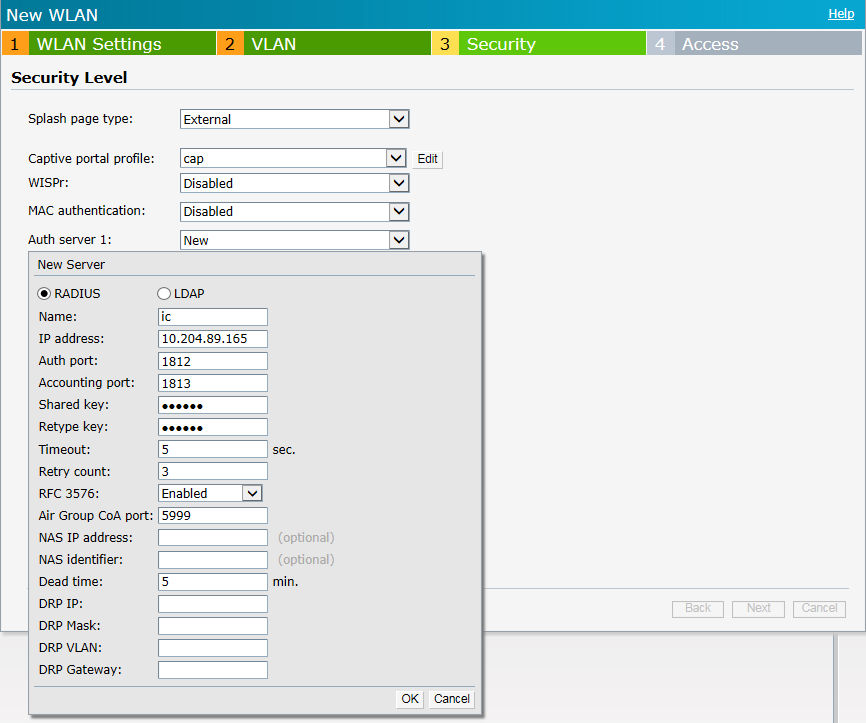
- From the Auth server 1 drop-down list select New.
- The New Server screen appears.
- Create a server pointing to IPS server. Enter the details as shown in figure and then click OK.
- The configured Security tab options appear as in the following figure.
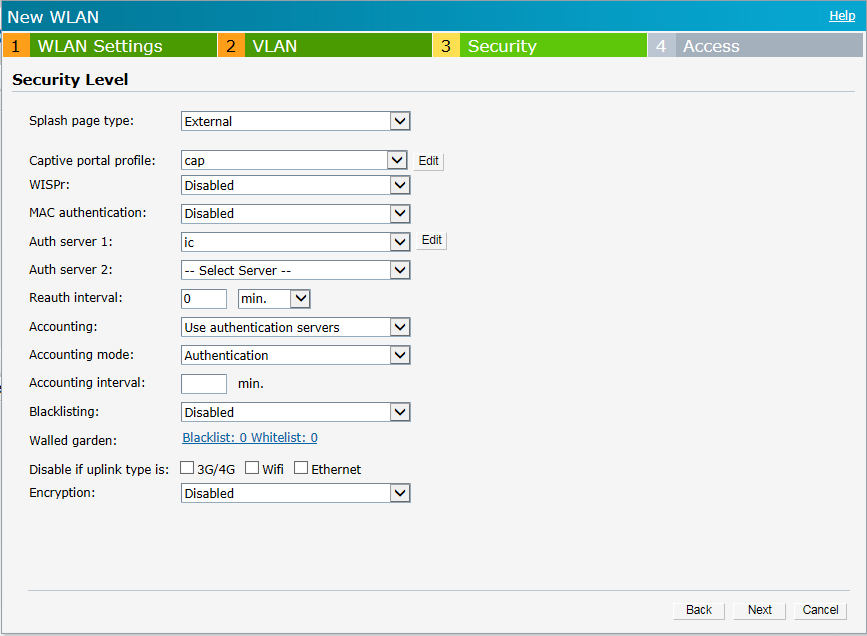
- Click Next. The Access tab options appear.
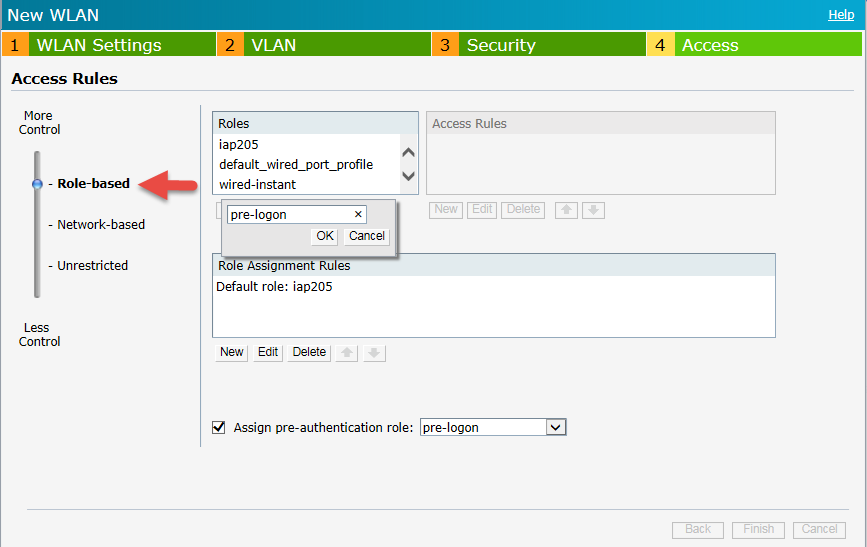
- In the Access Rules section:
- Move the slider to Role-based,
- Under the Roles section, click New to create a new role ‘pre-logon’.
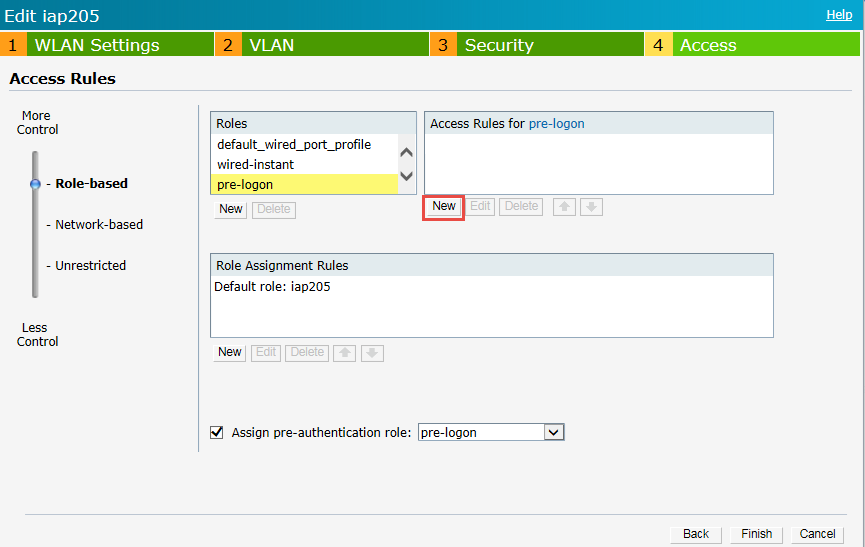
- Under the Access Rules section click New to create an access rule for the role. The New Rule window appears.
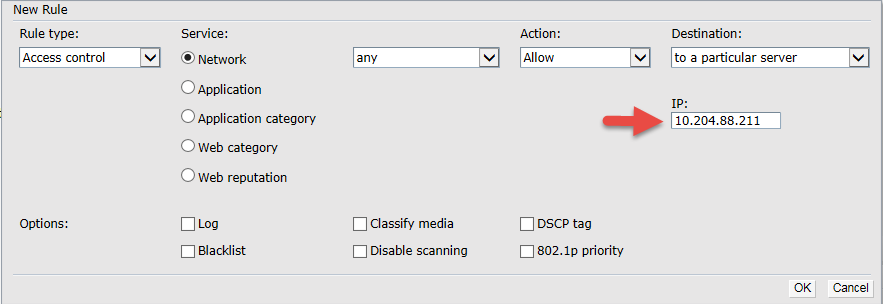
- Select the options as shown in the above figure.
- From the Destination drop-down list select ‘to a particular server’.
- In the IP box enter the IPS server’s IP address.
- Click OK.
- The Access Rule appears in the Access Rules for list box.
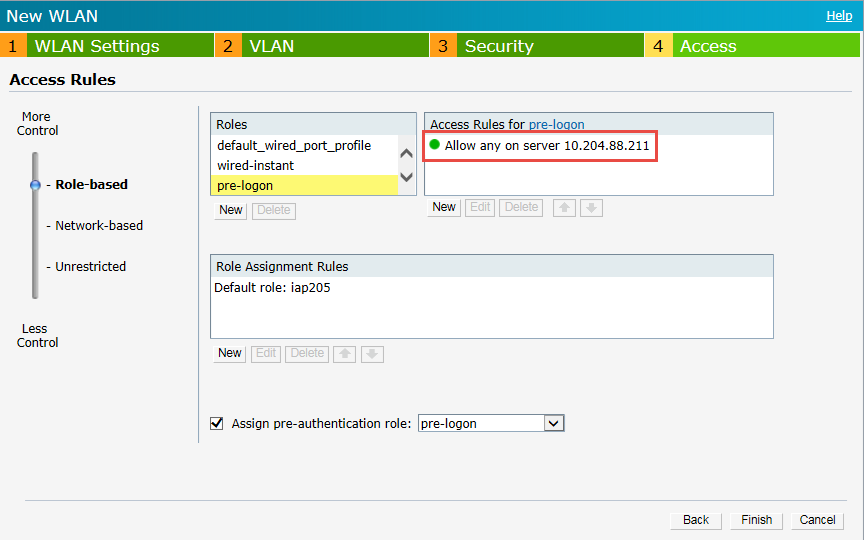
- Select the Assign pre-authentication role check box and then select ‘pre-logon’ from the drop-down list.
- Click Finish to complete the settings.