Configuring Cisco 2500 WLC
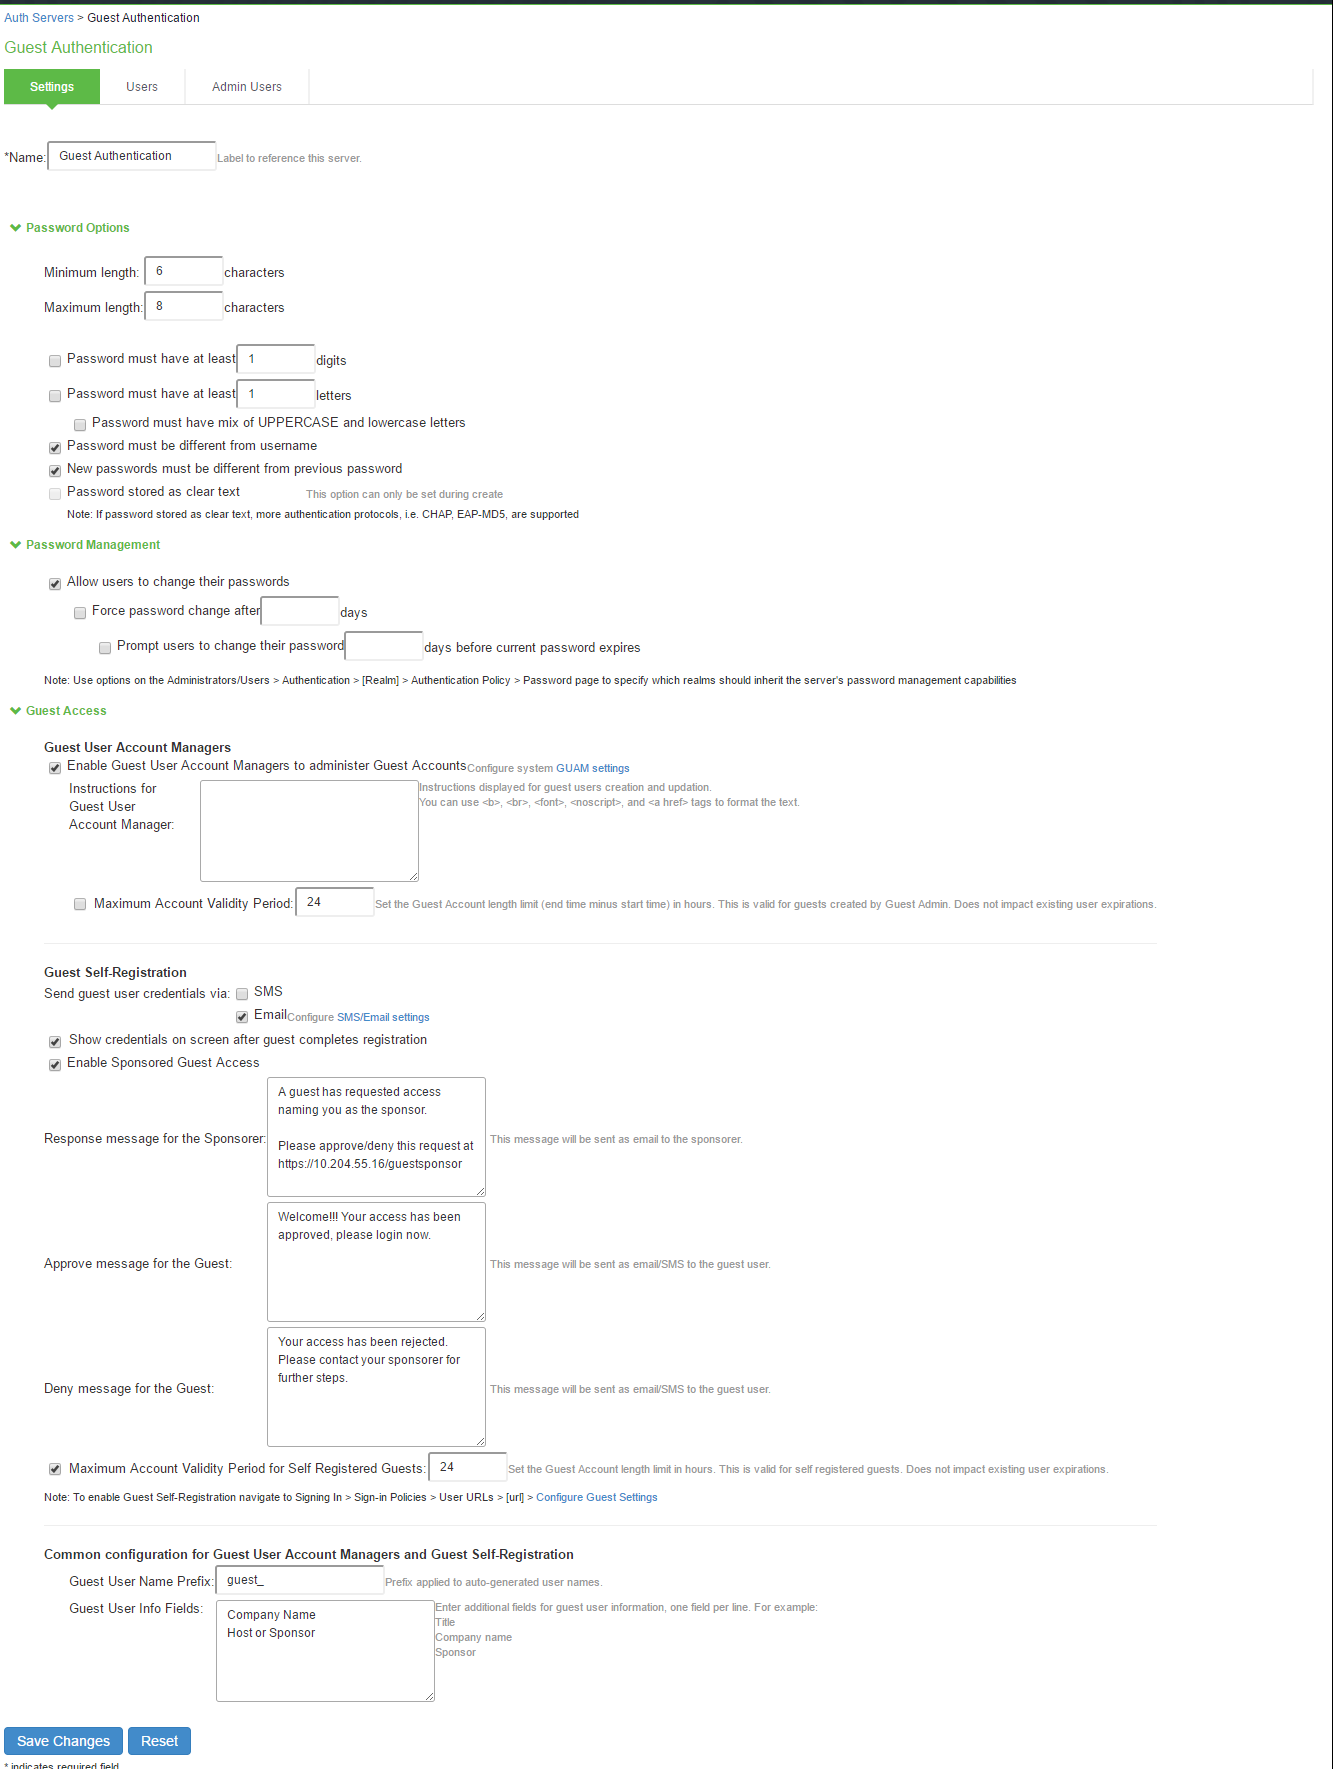
Configuring Cisco WLC for IPS GUAM and Guest Self-Registration
This section explains the steps to configure Cisco 2500 WLC for deploying IPS GUAM and Guest Self-Registration feature. This section provides examples of how to configure the Cisco WLC. For more information, see Cisco documentation.
Configuration Required on Cisco WLC for Local AP mode
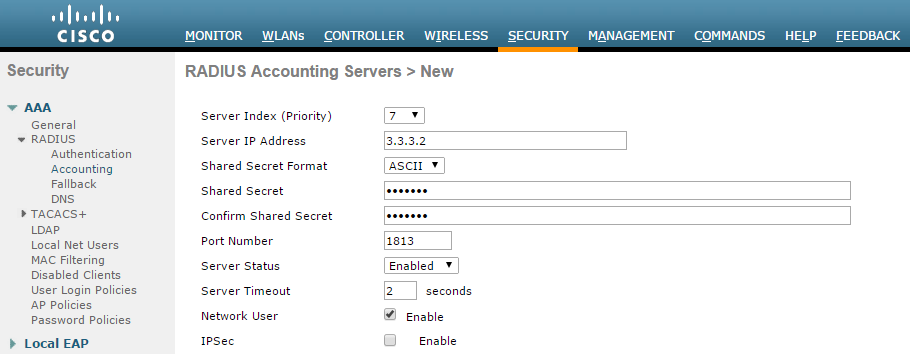
Configuring RADIUS server
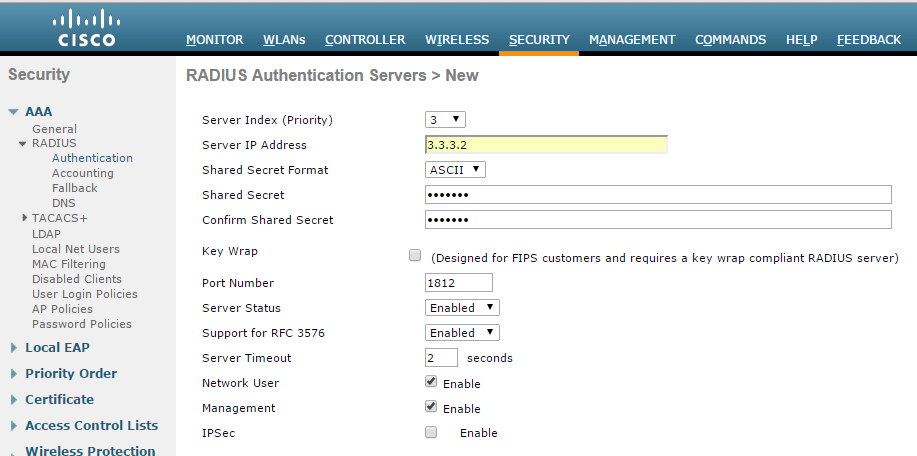
- Login to Cisco WLC. Select Security > AAA > RADIUS. Configure IPS server as authentication and accounting servers.
-
Support for RFC 3576 - Enable this option to trigger RADIUS disconnect when required.
Using CLI
Before creating the radius server, you need to allot an index number to it which is not currently in use. To find out the index numbers which are currently in use in WLC, use the following command:
show radius summary
Go through the authentication servers and accounting servers section in the displayed output. Use an unused index number for adding radius authentication or accounting server.
config radius auth add <RADIUS auth server ID> <RADIUS server IP> 1812 ascii <password>
config radius auth disable < RADIUS auth server ID >
config radius auth rfc3576 enable < RADIUS auth server ID >
config radius auth enable < RADIUS auth server ID >
config radius acct add <RADIUS acct server ID > <RADIUS server IP> 1813 ascii <password>
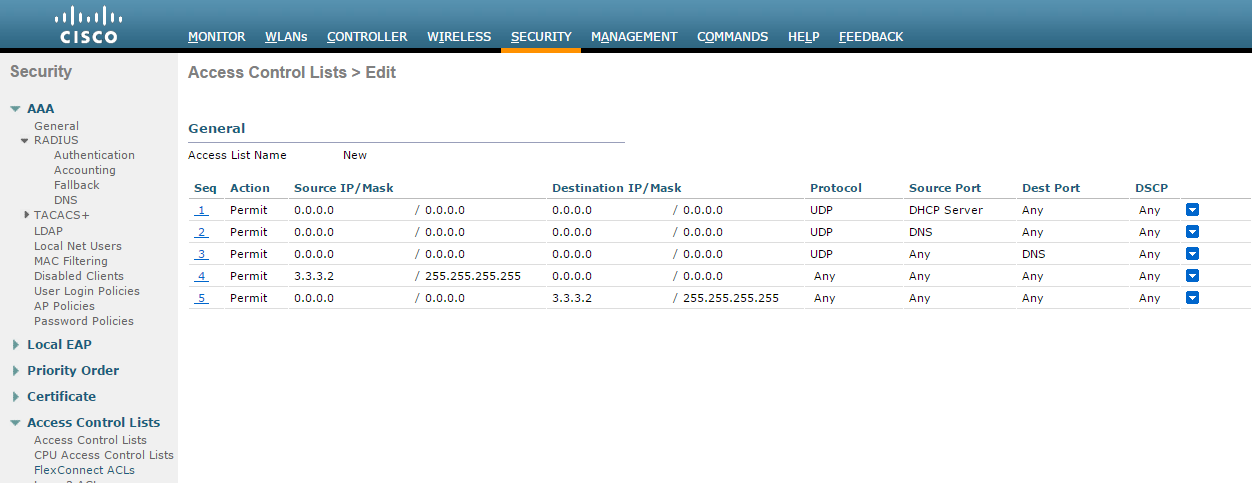
Configuring ACLs
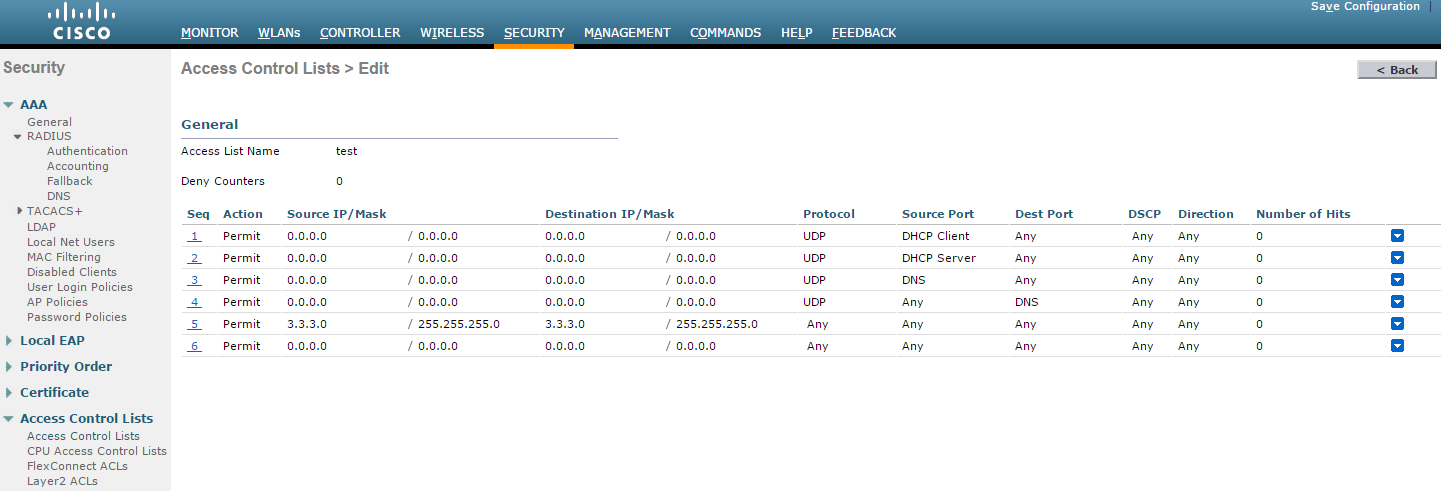
- On the CISCO WLC main screen go to Security > Access Control Lists. Create an IPv4 ACL list to allow DNS, DHCP and IPS (Traffic).
Using CLI
To see all the ACLs that are configured on the controller enter the following command:
show acl summary
To create an ACL with name test
config acl create test
To create a rule in the test ACL
config acl rule add test 1 # Creating Rule No 1
config acl rule protocol test 1 17 # 17 is UDP protocol
config acl rule source port range test 1 68 68 # 68 is DHCP client port number
config acl rule action test 1 permit # Allow access
config acl rule add test 2 # Creating Rule No 2
config acl rule protocol test 2 17
config acl rule source port range test 2 67 67 # 67 is DHCP server port number
config acl rule action test 2 permit
config acl rule add test 3 # Creating Rule No 3
config acl rule protocol test 3 17
config acl rule source port range test 3 53 53 # Port 53 for DNS
config acl rule action test 3 permit
config acl rule add test 4 # Creating Rule No 4
config acl rule protocol test 4 17
config acl rule destination port range test 4 53 53
config acl rule action test 4 permit
config acl rule add test 5 # Creating Rule No 5
config acl rule source address test 5 3.3.3.2 255.255.255.255
config acl rule action test 5 permit
config acl rule add test 6 # Creating Rule No 6
config acl rule destination address test 6 3.3.3.2 255.255.255.255
config acl rule action test 6 permit
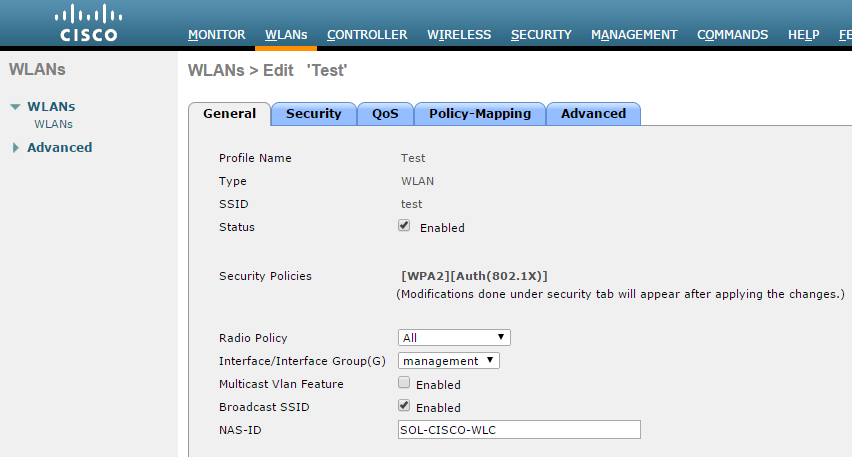
Configuring WLAN
To configure Cisco WLAN:
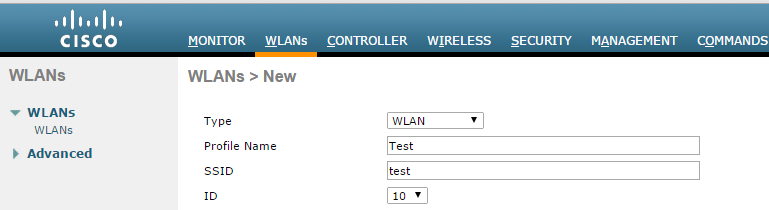
- On the CISCO WLC main screen select WLANs tab and create a new WLAN.
- Select to General tab and enable Status checkbox
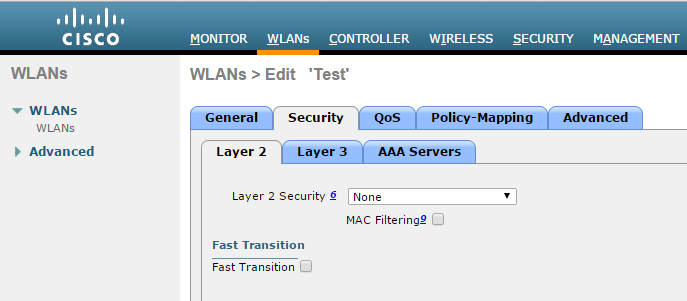
- Select Security > Layer 2 in WLANs tab. Select ‘None’ from the Layer 2 Security drop-down list.
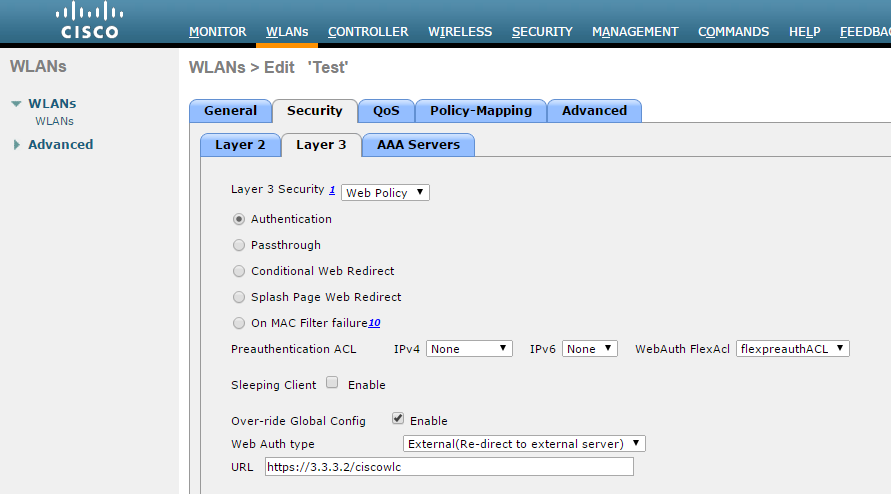
- Select Security > Layer3 in WLANs tab.
- From the Layer 3 security drop-down list select 'Web Policy'.
- For Preauthentication ACL, associate the ACL that is created earlier for IPv4.
- Over-ride Global Config - Select the Enable check box.
- From the Web auth type drop-down list select External (Re-direct to external server)
- URL – Enter the IPS (Guest sign-in URL) for redirection URL.

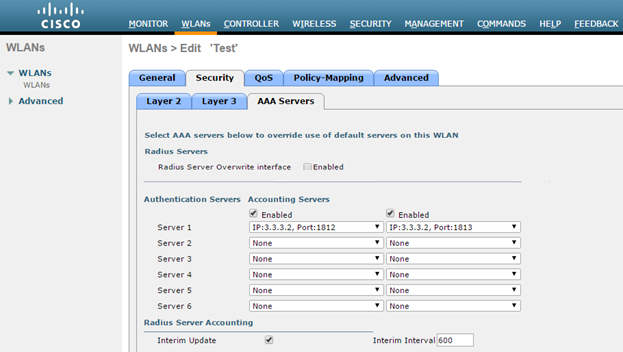
- Select Security > AAA Servers tab. Configure RADIUS server for authentication and accounting.

-
Select the Interim Update check box.
Instead of management port, if some other Interface/Interface Group (G) is selected during WLAN creation then Radius Server Overwrite interface option must be enabled.

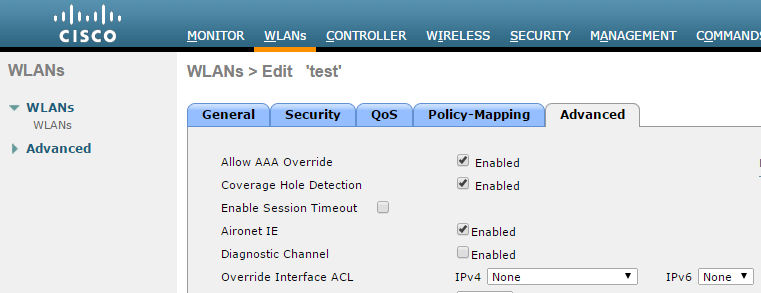
- Select Advanced tab and enable Allow AAA Override checkbox.
Using CLI
Before creating a new WLAN verify the existing WLANs on the WLC using the following command and use an unused index id for the new WLAN.
show wlan summary
To create a new WLAN
config wlan create <WLAN_ID> <Profile name> <SSID>
Ex: - config wlan create 10 Test Test # Test is the WLAN name and SSID
config wlan interface <WLAN_ID> <interface-name>
Ex: - config wlan interface 10 management # assigning the WLAN to management port
config wlan security wpa disable <WLAN_ID>
config wlan security web-auth enable <WLAN_ID>
config wlan custom-web global disable <WLAN_ID>
config wlan custom-web ext-webauth-url <ext-webauth-url> <WLAN_ID>
config wlan custom-web webauth-type external <WLAN_ID>
config wlan security web-auth acl <WLAN_ID> <ACL_name>
config wlan radius_server auth add <WLAN_ID> <Radius_auth_server_ID>
config wlan radius_server acct add <WLAN_ID> <Radius_acct_server_ID>
config wlan radius_server overwrite-interface enable <WLAN_ID> ( This command is required only if instead of management, some other interface is configured for WLAN. Please
check steps 2 and 5)
config wlan radius_server acct interim-update enable <WLAN_ID>
config wlan radius_server acct interim-update <Interval> <WLAN_ID>
config wlan aaa-override enable <WLAN_ID>
config wlan enable <WLAN_ID>
Configuring AP Group
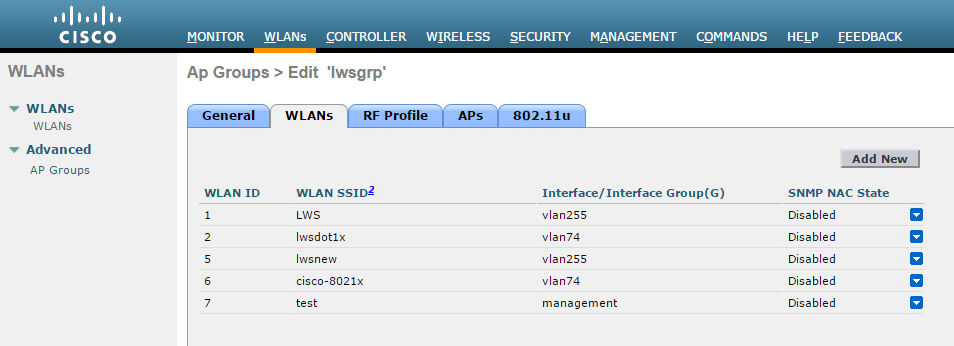
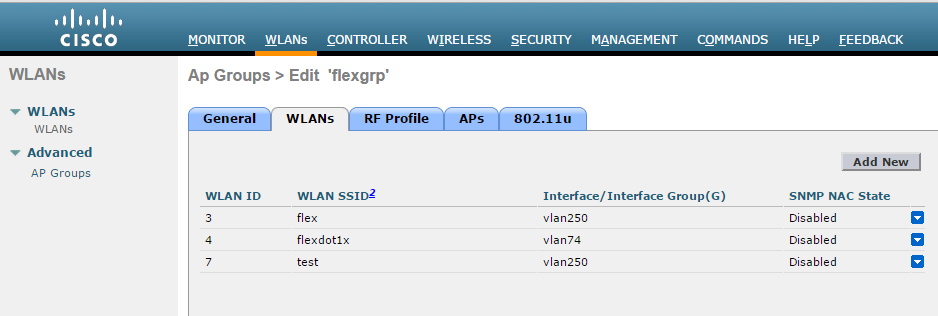
On the CISCO WLC main screen go to WLANs > Advanced > AP Groups screen and map WLAN to the Local AP (Campus Only mode) group.
Using the CLI
config wlan apgroup interface-mapping add <APgroup Name> <WLAN ID> <interfacename>
To save the configuration use the following command:
save config
Configuration Required on Cisco WLC for Remote AP mode
Configuring RADIUS server
- Login to Cisco WLC. Go to Security > AAA > RADIUS. Configure IPS server as authentication and accounting server.
-
Support for RFC 3576 - Enable this option to trigger RADIUS disconnect when required.
Support for RFC3576 for RADIUS disconnect does not work properly with Cisco 2500, 5500, 7500, and 8500 series.

Using the CLI
Before creating the radius server, you need to allot an index number to it which is not currently in use. To find out the index numbers which are currently in use in WLC, use the following command
show radius summary
Go through the authentication servers and accounting servers section in the displayed output. Use an unused index number for adding radius authentication or accounting server.
config radius auth add <RADIUS auth server ID> <RADIUS server IP> 1812 ascii <password>
config radius auth disable < RADIUS auth server ID >
config radius auth rfc3576 enable < RADIUS auth server ID >
config radius auth enable < RADIUS auth server ID >
config radius acct add <RADIUS acct server ID > <RADIUS server IP> 1813 ascii <password>
Configuring FlexConnect ACLs
- Select Security > Access Control Lists > FlexConnect ACLS. Create a FlexConnect ACL list to allow DNS, DHCP and IPS (Traffic).
Using the CLI
To see all the ACLs that are configured on the controller enter the following command:
show flexconnect acl summary
To create a new ACL
config flexconnect acl create <ACL name>
To create rules in the newly created ACL
config flexconnect acl rule add <ACL name> <Rule number1>
config flexconnect acl rule protocol <ACL name> <Rule number1> 17 # 17 is UDP
config flexconnect acl rule source port range <ACL name> <Rule number1> 68 68 # 68 is DHCP client port number
config flexconnect acl rule action <ACL name> <Rule number1> permit # Allow access
config flexconnect acl rule add <ACL Name> <Rule number2>
config flexconnect acl rule protocol <ACL name> <Rule number2> 17
config flexconnect acl rule source port range <ACL name> <Rule number2> 67 67 # 67 is DHCP server port number
config flexconnect acl rule action <ACL name> <Rule number2> permit
config flexconnect acl rule add <ACL name> <Rule number3>
config flexconnect acl rule protocol <ACL name> <Rule number3> 6
config flexconnect acl rule source port range <ACL name> <Rule number3> 53 53 # Port 53 for DNS
config flexconnect acl rule action <ACL name> <Rule number3> permit
config flexconnect acl rule add <ACL name> <Rule number4>
config flexconnect acl rule protocol <ACL name> <Rule number4> 6
config flexconnect acl rule destination port range <ACL name> <Rule number4> 53 53 #port 53 for DNS
config flexconnect acl rule action <ACL name> <Rule number4> permit
config flexconnect acl rule add <ACL name> <Rule number5>
config flexconnect acl rule source address <ACL name> <Rule number5> <IPS IP> <Subnetmask>
config flexconnect acl rule action <ACL name> <Rule number5> permit
config flexconnect acl rule add <ACL name> <Rule number6>
config flexconnect acl rule destination address <ACL name> <Rule number6> <IPS IP> <Subnetmask>
config flexconnect acl rule action <ACL name> <Rule number6> permit
Configuring WLAN
- Go to WLANs tab and create a new WLAN.
- Navigate to General tab and enable Status checkbox.
- Go to Security > Layer 2 in WLAN settings. From the Layer 2 Security drop-down list Select ‘None’.

- Go to Security > Layer3 in WLANs tab.
- From the Layer 3 security drop-down list select 'Web Policy'.
- For Preauthentication ACL, associate the FlexConnectACL that is created earlier.
- Over-ride Global Config - Select the Enable check box.
- From the Web auth type drop-down list select External (Re-direct to external server)
- URL - Enter the IPS (Guest sign-in URL) for redirection URL.
- Go to Security > AAA Servers in WLANs tab. Configure RADIUS server for authentication and accounting.

- Select the Interim Update check box.
- Select Advanced tab and enable Allow AAA Override checkbox.


Using the CLI
Before creating a new WLAN verify the existing WLANs on the WLC using the following command and use an unused index id for the new WLAN
show wlan summary
To create a new WLAN:
config wlan create <WLAN_ID> <Profile name> <SSID>
eg: config wlan create 10 Test Test # Test is the WLAN name and SSID
config wlan interface <WLAN_ID> <interface-name>
eg: config wlan interface 10 management # assigning the WLAN to management port
config wlan security wpa disable <WLAN_ID>
config wlan security web-auth enable <WLAN_ID>
config wlan custom-web global disable <WLAN_ID>
config wlan custom-web ext-webauth-url <ext-webauth-url> <WLAN_ID>
config wlan custom-web webauth-type external <WLAN_ID>
config wlan security web-auth flexacl <WLAN_ID> <ACL_name>
config wlan radius_server auth add <WLAN_ID> <Radius_auth_server_ID>
config wlan radius_server acct add <WLAN_ID> <Radius_acct_server_ID>
config wlan radius_server overwrite-interface enable <WLAN_ID> ( This command is required only if instead of management, some other interface is configured for WLAN.
Please check steps 2 and 5)
config wlan radius_server acct interim-update enable <WLAN_ID>
config wlan radius_server acct interim-update <Interval> <WLAN_ID>
config wlan aaa-override enable <WLAN_ID>
config wlan enable <WLAN_ID>
Configuring AP Group
- On the CISCO WLC main screen go to WLANs > Advanced > AP Groups screen and map WLAN Flexl AP (Remote AP mode) group.
Using the CLI
config wlan apgroup interface-mapping add <APgroup Name> <WLAN ID> <interfacename>
Adding ACLs in FlexConnect Group
To add ACLs in FlexConnect Group:
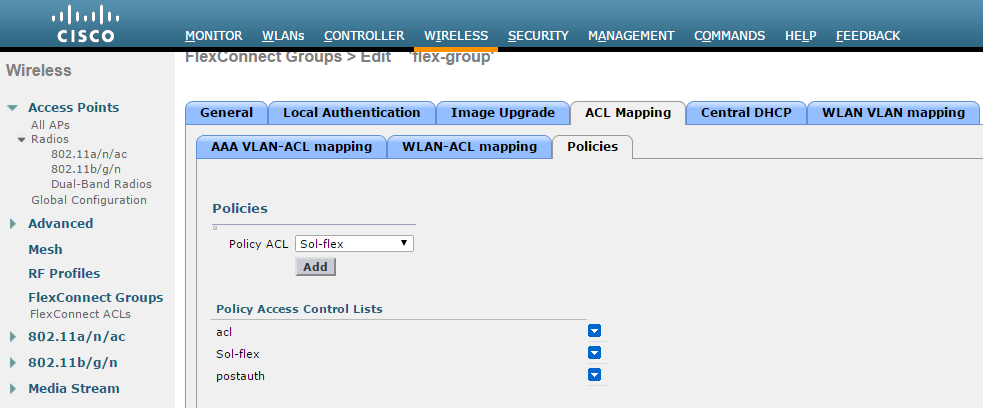
- Select Wireless >FlexConnect Groups. Click on the required FlexConnect Group and select ACL Mapping > Policies. Add all the required FlexConnect ACLs to this group. This configuration is required when admin wants to push ACL name using RADIUS return attributes from IPS.
Using the CLI
To see all the flexconnect groups that are configured on the controller enter the following command:
show flexconnect group summary
To add policy ACLs in the flexconnect group use the following command:
config flexconnect group <flex-group> policy acl add <flexconnect_ACL>
Save the config using the following command:
save config