Configuring Cisco 3850 WLC
Configuring Cisco WLC using Web GUI
You can configure CISCO WLC 3850 by performing the steps as stated below:
- Create a RADIUS server.
- Create a Radius Server Group and map with the newly created RADIUS server
- Create an Authentication list and map with the newly created Radius Server Group.
- Create an Accounting list and map with the newly created Radius Server Group.
- Create an Authorization list and map with the newly created Radius Server Group.
- Create a Webauth Parameter Map
- Create an Access List
- Create a Sequence Number
- Create a Wireless SSID
To configure the CISCO WLC 3850:
- Login to CISCO WLC. The CISCO Wireless Controller home page appears.
- From the Configuration, drop-down list select Security. The options under the Security section are displayed.
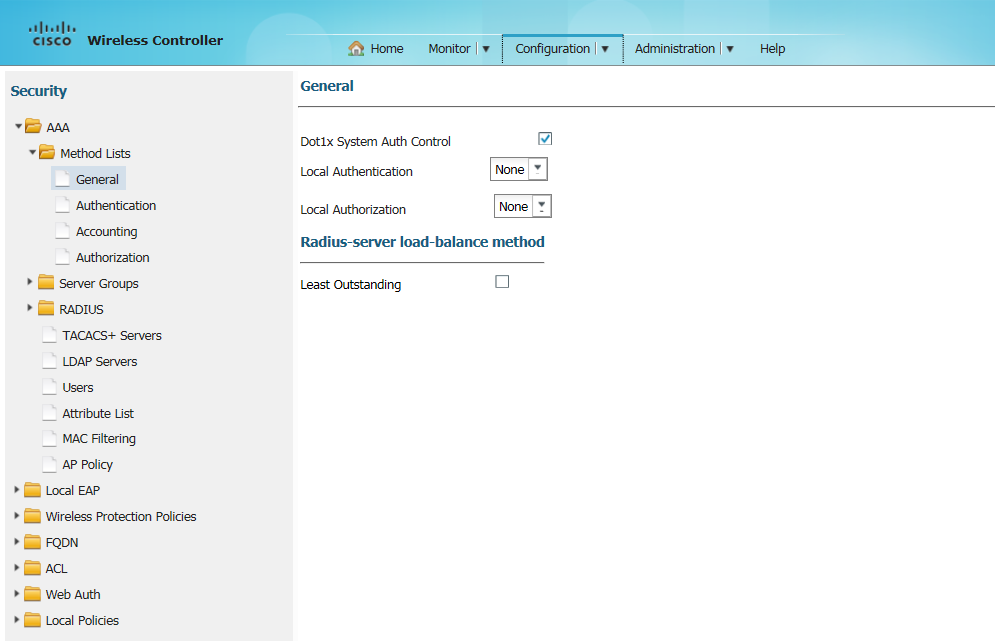
- Select AAA > Radius > Servers to create a Radius server. The Radius Server screen appears.

- Click New to create a Radius server.
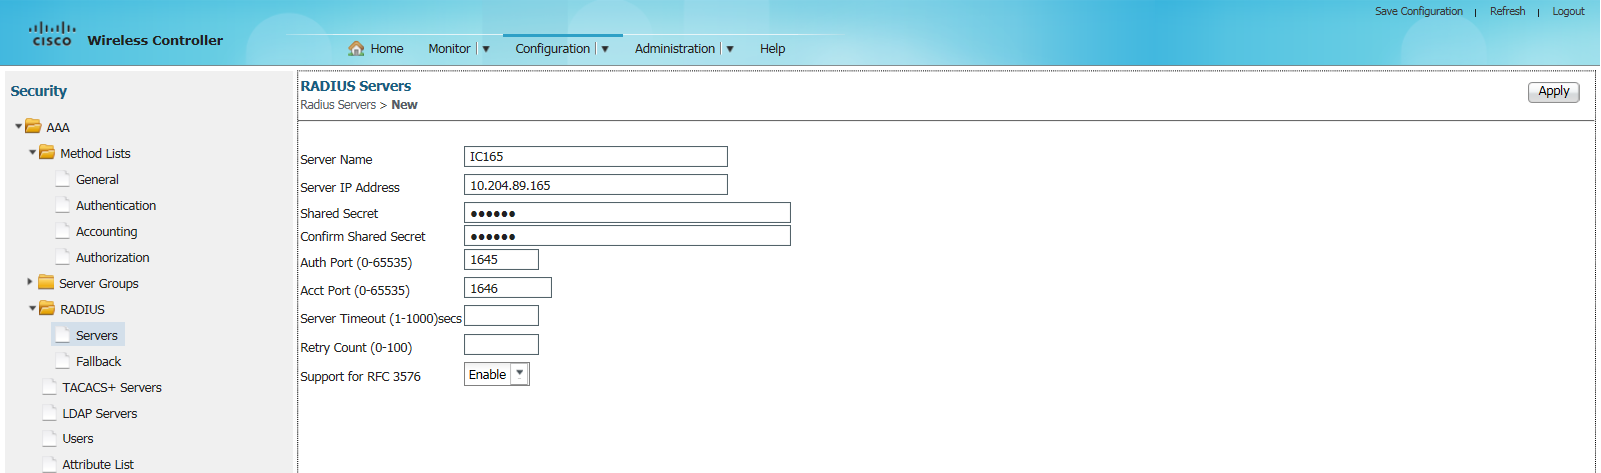
- Enter relevant details and click Apply at the right top corner of the page. A new RADIUS server is created.
- Select AAA > Server Groups > Radius to create a Radius Server Group. The Radius Server Groups screen appears.
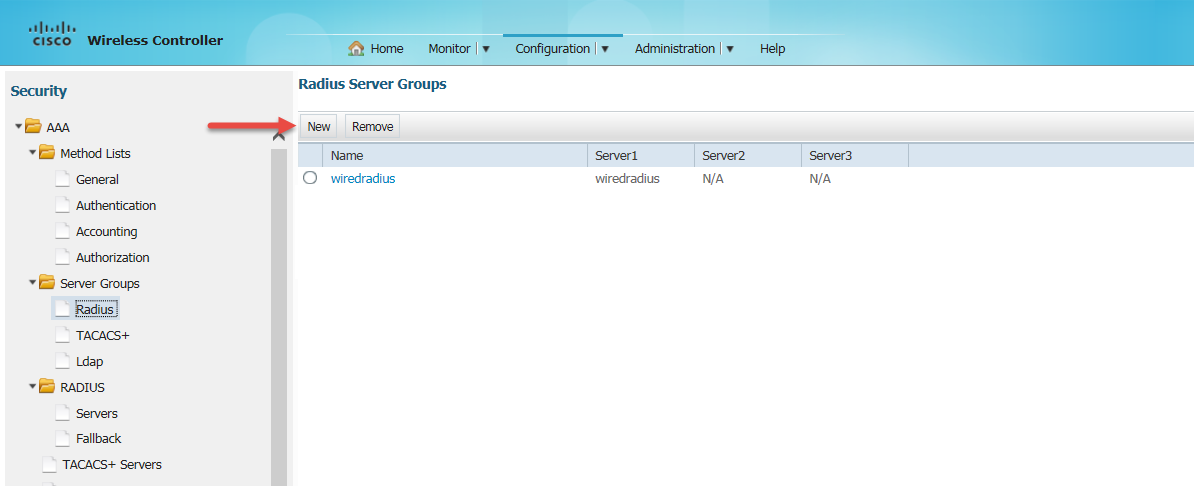
- Click New the Radius Server Group > New screen appears.
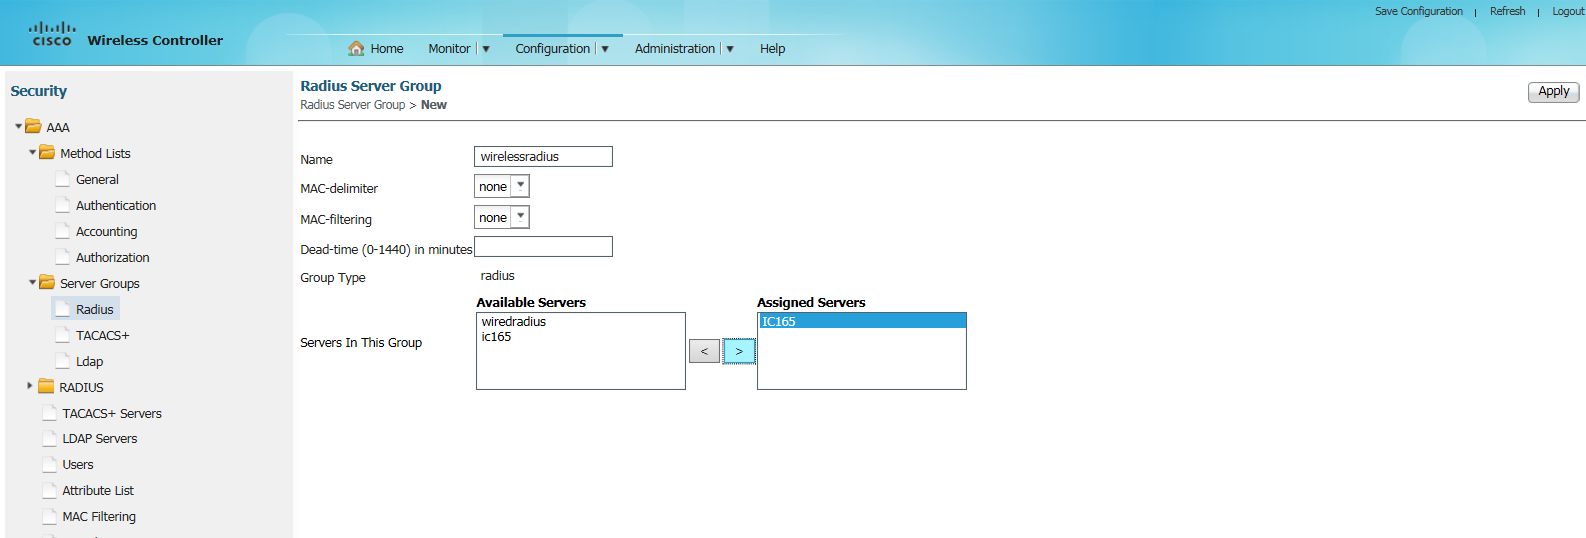
- Enter a name in the Name field. From the Available Servers box select the server which you have created in step 5 and click the button
 to move it to the Assigned Servers box.
 - Click Apply to save the Radius Server Group.
- Select AAA > Method List > Authentication to create an Authentication list.
The Authentication screen appears.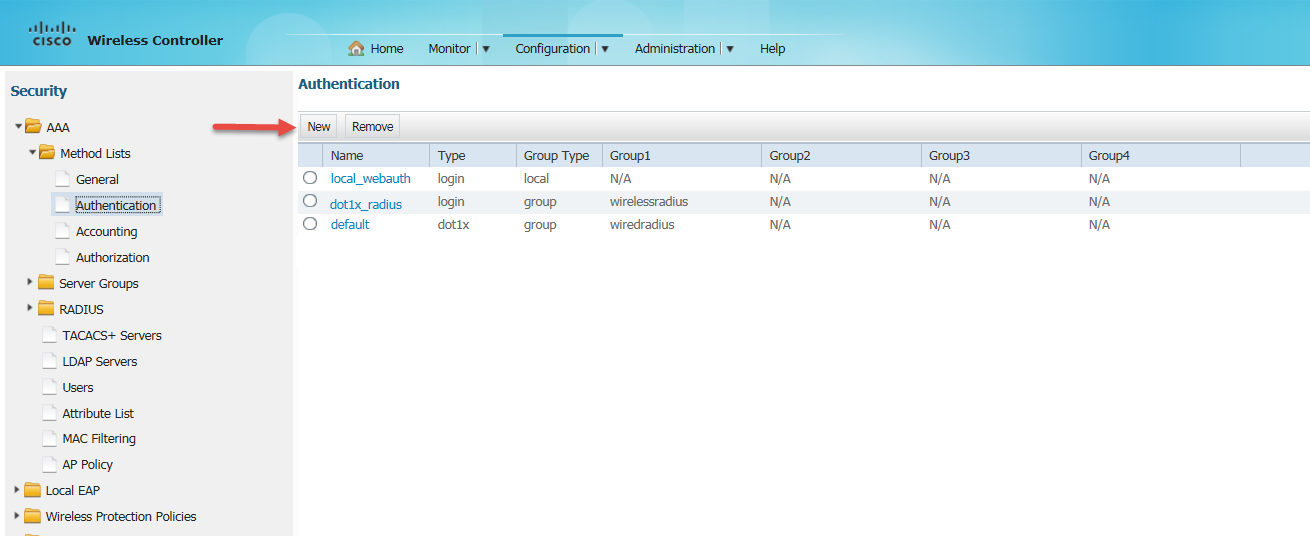
- Click New. The Authentication > New screen appears.
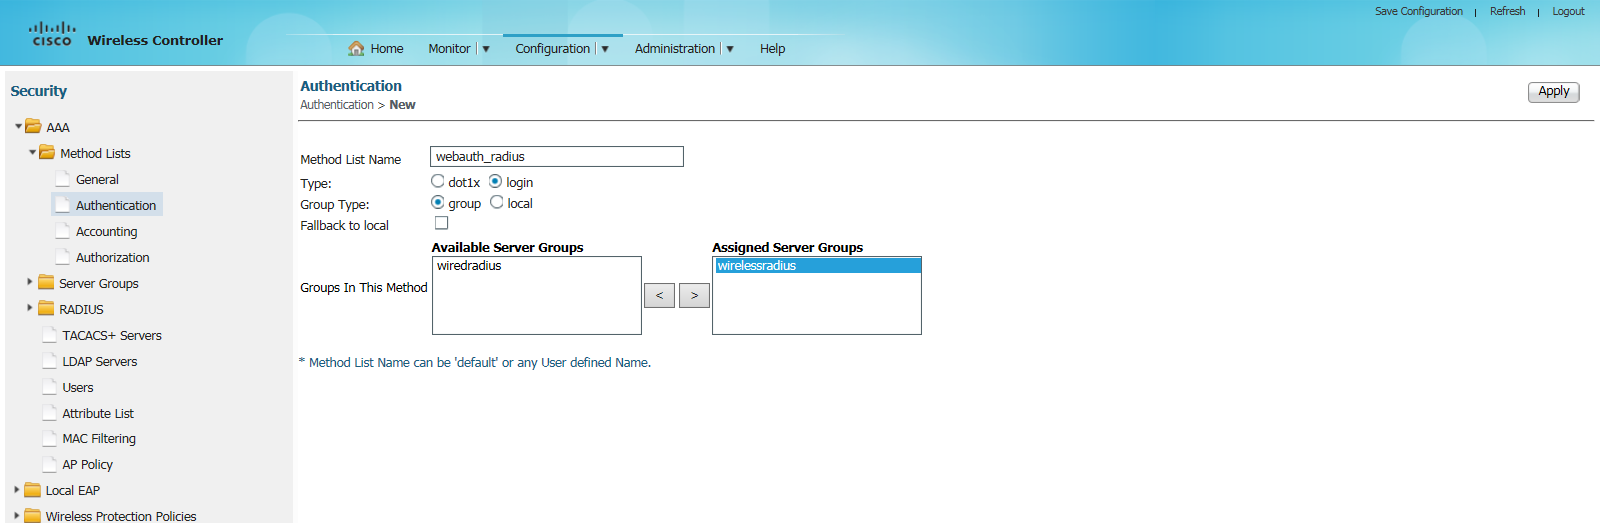
- Enter the details in the fields as follows:
- In the Method List Name field enter webauth_radius
- For Type, select login
- For Group Type select group
- Select the ‘wirelessradius’ server group that you have created earlier from the Available Server Groups box and click to move it to the Assigned Server Groups box.
- Click Apply to save the Authentication.
- Select AAA > Method List > Accounting to create an Accounting list. The Accounting screen appears.
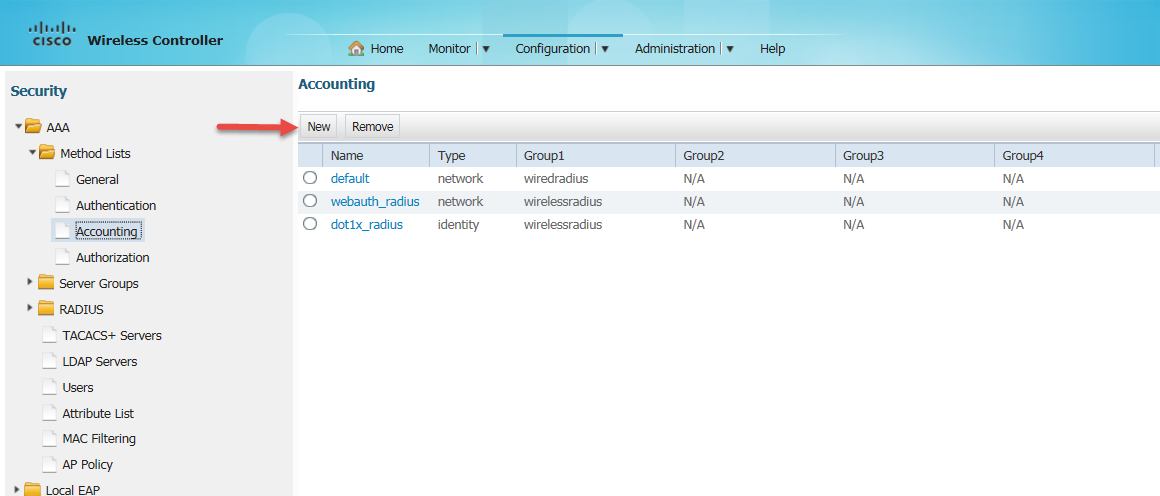
- Click New to create an Accounting list. The Accounting > New screen appears.
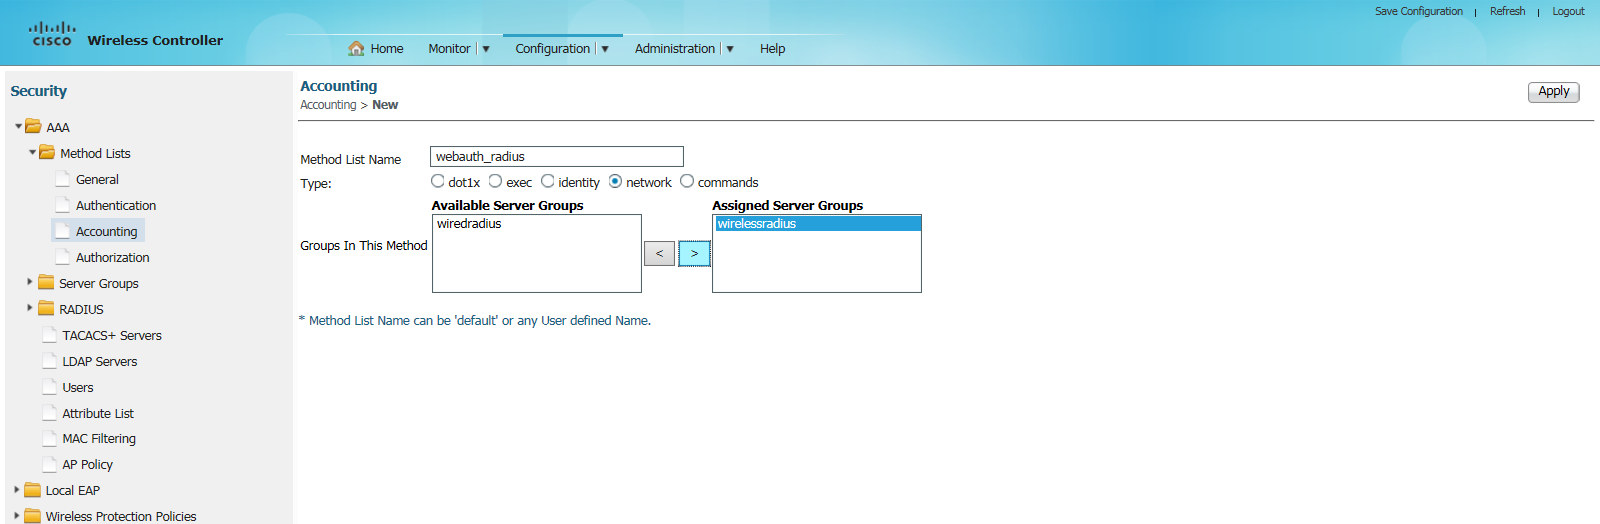
- Enter the details in the fields as follows:
- In the Method List Name field enter webauth_radius.
- For Type, select network.
- Select the ‘wirelessradius’ server group that you have created earlier from the Available Server Groups box and click to move it to the Assigned Server Groups box.
- Click Apply to save the Accounting list.
- Select AAA > Method Lists > Authorization to create an Authorization list. The Authorization screen appears.
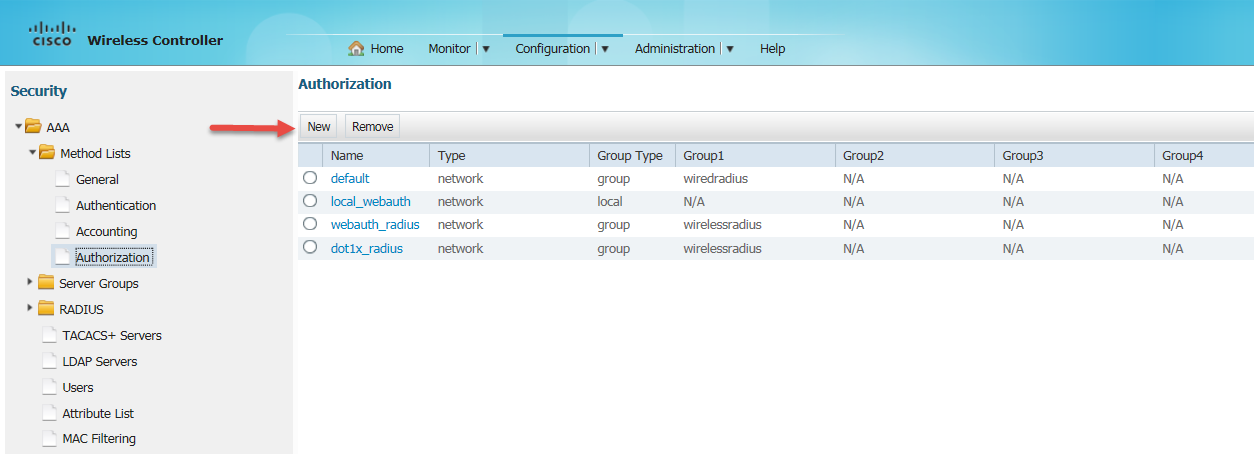
- Click New to create an Authorization list. The New screen appears.
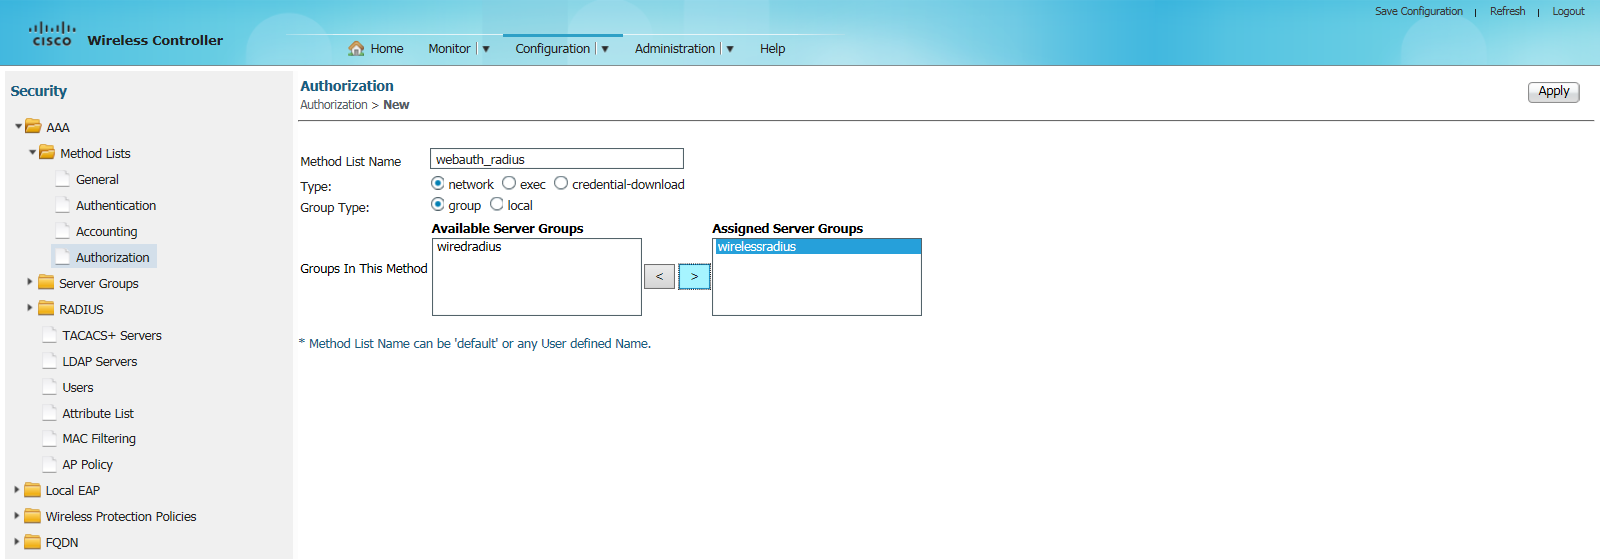
- Enter the details in the fields as follows:
- In the Method List Name field enter webauth_radius.
- For Type, select network.
- For Group Type select group.
- Select the ‘wirelessradius’ server group that you have created earlier from the Available Server Groups box and click to move it to the Assigned Server Groups box.
- Click Apply to save the Authorization list.
- Select Web Auth > Webauth Parameter Map to create a Webauth Parameter Map. The Webauth Parameter Map screen appears.
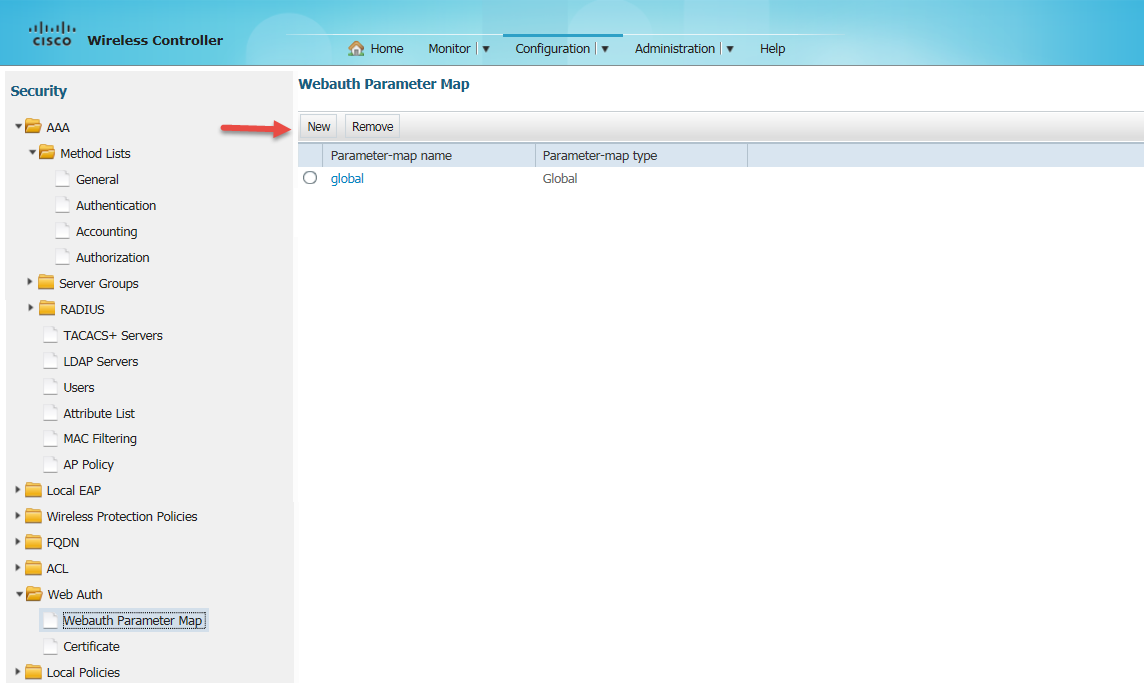
- Click New to create a Webauth Parameter Map. The Webauth Parameter Map > New screen appears.
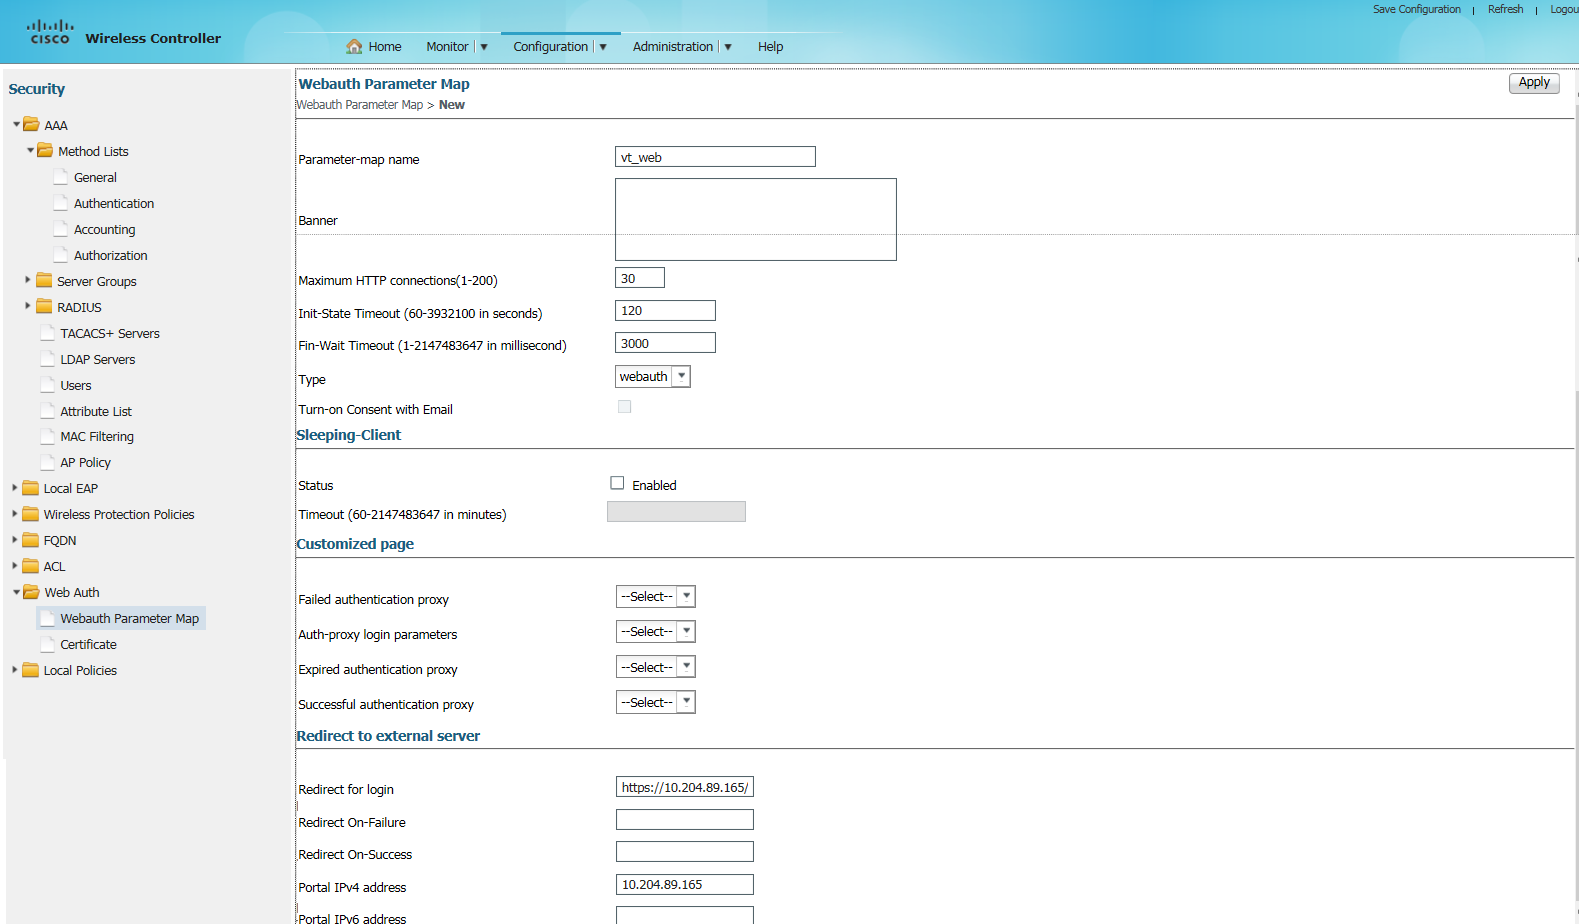
- Enter the details in the fields as follows:
- In the Parameter – map name field enter vt_web.
- In Maximum HTTP connections (1-200) enter 30.
- In Init-State Timeout (60-3932100 in seconds) enter 120.
- In Fin-Wait Timeout (1-2147483647 in millisecond) enter 3000.
- In Redirect for login field enter https://10.204.89.165/guest - This is the IPS URL to which a guest is redirected when tried to access a website.
- In Portal IPv4 address enter 10.204.89.165.
- Click Apply to save the Webauth Parameter Map.
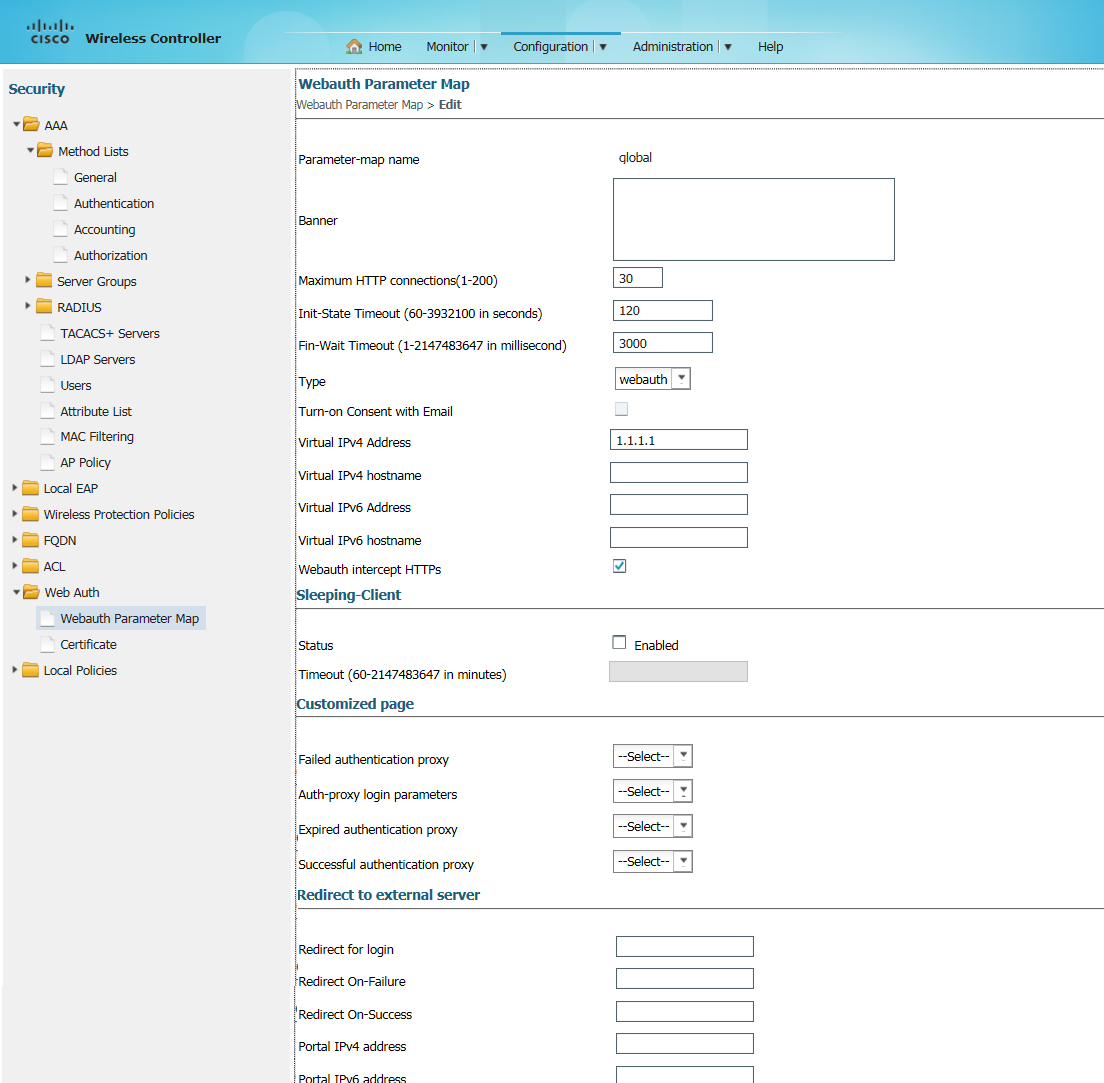
A default Webauth Parameter Map is created a shown in the following figure.
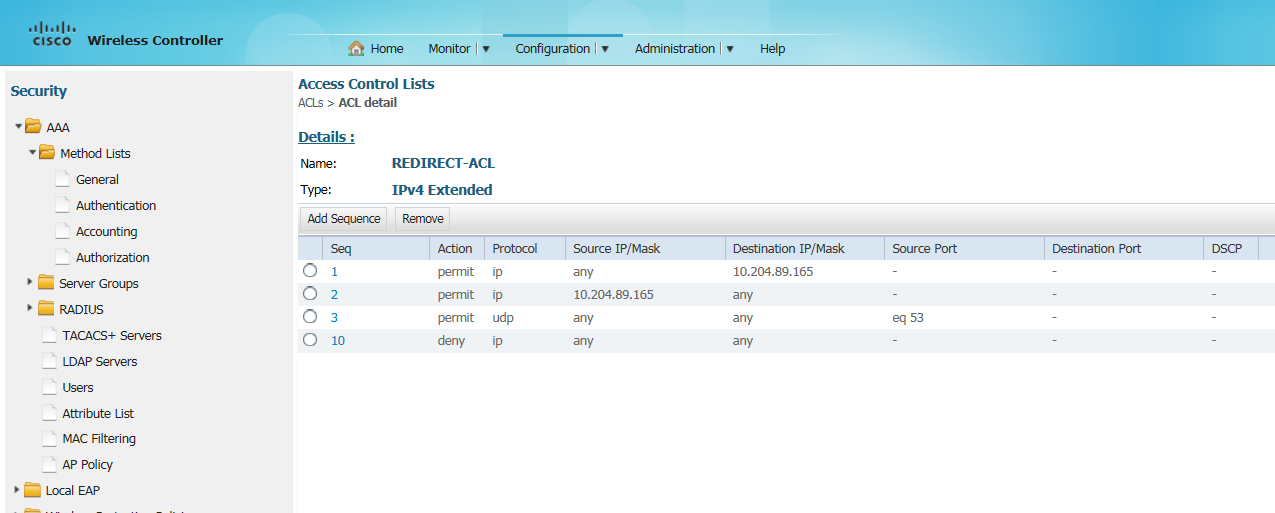
- Select ACL > Access Control List to create an Access Control List. The Access Control Lists screen appears.
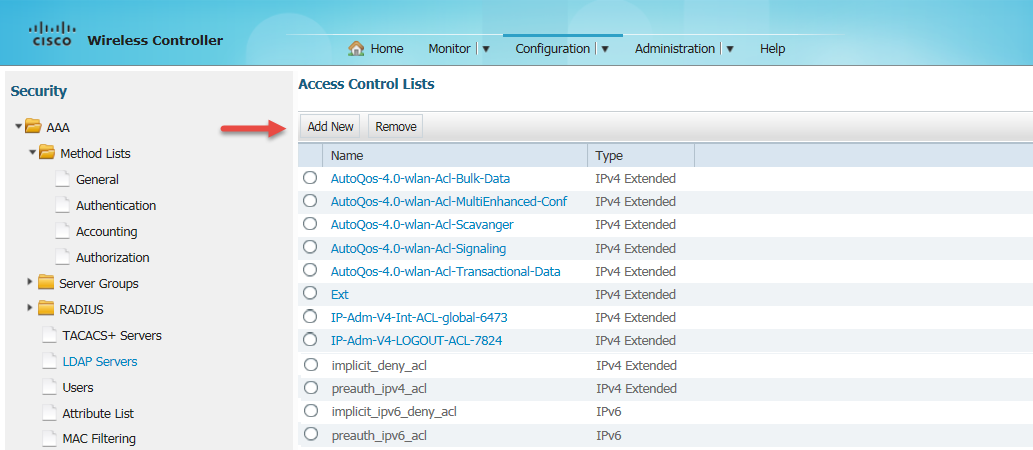
- Click Add New. The New Access List screen appears.

- In the Name field enter REDIRECT-ACL, and then click Apply at the right top corner. The New Sequence Number screen appears.
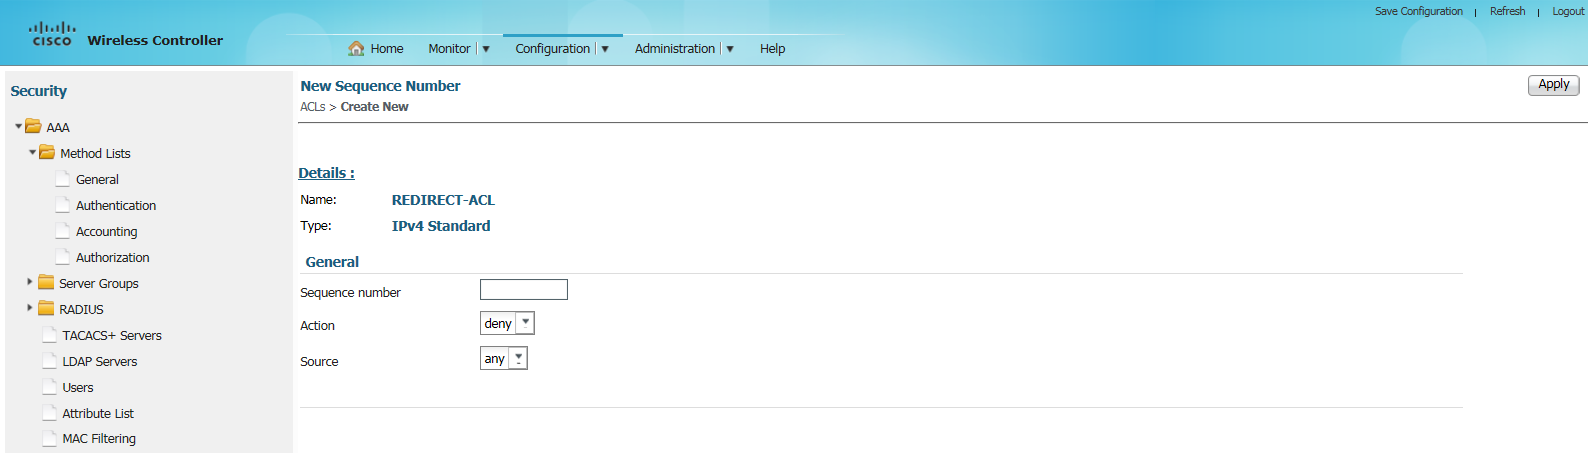
- Enter relevant details and click Apply. Allow traffic to the Ivanti Policy server IP address - 10.204.89.165.
- On the main menu select Configuration > Wireless to create a Wireless SSID. The WLANs screen appears.
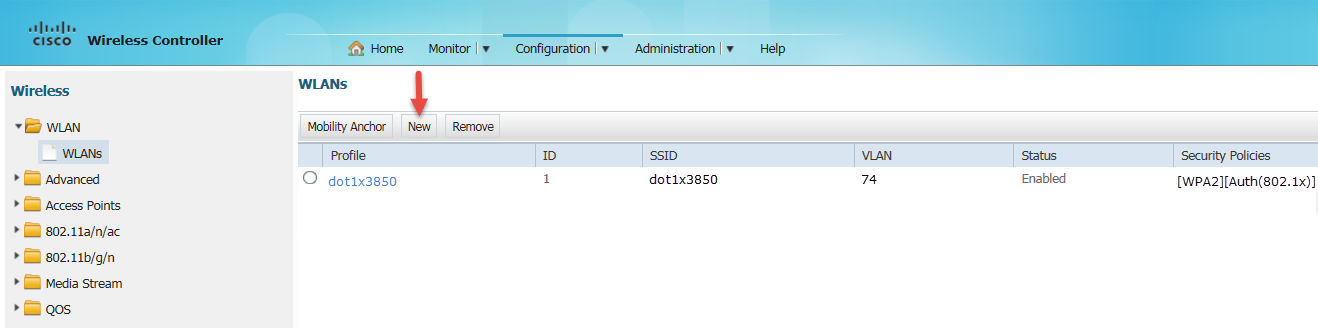
- Click New. The WLANs > Create New screen appears.
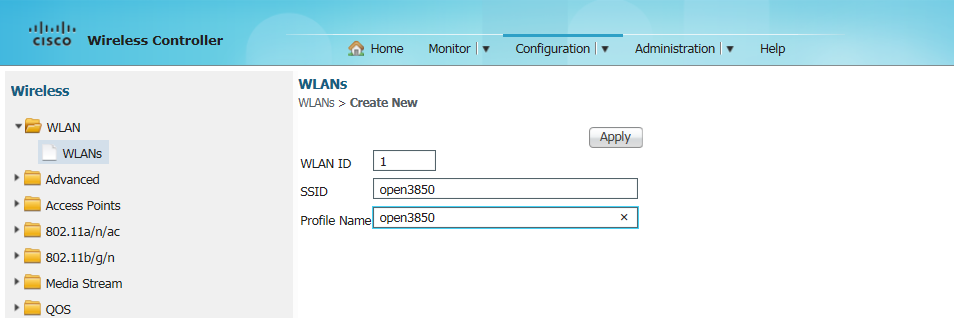
- Click Apply. The WLAN is created and displayed in WLANs screen.
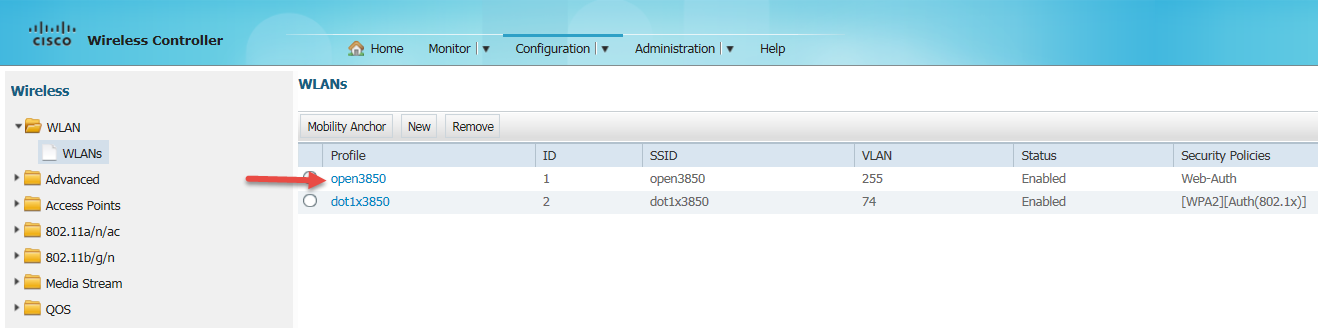
- Click the WLAN to configure. The General tab options of the WLAN appears.
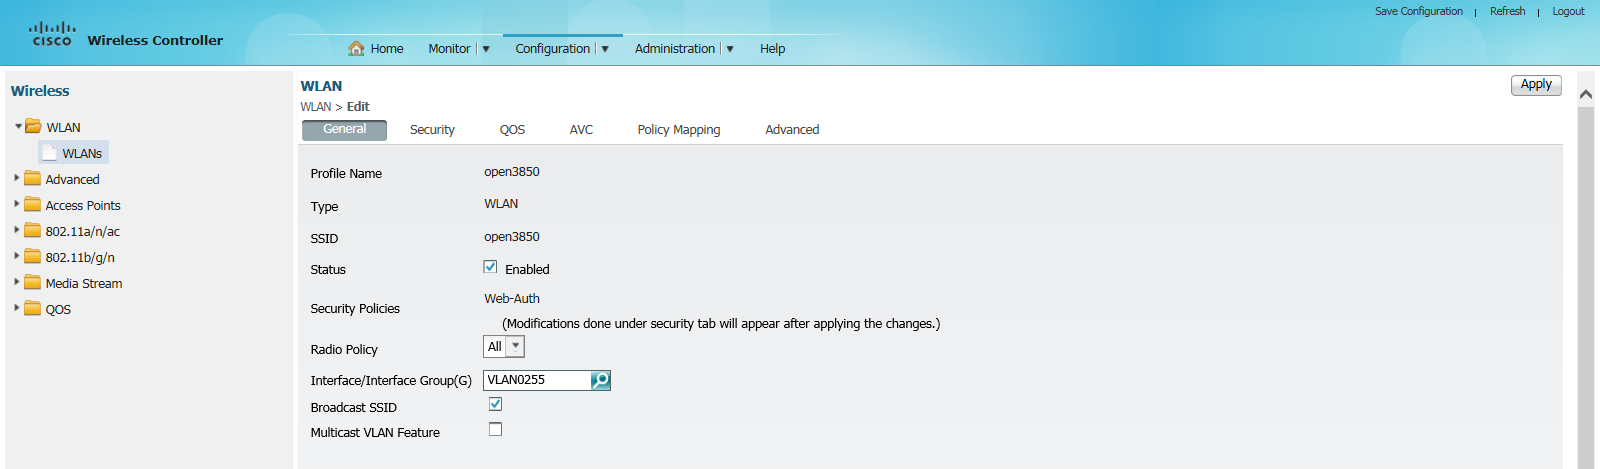
- Select the options as shown in figure and then click Apply to save the configurations.
- Click the Security tab. The options under Security > Layer2 appears.
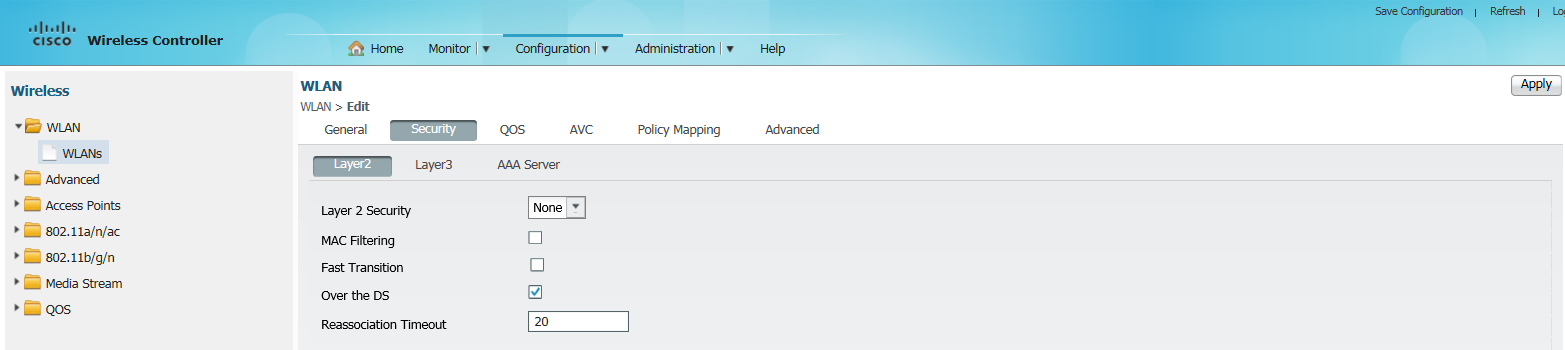
- Select the options as shown in figure and then click Apply to save the configurations.
- Click Layer3 The options under Layer3 appears.
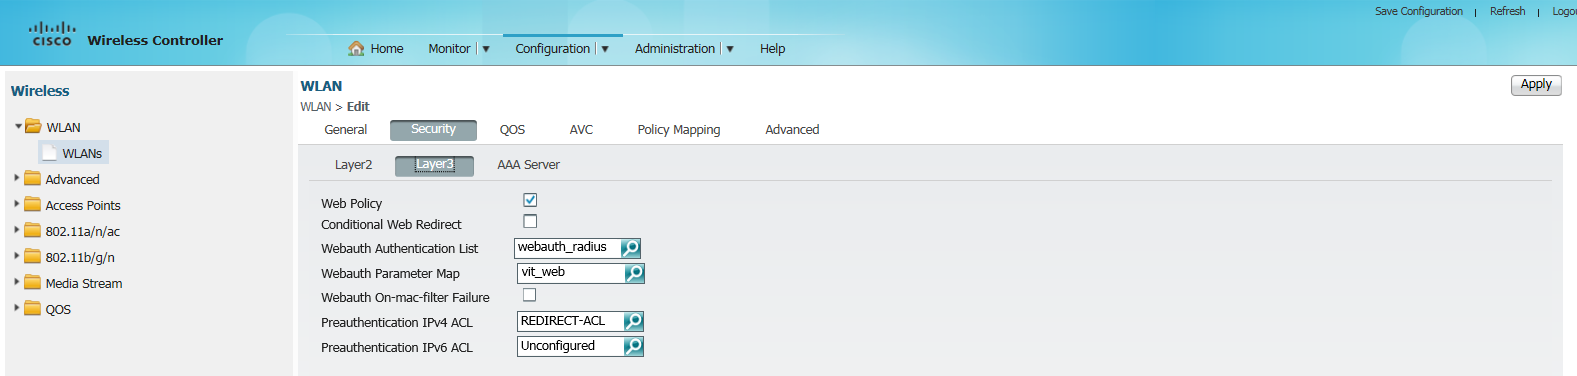
- Select the options:
- For Webauth Authentication List select ‘webauth_radius’ which you have created earlier.
- For Preauthentication IPv4 ACL select ‘REDIRECT-ACL’ which you have created earlier.
- Click Apply to save the configurations.
- Click AAA Server.
The options under AAA Server appears.
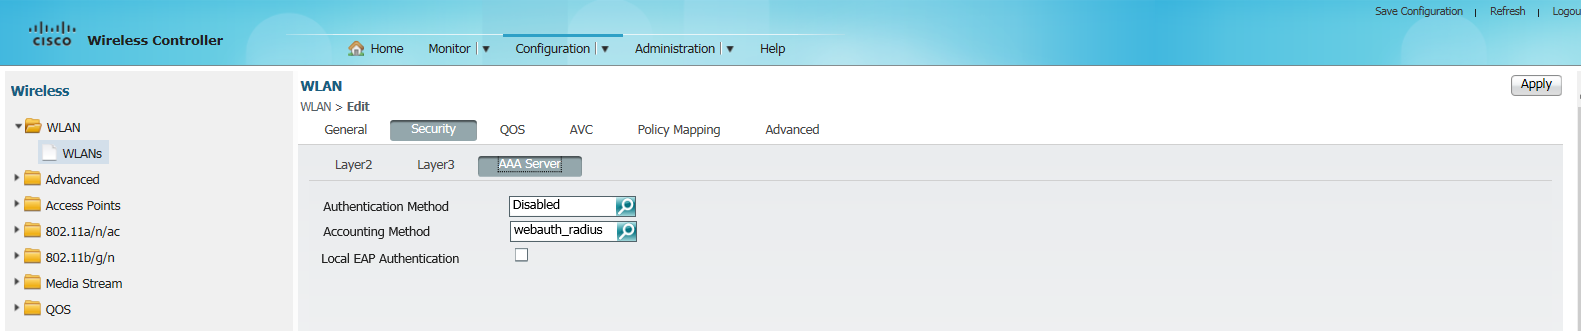
- From the Accounting Method drop-down list select ‘webauth_radius’ which you have created earlier. Click Apply to save the configurations.
- Click Advanced.
The options under Advanced appears.
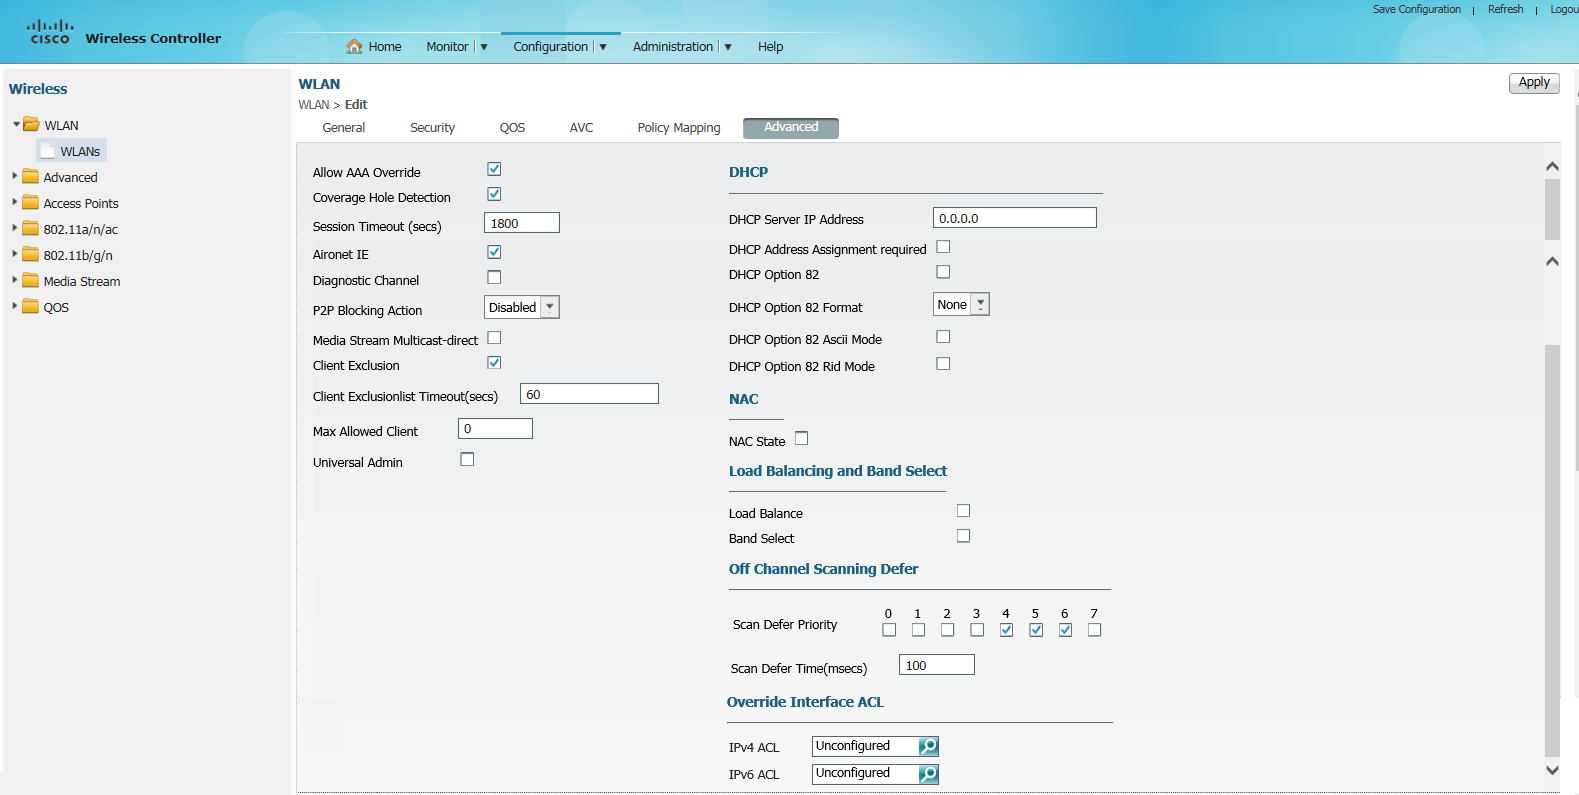
-
Select the check box Allow AAA Override, so that radius attribute sent from IPS can be applied. Select other options as shown in the above figure and then click Apply to save the configurations.