Configuring IPS for WLC Deployment
This section describes the configuration that is required on IPS to communicate with a Wireless LAN Controller (WLC) for Guest user management.
Ivanti Policy Secure(IPS) server acts as RADIUS server that allows to centralize the authentication and accounting for the users. You can add Cisco, Aruba, or Ruckus WLC as a RADIUS client on IPS. Guest user Self-Registration options need to be configured in the authentication server used for managing guest accounts and in sign-in policy settings.
Default Configurations for Guest Access
Ivanti Policy Secure(IPS) has some default configuration settings for convenience of the Admin users.
The default settings are:
- Sign-in Policies
- User Realms
- User Roles
- Location Groups
- Authentication Protocol Sets
- Authentication Server
Sign-In-Policies
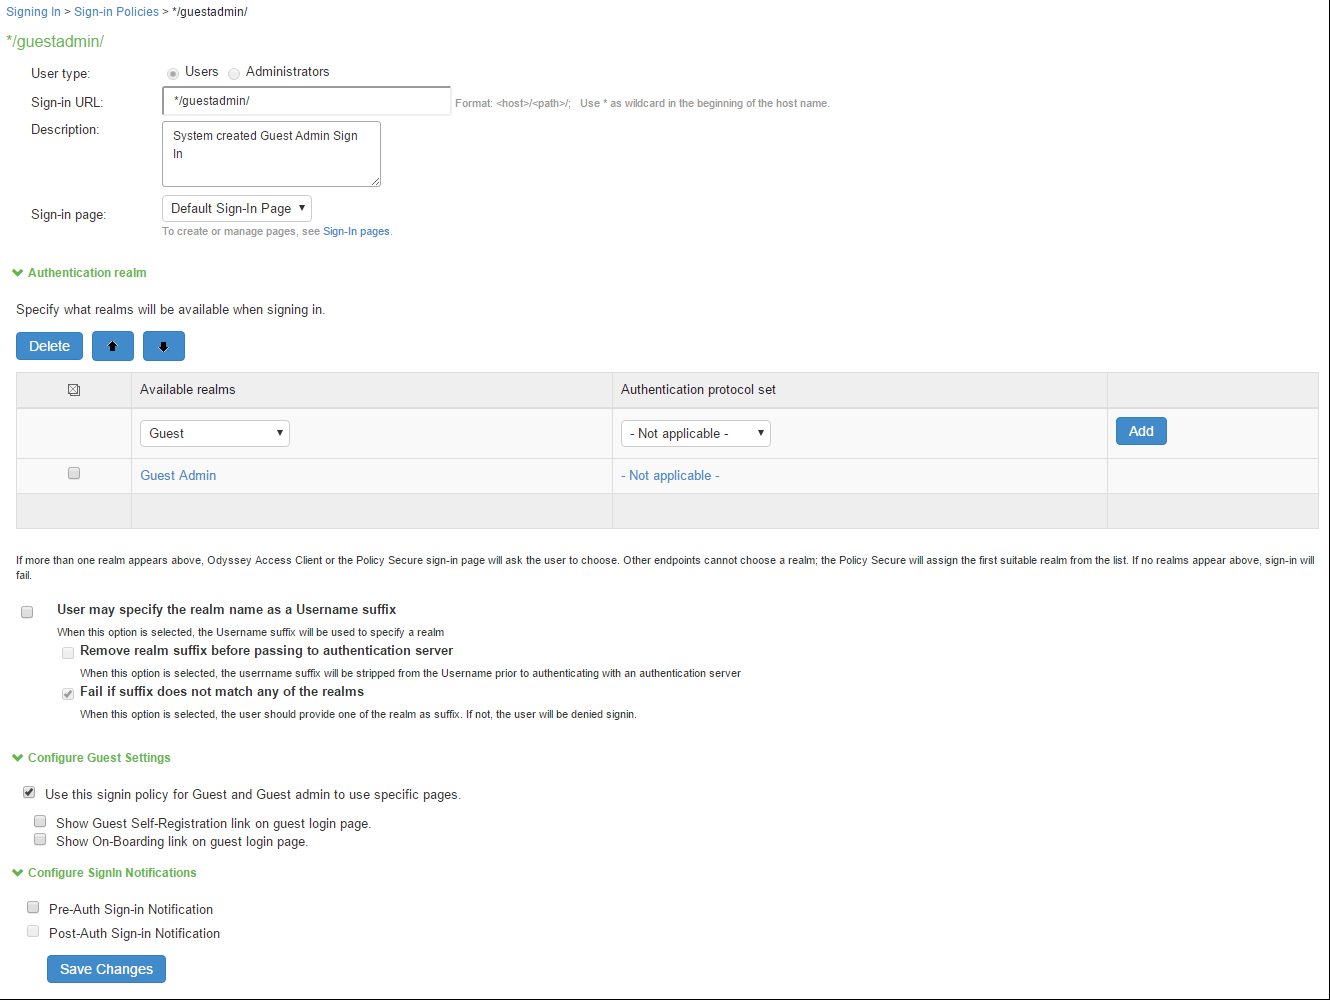
The */guestadmin/, */guest/, and */guestsponsor are the default Sign-in-Polices in IPS. A Sign-in Policy is mapped with a default Authentication Realm.
To view the Sign-in-Polices:
- Select Authentication > Signing In > Sign-in Policies. The Sign-in Policies screen appears.
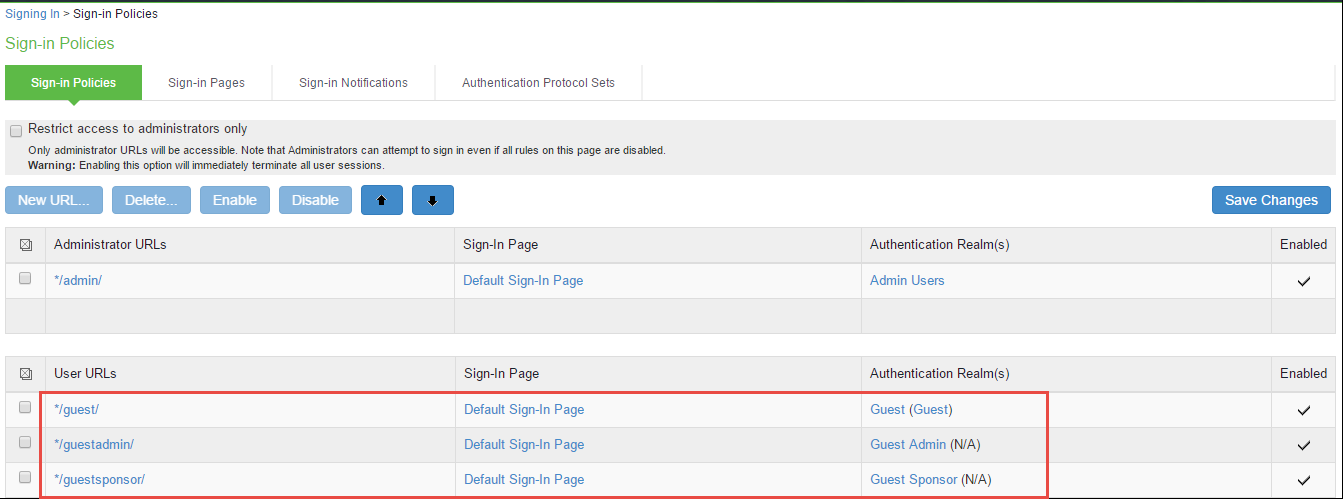
- Click on a Sign-in Policy to view the settings. You can make necessary changes or add realms in a Sign-in Policy and click Save Changes.
User Realms
The Guest, Guest Admin and Guest Sponsor are the default user realms in IPS. A user realm is mapped with a default Role.
For a Guest Admin realm and Guest Sponsor Realm, Administrator must create the role mapping rule for the user name who has rights for creating Guest accounts.
To configure a guest admin realm:
- Select Users > User Realms. The User Authentication Realms screen appears.

- Click on a Guest Authentication Realm to view the settings. The Role Mapping screen of the Realm appears.

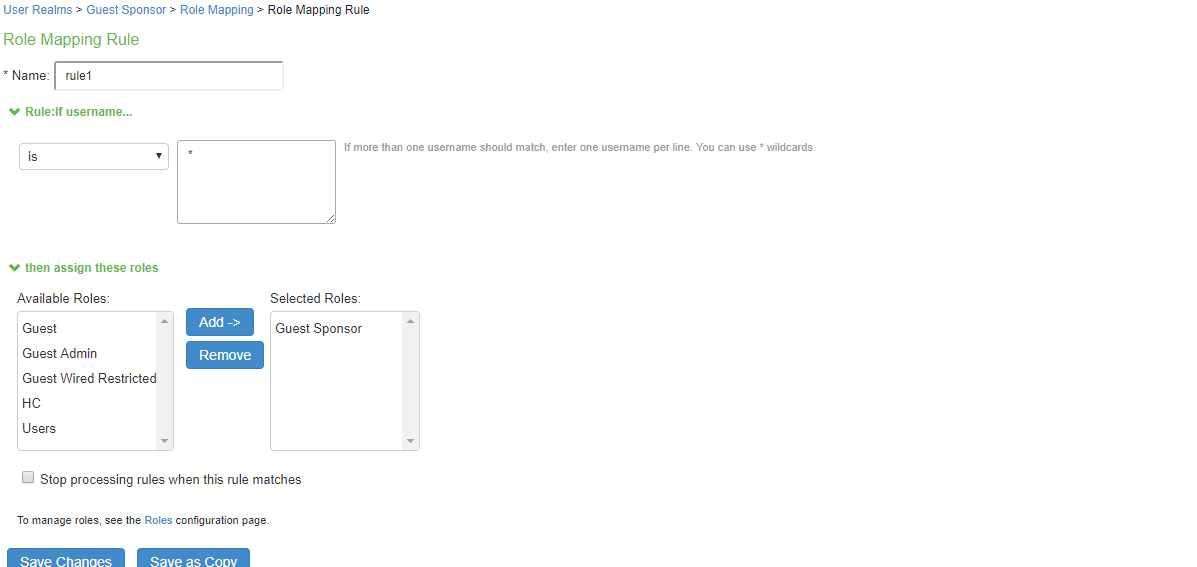
- Click an existing Rule of the Role to view the settings.
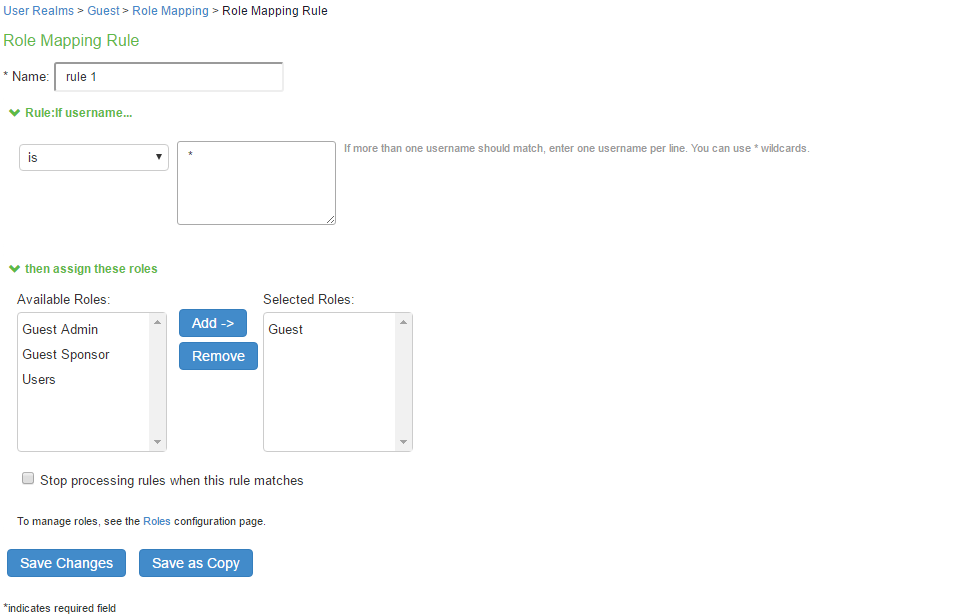
- For Guest Sponsor, Click the Guest Sponsor Realm and specify how to assign the role. Click New Rule to add a new role and then click Save Changes.
- You can make necessary changes and click Save Changes to save the settings.

- Click the General tab to view the settings. The General screen appears.
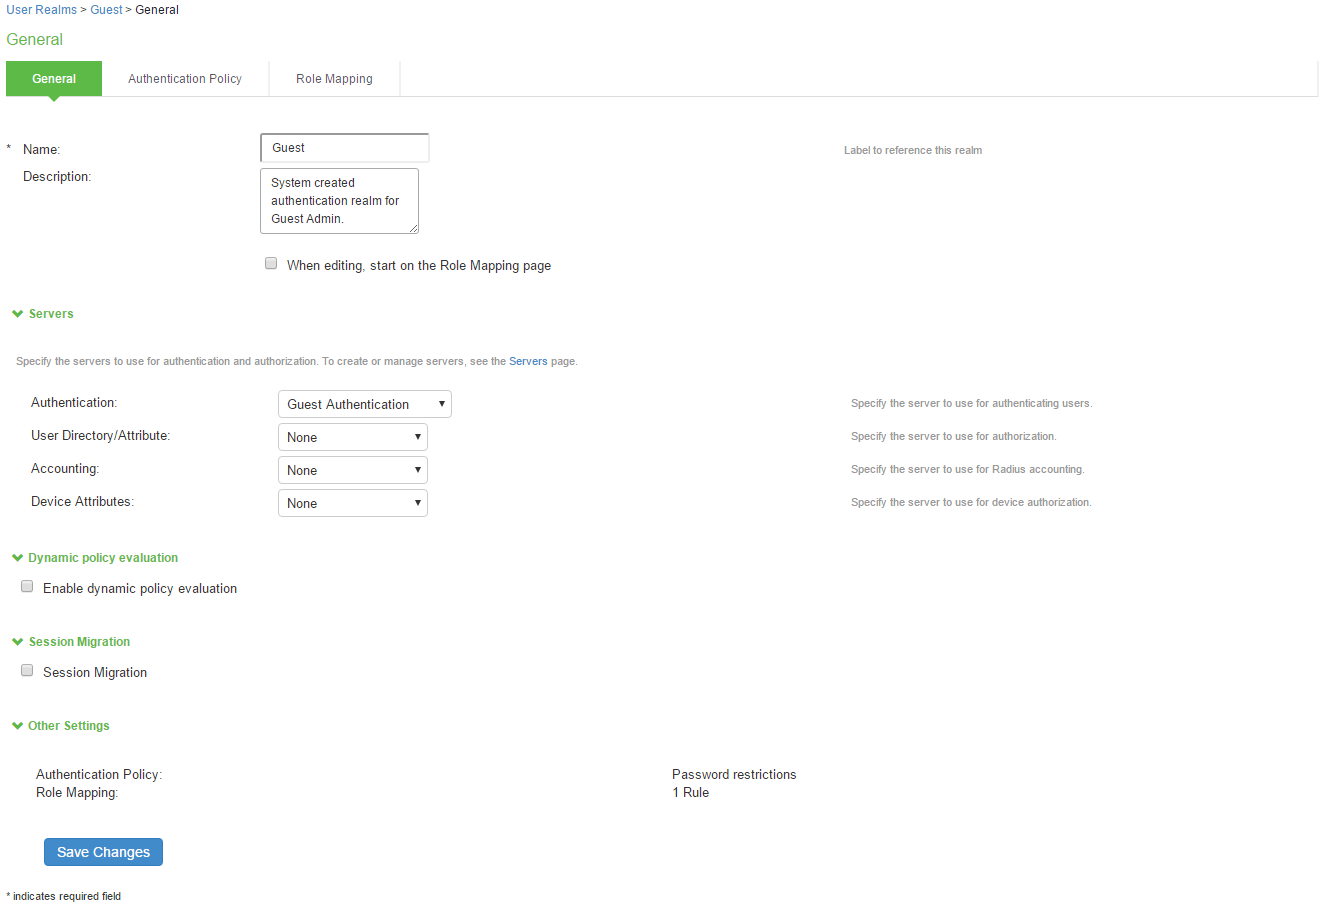
- You can make necessary changes and click Save Changes to save the settings.
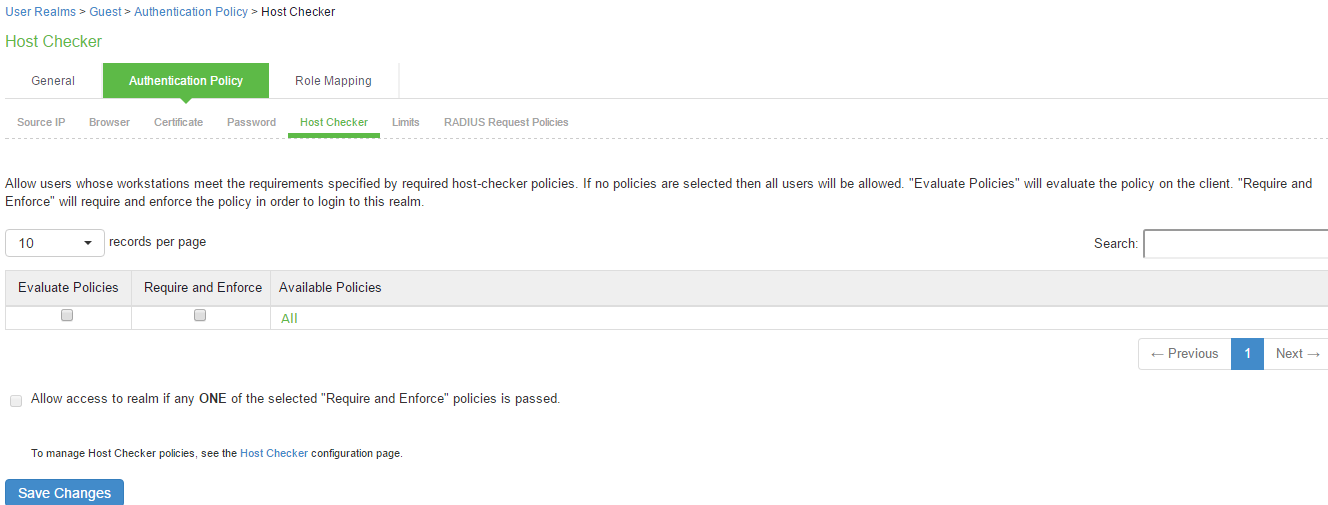
- Click Host Checker. You can make the necessary changes and click Save Changes.
User Roles
The Guest Admin, Guest, and Guest Sponsor are the default user roles in IPS. A user realm is mapped with a default Role.
To view a User Role:
- Select Users > User Roles. The Roles screen appears.
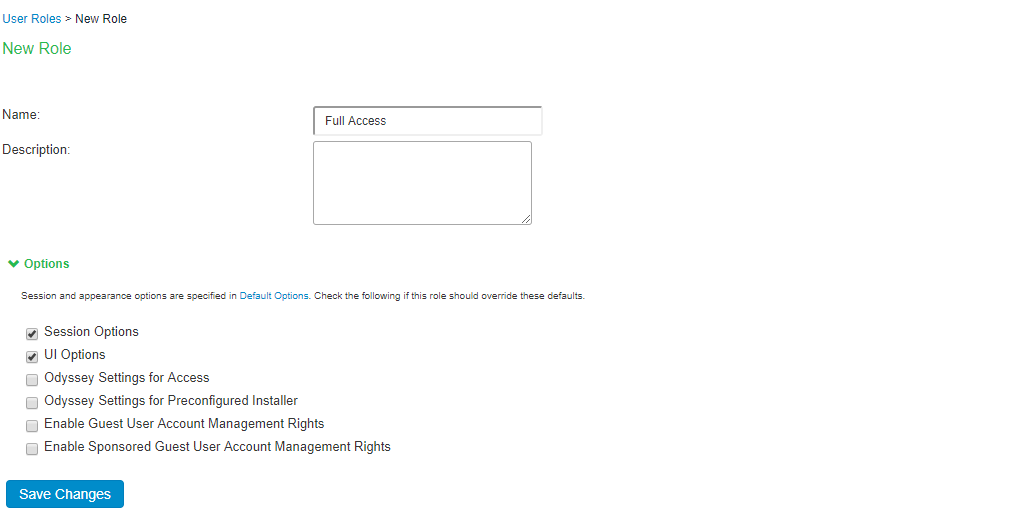
- Click on a default Guest Role to view the settings.
- The General > Overview screen appears. You can make necessary changes and click Save Changes to save the settings.
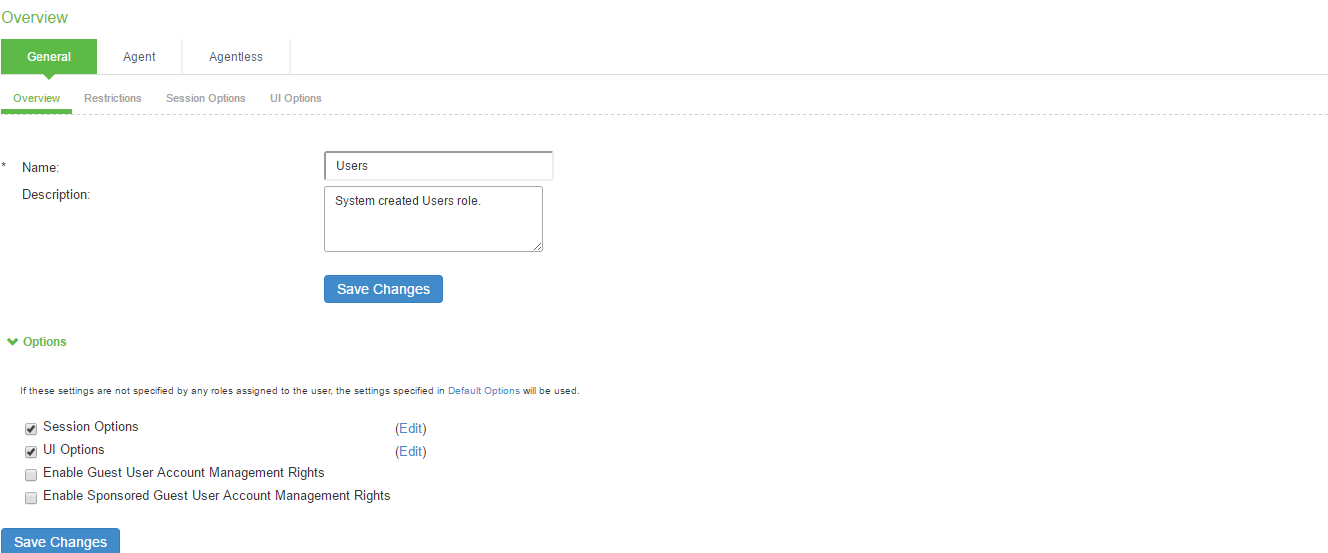
- Click Guest Sponsor in the user role page to view the settings.
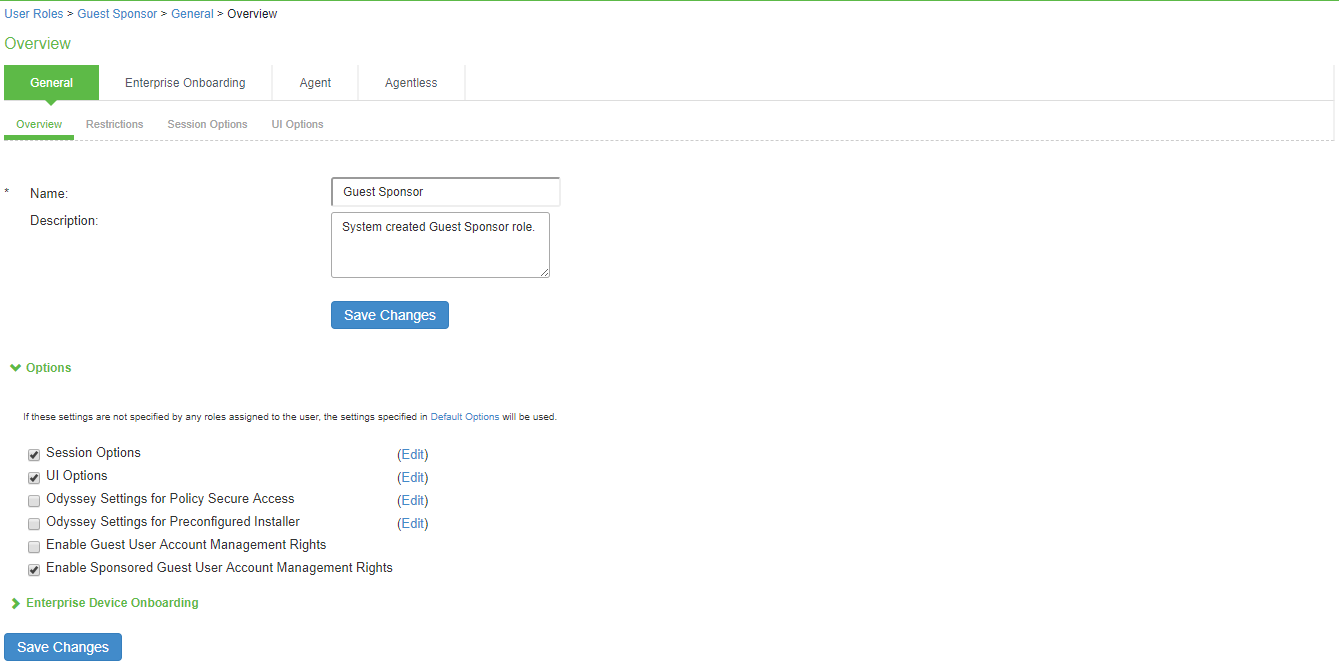
- You can go to other tabs of the User Roles, to view the default settings and make necessary changes.
Location Groups
The ‘Guest’ is the default Location Group configured in IPS. A Location Group is mapped with a default Sign-in Policy and a default Realm.
To view a Location Group:
- Select Endpoint Policy > Network Access > Location Group. The Location Group screen appears.
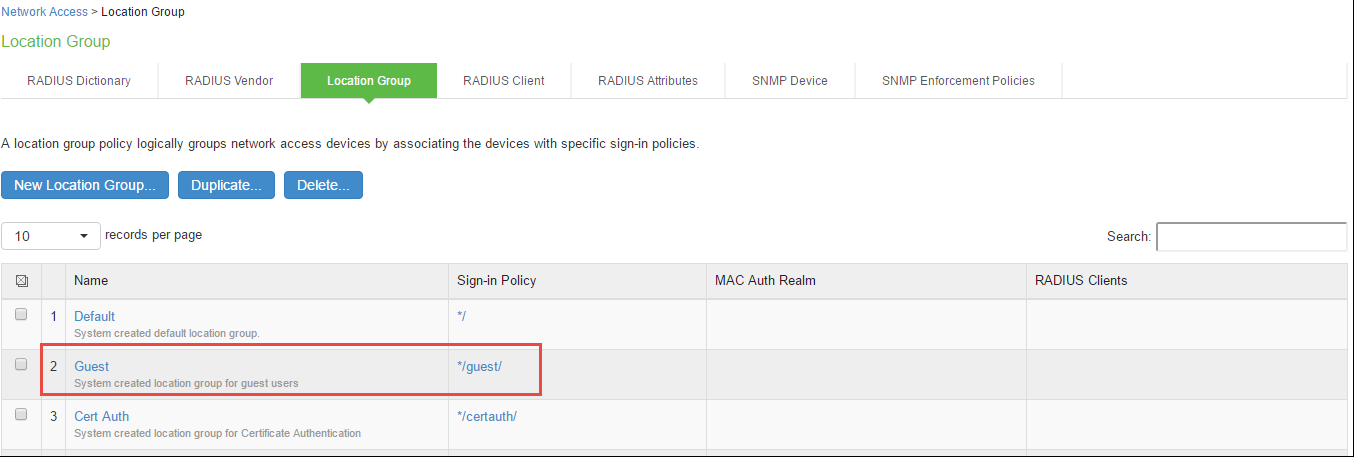
- Click the Location Group to view the settings.

- You can make necessary changes and click Save Changes to save the settings.
Authentication Protocol Set
The ‘Guest’ is the default Authentication Protocol Set configured in IPS.
To view the Authentication Protocol:
- Select Authentication > Signing In > Authentication Protocol Sets. The Authentication Protocol screen appears.
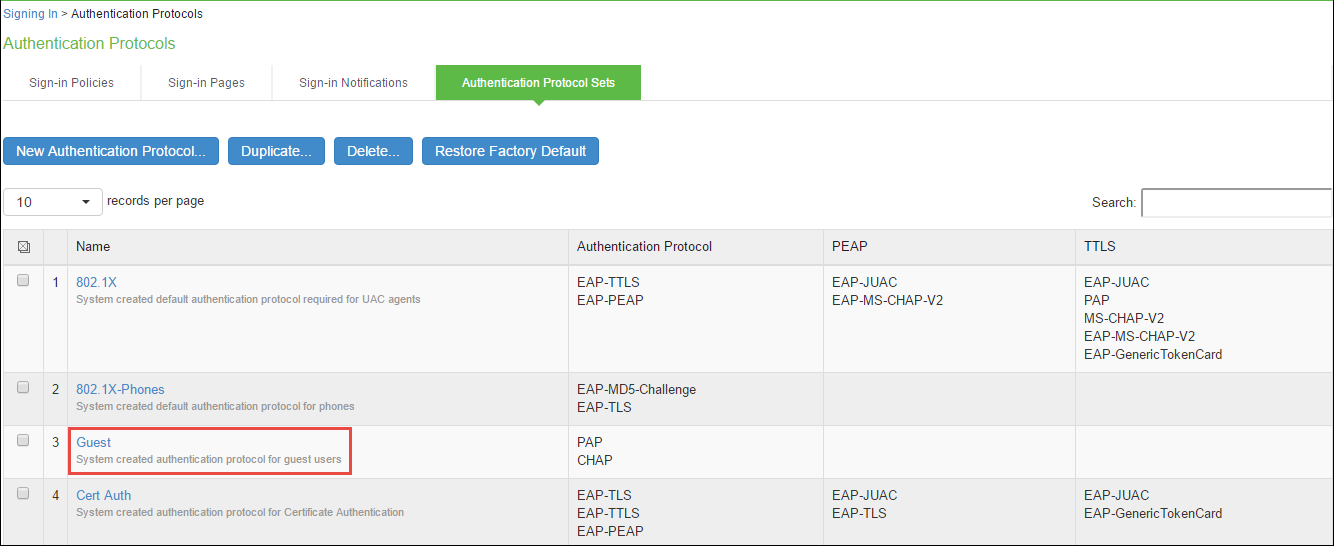
- Click the Authentication Protocol to view the settings.
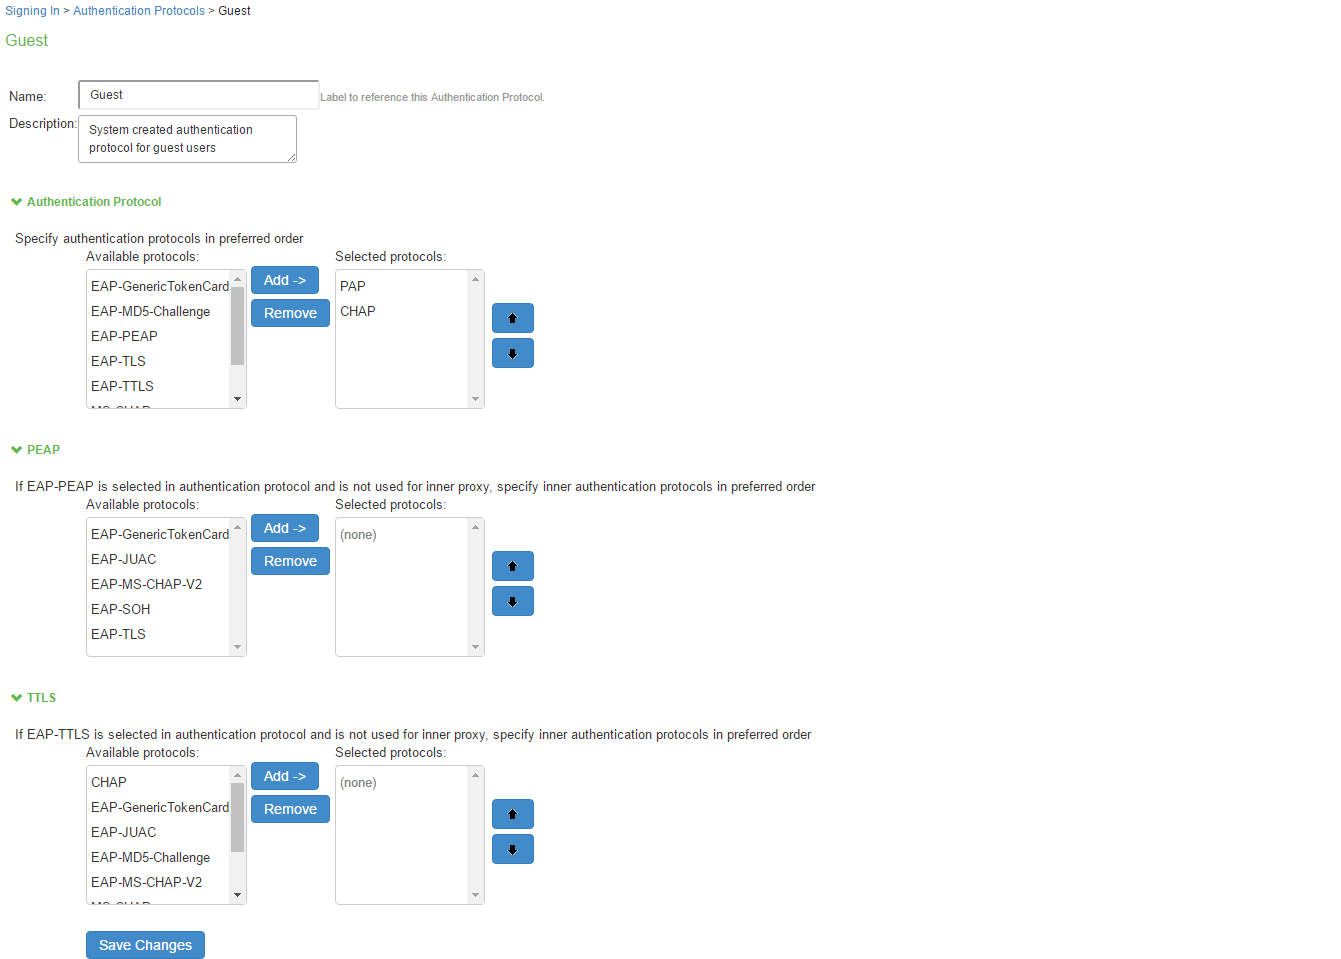
- You can make necessary changes and click Save Changes to save the settings.
Authentication Server
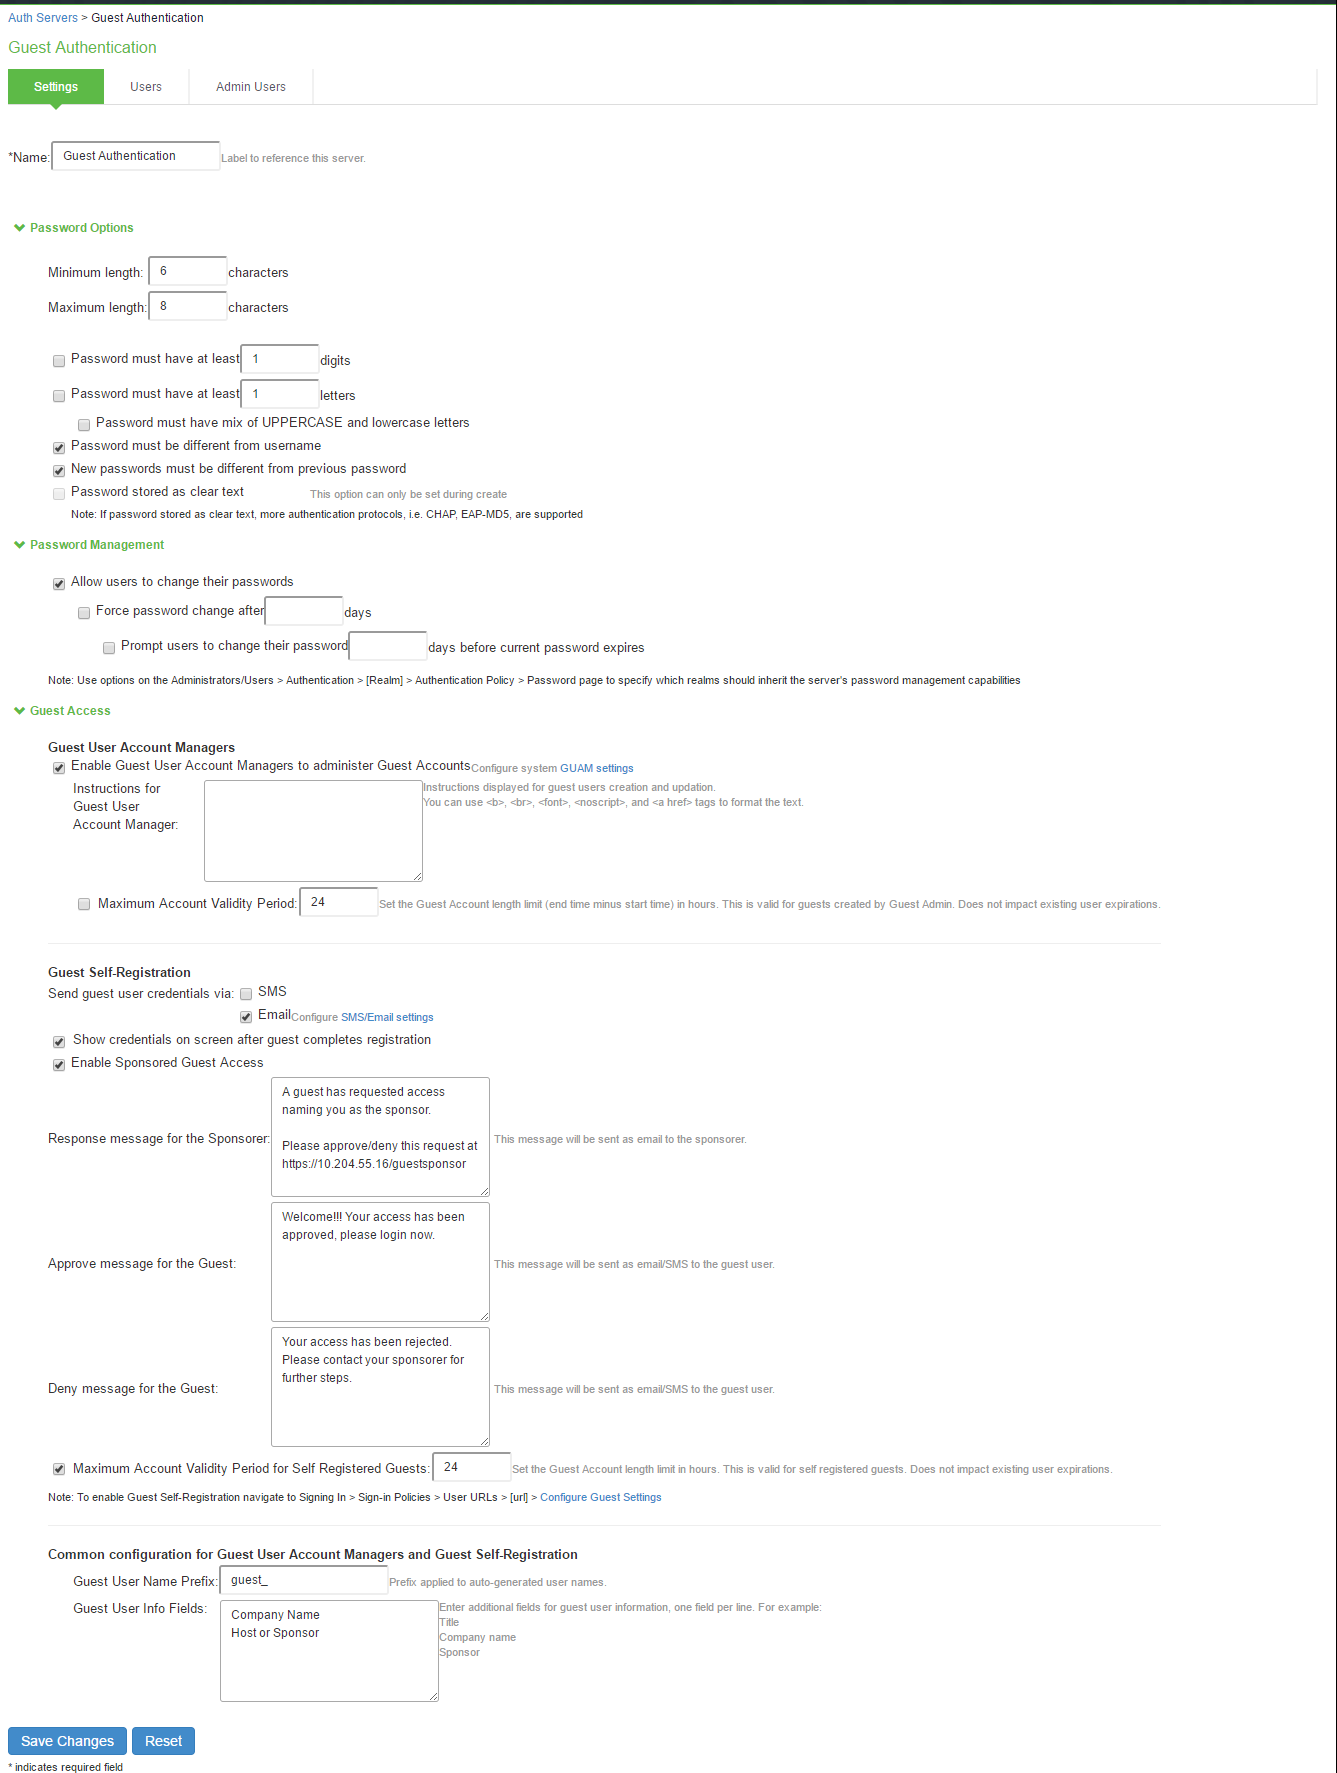
The ‘Guest Authentication and Guest Wired Authentication are the default Authentication Servers configured in IPS.
To view the Authentication Server:
- Select Authentication > Auth. Servers. The Authentication Servers screen appears.

- Click the Guest Authentication server to view the settings.
- The options under the Settings tab appears.
- You can make necessary changes and click Save Changes to save the settings.
- Click the Users tab to view the guest users list. This page displays all the users that are created by guest self-registration option, GUAM, and Sponsorer.

Configuring RADIUS Client on IPS
Ivanti Policy Secure(IPS) is configured with the default settings for RADIUS. You must configure only the RADIUS client and a RADIUS Return Attributes Policy.
To configure RADIUS Client on IPS:
- Select Endpoint Policy > Network Access > RADIUS Client > New RADIUS Client to create a new RADIUS client. The New RADIUS Client screen appears.


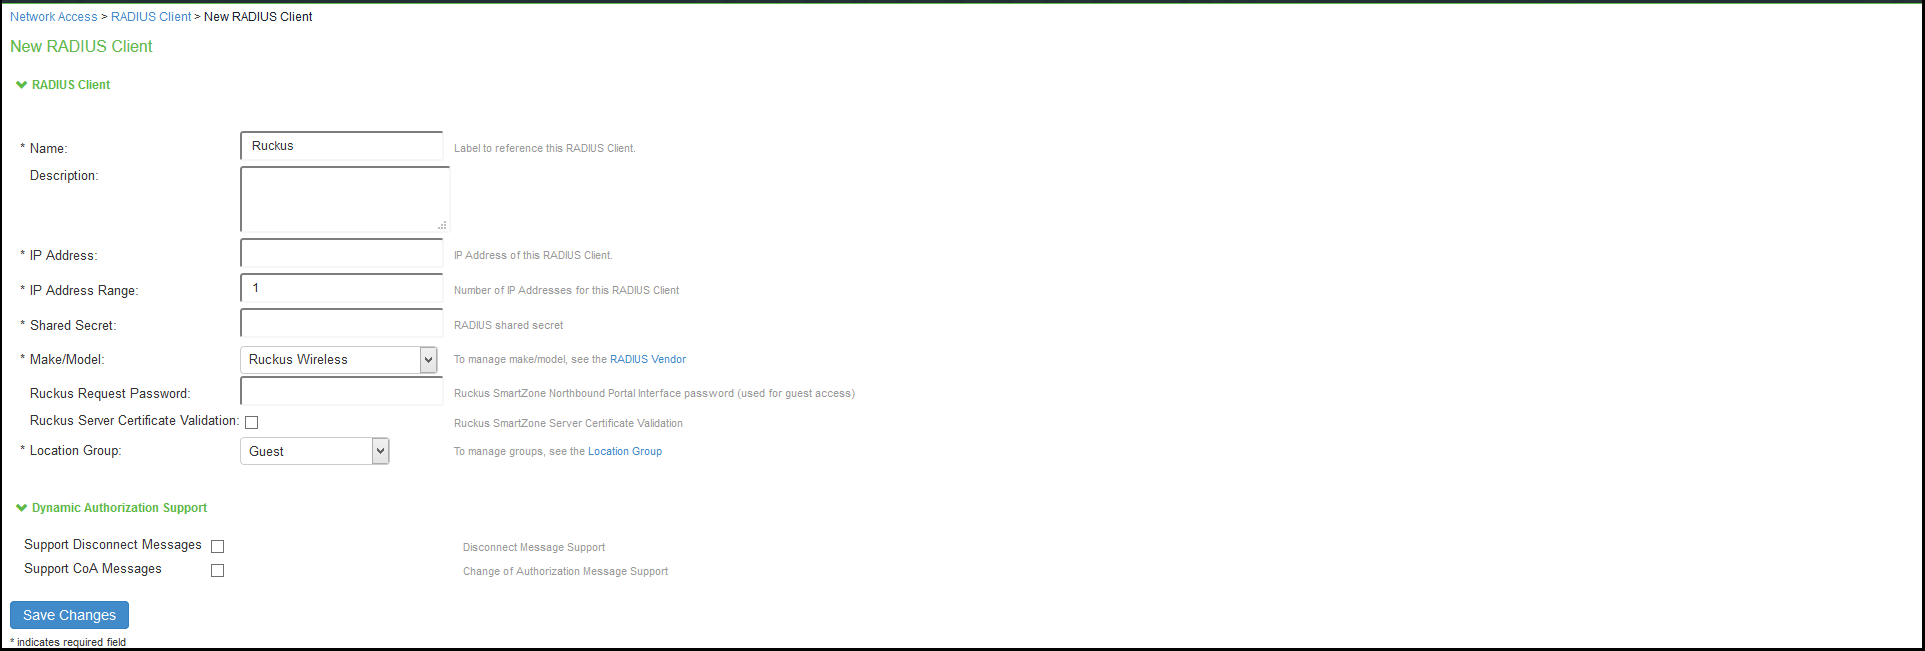
Configure the WLC (For example, Aruba, Cisco, Ruckus) as a RADIUS client and map with the default location group.
You can enable Ruckus Server Certificate Validation option to validate the device certificate. See Verifying Device Certificates for understanding the validation procedure.
- Click Save Changes to save the settings.
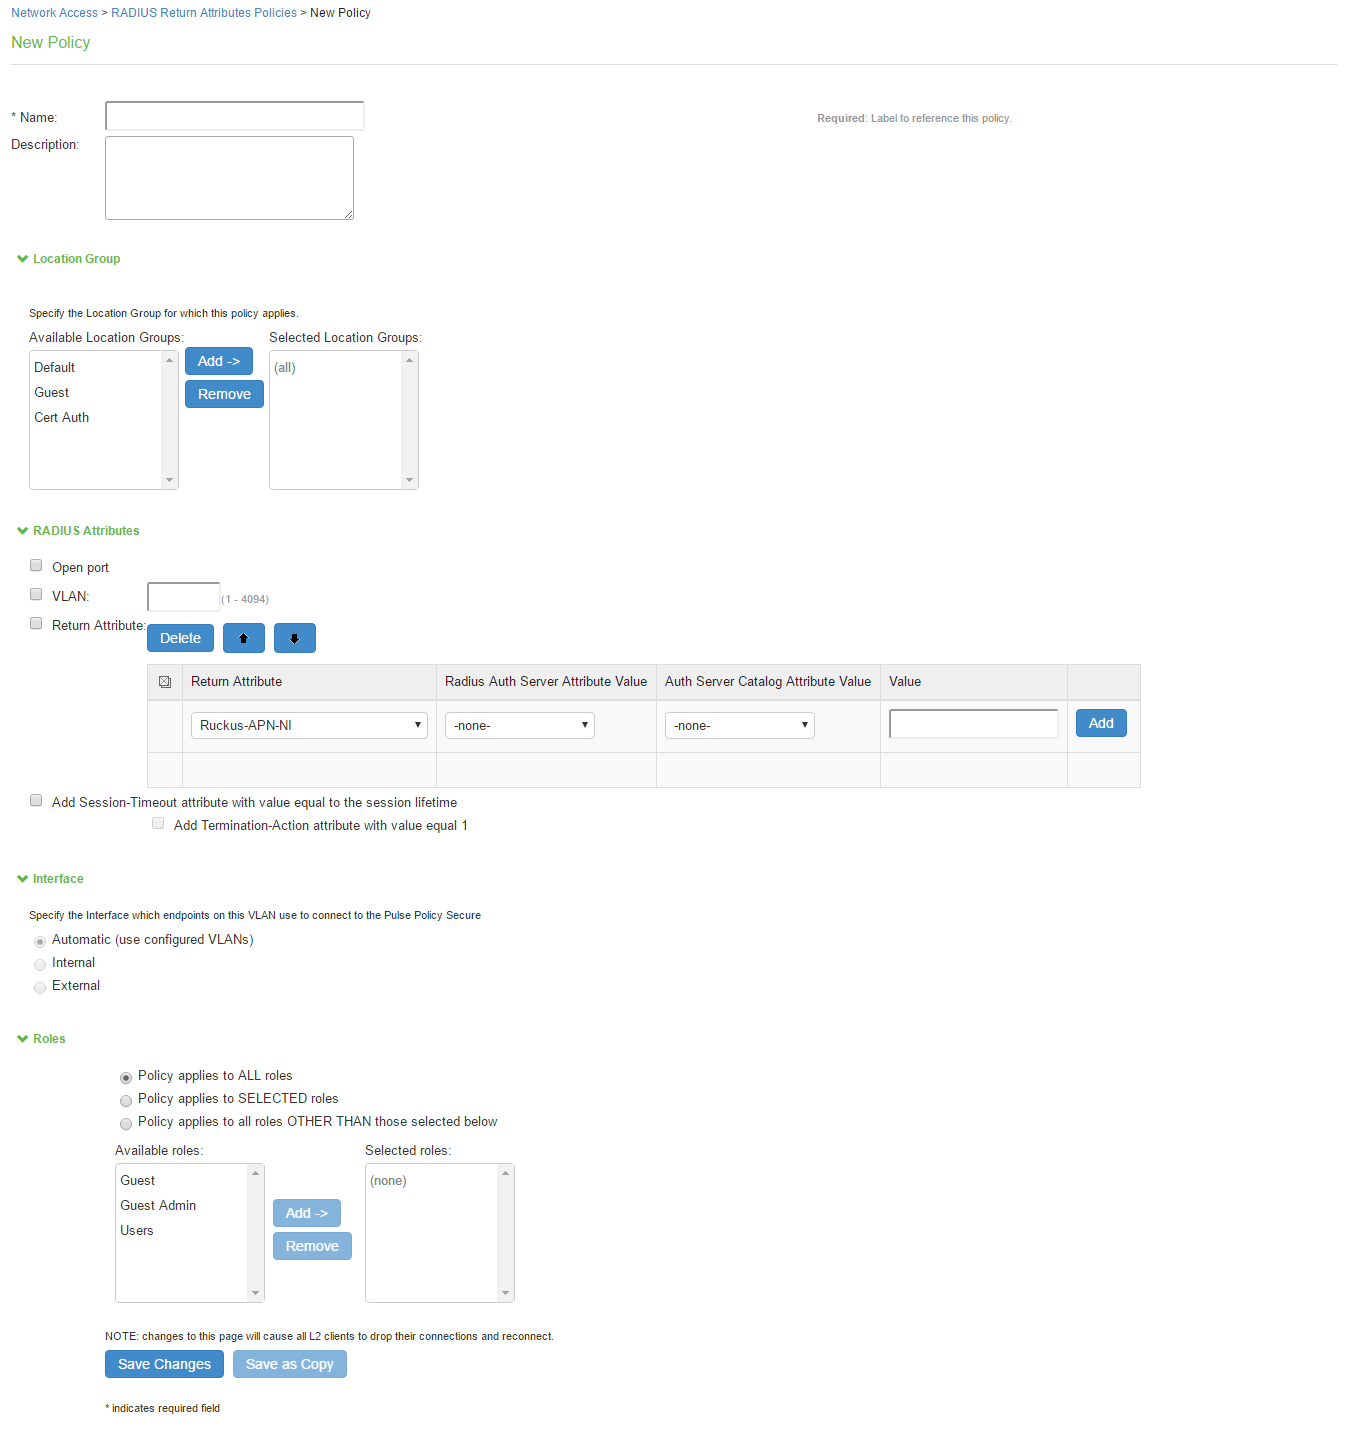
- Select Endpoint Policy > Network Access > RADIUS Attributes > Return Attributes > New Policy to create a new RADIUS Return Attribute policy.
- Map with the default location group. Configure other return attributes and session-timeout attributes as required.
- Click Save Changes to save the Return Attribute Policy.
Configuring SMTP and SMS gateway settings on IPS
The SMTP and SMS configuration settings must be configured to enable guest users to create user accounts on their own.
SMTP Settings for Guest User Accounts
To configure the SMTP settings:
- Select System > Configuration > Guest Access > SMTP Settings. The SMTP Settings screen appears.
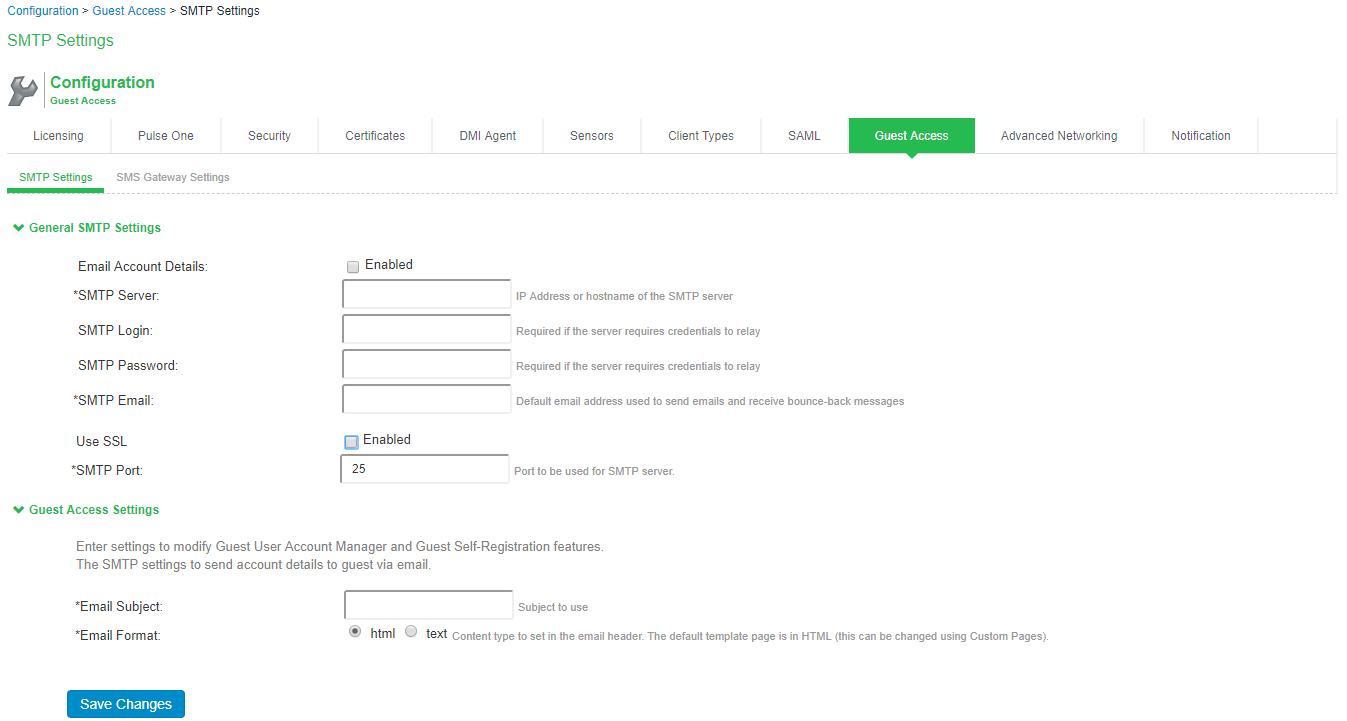
- Under General SMTP settings:
- Enter the host name or IP address of the SMTP server.
- Enter the SMTP login name.
- Enter the SMTP password.
- Enter the SMTP email address.
- The Use SSL option supports the SMTP port 587.
- Under Guest Access Settings:
- Enter the email subject.
- Select the email format- html, text.
- Click Save Changes.
SMS Gateway Settings for Guest User Accounts
Short Message Service (SMS) is delivered through an SMS gateway service that supports HTTP, HTTPS, and SMTP (Simple Mail Transport Protocol) delivery. You need to subscribe to an external service to be able to deliver guest details using SMS. The SMS gateway sends SMS in formatted text message using HTTP/HTTPS interface (SMS message) and can also allow email message to be sent as an SMS. An example of an SMS gateway is clickatell.com. You should have a valid account with this third party.
To create an account with Clickatell:
- Go to http://www.clickatell.com/products/sms_gateway.php, and choose the appropriate API sub-product (connection method) you wish to use.
- Click on the registration hyperlink.
- Select the Account type you would like to use (Local or International).
- Enter your personal information to complete the registration form.
- Accept the Terms & Conditions.
- Click Continue - An email containing your log in details such as account log in name, password, and clientID will be sent to the email address you have provided.
- Activate your account – When user has logged in, and user will be on the Clickatell Central landing page and HTTP API will be added to the account and client API ID will be issued to the account. A single account may have multiple API IDs associated with it.
Ivanti Policy Secure(IPS) integration with Clickatell
To enable the SMS gateway settings for Clickatell:
- Select System > Configuration > Guest Access > SMS Gateway Settings. The SMS Gateway Settings screen appears.
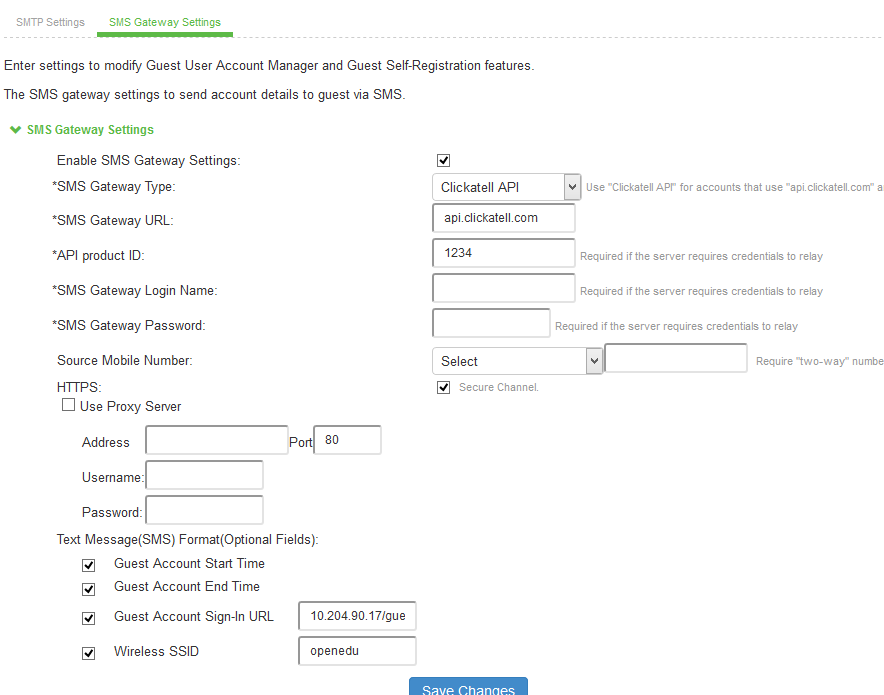
- Select the Enable SMS Gateway Settings check box.
- Complete the configuration settings as described in table.
- Click Save Changes.
- Select the Country and enter the mobile number. Click Send Test SMS.
|
Settings |
Guidelines |
|---|---|
|
SMS Gateway Settings |
|
|
SMS Gateway Type |
Select the gateway type: Clickatell Platform- Select this option to send SMS as a text message. Use “Clickatell Platform" for accounts that use "platform.clickatell.com" as gateway. Clickatell API– Select this option to send SMS as a text message. Use "Clickatell API" for accounts that use "api.clickatell.com" as gateway. Clickatell Email2SMS – Select this option to use email format as an SMS using SMTP. |
|
API product ID |
Specify the API product ID that you received from Clickatell during account creation. |
|
SMS Gateway Login Name |
Specify the SMS gateway login name. |
|
SMS Gateway Login password |
Specify the SMS gateway login password. |
|
Text Message (SMS) Format |
(Optional) Select the following fields: Guest Account Start Time Guest Account End Time Guest Account Sign-in URL Wireless SSID |
|
The following options apply if you select Clickatell Platform as gateway type. |
|
|
SMS Gateway URL |
Specify the SMS Gateway URL. (Default) https://api.clickatell.com or http://api.clickatell.com |
|
HTTPS |
Select this option to use a secure connection. If you don't select this option user will be notified about clear text transmission of guest user credentials. |
|
Use Proxy Server |
Select this option to access the internet or SMS gateway URL using a proxy server. |
|
Address |
Specify the address of the proxy server and its port. |
|
Username |
Specify the username of the proxy server. |
|
Password |
Specify the password of the proxy server. |
|
Send Test SMS |
|
|
Mobile Number |
Select the country name and then specify a valid phone number of the guest user. The phone number should not include country code or any special character such as +,*, and so on. The IPS sends a test SMS with the login credentials to this mobile number through SMS. |
|
Source Mobile Number |
Specify the sender ID configured in Clickatell Account |
Ivanti Policy Secure(IPS) integration with EasiSMS
Ivanti Policy Secure(IPS) integrates with EasiSMS through the SMTP server. EasiSMS uses an email format to send SMS to end user mobile phones.
Ensure SMTP server is configured to use the EasiSMS feature.
To configure the SMS gateway settings for EasiSMS on IPS:
- Select System > Configuration > Guest Access > SMS Gateway Settings.
- The SMS Gateway Settings screen appears.
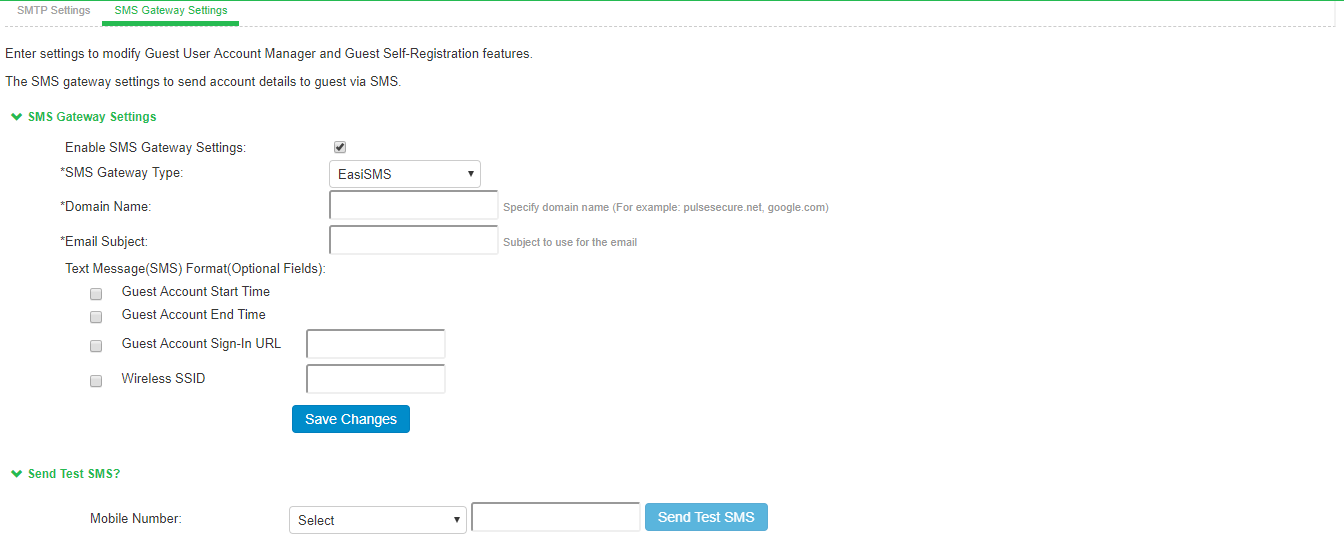
- Select Enable SMS Gateway Settings check box.
- Select the SMS Gateway Type as EasiSMS.
- Enter the Domain Name provided by EasiSMS.
- Enter the unique ID in Email Subject provided by EasiSMS.
- Optionally configure Text Message Format.
- Click Save Changes.
When a guest user registers on the guest portal, the user receives an SMS with the login credentials that allows the user to access the resources.
Configuring Guest Access Settings on IPS
To configure guest access settings on IPS:
- Select Authentication > Auth. Servers > System Local > Settings.
-
Under Guest Access Configurations:
- Select the check box Enable Guest User Account Managers to administer Guest Accounts.
- Under the Guest Self-Registration select
Send guest user credentials via- SMS
- Click the SMS/Email settings link and do the necessary settings.
- Show credentials on screen after guest completes registration
- Maximum Account Validity Period for Self Registered Guest – Default is 24 hours. You can change this as per the requirement.
- For Sponsored Guest Access, select Enable Sponsored Guest Access.
Self-Registration is supported only with WLC deployment.
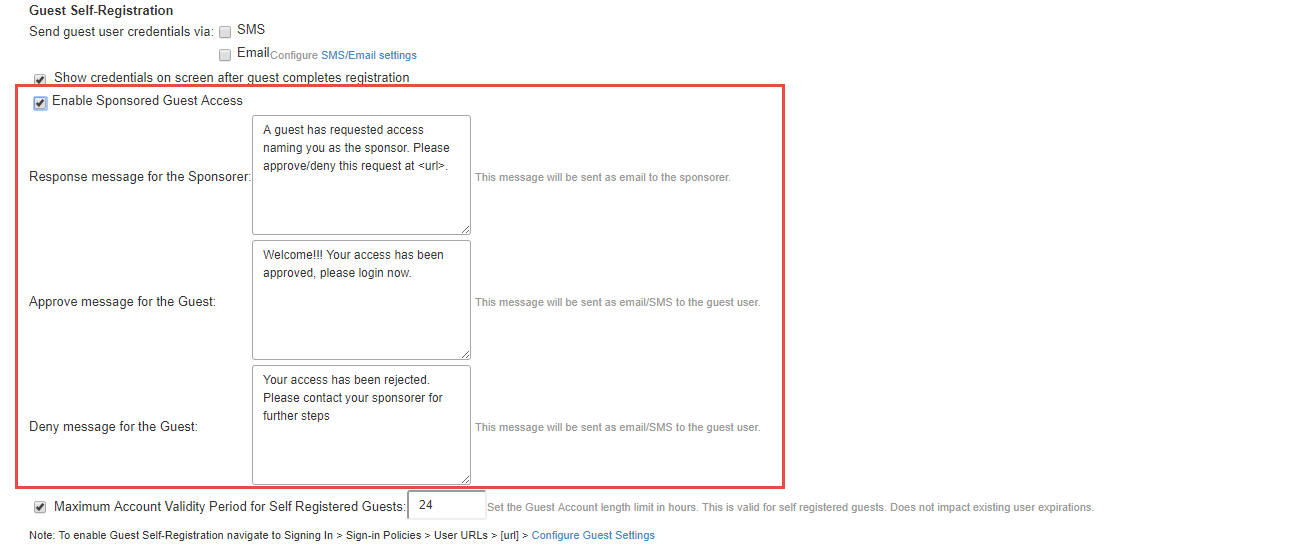
- Select Authentication >Signing In >Sign-In Policies.
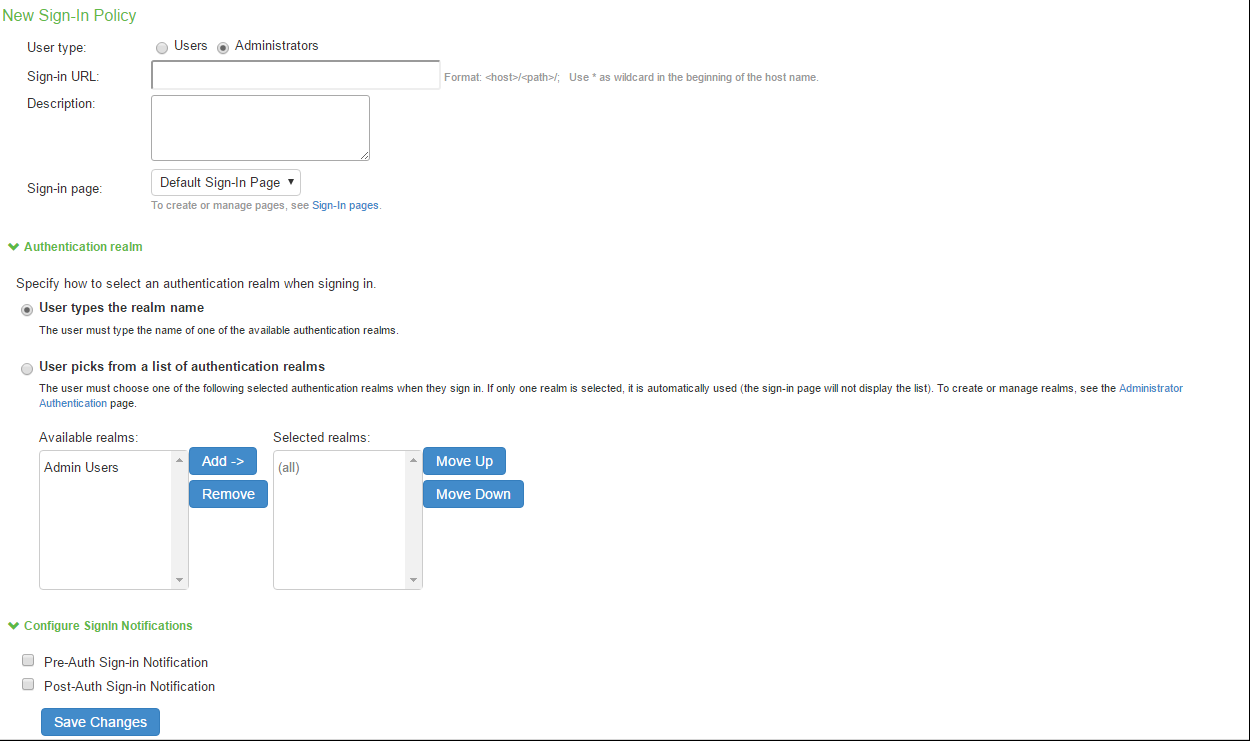
- Select the sign-in policy that is created earlier.
Under Configure Guest settings select the check boxes:- Use this sign-in policy for Guest and Guest admin to use specific pages
- Show Guest Self Registration link on the guest log in page.
- The Register as Guest link appears on the guest log in page.