Configuring Sign-In Notifications
With sign-in notifications, you can create and configure detailed notification messages that appear for Ivanti Secure Access Client and for agentless access endpoints when the user attempts to sign in. For example, you can configure a notification message that explains terms of use, company-specific policies, a welcome page, an end user license agreement (EULA), or a message of the day.
For a browser-based (agentless) log in, the notification message appears in a separate page either before (pre-auth) or after (post-auth) user authentication during the sign-in process. For a Ivanti Secure Access Client log in, the notification messages appear in a message box. The user is expected to read the content of the sign-in notification message and acknowledge by clicking a Proceed button. The user may indicate disagreement by clicking a Decline button, which ends the log in attempt.
You can configure a sign-in policy to use a sign-in notification either as pre-auth or post-auth (or both). In the case of post-auth configuration, you can either use a common message for all roles or use separate messages for each role.
You can create a multi-language sign-in notification package that relies on the language setting of the endpoint. You can customize the sign-in notification page appearance for browser-based log ins by modifying the related fields in a sign-in page in the Admin UI or by using a custom sign-in page.
Configuring and Implementing Sign-In Notifications
Sign-in notifications appear for Ivanti Secure Access Client and for browser-based logins when the user attempts to sign in.
To configure and implement sign-in notifications:
- Select Authentication > Signing In > Sign-in Notifications.
- Click New Notification.
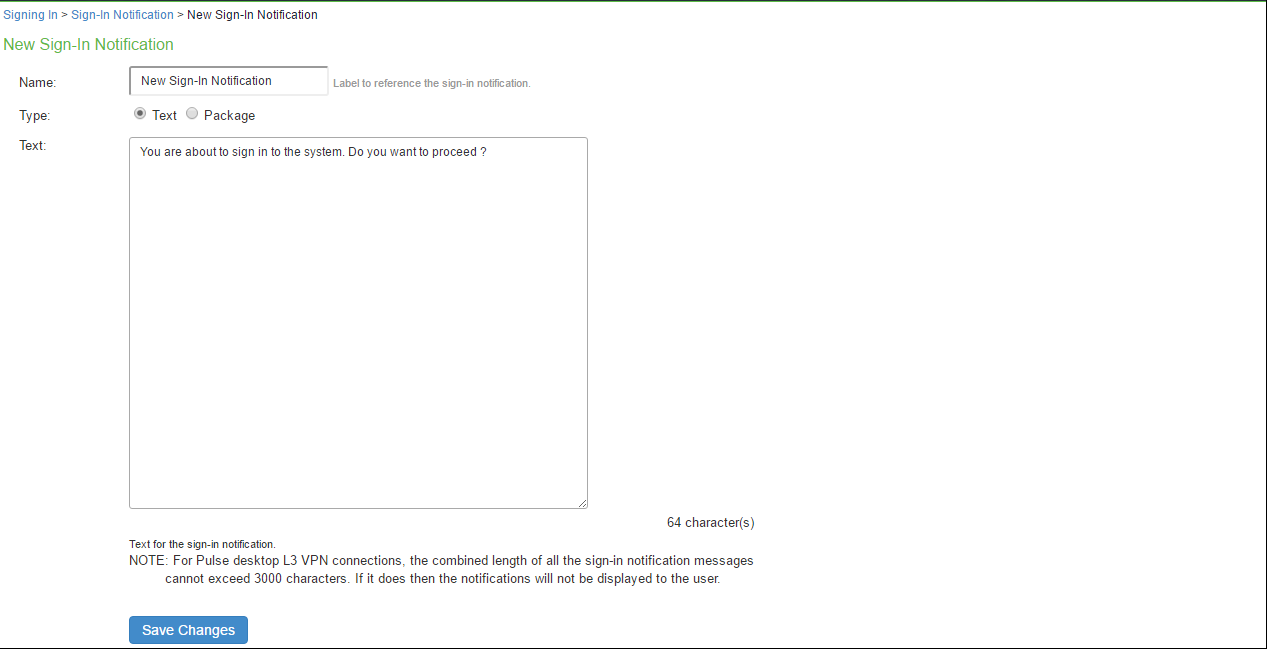
- Specify a Name for the notification. This name appears in the sign-in policies page, and in the UI Options page for a selected role.
- Select Text or Package.
- If you select Text, type the desired sign-in notification message, or copy and paste the relevant text into the Text field.
- If you select Package, click the Browse button and navigate to a previously prepared .zip file. A package is typically used to provide different language versions of the notification message.
- The zip file should include a default.txt file and one or more <language>.txt files (Example: en.txt).
- Language-abbreviations should be strings that can appear in Accept-Language header of an HTTP request.
- The character encoding supported is UTF-tly.
- Click Save Changes. To enable sign-in notifications:
- Click Authentication > Signing In > Sign-in Policies.
- Under Configure Sign-in Notifications, select the check box for Pre-Auth Sign-in Notification, Post-Auth Sign-in Notification, or both.
- After Pre-Auth Sign-in Notification, select a previously configured sign-in notification from the drop-down menu.
- After Post-Auth Sign-in Notification, select the option for Use a common Sign-in Notification for all roles or Use the Sign-in Notification associated to the assigned role.
- If you select Use a common Sign-in Notification for all roles, select a previously configured sign-in notification from the drop-down menu.
- If you select Use the Sign-in Notification associated to the assigned role, the sign-in notification configured for the assigned role will be used.
- Prevent the Post-Auth sign-in notification from being displayed to users who have seen it before, by selecting the Skip if already shown check box. (This is only a hint to the system and might not be honored in all environments.)
- Click Save Changes.
- You can customize the appearance of the sign-in notification message by selecting Authentication > Signing In > Sign-in Pages and creating a sign-in page or using an existing page.
- Under Sign-in Notification appearance, customize UI options for Pre-Auth Notifications and Post-Auth Notifications by changing the following items:
- For Notification Title enter the text that appears at the top of the sign-in notification page.
- In the Proceed Button box, enter the text for the button that the user clicks to proceed with the sign-in. This text applies to browser-based log ins only. A Ivanti Secure Access Client log in always displays Proceed.
- Optionally, clear the check box for Display “Decline” Button. If this box is not checked, the user does not have the option to decline.
- In the Decline Button box, enter the text for the button that the user clicks to decline.
- This text applies to browser-based log ins only. A Ivanti Secure Access Client log in always displays Decline.
- In the Message on Decline box, enter the text that you would like to appear when a user clicks the Decline button.
- Click Save Changes.
If you enabled Use the Sign-in Notification associated to the assigned role you must complete the implementation by selecting the sign-in notification on the Users > User Roles > Role Name > General > UI Options page or Administrators > Admin Roles > Role Name > General > UI Options page, as applicable.
If more than one role is available to a user, the sign-in notification associated with the first role assigned is displayed.
- Add the sign-in page in which you have customized the sign-in notification appearance to the sign-in policy.