Licensing
Introduction
Ivanti Policy Secure is a licensed software and the licenses can be downloaded from Software Download Center @ https://my.pulsesecure.net. The licenses can be applied directly on the IPS or can be leased from the License Server.
Alternatively, you can install and manage licenses directly on each device and eliminate the license server entirely. Your company’s needs and requirements dictate which configuration is best for you.
•User Core License are introduced for ISA devices. Concurrent user will reset to two users, if core license is not installed or leased.
•22.1R1 and later release supports License server and can lease license to 22.x and 9.x clients.
The following list shows the significant changes in IPS 22.x compared to IPS 9.x:
•Introduction of IPS SKUs
•Does not support PSA-specific concurrent user licenses
•Core licenses and V-FED are not required for upgrading and creating clusters
•Supports existing Feature licenses, excluding the deprecated features (see the section Features not Supported)
•Install licenses directly on the Standalone IPS Gateway.
•GW Licensing mode
•IPS 22.x supports the following platforms:
|
ISA Model Name |
vCPUs |
Memory |
Max Concurrent Users |
|---|---|---|---|
|
ISA4000-V |
4 |
8GB |
500 |
|
ISA6000-V |
8 |
16GB |
10,000 |
|
ISA8000-V |
12 |
32GB |
50,000 for VMware |
End User License Agreement (EULA) acceptance is mandatory, and you are entitled to use the features of the software that you have licensed within the limits of your Proof of Entitlement. Contact your sales representative for more information.
Gateway Licensing
The IPS Gateway supports new IPS SKU's. The following table lists the few sample IPS SKUs:
|
SKU |
Example |
|---|---|
|
IPS Perpetual |
IPS-ADD-1000U |
|
IPS Subscription |
IPS-SVC-GLD-2000U-1YR IPS-SVC-PLN-1000U-1YR IPS-PAR-GLD-1000U-1YR IPS-PAR-PLN-1000U-1YR |
|
Eval License |
IPS-EVAL-2W |
|
ICE License |
ISA4K-ICE-GLD-1YR ISA6K-ICE-GLD-1YR ISA4K-ICE-PLN-1YR ISA6K-ICE-PLN-1YR |
Obtaining and Installing License Keys
You can install licenses directly on the IPS Gateway by obtaining authentication code via email and then download and install licenses.
•Installing licenses on a Standalone Gateway
•Configuring the IPS VM as a License Client
Installing License on a Standalone Gateway
An admin obtains an authentication code for his entitlement externally via e-mail.
To obtain license keys:
1.Go to System > Configuration > Download Licenses.
2.Under On demand license downloads, enter the authentication code in the text box.
3.Click on Download and Install.
4.Now, go to the License Summary tab to view a list of licenses installed.
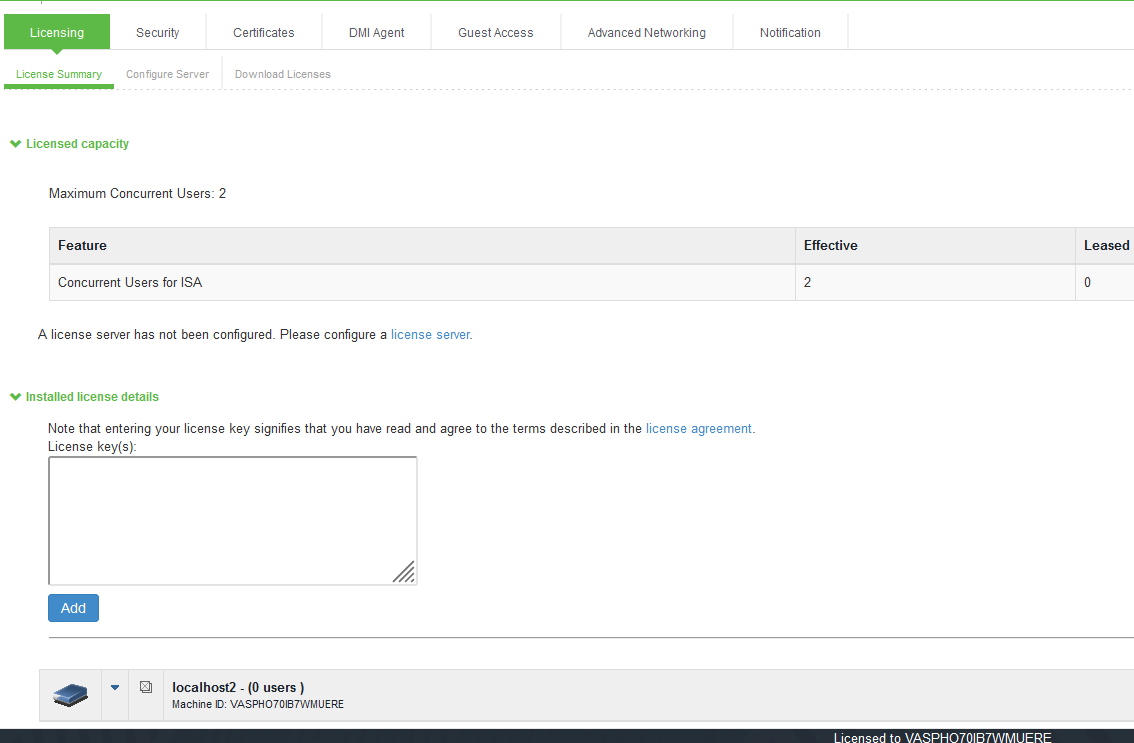
5.To delete one or more licenses, select the corresponding check box(es) and click Delete.
Configuring IPS VM as a License Client
You can configure an IPS VM as a license client. As a prerequisite, you need ICS 9.1R13.1 License Server and above releases. You can also use 21.x and above releases for leasing licenses to clients.
To configure an IPS VM as a license client:
1.In the admin console of the license server, choose System > Configuration > Licensing > Configure Clients.
2.Click New Client.
3.Enter the Client ID. The ID is defined on the client Gateway under System > Configuration > Licensing > Configure Server.
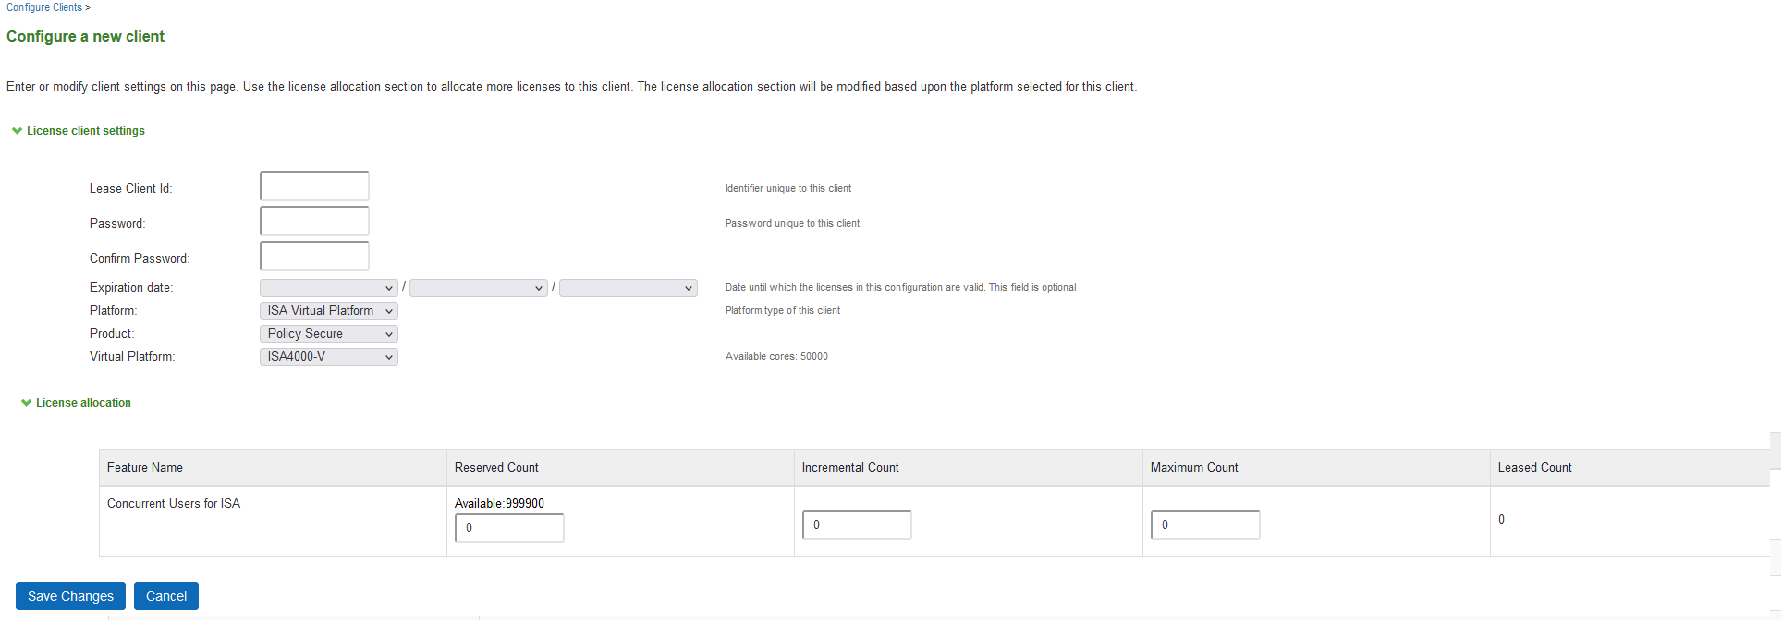
4.Enter the client password and confirm it. The password is defined on the client Gateway under System > Configuration > Licensing > Configure Server.
5.(optional) Enter the client configuration Expiration date.
6.Select the client’s platform as ISA Virtual Platform.
7.Select the product type to be configured to Policy Secure.
8.Select the Virtual Platform from the drop-down list for configuring ,example ISA4000-V
9.For each feature you want to lease to this client, enter:
•Reserved Count— the number of licenses to reserve for this client. The reserve count must be less than the available amount displayed.
•Incremental Count— the incremental number of licenses to grant when the client requests more licenses. If the number of licenses on the client plus this incremental value is greater than the maximum count, no additional licenses are granted.
•Maximum Count— the maximum number of licenses a client can receive for this feature. This value must be equal to or greater than the reserved count. Available counts are updated as you configure the client.
10.Click Save Changes.
The License clients table displays the client information you entered.
Configuring a License Server
This section describes the steps to install and lease cores to license clients from license server.
1.Navigate to System > Configuration > License Summary page and install SKU on license server. Installing SKUs will also enable license server functionality on ISA License Server. No separate license server license is needed.
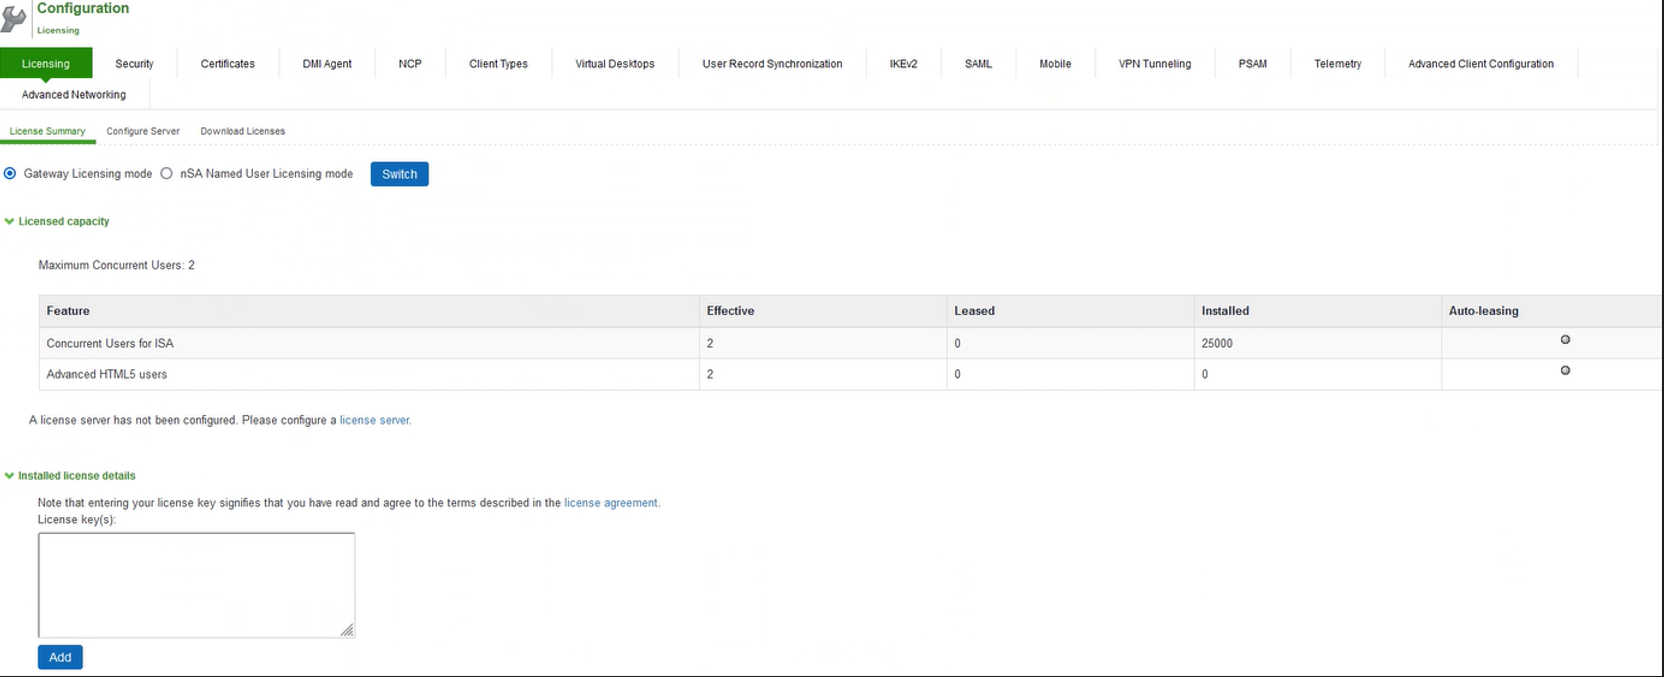
The following figure depicts the concurrent user on License Server before leasing Cores. You see that concurrent user is reset to two users, if core license is not installed or leased.
The following figure depicts the Platform page on License Client before leasing Cores
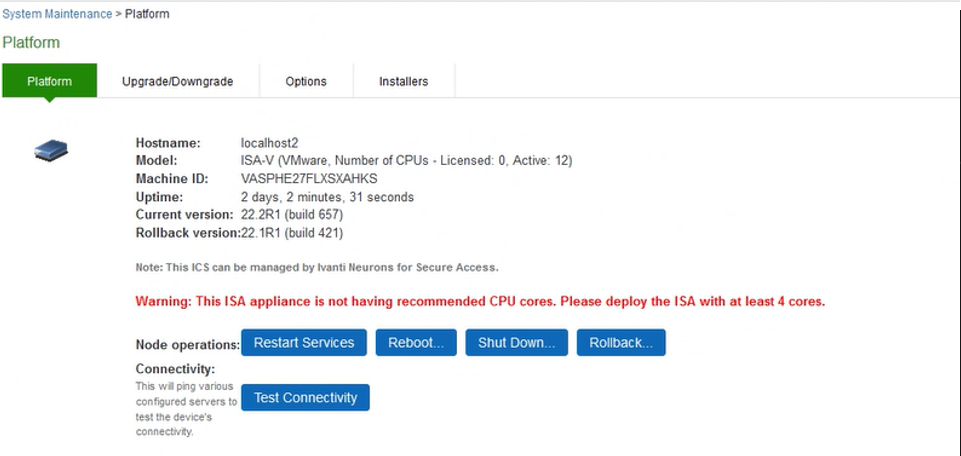
2.Navigate to System > Configuration > Licensing > Configure Server section and configure license server details on license client.
3.Now, from License Summary page, click on Pull State from Server button and observe the core leased information on License Summary page as shown below.
The following figure depicts the License Summary Page - Core Leased Information
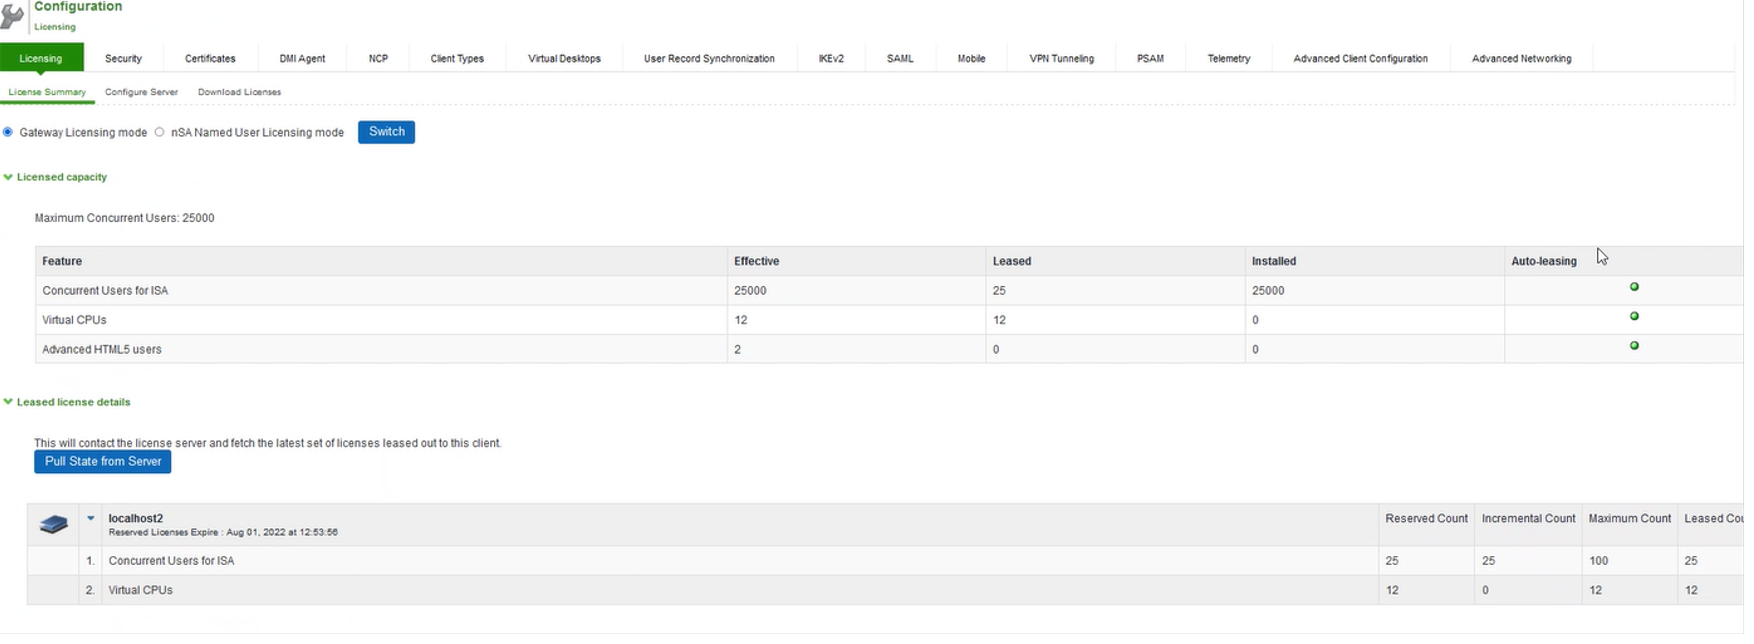
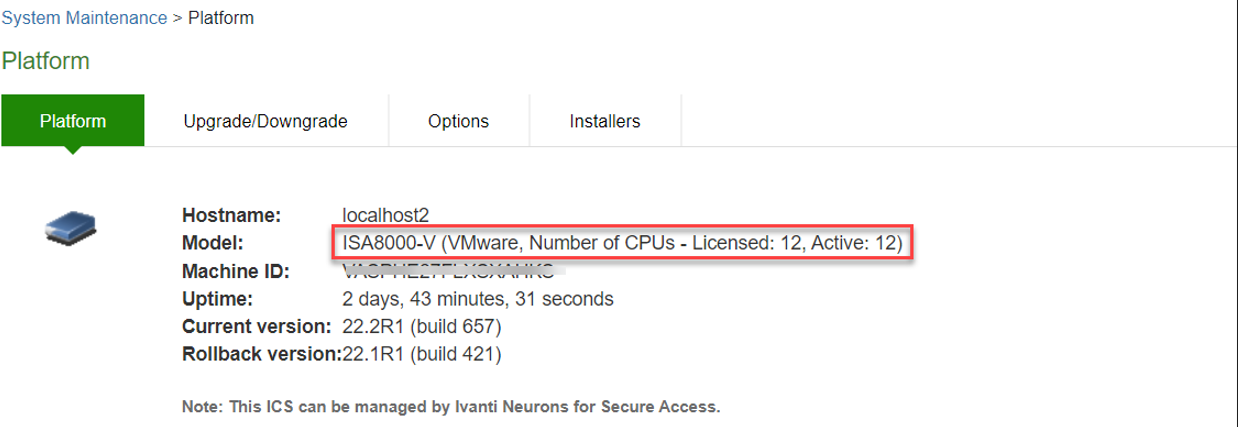
4.After successful leasing of cores, Platform Model is updated to ISA4000-V based on cores leased as shown below.
The following figure depicts the Platform page on License Client after leasing Cores
