SAML 2.0 Configuration Tasks
To use SAML server on IPS follow the below configuration steps:
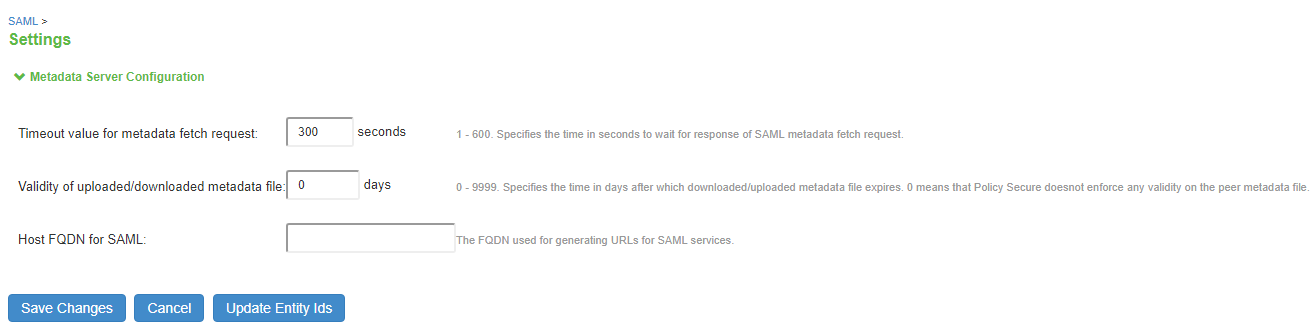
Configure SAML host FQDN under Configuration > SAML > Settings. This FQDN is used to generate SAML Entity Id. See Configuring System-Wide SAML Settings
Configure third party
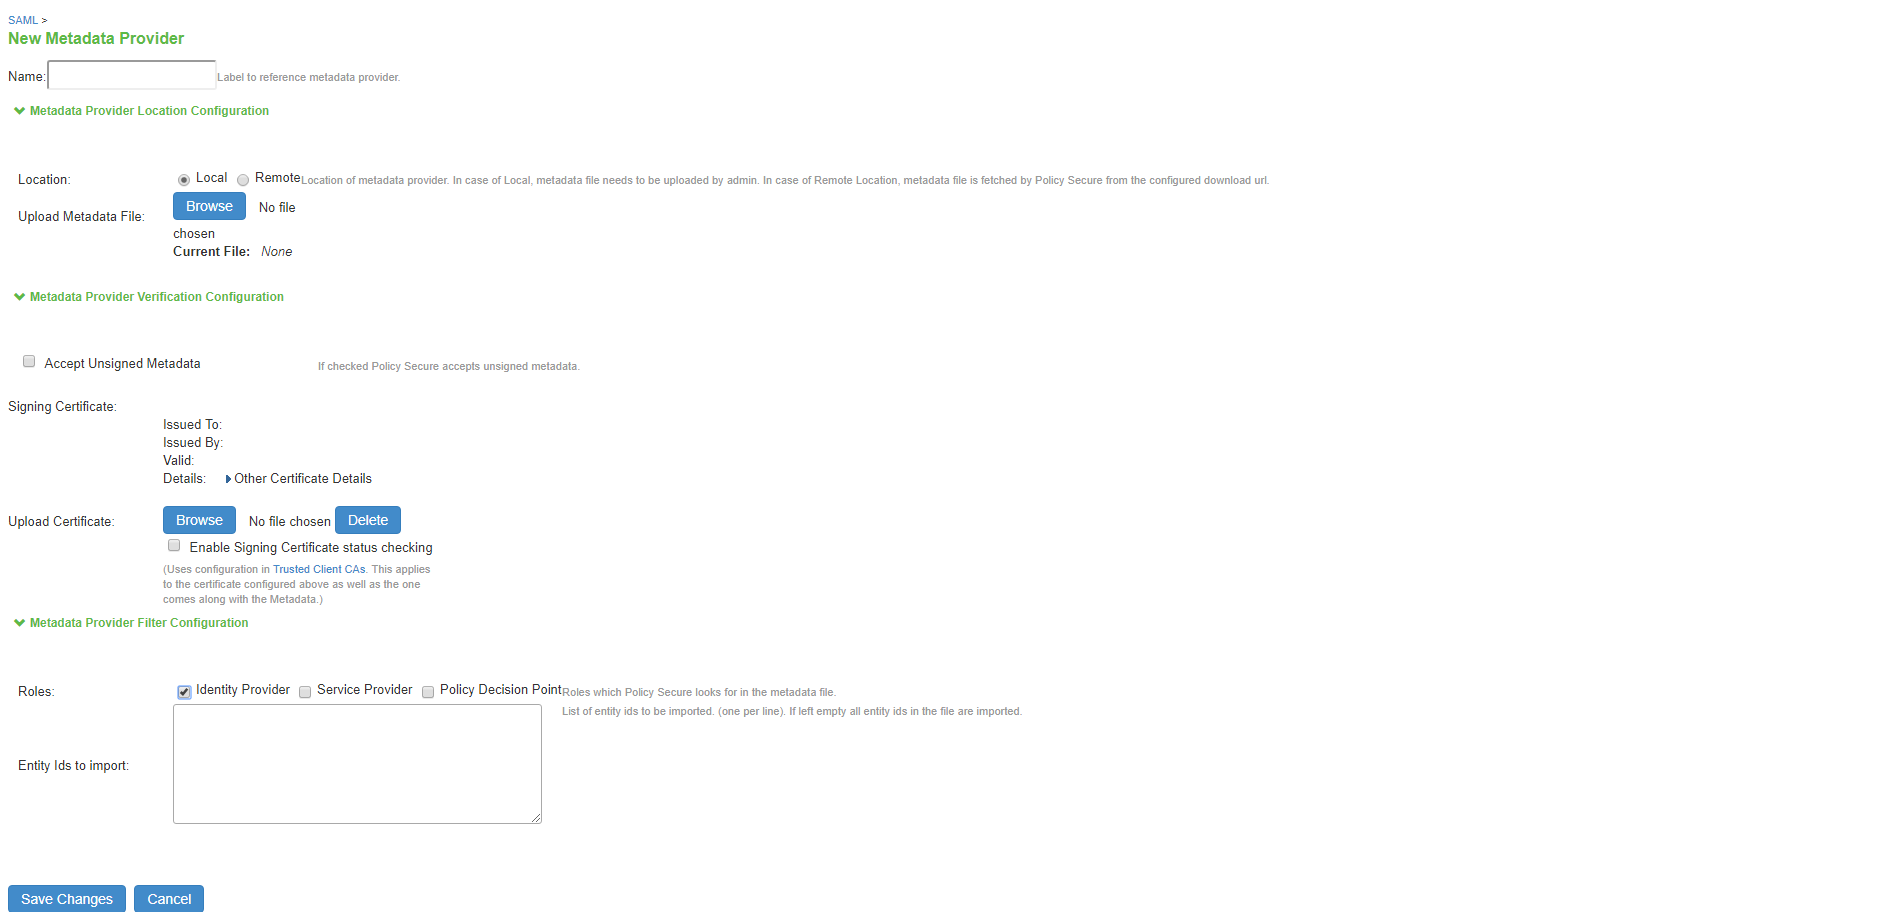
SAML IdP like Ping Federate, Okta. Get SAML IdP metadata and configure it under Configuration > SAML > New Metadata Provider. Under Metadata Provider configuration, "Identity Provider" roles should be selected since it is an SAML IdP metadata. (For screenshot, refer section "Admin UI changes")
Configure SAML Server under
- Authentication > Auth. Server. See Configuring SAML Authentication server.
- If SAML IdP's metadata is not configured, admin needs to configure IdP's information manually.
- If only one IdP metadata is configured, IdP information is automatically populated. If multiple IdP metadata are configured, admin needs to selected approriate IdP's information.
- If admin wants to sign or encrypt the request, appropriate certificates need to be selected.
After configuring SAML server on IPS, the metadata of IPS acting as an SAML SP can be downloaded from SAML server page.
Configure IPS metadata on SAML IdP and configured SAML SP details on IdP. See Configuring IPS as a Configuring IPS as a SAML 2.0 Service Provider
Configuring System-Wide SAML Settings
This section describes tasks related to configuring system-wide SAML settings. It includes the following topics:
Configuring Global SAML Settings
The system-wide SAML settings impact all SAML service provider and identity provider instances.
To configure global SAML settings:
- Select System > Configuration > SAML.
- Click the Settings button to display the configuration page.
- Complete the settings described in
- Click Save Changes.
Managing SAML Metadata Files
You use the System > Configuration > SAML pages to maintain a table of SAML metadata files for the SAML service providers and identity providers in your network. Using SAML metadata files makes configuration easier and less prone to error.
You can add the metadata files to the system by:
- Uploading a metadata file.
- Retrieving the metadata file from a well-known URL.
To add metadata files:
- Select System > Configuration > SAML.
- Click New Metadata Provider to display the configuration page.
- Complete the settings described in table.
- Save the configuration.
|
Settings |
Guidelines |
|---|---|
|
Metadata Provider Location Configuration |
Select one of the following methods:
|
|
Metadata Provider Verification Configuration |
|
|
Accept Untrusted Server Certificate |
If you specify a URL for the metadata provider, select this option to allow the system to download the metadata file even if the server certificate is not trusted. This is necessary only for HTTPS URLs. |
|
Accept Unsigned Metadata |
If this option is not selected, unsigned metadata is not imported. Signed metadata is imported only after signature verification. |
|
Signing Certificate |
Browse and locate the certificate that verifies the signature in the metadata file. This certificate overrides the certificate specified in the signature of the received metadata. If no certificate is uploaded here, then the certificate present in the signature of the received metadata is used. Select the Enable Certificate Status Checking option to verify the certificate before using it. Certificate verification applies both to the certificate specified here and the certificate specified in the signature in the metadata file. |
|
Metadata Provider Filter Configuration |
|
|
Roles |
Select whether the metadata file includes configuration details for a SAML service provider, identity provider, or Policy Decision Point. You may select more than one. If you select a role that is not in the metadata file, it is ignored. If none of the selected roles are present in the metadata file, the system returns an error. |
|
Entity IDs To Import |
Enter the SAML Entity IDs to import from the metadata files. Enter only one ID per line. Leave this field blank to import all IDs. This option is available only for uploading local metadata files. |
The Refresh button downloads the metadata files from the remote location even if these files have not been modified. This operation applies only to remote locations; local metadata providers are ignored if selected.
To refresh a metadata file:
- Select System > Configuration > SAML.
- Select the metadata file to refresh and click Refresh.
To delete a metadata file:
- Select System > Configuration > SAML.
- Select the metadata file to delete and click Delete.
Configuring IPS as a SAML 2.0 Service Provider
This topic describes how to configure the system as a SAML service provider. When the system is a SAML service provider, it relies on the SAML identity provider authentication and attribute assertions when users attempt to sign in to the device. Note that authentication is only part of the security system. The access management framework determines access to the system and protected resources.
The system supports:
- HTTP Redirect binding for sending AuthnRequests
- HTTP Redirect binding for sending/receiving SingleLogout requests/responses
- HTTP POST and HTTP Artifact bindings for receiving SAML responses
- RequestedAuthnContext context class specifications
Before you begin:
- Check to see whether the SAML identity provider uses HTTP POST or HTTP Artifact bindings for SAML assertions.
- Check to see whether the SAML identity provider has published a SAML metadata file that defines its configuration. If the SAML identity provider metadata file is available, configuration is simpler and less prone to error.
- Complete the system-wide SAML settings if you have not already done so. Select System > Configuration > SAML > Settings. For details, see Configuring Global SAML Settings
- Add metadata for the SAML identity provider to the metadata provider list if you have not already done so. Select System > Configuration > SAML. For details, see Managing SAML Metadata Files
The sign-in URL for which a session needs to be established for the system as a service provider is identified by the RelayState parameter (HTTP URL parameter for artifact and HTML form parameter for POST.) In a service provider initiated case, the system populates RelayState as an HTTP URL parameter while sending AuthnRequest. In the IdP-Initiated scenario (Connect Secure is a service provider and there is a third-party IdP), the IdP must be configured to set the appropriate Sign-in URL of the system in the RelayState parameter of the HTML form containing the SAML response. For more information, see the SAML 2.0 specification.
To configure the system as a SAML service provider:
- Select Authentication > Auth. Servers.
- Select SAML Server from the New list and then click New Server to display the configuration page.
- Complete the settings as described in table.
- Save the configuration.
After you save changes for the first time, the page is redisplayed and now has two tabs. Use the Settings tab to modify any of the settings pertaining to the SAML server configuration. Use the Users tab to monitor user sessions.
Next steps:
- Configure the access management framework to use the SAML authentication server. Start with realm and role mapping rules.
- Configure a sign-in policy. When using a SAML authentication server, the sign-in policy can map to a single realm only.
Configuring a Role Mapping Rule Based on a SAML Attribute
You can use role mapping rule custom expressions to include SAML Attribute statement as a factor in role determination. IPS uses attributes from attribute statement in "User Name Template" under Authentication > Auth. Server > SAML Server.
To configure role mapping rules:
- Select Users > User Realms.
- Create a new realm or edit a realm you have already created.
- Click New Rule to display the configuration page.
- Select Custom Expression and click Update to redisplay the configuration page with the controls related to custom expressions.
- Click Expressions to display the server catalog dialog box.
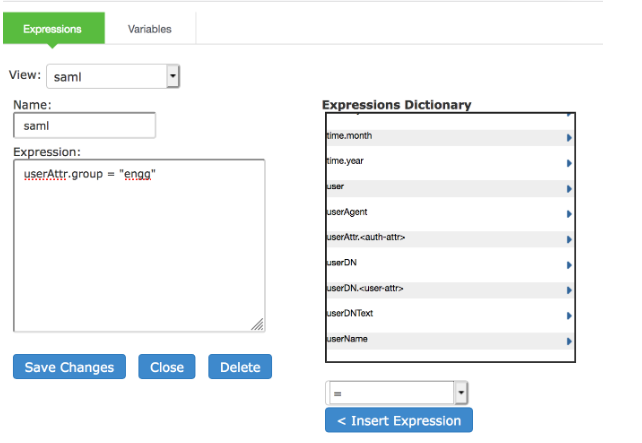
On SAML IdP, attributes in attribute statement can be configured as name-value pairs and/or can be fetched from directory server. For example, an attribute with name="group" and value="engg" can be configured on IdP asserts that an authenticated user belongs to engineering group. SAML assertion from IdP contains this attribute in attribute statement.
- Select samlAuthnContextClass, select an operator, and click Insert Expression.
- Edit the expression template to match the AuthnContextClassRef data expected from the SAML IdP.
- Save your changes to the variable expression and return to the rule configuration page.
- Select the expression, roles for the rule, and the stop option (if desired).
- Save your changes to the rule configuration and return to the realm configuration page.
- Reorder the rules if necessary.
- Save the realm configuration.