Using a Time-Based One-Time Password (TOTP) Authentication Server
This topic describes IPS integration with the Time-Based One-Time Password (TOTP) Authentication
Overview
This section describes support for using the Local/Remote IPS TOTP authentication server.
Understanding TOTP
Time-based One-time Password Algorithm (TOTP) is an algorithm that computes a one-time password (token) from a shared secret key and the current time. Google Authenticator is one of such implementations of TOTP algorithms. IPS supports TOTP authentication by using the Google Authenticator algorithm for generation of shared secret key and token. Many third-party aIPS are available for almost all mobile and desktop operating systems for the generation of TOTP tokens.
Interoperability Requirements and Limitations
Before you begin:
TOTP authentication server users’ configuration is automatically synchronized within all nodes in a single cluster. If there are multiple clusters behind a DNS load-balancer, then the admin has to manually perform binary export/import user's configuration to all the nodes in different clusters.
TOTP feature is configurable across clusters.
First time users have to register a new TOTP user-account via web. End-users cannot use Desktop applications and Mac applications for new user registration.
Two standalone nodes or separate clusters can be synced. For now, binary import/export of user configuration option can be used.
For the users who are already using custom sign-in pages:
For TOTP authentication to work, existing custom sign-in pages need to include following sign-in pages:
•TotpAuthRegister.thtml
•TotpAuthRegister-mobile-webkit.thtml
•TotpAuthRegister-ipad.thtml
•TotpAuthRegister-stdaln.thtml
•TotpAuthRegister-new-ux.thtml
•TotpAuthTokenEntry.thtml
•TotpAuthTokenEntry-new-ux.thtml
•TotpAuthTokenEntry-mobile-webkit.thtml
•TotpAuthTokenEntry-ipad.thtml
•TotpAuthTokenEntry-stdaln.thtml
These files can be downloaded from sample custom sign-in pages URL: https://<<IPS>>/dana-admin/download/sample.zip?url=/dana-admin/auth/custompage.cgi?op=Download&samplePage=sample
Configuring Authentication with a TOTP Authentication Server
To configure the TOTP server as Local:
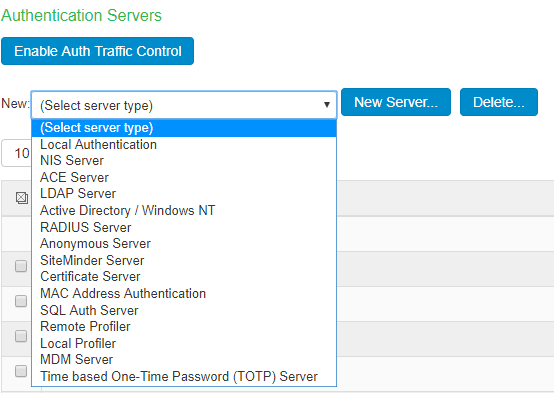
- Select Authentication > Auth. Servers.
- Select Time based One-Time Password (TOTP) Server and click New Server to display the configuration page.
- Complete the configuration as described in table.
- Save the configuration.
|
Settings |
Guidelines |
|---|---|
|
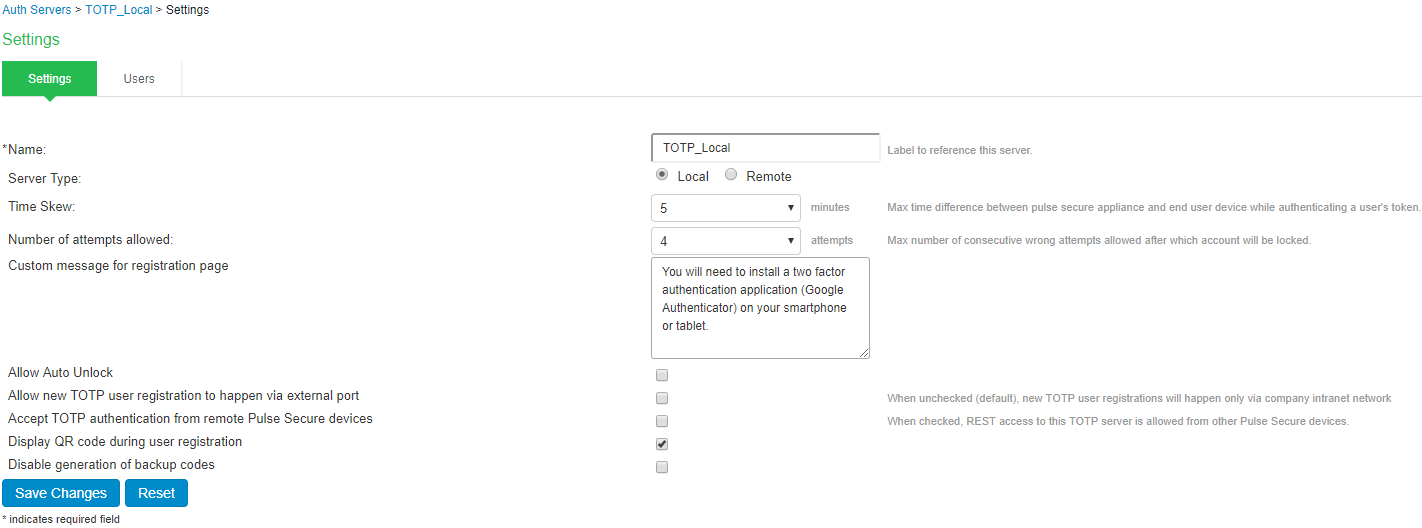
Name |
Specify a name to identify the server within the system. |
|
Server Type |
TOTP server can be configured as local or remote. Select Local. Local: TOTP context is created locally and user database is maintained locally on the same device. |
|
Time Skew |
Specify maximum time difference between IPS and end user device while authenticating a user's token. (minimum: 1 minute, maximum: 5 minutes). |
|
Number of attempts allowed |
Specify maximum number of consecutive wrong attempts allowed after which account will be locked (minimum: 1 attempt, maximum: 5 attempts). |
|
Custom message for registration page |
Specify a custom message which can be shown on new TOTP user registration web-page. |
|
Allow Auto Unlock |
When checked, locked account will be automatically unlocked after specified period. (minimum: 10 minutes, maximum: 90 days) |
|
Allow new TOTP user registration to happen via external port |
When unchecked (default), new TOTP user registrations will happen only via internal port |
|
Accept TOTP authentication from remote internal devices |
When checked, REST access to this TOTP server is allowed from other internal devices. |
|
Display QR code during user registration |
When checked, displays QR code during user registration. |
|
Disable generation of backup codes |
When unchecked, generates backup codes. |
To configure the TOTP server as Remote:
- Select Authentication > Auth. Servers.
- Select Time based One-Time Password (TOTP) Server and click New Server to display the configuration page. See figure
- Complete the configuration as described in table.
- Save the configuration.
If IPS is configured to use Remote TOTP server, then the remote server should have a valid certificate issued by a Trusted CA.
|
Settings |
Guidelines |
|---|---|
|
Name |
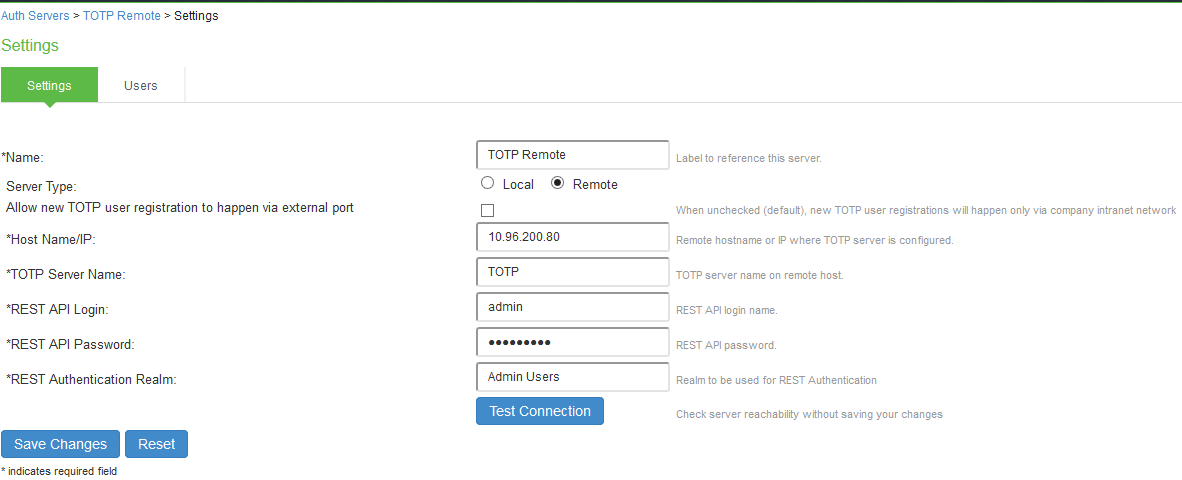
Specify a name to identify the server within the system. |
|
Server Type |
TOTP server can be configured as local or remote. Select Remote. Remote: In this configuration, authentication check happens on the remote TOTP server. The user local device acts as a proxy between the user's client device and TOTP server. The communication to the remote device happens on REST API. |
|
Allow new TOTP user registration via external port |
Enable this option to allow TOTP user registrations through external port. |
|
Host Name/IP |
Specify remote host name or IP address where the TOTP server is configured. |
|
TOTP Server Name |
This is the name of the TOTP server configured on the Remote TOTP server. |
|
REST API Login |
Enter the REST API login name. |
|
REST API Password |
Enter the REST API password. |
|
REST Authentication Realm |
Enter the realm name, which refers to the realm that should be used for authenticating the rest user ( using the authserver mapped to the Realm). |
Configuring Admin/User Realm to Associate a TOTP Authentication Server as Secondary Authentication Server
For example, to configure a user realm:
- Select Users > User Realms > New User Realm.
- Complete the settings for the user-realm.
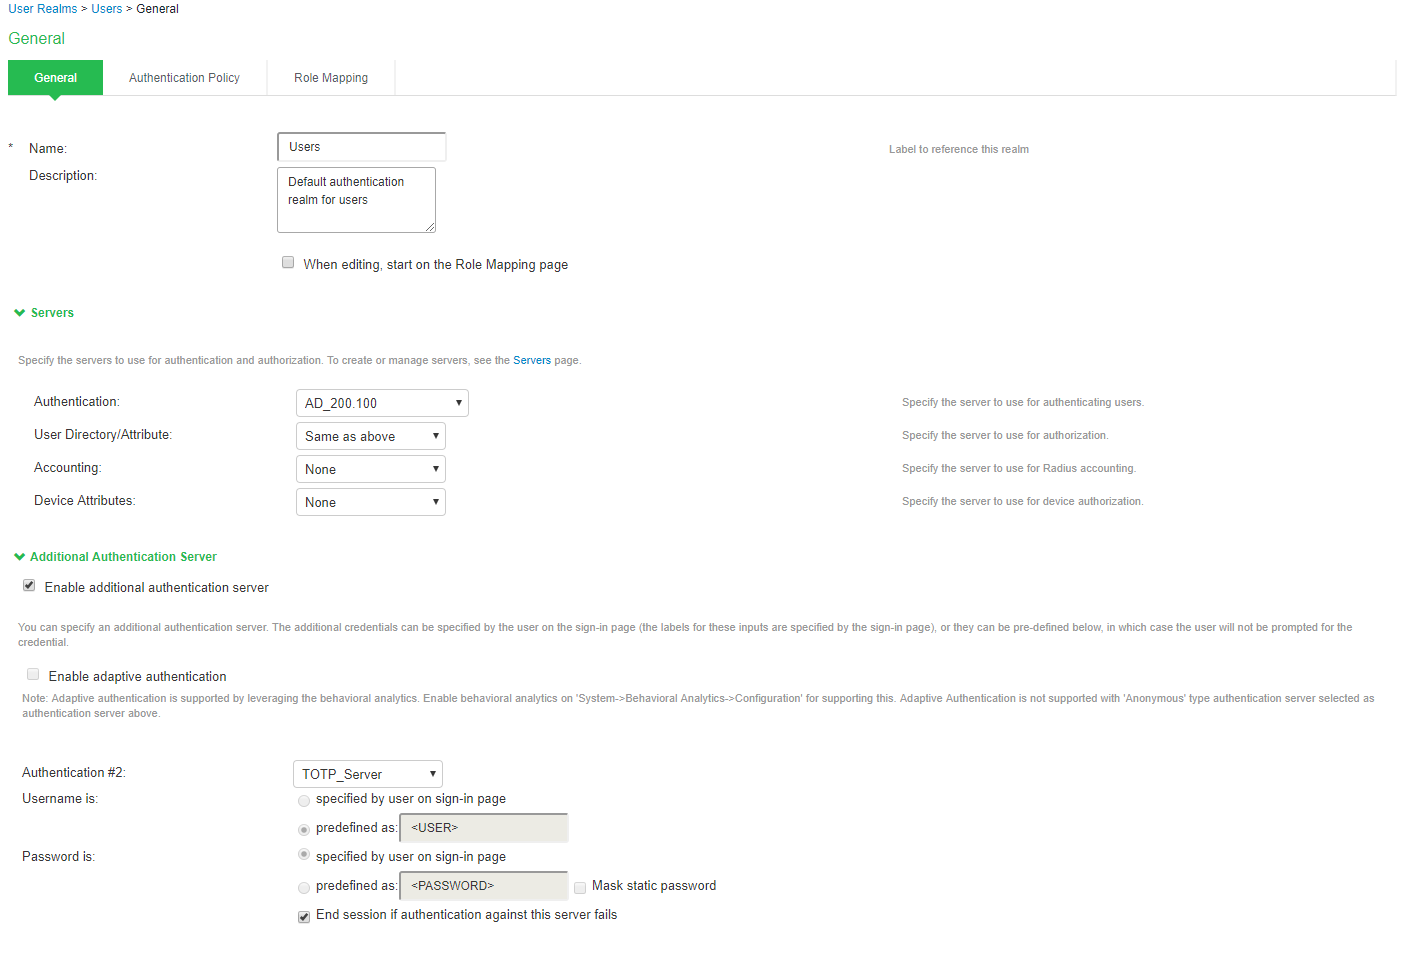
- Check the Enable additional authentication server option.
- Under Additional Authentication Server, select any already created TOTP authentication-server from the Authentication #2 dropdown, as shown in table.
Whenever admin selects TOTP authentication-server as the additional authentication server, then the Username: Predefined as <USER> and Password: specified by user in sign-in page options are set by default.
- Click on Save Changes.
Using Google Authenticator Application to Register to a TOTP Server
The admin can associate an end-user to a realm that has a secondary authentication server configured as TOTP authentication server.
For first time registration via web, perform the following steps:
For example: Admin associates an end-user User1 to a user-realm that has the TOTP authentication-server configured as the secondary authentication-server.
When User1 for the first time, performs a login to the above configured user-realm:
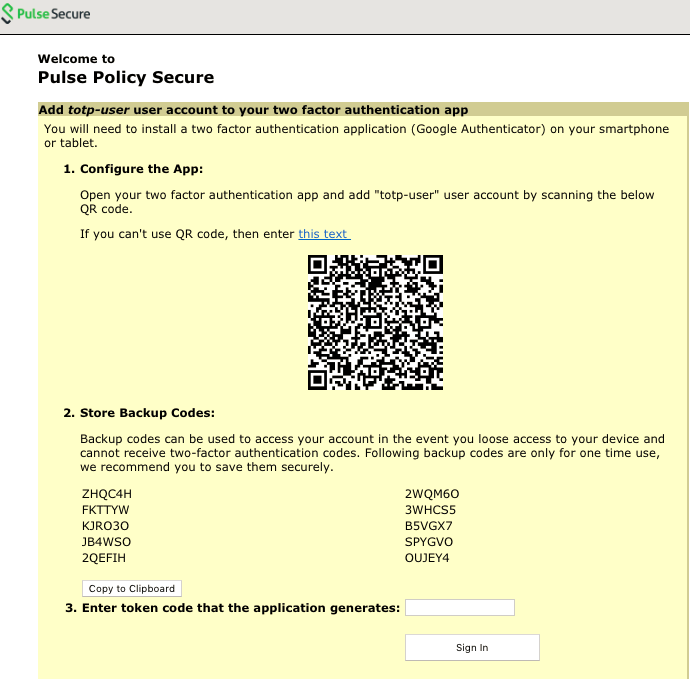
- After successful authentication with primary authentication-server, User1 is shown the TOTP registration page. See figure
- User1 is given a TOTP registration key in text form/QR image form and 10 backup codes. User saves 10 backup codes in a safe place for using it later during authentication when end-user device (where Google Authenticator app is installed) is not available (in emergency).
- Now, User1 opens the device where Google Authenticator app is installed, then either scans the QR image (or) manually adds a new user (for example: GA-User1) by entering the above given secret registration key.
- The Google-Authentication app (for GA-User1) generates a new 6-digit number called as a token once in every 30 seconds.
- Enter the current token in the registration page. Click on Sign In. On successful authentication with that token, User1 will be taken to his/her home page.
For already registered user, perform the following steps:
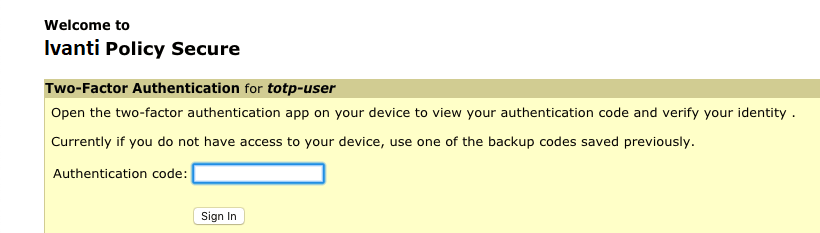
- The already-registered user (For example: User1), whose realm was associated with secondary authentication server configured as TOTP authentication server, accesses IPS URL via web (User1 has already registered TOTP user in Google Authenticator app.)
- After successful authentication with primary authentication server, user1 is shown TOTP Token entry page as seen in figure
- User1 opens Google Authentication app that was installed in mobile (or PC), enters the current token to the
- Authentication Code. If mobile is not available, user can enter any of the unused backup codes.
- On successful authentication with the token, User1 can enter any of the unused backup codes.
A backup code can be used only once to successfully authenticate with the TOTP authentication server. Once used, the same backup code cannot be reused.
Displaying the User Accounts Table
To display user accounts:
- Select Authentication > Auth.Servers.
- Click the link for the authentication server you want to manage.
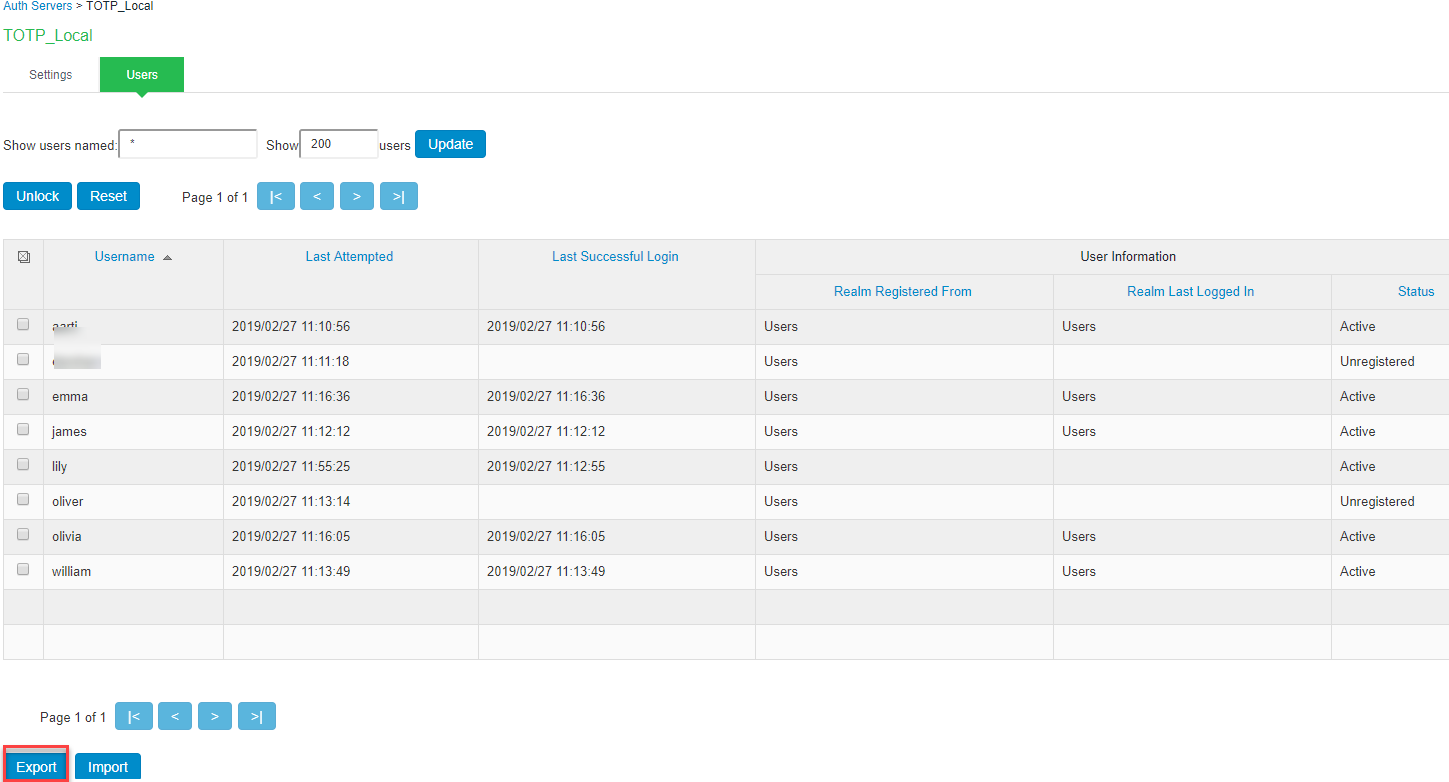
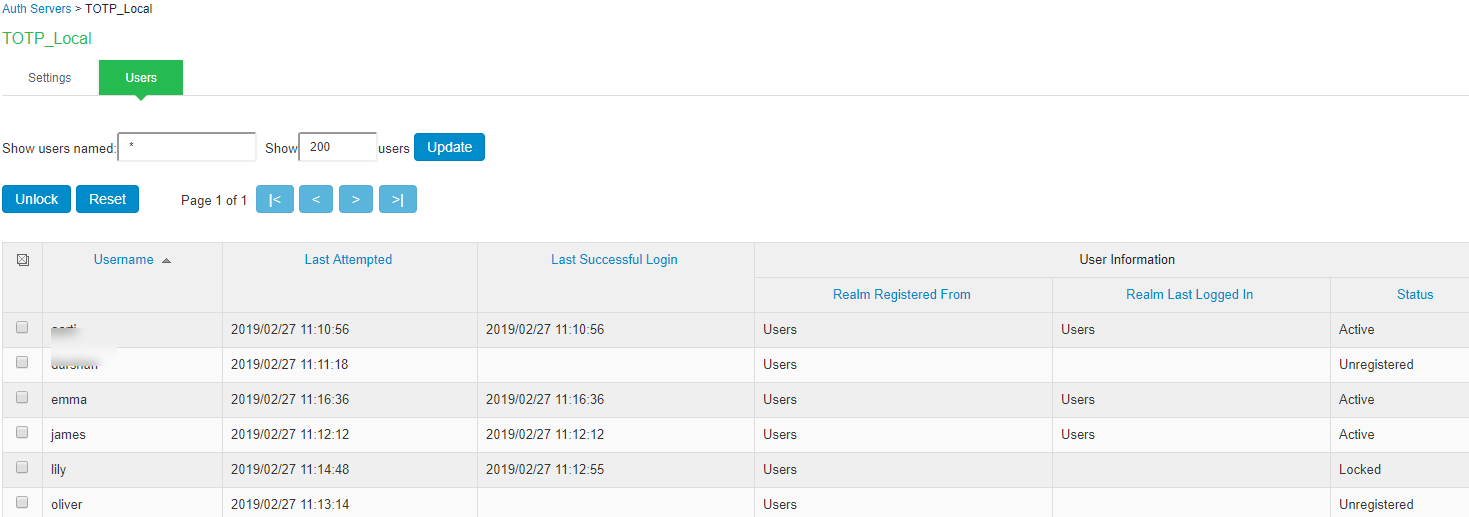
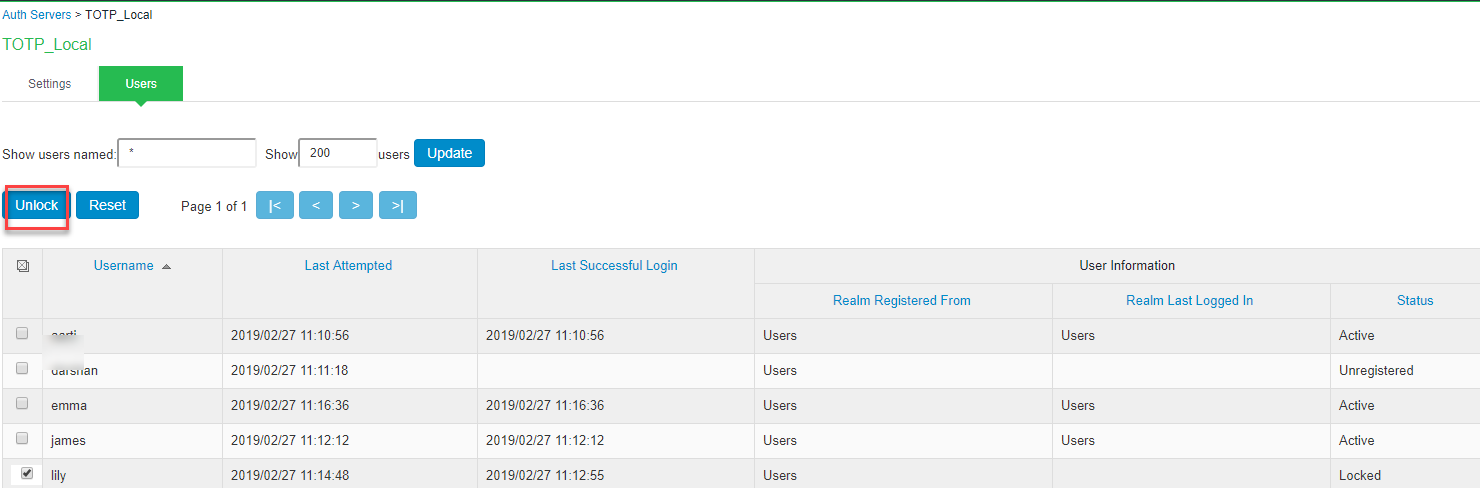
- Click the Users tab to display the user accounts table. The Last Sign-in Statistic column shows the last successful sign-in date and time for each user, the user’s IP address, and the agent or browser type and version.
- The “Last Attempted” column shows the last time and date a user attempted to login.
- The “Last Successful Login” shows the last successful sign-in date and time for each user.
- Under the “User Information” column, there are details available for a user’s “Realm”, “Primary AuthServer” and the “Status” columns.
There are 3 possible states for the “Status" column:
- Active: TOTP user’s account is in use (that is user has used this account less than stale period of this TOTP authentication server)
- Locked: TOTP user account has been locked due to maximum number of wrong login attempts
- Unregistered: TOTP user has seen registration page, but yet to complete the registration by entering the correct token in the registration page.
Use the controls to search for users and manage user accounts:
To search for a specific user, enter a username in the Show users named field and click Update.
You can use an asterisk (*) as a wildcard, where * represents any number of zero or more characters. For example, to search for all usernames that contain the letters jo, enter *jo*. The search is case-sensitive. To display the entire list of accounts again, type * or delete the field’s contents and click Update.
To limit the number of users displayed on the page, enter a number in the Show N user’s field and click Update.
To unlock a user, select the specific user and click Unlock.
To reset a user’s credentials, select the specific user and click Reset.
To unlock a TOTP user’s account:
- Go to the Users tab. The list of users is displayed.
- Select the user whose account you choose to unlock.
- Click on the Unlock button.
To reset a TOTP user’s account:
- Go to the Users tab. The list of users is displayed.
- Select the user whose account you choose to reset.
- Click on the Reset button. This removes the user entry from the table.

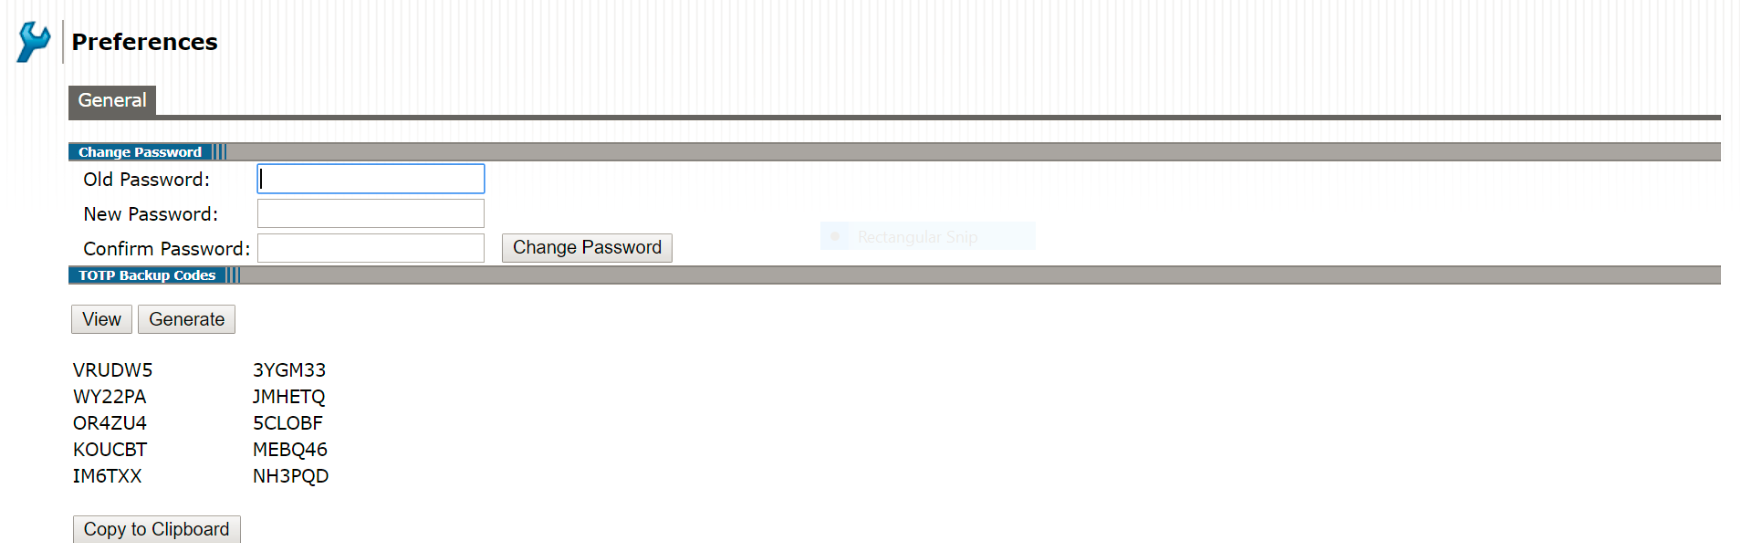
Viewing/Generating Backup Codes
To view/generate TOTP backup codes after successful login to a TOTP server via web:
- User successfully authenticates to primary auth-server and TOTP auth-server via web.
- Click on the Preference option on the top of the page.
- In the Preference page, under TOTP Backup codes, click on either View or Generate to obtain user's TOTP backup codes.
Exporting/Importing TOTP Users
To export/import TOTP users:
- Select Authentication > Auth. Servers.
- Click the link for the authentication server you want to manage.
- Click the Users tab to display the user accounts table. The user accounts table includes entries for the accounts that have been created.
- Use the Export and Import buttons located at the bottom of the user accounts table to export and import TOTP users data.