Using the Authentication Report
This topic describes the authentication report.
Overview
The authentication report displays the authentication result for each user based on the device activity in the selected time range.
Displaying the Authentication Report
To display the authentication report, select System > Reports > Authentication.
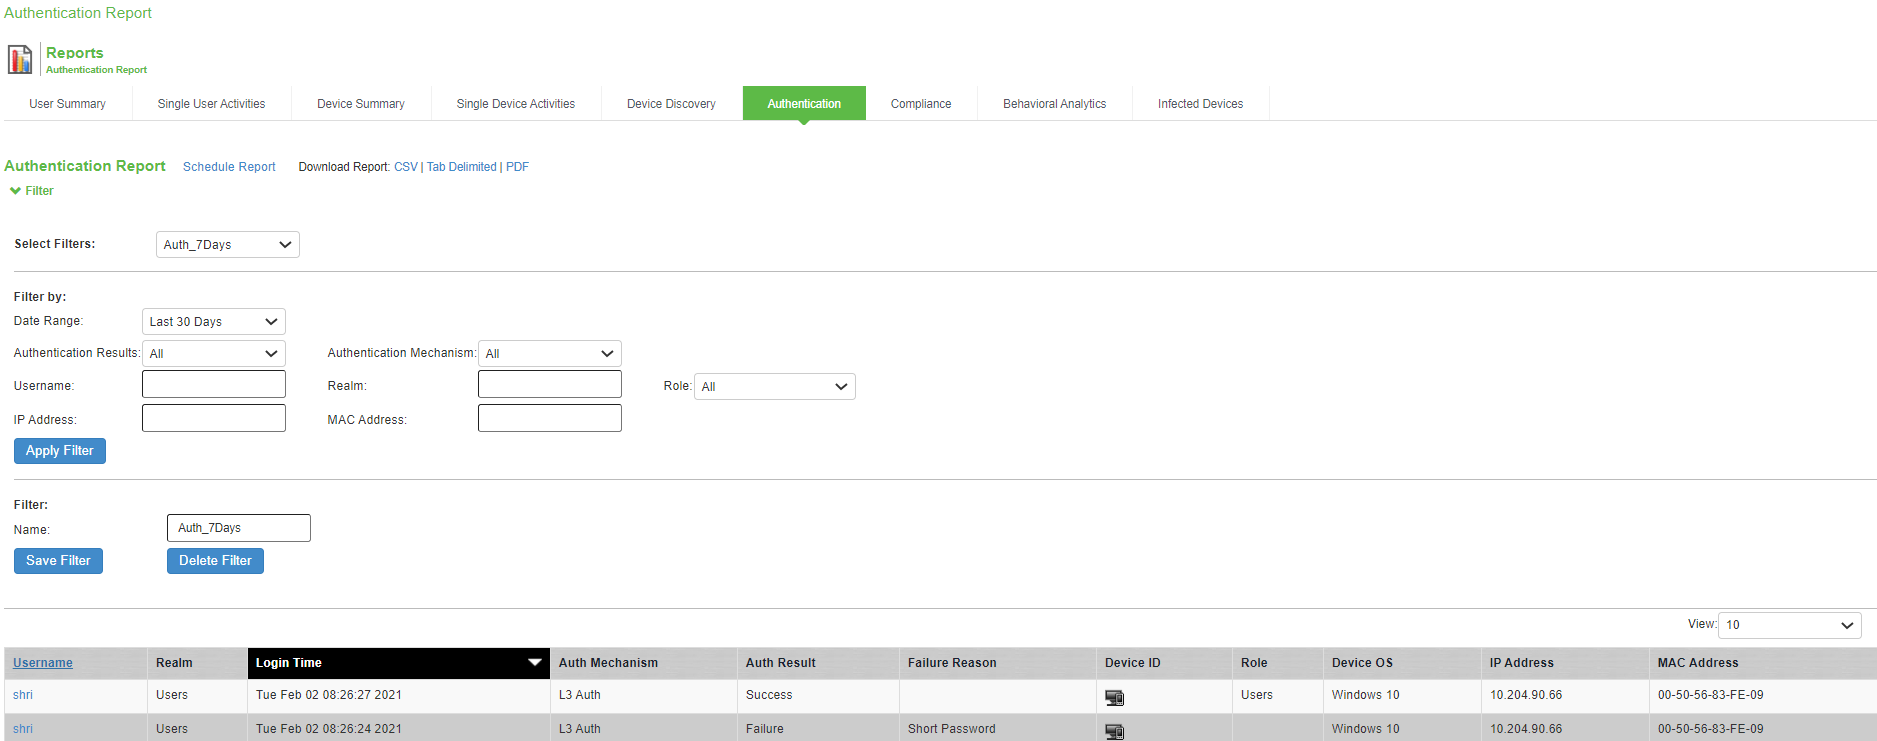
Table describes the columns on the authentication report.
|
Description |
|
|---|---|
|
Username |
Specifies the name of the user. |
|
Realm |
Specifies the realm. |
|
Login Time |
Specifies the time the user logged in. |
|
Auth Mechanism |
Specifies the authentication mechanism: 802.1x, Layer 3, MAC address. |
|
Auth Result |
Specifies the authentication result. |
|
Failure Reason |
Specifies the host checker failure reason. |
|
Device ID |
Specifies a unique identifier used to identify an end point. Click the device ID icon to view a single device report. |
|
Role |
Specifies the user role. |
|
Device OS |
Specifies the operating system of the device. |
|
IP Address |
Specifies the IP Address of the device. |
|
MAC Address |
Specifies the MAC Address of the device. |
The Authentication Report in the dashboard database has a maximum limit of 300K records. After this limit, the oldest records are removed.
Creating a new Filter
To create a new filter:
- Select System > Reports > User Summary.
- Under Filter, enter the name of the filter.
- Under Filter by: Select one of the following periods from the Date Range list box:
- Last 24 Hours– (Default) Refers to the last 24 hours from the current hour.
- Last 7 Days– Refers to current day and the previous last 6 days.
- Last 30 Days– Refers to current day and the previous last 29 days.
- Custom– Enter the custom from and till date range.
- Enter search criteria in one or more of the following attribute columns:
- Authentication Mechanism
- Authentication Results
- Username
- Realm
- IP Address
- Mac Address
- Roles
- Click Save Filter.
Once the filter is created, it gets listed in the filter drop-down. Administrator can also choose to edit the existing filter to customize the report based on the requirement. The filter can also be deleted using the Delete Filter option.
Applying Data Filters
To apply a data filter:
- Select System > Reports > Authentication.
- Select one of the following periods from the Filter by: Date Range list box:
- Last 24 Hours– (Default) Refers to the last 24 hours from the current hour.
- Last 7 Days– Refers to current day and the previous last 6 days.
- Last 30 Days– Refers to current day and the previous last 29 days.
- Custom– Enter the custom from and till date range.
- Enter search criteria in one or more of the following columns:
- Authentication Mechansim
- Authentication Results
- Username
- Realm
- IP Address
- Mac Address
- Roles
- Click Apply Filter.
Sorting Records
The data source determines the default sort order of the data rows in the report. Typically, data appears randomly, so sorting is an important task in creating a useful report. You can sort single data column.
To sort the authentication report:
- Select System > Reports > Authentication.
- Select Login Time column and click either the ascending or descending order icon.
Exporting Authentication Report
To export an authentication report:
- Select System > Reports > Authentication.
- Select a Download Report option.
- CSV– Exports the report in CSV format.
- Tab Delimited– Exports the report in tab-delimited format.
- PDF– Exports the report in PDF format.