Configuring IPS with Check Point Next-Generation Firewall
This section covers the configuration of IPS for adding Check Point Next-Generation Firewall as an Infranet Enforcer.
Configuring Check Point Infranet Enforcer in IPS
The IPS configuration requires defining a new Check Point Infranet Enforcer instance on IPS and then fetching the pre-configured shared secret key from the firewall. The shared secret key is used to communicate between the Check Point firewall and IPS. The standard user authentication / authorization configurations such as Auth Table Mapping Policies should also be created and associated with the required roles.
To configure a Check Point Firewall Infranet Enforcer in IPS:
- Select Endpoint Policy > Infranet Enforcer.
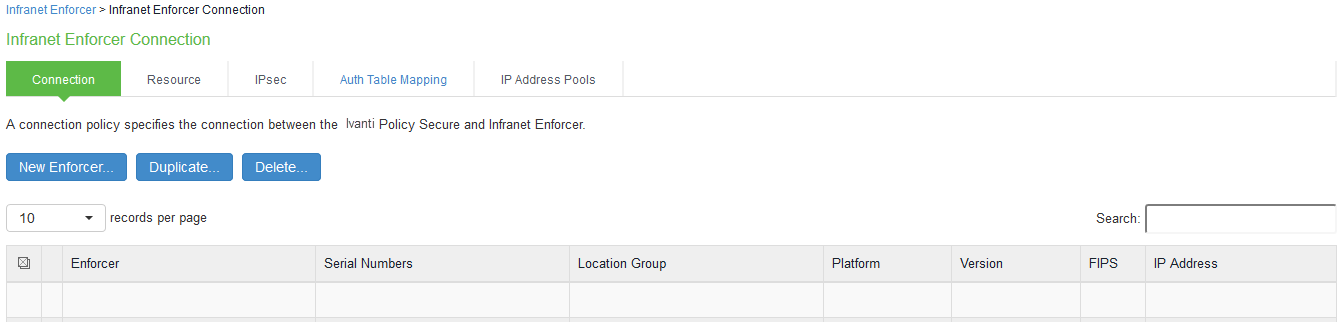
- Click New Infranet Enforcer and select Check Point Firewall in the Platform drop down.
-
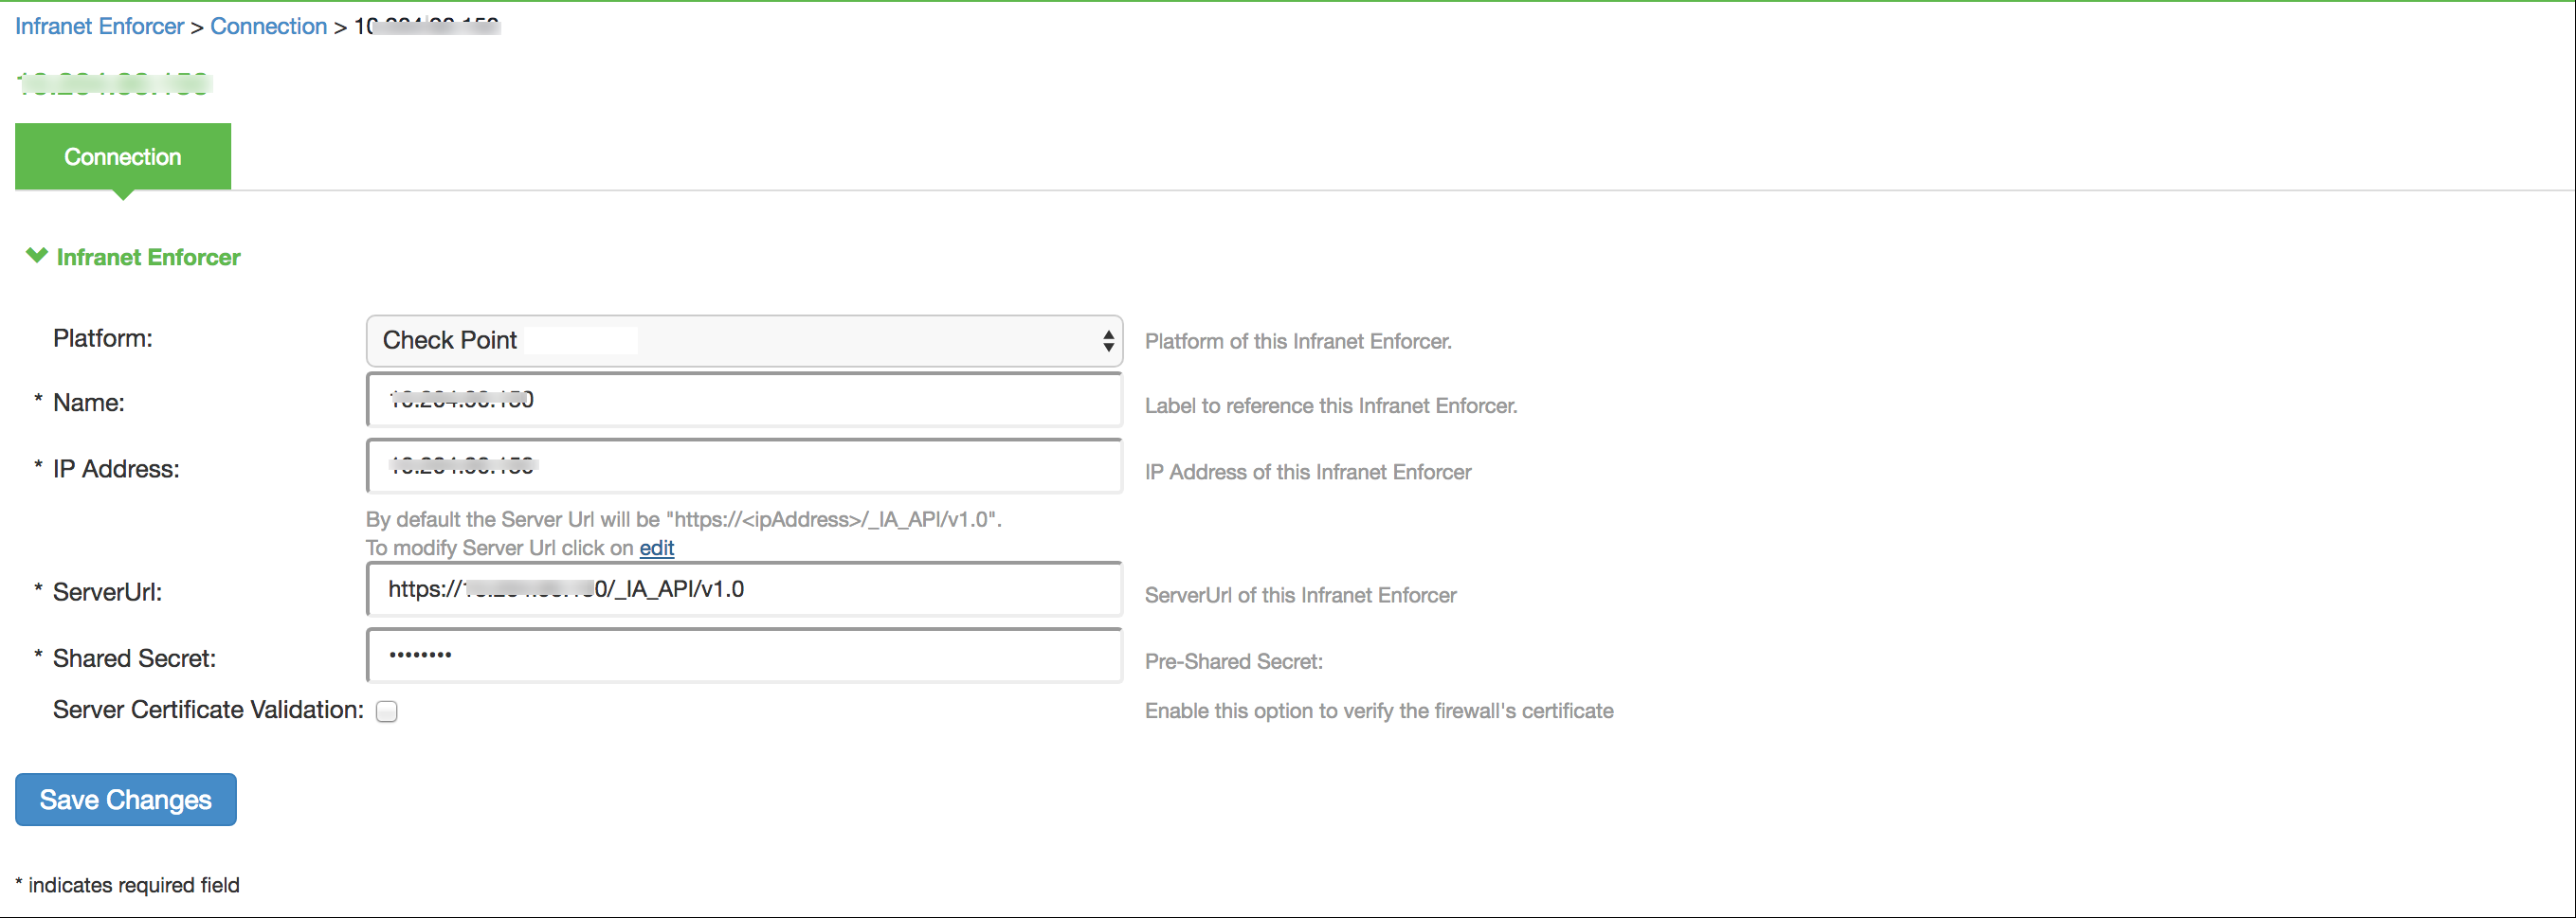
Enter the Name and IP Address of the Check Point Next-Generation Firewall and enter the shared secret between IPS and Check Point.
IPS has the default server URL for Check Point R80.10.
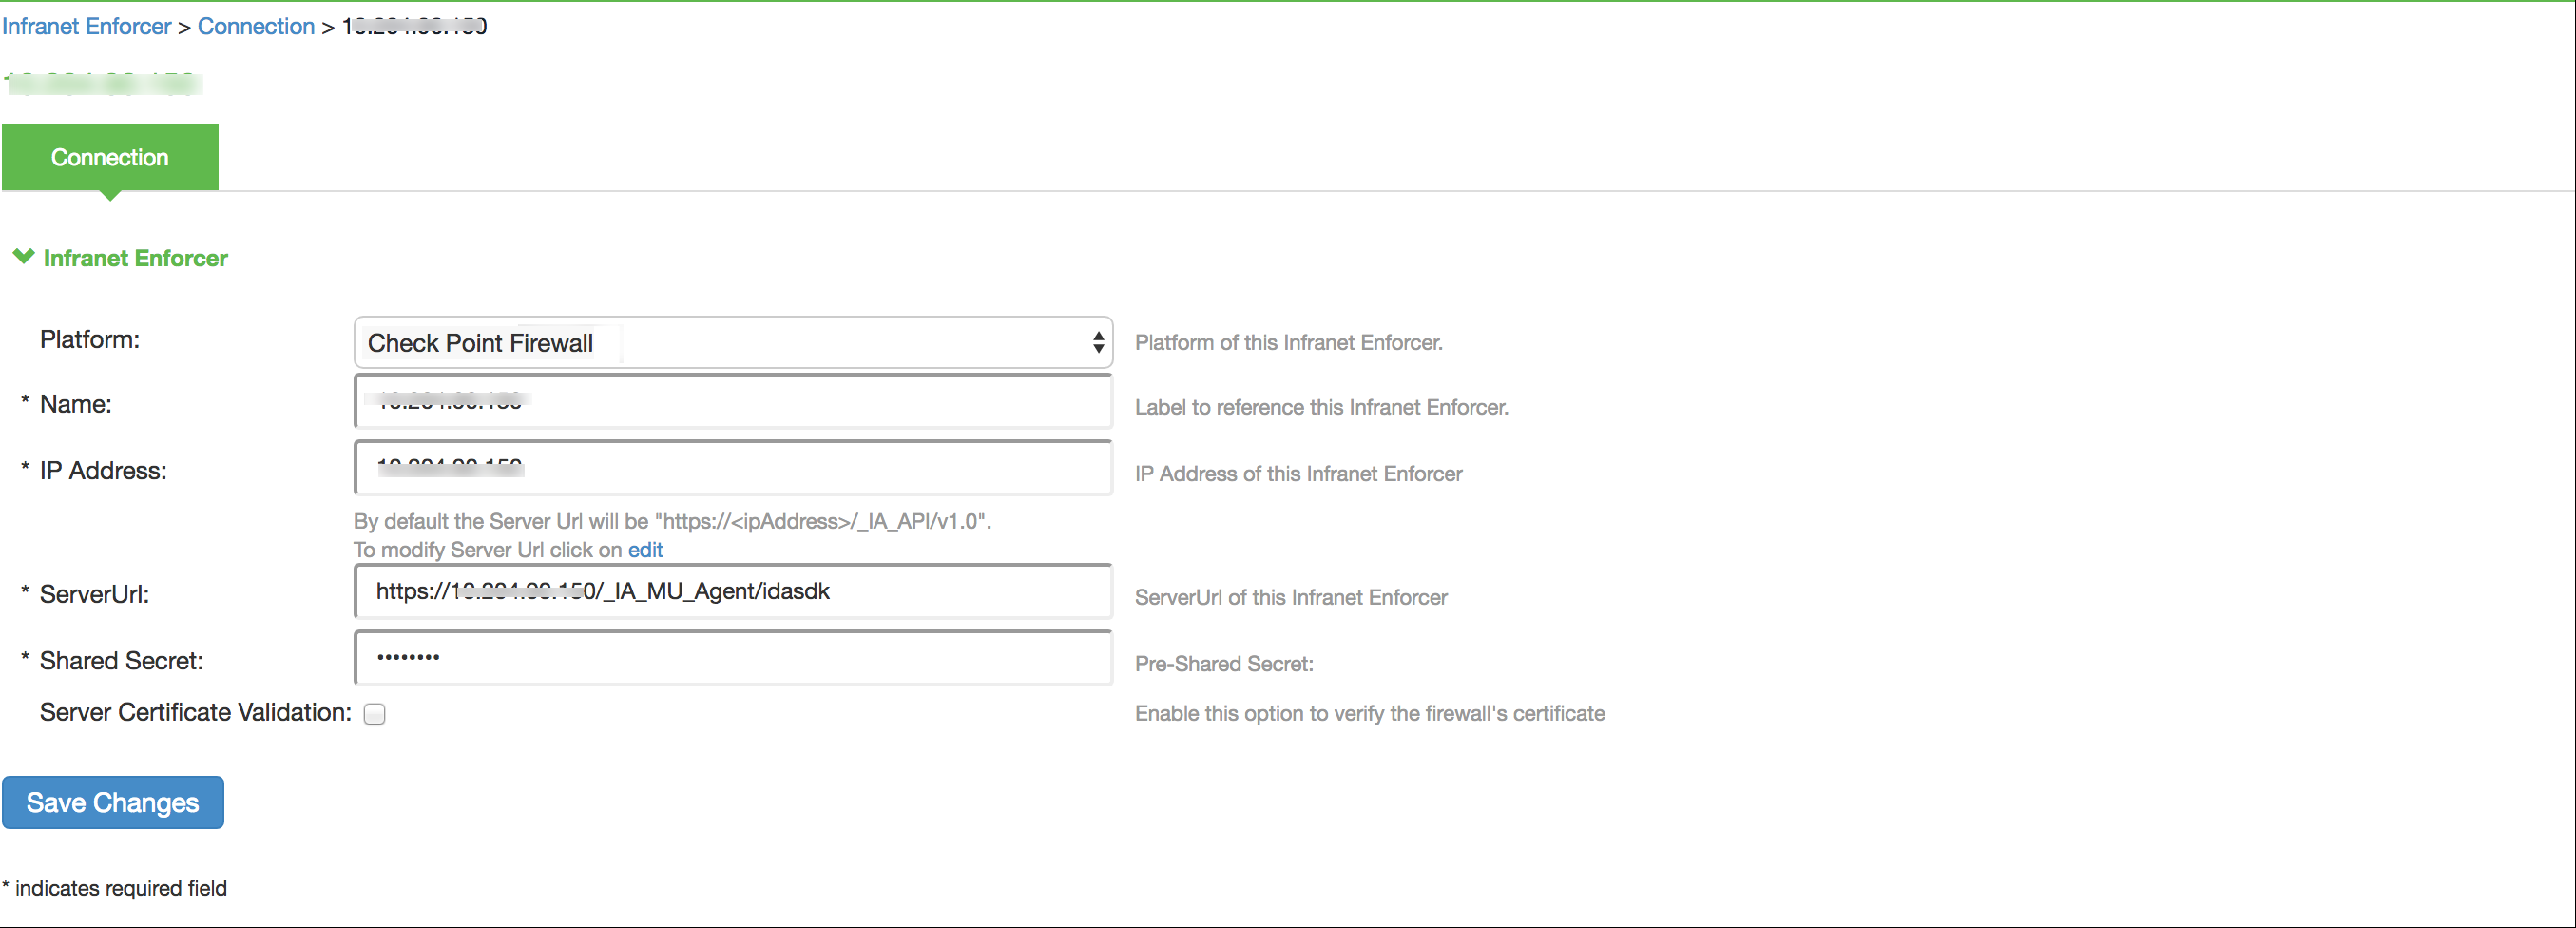
For previous version of Check Point (R77.30), edit the server URL manually to https://<IP_Address>/_IA_MU_Agent/idasdk
- (Optional) Select Server Certificate Validation to verify the firewall certificate.
- Click Save Changes.
Configuring Auth Table Mapping Policies
An auth table entry consists of the user's name, a set of roles, and the IP address of the user device. An auth table mapping policy specifies which enforcer device (Firewall) can be used for each user role. These policies prevent the IPS from creating unnecessary auth table entries on all connected enforcer devices.
IPS's default configuration includes only one default auth table mapping policy. When the default auth table mapping policy is enabled, IPS pushes one auth table entry for each authenticated user to the selected Check Point Next-Generation Firewall configured as Infranet Enforcers in IPS.
To configure an Auth Table Mapping Policy:
- Select Endpoint Policy > Infranet Enforcer > Auth Table Mapping and click New Policy.
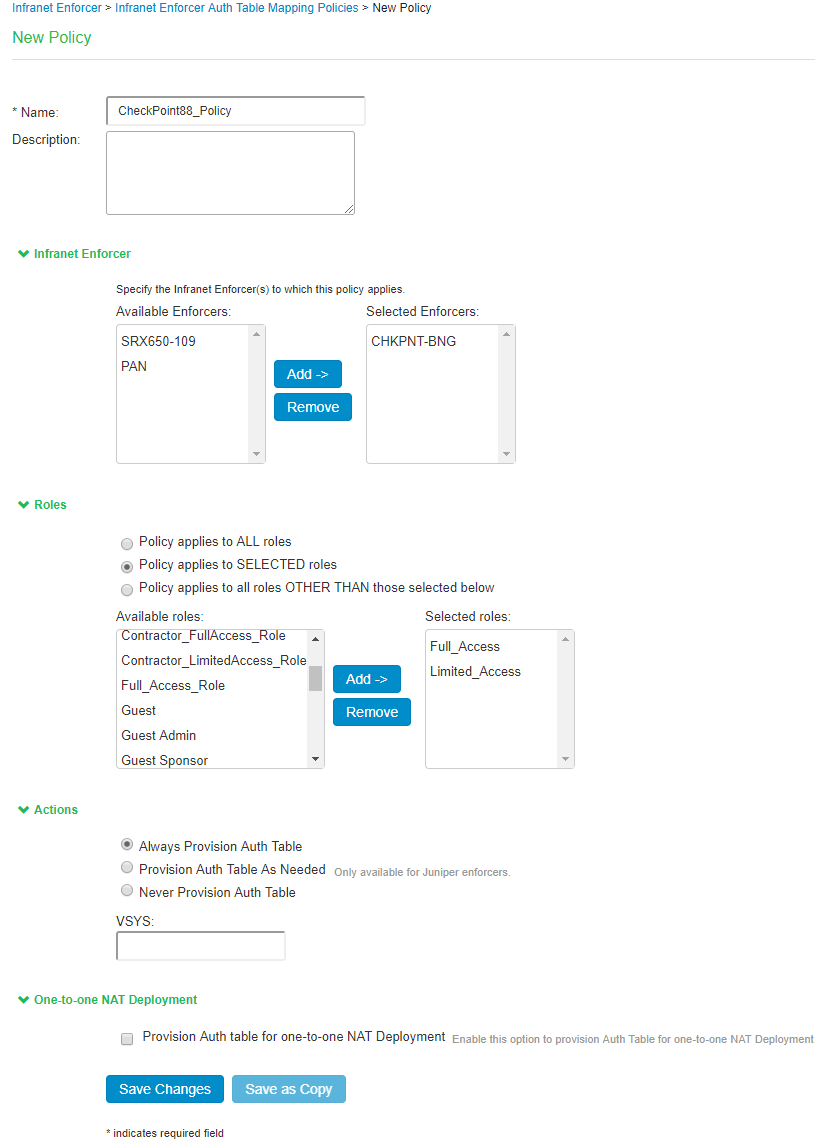
- On the New Policy page:
- For Name, enter a name to label the auth table mapping policy.
- (Optional) For Description, enter a description.
- In the Enforcer section, specify the Infranet Enforcer firewall(s) to which you want to apply the auth table mapping policy.
- In the Roles section, specify:
- Policy applies to ALL roles-Select this option to apply the auth table mapping policy to all users.
- Policy applies to SELECTED roles-Select this option to apply the auth table mapping policy only to users who are mapped to roles in the SELECTED roles list. You can add roles to this list from the available roles list.
- Policy applies to all roles OTHER THAN those selected below-Select this option to apply the auth table mapping policy to all users except for those who map to the roles in the SELECTED roles list. You can add roles to this list from the available roles list.
- In the Action section, specify auth table mapping rules for the specified Infranet Enforcer.
- Always Provision Auth Table-Select this option to automatically provision auth table entries for chosen roles on the specified Infranet Enforcer.
- Provision Auth Table as Needed-Select this option to provision auth table entries only when a user with a chosen role attempts to access a resource behind the specified Infranet Enforcer. This option is greyed out for Check Point Firewall Enforcers since it is not supported.
- Never Provision Auth Table-Select this option to prevent chosen roles from accessing resources behind the specified Infranet Enforcer.
- You must delete the Default Policy if you configure any custom auth table mapping policies. IPS's default configuration includes this default auth table mapping policy that allows all source IP endpoints to use all Infranet Enforcers.
- Click Save Changes.