Configuring the Local Profiler Authentication Server
Ensure you perform the following tasks before proceeding with the Profiler Authentication server configuration.
•To use DHCP fingerprinting, configure the switch(es) to forward DHCP packets to the IPS.
•To use SNMP/SSH-based profiling from Network Infrastructure Devices, configure one or more switches in the Network Infrastructure Device page of the IPS Administrator User.
•Download the latest device fingerprints package from the support portal. Minimum supported fingerprints database version for 9.1R11 is 45.
Basic Profiler Configuration
To configure basic settings for the Local Profiler:
1.Navigate to Profiler > Profiler Configuration > Basic Configuration.
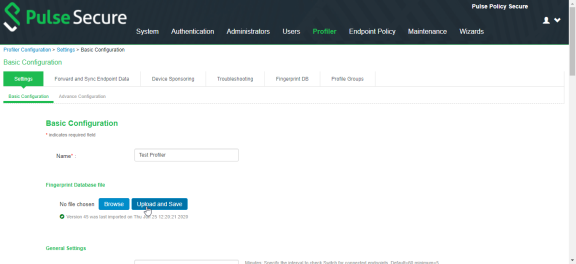
2.Enter a name for the Profiler.
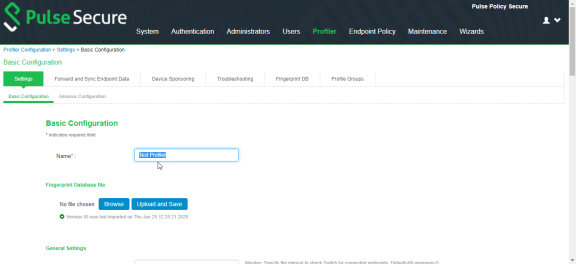
3.Click Browse and upload the device fingerprints package.
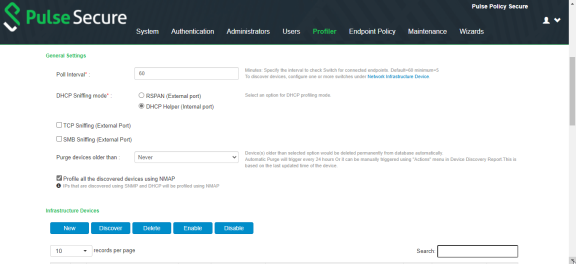
4.Set the General Settings for the profiler:
•Set SNMP Poll interval, for polling the Network Infrastructure Devices. By default, the poll interval is set to 60 minutes.
•Select the DHCP Sniffing mode. RSPAN for external ports and DHCP Helper for internal ports. Optionally, select the TCP or SMB Sniffing modes to profile devices using TCP and SMB. External interface is connected to switch SPAN port.
•Select the interval to purge older devices from the database periodically. By default, the interval is set to Never that means purging is disabled.
•Optionally, select the option to profile all the discovered devices using NMAP.
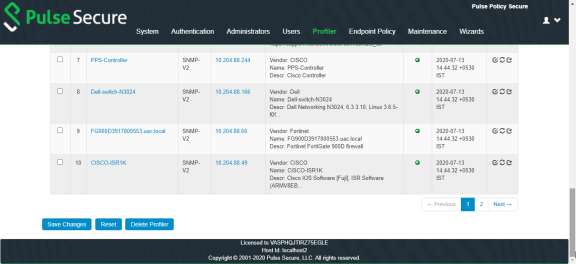
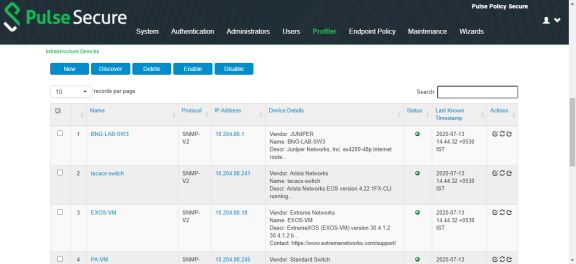
5.The SNMP/SSH scans and lists the Infrastructure Devices and connected endpoints after a predefined Poll interval with details.
•Use New to add devices, Discover to find a range of devices in the network by entering the details in the pop-up window.
•For each device, use the icons in the Actions column to Edit, Refresh, or Duplicate the device details.
6.Click Save Changes to save the basic profiler configuration, Reset to clear the settings and revert to default settings, or Delete Profiler to delete the profiler.