Configuration
Configuring Authentication Server
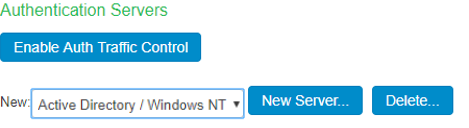
Create a new AD Authentication server, select Authentication > Auth.Servers. For example, Select AD server from the drop down and Click New Server.
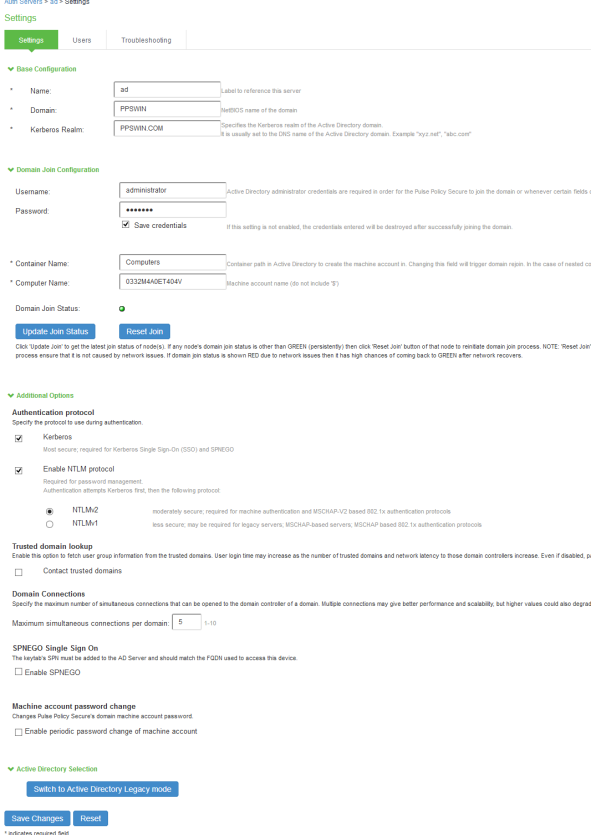
The AD configuration page is shown below.
Updating Default Realm
-
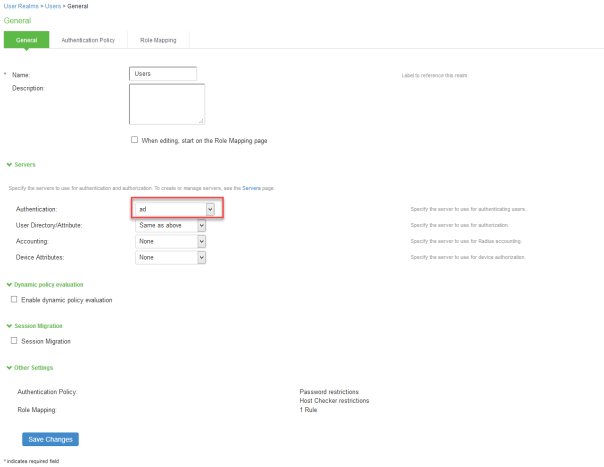
Select User Realms > User > General.
-
Under Authentication, select the AD as the authentication server.
-
Click Save Changes.
Updating Default Sign-in Policy
-
Select Authentication > Signing In > Sign-in Policies.
-
Add Available Realms as Users, Authentication protocol set as 802.1X.
-
Click Save Changes.

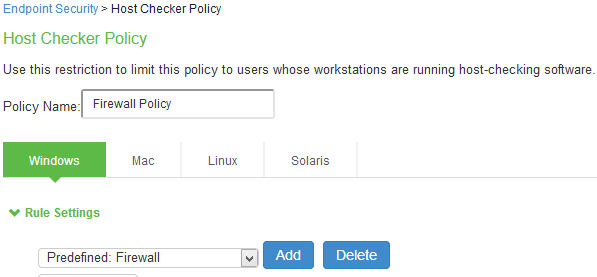
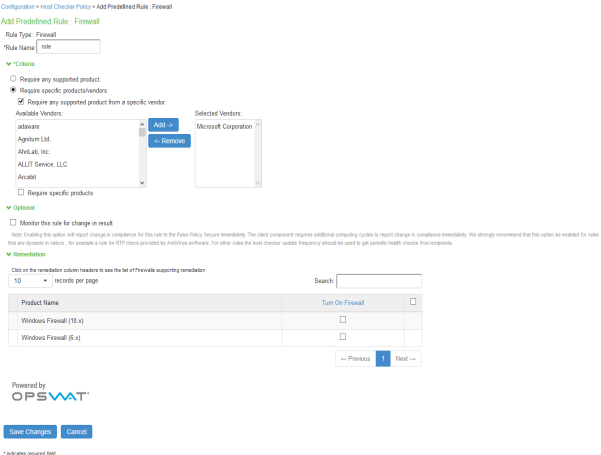
Creating a Host Checker Policy
-
Select Authentication > Endpoint Security > Host Checker.
-
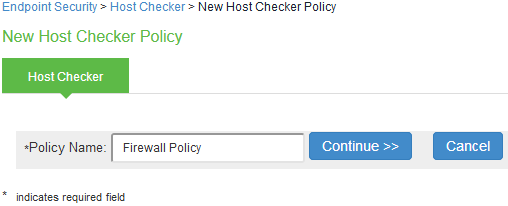
Under Policies, Click New and enter a policy name and click Continue.
-
Under Rule Settings, select the rule type as Predefined Firewall and click Add.
-
Enter the rule name and specify the criteria for compliance and click Save Changes.
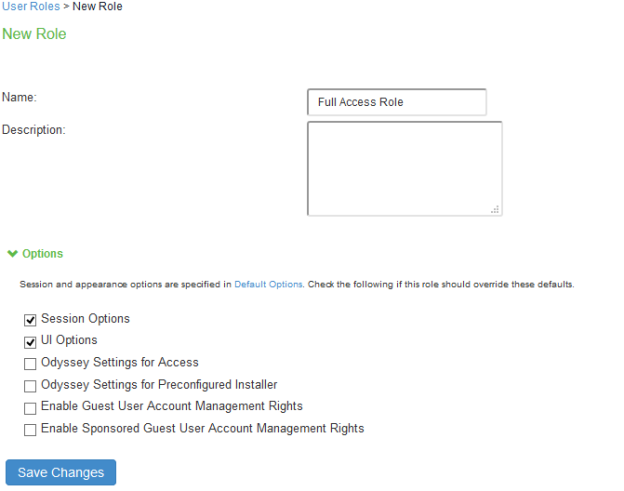
Creating User Roles
-
Select Users > User Roles > New User Role.
-
Enter a name. For example, Full Access Role, Limited Access Role.
-
Click Save Changes.
-
Select User Roles > <Full Access Role> > General > Restrictions > Host Checker. Add the Firewall Policy restriction created earlier in Creating a Host Checker Policy for Full Access Role. Click Save Changes.
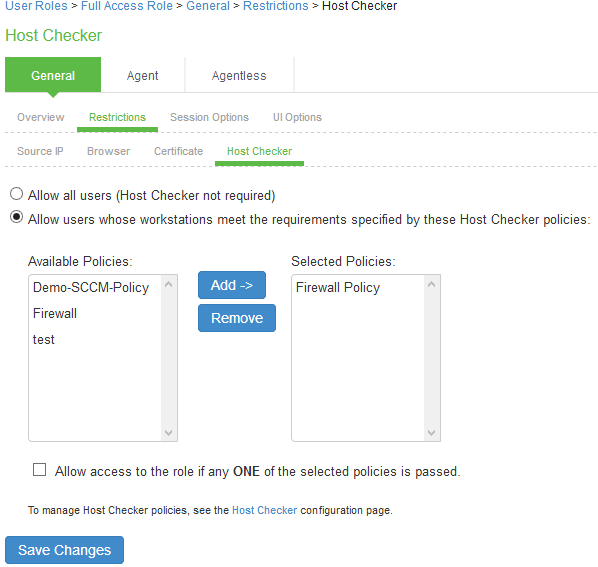
For Limited Access Role, ensure that the Host Checker not required option is not selected.

-
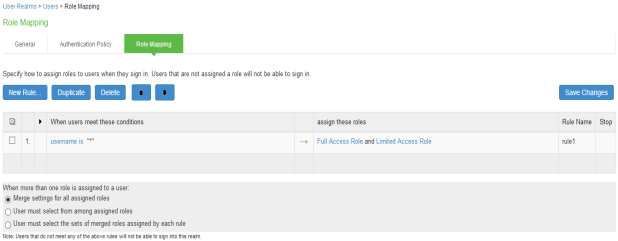
Set Role Mapping rules. Select User Realms > Users > Role Mapping > New Rule
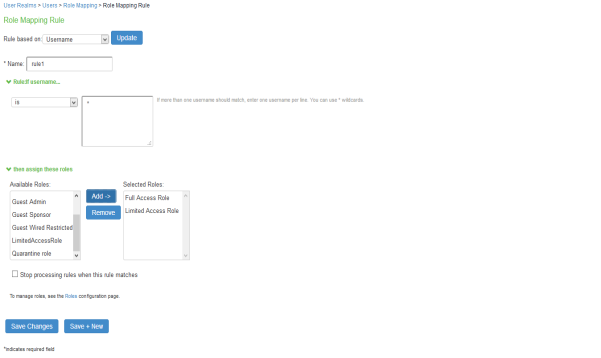
Once the role mapping roles are configured the following screen is displayed.
Creating a new RADIUS Client
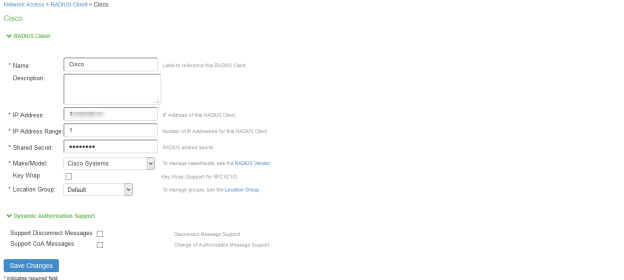
Add the Switch as RADIUS client
-
Select Endpoint Policy > Network Access > RADIUS Client.
-
Enter the name.
-
Enter the IP address of the Switch.
-
Select the make/model as Cisco Systems.
-
Select the default location group.
-
Click Save Changes.
Shared Secret will be used in the Cisco/RADIUS configuration.
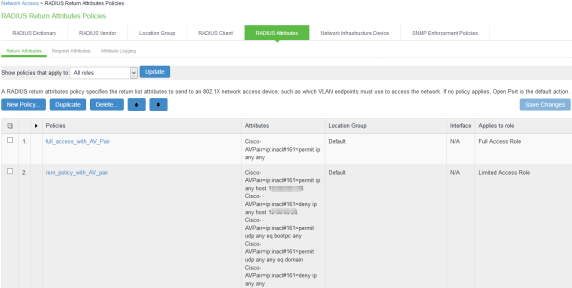
Configuring RADIUS Return Attribute Policies
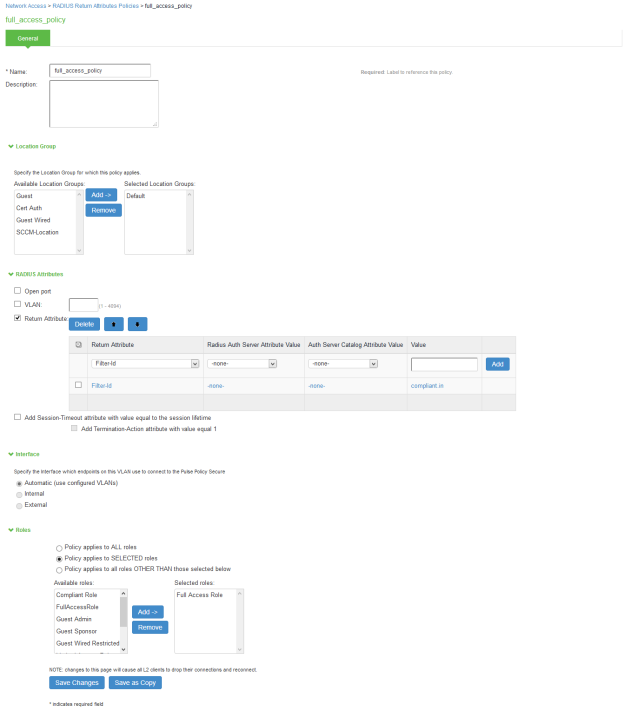
Define Radius Return Attribute policy based on ACL for different roles.
-
Set RADIUS return attributes. Select Endpoint Policy > Network Access > RADIUS Return Attribute Policies. Click New Policy.
-
Under RADIUS Attributes tab, select the check box for Return Attribute. Select appropriate Vendor Specific Attribute as Return Attribute. In the Value filed, define the ACL/Firewall Filter. For example, Return Attribute is Filter-Id and Value as compliant.in.
Similarly define a remediation policy with Return Attribute as Filter-Id and Value as noncompliant.in.
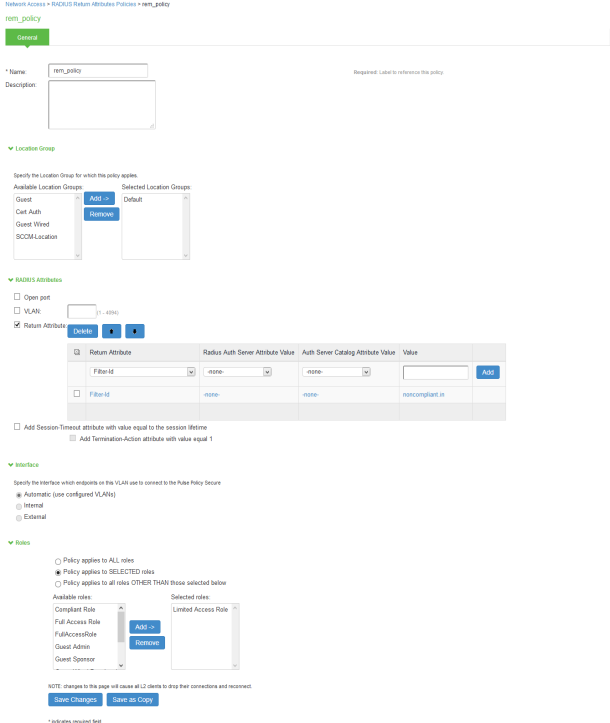
The following example shows the Filter-Id radius attribute policy for Cisco Switches.

The following example shows RADIUS return attribute used to send the VLAN ID. In the below example, VLAN 65 is sent for Full Access Role and VLAN 60 for Limited Access Role.
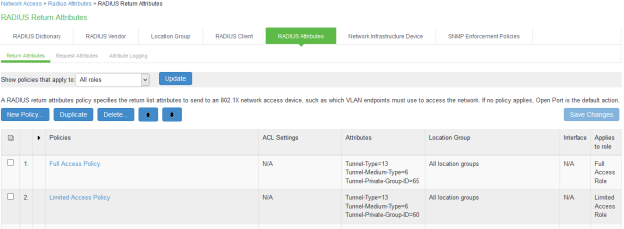
The following example shows the Cisco-AVPair radius attribute policy for Cisco Switches.
- When using VSAs there is no need to configure ACL/Firewall filters in the switches. These are managed by IPS and access control entries (ACEs) will be applied on the switches after User Authentication.
- VLAN change using CoA is not supported with Cisco Switches. It is recommended to use RADIUS disconnect for VLAN change.
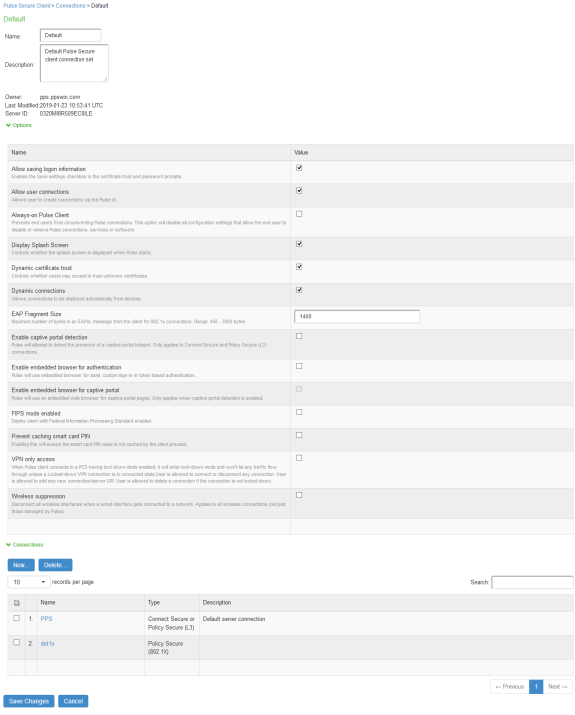
Configuring 802.1X Connections
-
Select Users > Pulse Secure Client > Connections. Click Default.
-
Under Connections, Click New to create a New Pulse Secure Connection.
Ensure that you have the valid device certificate to avoid certificate warnings at Pulse Client.
The configuration mentioned is only for User mode connections.
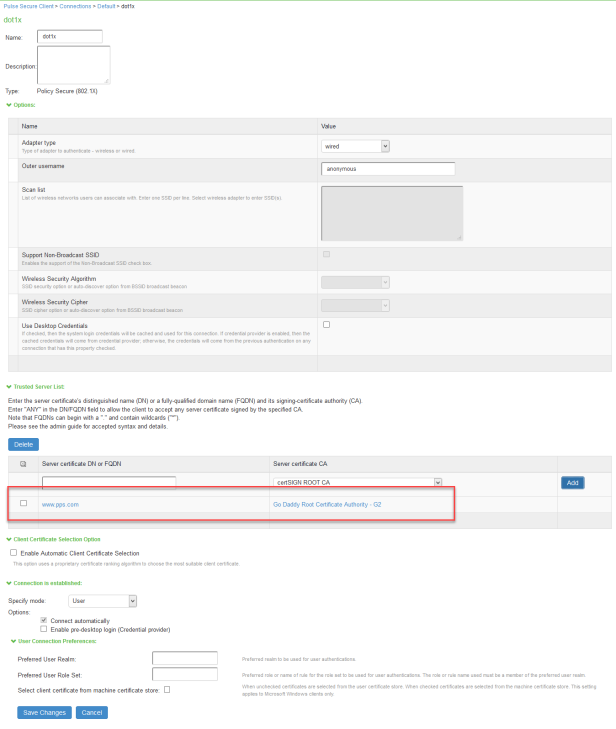
-
Enter name and select Type as Pulse Secure (802.1X).
-
Click Save Changes.
Configuring Cisco Switch
CLI command to configure 802.1X on Cisco 3850. The switch configuration varies for each switch type.
Run the show run command on your switch to ensure that your access interface connections are set up.
# Interface configuration.
interface GigabitEthernet1/0/7
switchport access vlan 60
switchport mode access
authentication periodic
authentication timer reauthenticate server
authentication event server dead action authorize
access-session port-control auto
dot1x pae authenticator
spanning-tree portfast
end
# Specify the server group for authentication, authorization and accounting.
aaa authentication dot1x default group <group-name>
aaa authorization network default group <group-name>
aaa accounting dot1x default start-stop group <group-name>
# Configure the IPS as radius server.
radius server <IPS-Server-name>
address ipv4 <IPS-IP Address> auth-port 1812 acct-port 1813
key psecure
radius-server attribute 44 extend-with-addr
radius-server attribute 6 on-for-login-auth
radius-server attribute 8 include-in-access-req
radius-server attribute 25 access-request include
radius-server retransmit 1
# Create the server group which will be used for AAA.
# Add IPS as server in the server group.
aaa group server radius <group-name>
server name <IPS-Server-name>
# ACL configuration
ip access-list extended compliant
permit ip any any
ip access-list extended uncompliant
deny ip any host <Resource-IP-Address1>
deny ip any host <Resource-IP-Address2>
permit ip any