Ivanti Policy Secure Configuration
The following configurations are required to permit the VoIP phone to access the LAN network:
- Create 2 roles, one for hosts that don’t have a 802.1x supplicant (For example, VoIP Phones) and another for putting all the other devices onto a remediation role.
- Create a MAC Address Authentication Server and MAC Address Authentication Realm.
- Create a Local Profiler authorization server and assign them to a MAC Address Authentication Realm.
- In the MAC Address Authentication Realm, create role mapping rules to assign roles to devices.
- Create a location group and map the location group to MAC Address Authentication Realm.
- Configure an SNMP client.
- Configure the SNMP enforcement policies for final VLAN assignment.
This use case configuration applies to profiled devices using either DHCP, or SNMP/NMAP mechanisms. For more information, see Profiler Deployment Guide.
Pre-Requisite
You must ensure that the Switch is configured with the linkup, MAC Address notification or port security trap. You must procure Profiler license for profiler functionality. For sample configuration, see Profiler Deployment Guide.
Procedure
-
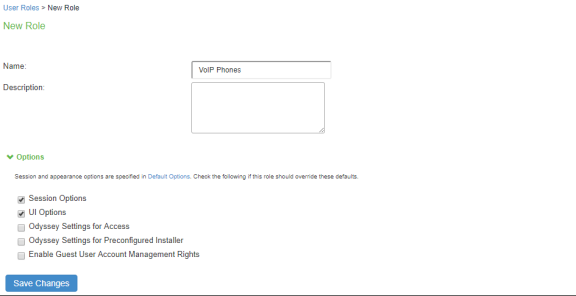
Create a new user role, select Users > User Roles > New User Role. Enter a name. For example, VoIP Phones.
-
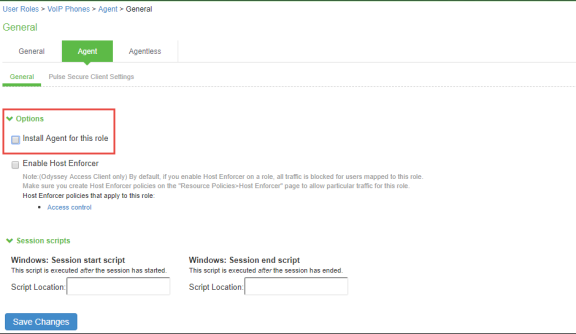
Uncheck Install Agent for this Role. Do not configure any role restrictions.
-
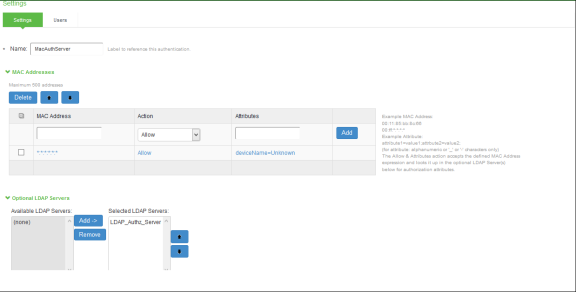
Create a new MAC Address Authentication server, select Authentication > Auth.Servers > MAC Address Authentication. Click New Server. To allow all MAC addresses, configure * as a wild character and assign the device attribute of “deviceName=unknown” as shown in the below screenshot.
-
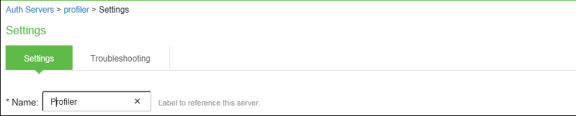
Create a new Local Profiler authorization server.
-
Select Authentication > Auth.Servers. Select Local Profiler from the server type drop-down list and click New Server.
-
Click Browse and upload the device fingerprints package from the software download site.

-
Configure SNMP Poll interval and DHCP sniffing mode interface. The SNMP poll interval must be set depending on your deployment. For example, if it is set to 60, the connected SNMP Switches are checked for every 60 minutes.

-
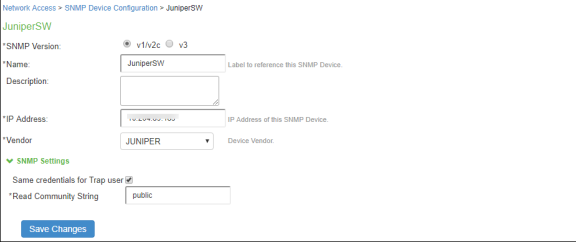
For Profiling devices using SNMP, configure the switch under Endpoint Policy > Network Access > SNMP Device Configuration.
-
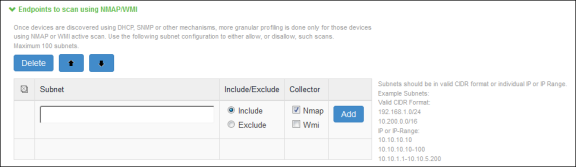
(Optional) Add one or more subnets that can be included or excluded for fingerprinting unmanaged devices using Nmap target scans. Note that an Nmap target scan is only performed on valid IP addresses in the subnet.
-
-
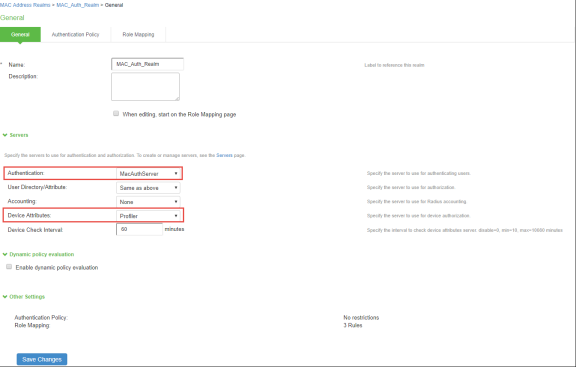
Create a new MAC Address Authentication Realm and assign the MAC Address Authentication Server and Profiler server to it, select Endpoint Policy > MAC Address Realms > MAC Authentication Realm.
-
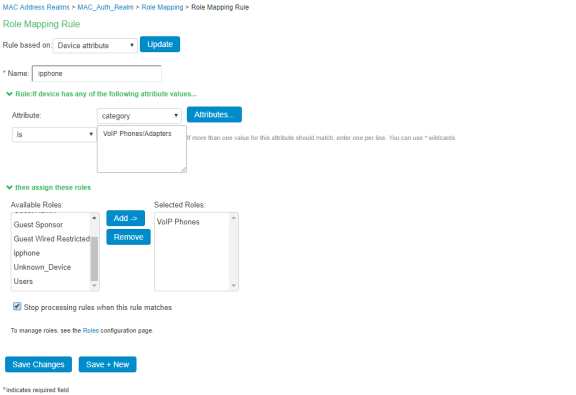
Set Role Mapping rules. Select Rule based on Device attribute and click Update. Enter the rule name and under Rule, select Category as Attribute and values as “VoIP Phone/Adapters” and then assign all devices of category to the role called “VoIP Phone” as shown below.
-
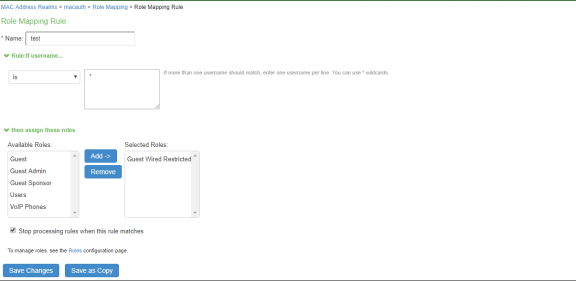
Create another rule, to assign all other devices to the role called “Guest wired restricted”.
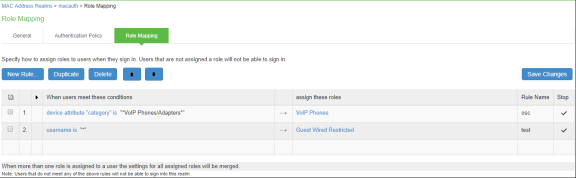
Once the role mapping roles are configured the following screen is displayed.
-
Configure the SNMP client (i.e Add the switch in the Ivanti Policy Secure admin UI).
-
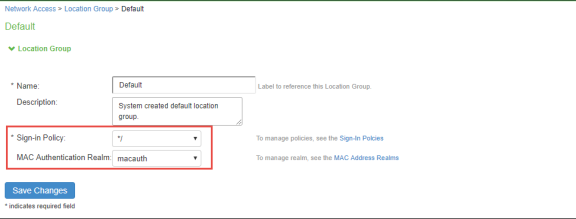
Create a location group. Select Endpoint Policy > Network Access > Location Group (and assign the default Signing In policy and MAC Address Authentication Realm).
-
Create a new SNMP client. Select Endpoint Policy > Network Access > SNMP Device Configuration. Enable SNMP Enforcement and select the location group.
You can also choose to add the SNMP client through Endpoint Policy > Network Access > SNMP Device Discovery.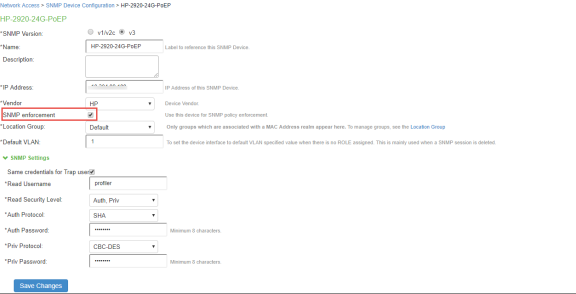
-
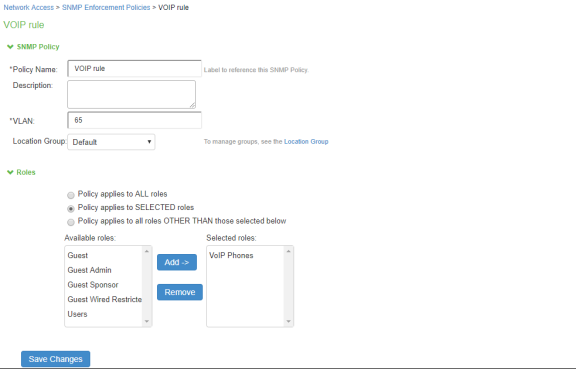
Define the SNMP enforcement policy. Select Endpoint Policy > Network Access > SNMP Enforcement Policies. Click New Policy. For example, Define an SNMP enforcement policy for moving VoIP Phones to the appropriate VLAN.
-
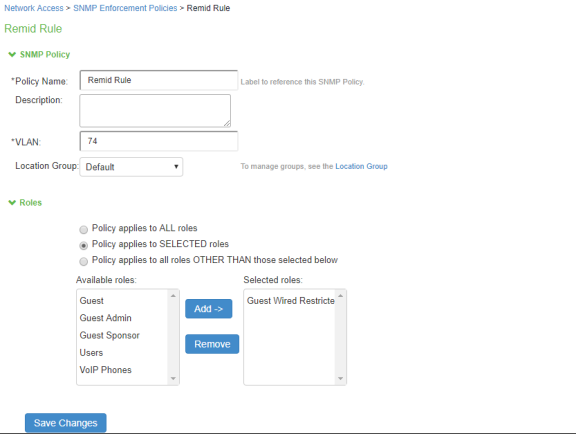
Define an SNMP enforcement policy for moving other devices to the appropriate VLAN.
-
Conclusion
You should now be able to properly authenticate devices based on their profile. For example, in the above scenario, all VoIP phones will be assigned with VoIP role and will be put under VLAN 65 when they attempt to access the network. The other devices will be assigned with a remediation role and will be put under VLAN 74.
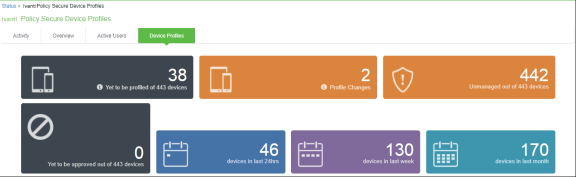
You can view the high-level device statistics from the Device dashboard page at System > Status > Device Profiles.
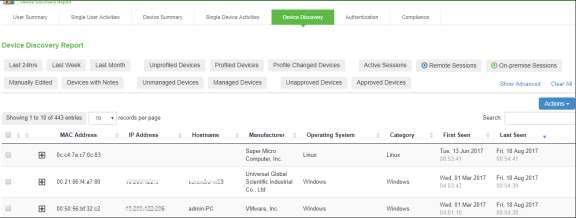
You can view the device reports at System > Reports > Device Discovery.

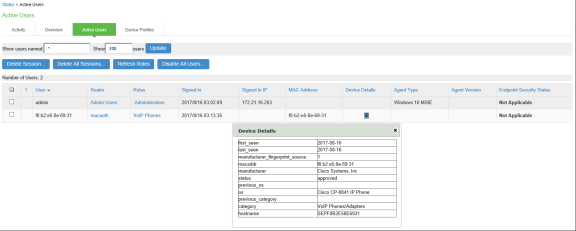
You can verify the active users table to view the session details of the user.
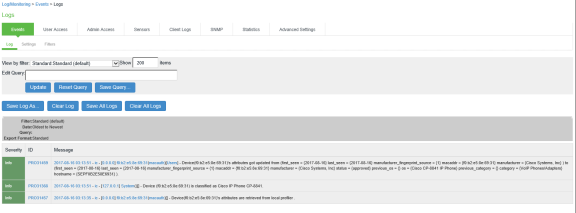
For troubleshooting, you can verify the user access logs.
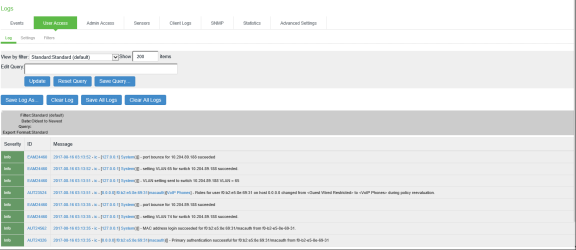
You can also verify the event logs.