One-to-One Network Address Translation (NAT)
Overview
One-to-One NAT is the process that maps one internal private IP address to one external public IP address. This helps to protect the private IP addresses from any malicious attack or discovery as the private IP addresses are kept hidden. Ivanti Policy Secure allows admin to provision auth table entries for endpoints behind one-to-one NAT deployment.
One-to-One NAT Deployment
In this deployment, each end user is having their local address and they are assigned a unique NAT IP address. Ivanti Policy Secure labels the end user as behind NAT for this type of deployment. The resources are provisioned to firewall only if the Provision Auth table for endpoints behind one-to-one NAT deployment option is enabled on Ivanti Policy Secure.
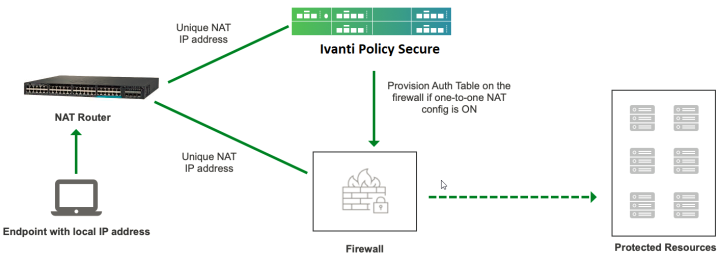
The authentication process is described below:
- User behind one-to-one NAT logs in and the corresponding user role is assigned.
- A matching auth table mapping policy is detected. If configuration for Provision Auth table for one-to-one NAT Deployment option is enabled in this policy, then authentication table for external public IP address for the user is pushed on the firewall.
- User logs out and all the external public IP address information associated with the user from that endpoint is removed from the firewall.
Configuring one-to-one NAT
To configure one-to-one NAT on Ivanti Policy Secure:
-
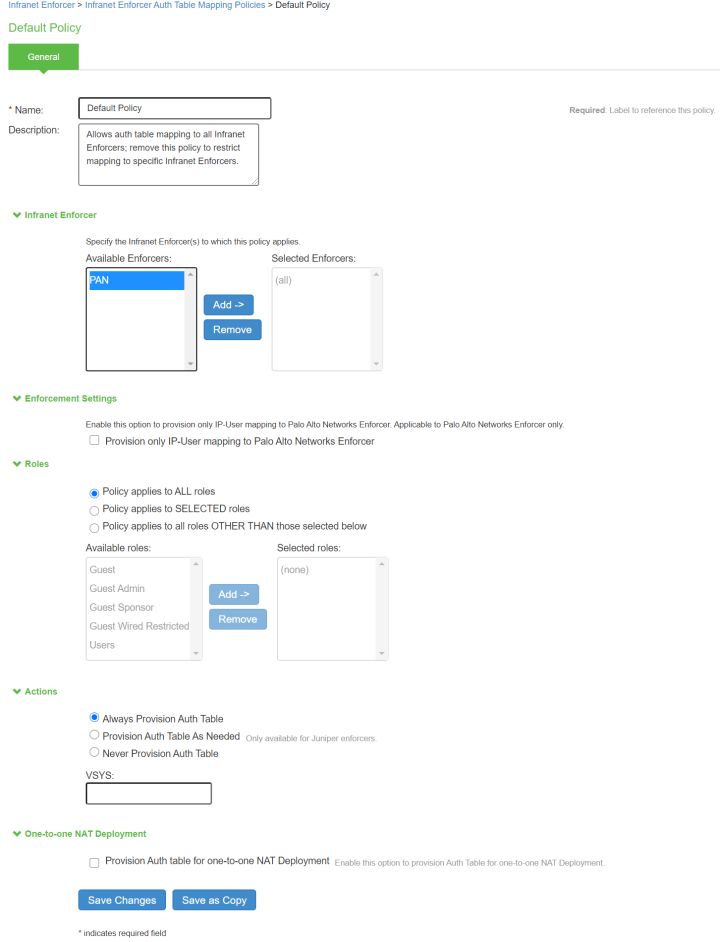
Select Endpoint Policy > Infranet Enforcer > Auth Table Mapping.
-
Select Provision Only User-IP Mapping to Palo Alto Networks Enforcer to provision user name only to PAN enforcer to use the directory services.
-
Under One-One NAT deployment, enable the checkbox for Provision Auth Tablefor one-to-one NAT deployment.
-
The Admin is redirected to a confirmation page with a warning message.
This configuration option is recommended to use for one-to-one NAT Deployment. It is not recommended to use for many-to-one NAT Deployment. If used, it could allow multiple endpoints behind many-to-one NAT to access resources without authentication.
-
Click Enable.
-
Click Save Changes.