Using Device Certificates
This topic describes how to use device certificates. It includes the following information:
Understanding Device Certificates
A device certificate helps to secure network traffic to and from the Ivanti Secure Access Client service using elements such as your company name, a copy of your company's public key, the digital signature of the Certificate Authority (CA) that issued the certificate, a serial number, and an expiration date. The system also uses device certificates for secure communications with the Infranet Enforcer.
When receiving encrypted data from the system, the client's browser first verifies whether the device certificate is valid and whether the user trusts the CA that issued the certificate. If the user has not already indicated that they trust the certificate issuer, the Web browser prompts the user to accept or install the certificate.
The system supports X.509 device certificates in DER and PEM encode formats (file extensions include .cer, .crt, .der, and .pem) as well as PKCS #12 (file extensions include .pfx and .p12). The system also supports the following features:
•Intermediate device CA certificates: Within a certificate hierarchy, one or more intermediate certificates are branched off a single root certificate.
•Multiple device certificates: When using multiple device certificates, each certificate handles validation for a separate hostname or fully qualified domain name (FQDN) and can be issued by a different CA.
Beginning with Connect Secure system software release 7.2, you can assign device certificates to the Connect Secure VLAN interfaces.
Understanding Self-Signed Certificates
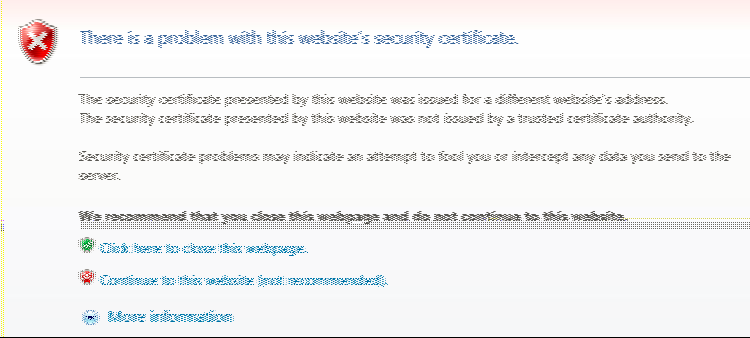
When you initialize the system with the serial console, the system creates a self-signed certificate that enables you to immediately begin setting up the system. Users are prompted with a security alert each time they sign in because the certificate is not issued by a trusted CA. Figure shows the security alert.
Before promoting the system to production use, we recommend you replace the self-signed certificate with a certificate issued by a trusted CA.
In Policy Secure deployments with ScreenOS Enforcers, you must use a CA-signed device certificate. If you use a self-signed certificate, the ScreenOS Enforcer does not allow a connection. Import a CA-signed device certificate into the Policy Secure and then import the certificate of the CA that signed the device certificate into the ScreenOS Enforcer.
Importing a Device Certificate and Private Key
The system uses certificates to verify itself to other network devices. A digital certificate is an electronic means of verifying your identity through a trusted third party, known as a Certificate Authority (CA). Your company might use its own enterprise CA server, or it might use a reputable third-party CA
To import an enterprise root server certificate and private key:
1.Select System > Configuration > Certificates > Device Certificates.
2.Click Import Certificate & Key to display the configuration page.
3.Use one of the following options to complete the import procedure:
•If certificate file includes private key: When the certificate and key are contained in one file.
•If certificate and private key are separate files: When the certificate and key are in separate files.
•Import via System Configuration file: When the certificate and key are contained in a system configuration file. With this option, the system imports all of the certificates specified (including private keys and pending CSRs, but not the corresponding port mappings).
In the appropriate form, browse to the certificate and key files. If the file is encrypted, enter the password key.
4.Click Import.
The Import Certificate and Key button is disabled on FIPS hardware platforms because importing private keys is not allowed. On a FIPS hardware platform, you must create a CSR and then import a signed certificate from the CA.
Creating a Certificate Signing Request
If your company does not own a digital certificate for its Web servers, you can create a certificate signing request (CSR) and then send the request to a CA for processing. When you create a CSR, a private key is created locally that corresponds to the CSR. If you delete the CSR at any point, this file is also deleted, prohibiting you from installing a signed certificate generated from the CSR.
To create a certificate signing request:
1.Select System > Configuration > Certificates > Device Certificates.
2.Click New CSR to display the configuration page.
3.Complete the required information and click Create CSR.
4.Follow the on-screen instructions, which explain what information to send to the CA and how to send it.
When you submit a CSR to a CA authority, you might be asked to specify either the type of Web server on which the certificate was created or the type of Web server the certificate is for. Select "apache" (if more than one option with apache is available, select "any"). If you are prompted for the certificate format to download, select the standard format.
Do not send more than one CSR to a CA at one time. Doing so can result in duplicate charges.
To view details of any pending requests that you previously submitted, click the Certificate Signing Request Details link.
Importing a Signed Certificate Created from a CSR
When you receive the signed certificate from the CA, import it.
To import a signed device certificate created from a CSR:
1.Select System > Configuration > Certificates > Device Certificates.
2.Under Certificate Signing Requests, click the Pending CSR link that corresponds to the signed certificate.
3.Under Import signed certificate, browse and select the certificate file you received from the CA, and then click Import.
Understanding Intermediate Certificates
Within a certificate hierarchy, one or more intermediate certificates are branched off a single root certificate. The root certificate is issued by a root CA and is self-signed. Each intermediate certificate is issued by the certificate preceding it in the chain.
To use chained certificates in your deployment, you must ensure that the server (Policy Secure or Connect Secure) and client (Web browser) together contain the entire certificate chain. For example, you can secure traffic using a chain that stems from a VeriSign root certificate. If your users' browsers come preloaded with VeriSign root certificates, you need to install only the lower-level certificates in the chain. When your users sign in, the system presents any required certificates within the chain to the browser to secure the transaction. The system creates the proper links in the chain using the root certificate's IssuerDN. If the system and browser together do not contain the entire chain, the user's browser does not recognize or trust the device certificate because it is issued by another certificate instead of by a trusted CA.
You can upload one or more intermediate CAs in a PEM file. The entire chain must be sent to the client in descending order, starting with the root certificate.
Within a certificate hierarchy, one or more intermediate certificates are branched off a single root certificate. The root certificate is issued by a root CA and is self-signed. Each intermediate certificate is issued by the certificate preceding it in the chain.
To use chained certificates in your deployment, you must install the appropriate client-side certificates in each user's Web browser and then upload the corresponding CA certificates to the Ivanti Secure Access Client Service Intermediate CA store. Use one of the following methods to upload the certificate chain:
•Import the entire certificate chain in one file. The file must contain the root certificate and any sub certificates whose parents are in the file or already imported. You can include certificates in any order in the import file.
•Import the certificates one at a time in descending order. You must install the root certificate first, and then install the remaining chained certificates in descending order.
If you follow one of these methods, the system automatically chains the certificates together in the correct order and displays them hierarchically in the admin console.
If you install multiple certificates in a user's Web browser, the browser prompts the user to choose which certificate to use when signing in.
Importing Intermediate CA Certificates
To import an intermediate CA certificate:
1.Select System > Configuration > Certificates > Device Certificates.
2.Click the Intermediate Device CAs link to display the management page.
3.Click Import CA certificate.
4.Browse to the certificate file, select it, and click Import Certificate to complete the import operation.
Importing a Renewed Certificate That Uses the Existing Private Key
You can renew a device certificate in two ways:
•Submit a new CSR to a CA: This process is more secure because the CA generates a new certificate and private key and retires the older private key. To use this renewal method, you must first create a CSR through the admin console.
•Request renewal based on the CSR previously submitted to the CA: This process is less secure, because the CA generates a certificate that uses the existing private key.
When you order a renewed certificate, you must either resubmit your original CSR or ensure that the CA has a record of the CSR that you submitted for your current certificate.
To import a renewed device certificate that uses the existing private key:
1.Follow your CA's instructions for renewing a certificate that you previously purchased through them. Be sure to specify the same information you used in the original CSR. Your CA uses this information to create a new certificate that corresponds to the existing key.
Even though you specify the same information used in the original CSR, your root CA might have different serial numbers and keys from the original. You might need to support both new client and old client certificates during the transition period, which also requires that you maintain two root CA certificates (your existing certificate and the renewed certificate), at least temporarily.
2.Select System > Configuration > Certificates > Device Certificates.
3.Click the link that corresponds to the certificate you want to renew.
4.Click Renew Certificate to display the page.
5.In the Renew the Certificate form, browse to the renewed certificate file, enter the password for the certificate key, and click Import.
Downloading a Device Certificate
You download the device certificate to your local host so that you can import it into other network devices as needed.
To download a device certificate:
1.Select System > Configuration > Certificates > Device Certificates.
2.Click the link of the device certificate you want to download to display the configuration page.
3.Click the Download link.
4.Save the file to the desired location.
Using Device Certificates with Virtual Ports
Virtual ports can be used to create multiple fully qualified domain names for user sign-in.
When a user tries to sign in using the IP address defined in a virtual port, the system uses the certificate associated with the virtual port to initiate the SSL transaction and for NetScreen Address Change Notification (NACN) communications with the Infranet Enforcer.
You must associate the signed certificate with the port that is connected to the Infranet Enforcer. You can use the same port and certificate for OAC or Ivanti Secure Access Client. Or, you can import other signed certificates and associate them with ports connected to OAC.
You can implement digital certificate security with virtual ports in either of the following ways:
•Associate all hostnames with a single certificate: With this method, you use a single wildcard certificate to validate the identity of all system hostnames, regardless of which hostname is used to sign into. A wildcard certificate includes a variable element in the domain name, making it possible for users who sign in from multiple hosts to map to the "same" domain. For example, if you create a wildcard certificate for *.yourcompany.com, the system uses the same certificate to validate its identity to users who sign in to employees.yourcompany.com as it does to users who sign into partners.yourcompany.com.
•Associate each hostname with its own certificate: With this method, you associate different hostnames with different certificates. Create a virtual port for each hostname. A virtual port activates an IP alias on a physical port. For example, you can create two virtual ports on a single appliance, mapping the first virtual port to the IP address 10.10.10.1 (sales.yourcompany.com) and the second virtual port to the IP address 10.10.10.2 (partners.yourcompany.com). Then you can associate each of these virtual ports with its own certificate, ensuring that users authenticate through different certificates.
To associate certificates with virtual ports:
1.Create the virtual ports.
2.Import the device certificates.
3.Associate the device certificates with the virtual ports:
•Select System > Configuration > Certificates > Device Certificates.
•Click the link of the device certificate you want to configure to display the configuration page.
•Use the controls in the "Present certificate on these ports" section to associate ports with the certificate.
You can assign only one device certificate to the Management Port. If you assign a certificate other than the default device certificate to the Management Port, the default device certificate is automatically deselected as the default. If you do not select a device certificate for the Management Port, the system uses the default device certificate that is presented on the Internal port. You cannot assign certificates to Management Port VIPs.