Deploying Applications Using Ivanti NMDM on Android
To deploy Ivanti managed application:
-
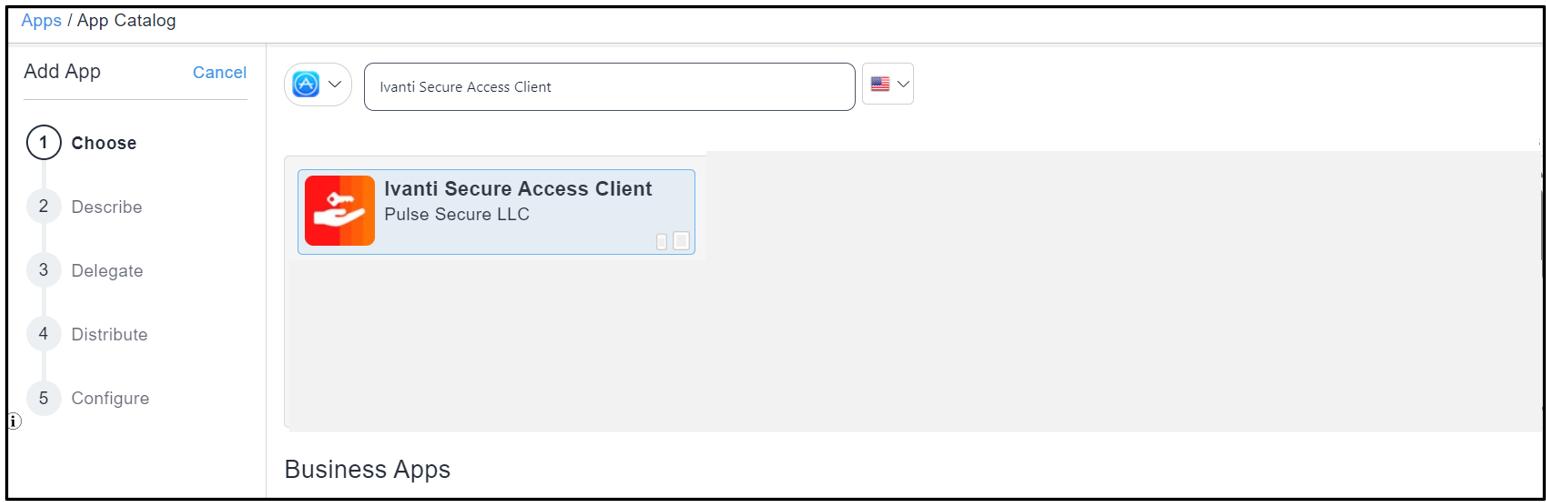
From the Ivanti NMDM console, select Apps > App Catalog, and then click Add.
-
From the application store drop-down list, select Google Play.
-
In the Google Play window, search for Ivanti Secure Access Client app, select the application, and then click Next.
-
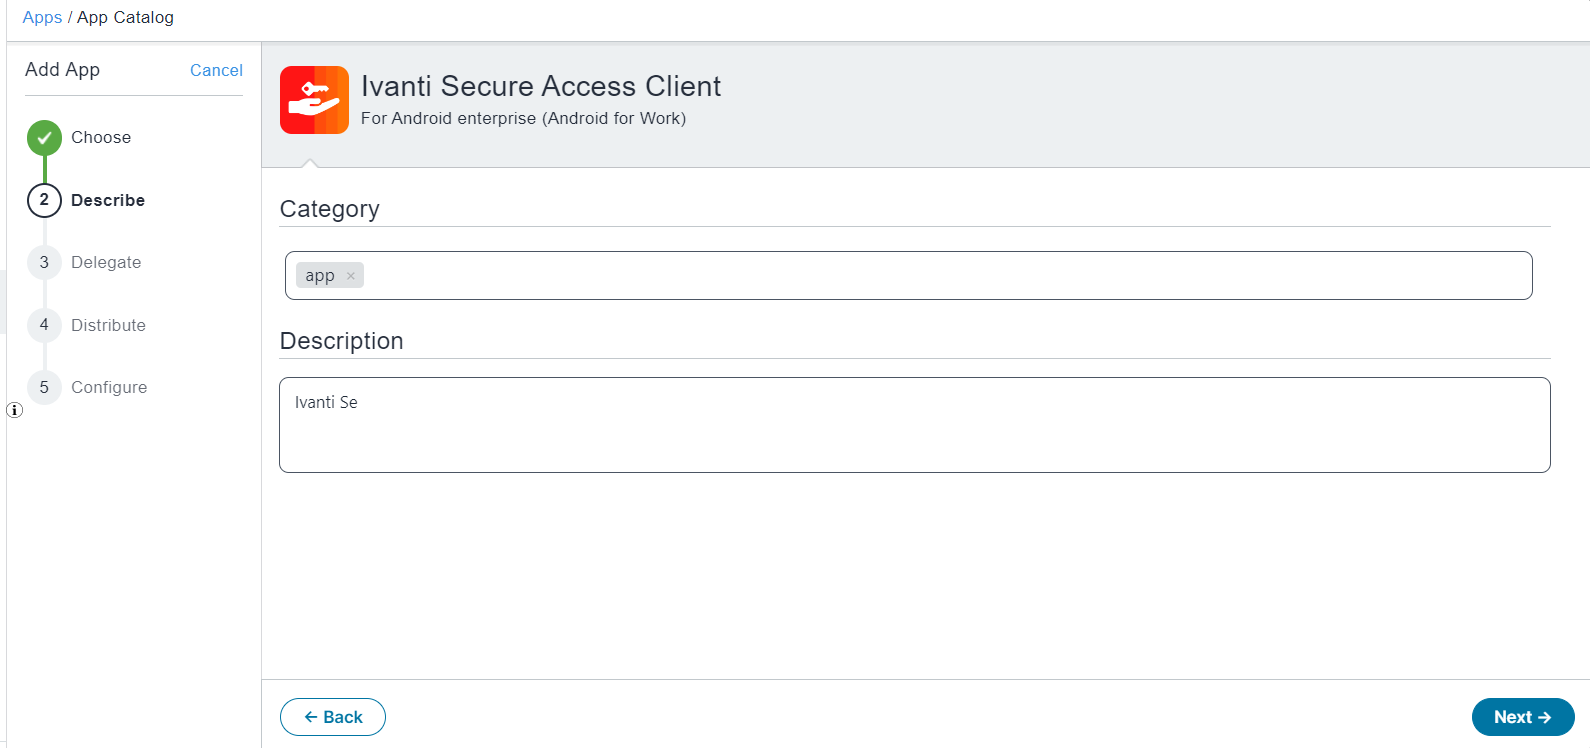
In the Describe window, enter the Category and a Description (optional), and click Next.
-
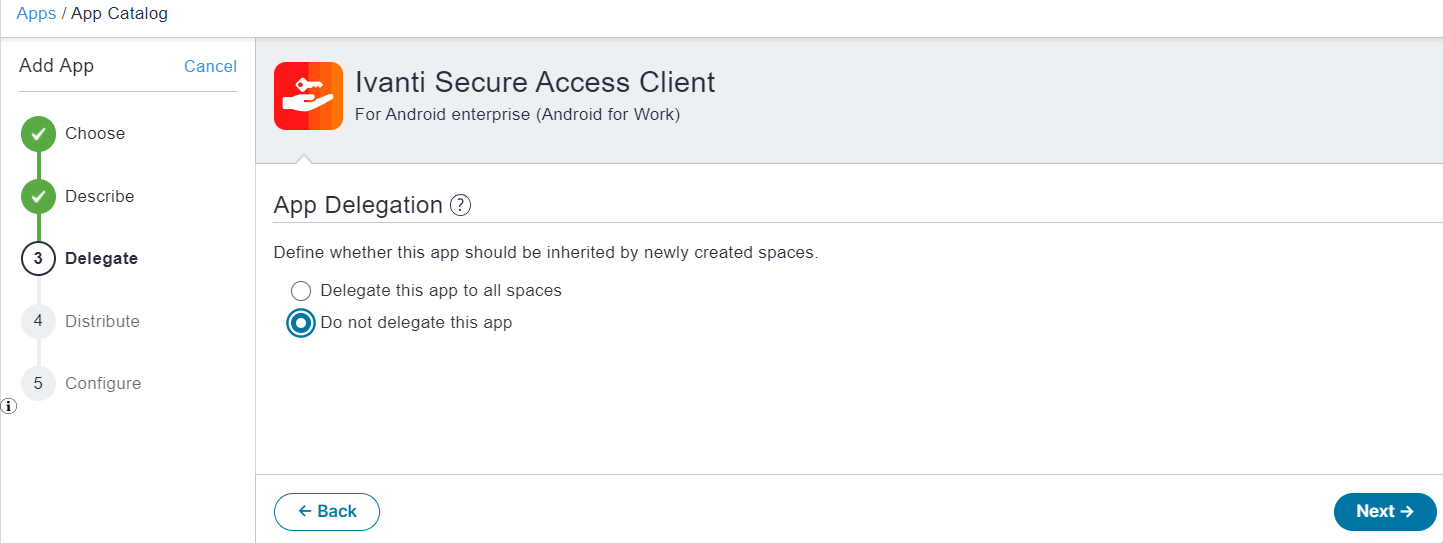
In the App Delegation window, select Do not delegate this app and click Next.
-
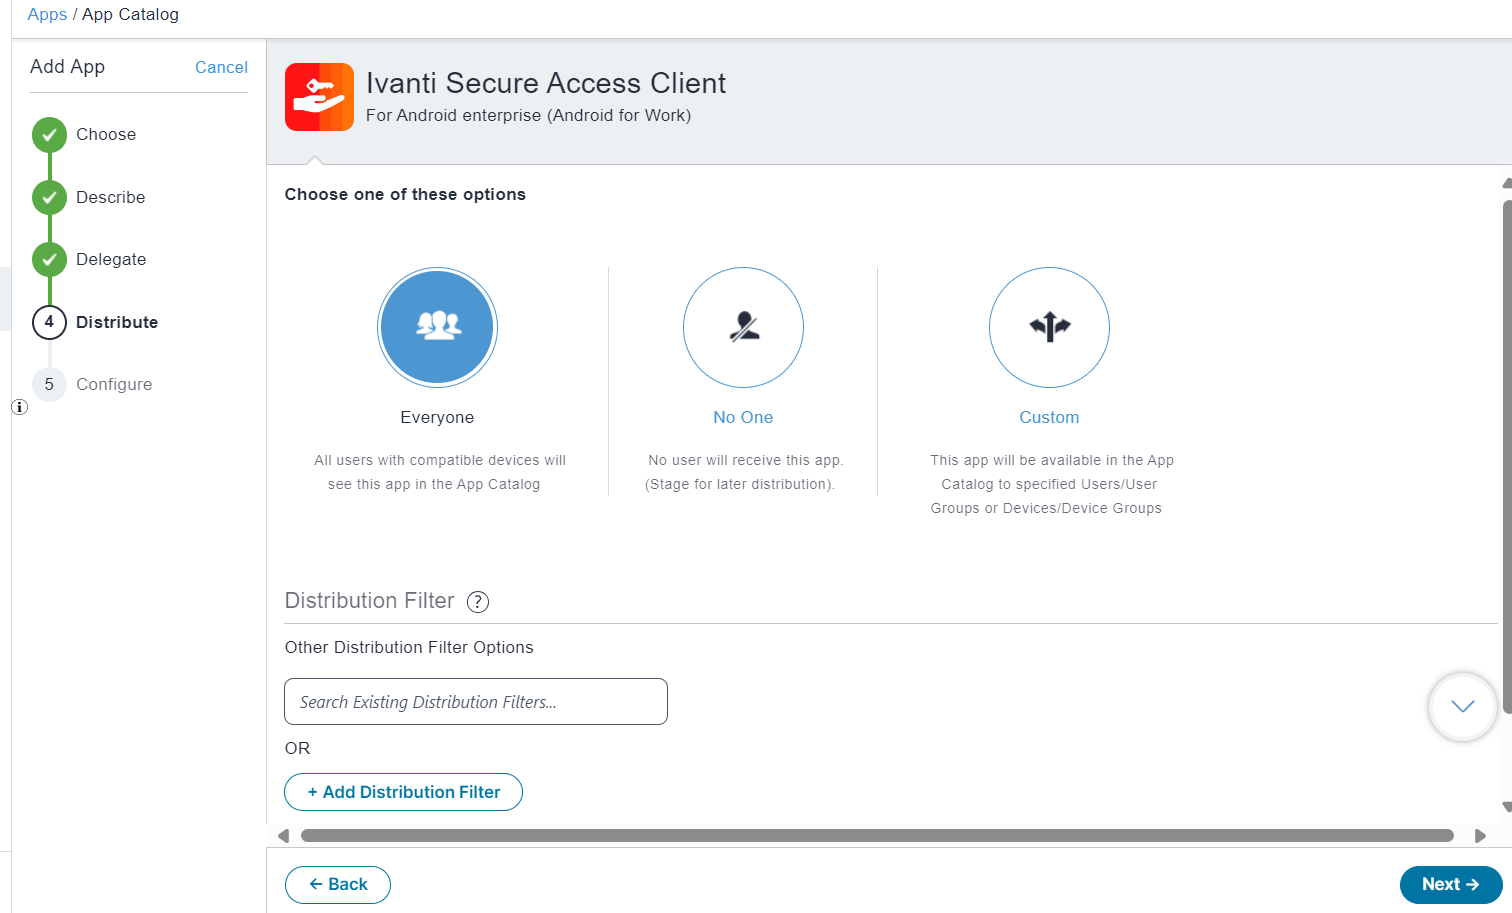
Choose a distribution level for this configuration of the app and click Next.
-
Everyone - The app is added to all the user compatible devices.
-
No One - The app is staged for distribution at a later date.
-
Custom - Select one of the options from "User/User Groups" or "Device/Device Groups".
-
-
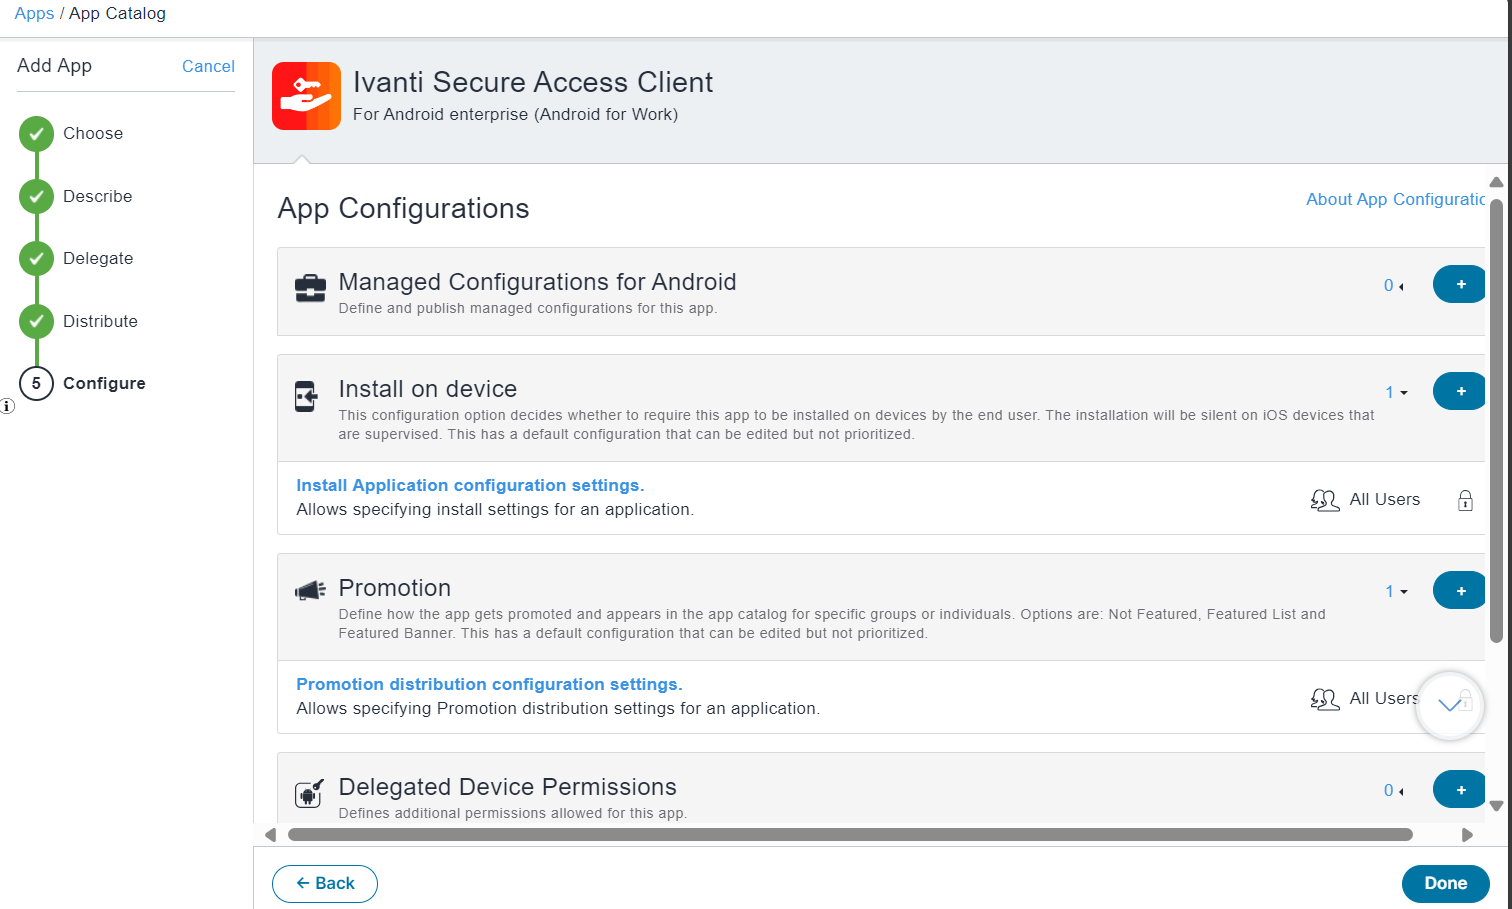
In the App Configurations window, click Done to push the App Catalog to the endpoints.
Configuring Per-App VPN, Always On VPN / On Demand VPN for Android Endpoints Using Ivanti NMDM
Per-app VPN allows Android devices to establish VPN connections only for specific apps. The specific app traffic will go through tunnel, whereas other application’s traffic goes through Physical Adapter.
In an Always On VPN configuration, the tunnel is always on. The device/app traffic that matches specific filters is always routed through the tunnel based on the configuration.
To configure application:
-
From the Ivanti NMDM console, select Apps > App Catalog.
The List View page shows a list of Ivanti managed apps.
-
Edit the application that you want to configure.
-
On the App Configurations tab, select Managed Configurations for Android and then click Add.
-
In the Configuration Setup page that is displayed:
-
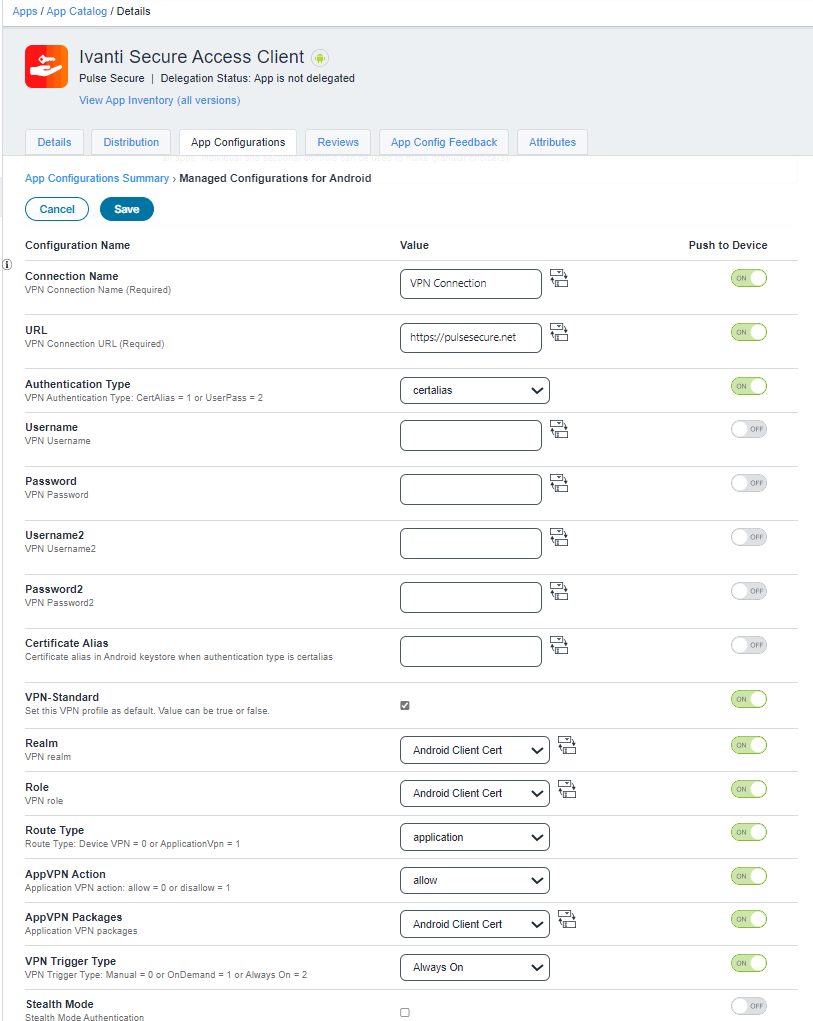
Enter a name for the configuration.
-
Enter Connection Name.
-
Enter application URL.
-
From the Authentication Type list, select certalias.
-
From the AppVPN Action list:
- select allow. This allows only AppVPN Packages through the tunnel.
- select deny. This denies AppVPN Packages, but allows other packages through the tunnel.
-
From the VPN Trigger Type list, choose one of the following:
- Manual: Connect manually by user.
- On Demand: Enable connection if needed.
- Always On: Always establish a connection.
- Specify the Realm name and user Role.
- Click Save.
-
Refer the following table for more details.
| Configuration Keys | Value Type | Configuration Values | Description |
|---|---|---|---|
| Stealth Mode | String | Stealth mode authentication | |
| VPN Trigger Type | Choice | 0 or 1 or 2 | VPN trigger type: Manual=0, On Demand=1, Always On VPN=2 |
| App VPN Packages | String | com.android.chrome, com.microsoft.skydrive | Application VPN packages (value should be comma separated) |
| AppVPN Action | Choice | 0 or 1 | Application VPN action: allow = 0, deny = 1 |
| Route Type | String | 0 or 1 | Route Type: device VPN = 0 or Per -App VPN = 1 |
|
Role |
String |
|
VPN Role |
|
Realm |
String |
|
VPN Realm |
|
VPN-Standard |
bool |
|
Set this profile as default. Existing default profile will be override |
|
Certificate Alias |
String |
|
Certificate alias in the Android KeyStore |
|
Password2 |
String |
|
VPN Password 2 |
|
Username2 |
String |
|
VPN Username 2 |
|
Password |
String |
|
VPN Password |
|
Username |
String |
|
VPN Username |
|
Authentication Type |
choice |
Certalias or userpass or dualauth |
VPN Authentication Type: certalias: Certificate Authentication, userpass: Username/Password based Authentication, dualauth: combination of userpass/certauth |
|
URL |
String |
|
VPN Connection URL |
|
Connection Name |
String |
|
VPN Connection name |
|
UDID |
String |
|
Device UDID to be allowed access and validate pre-auth |