Deploying Applications Using Ivanti NMDM on Apple iOS
To deploy Ivanti managed applications:
-
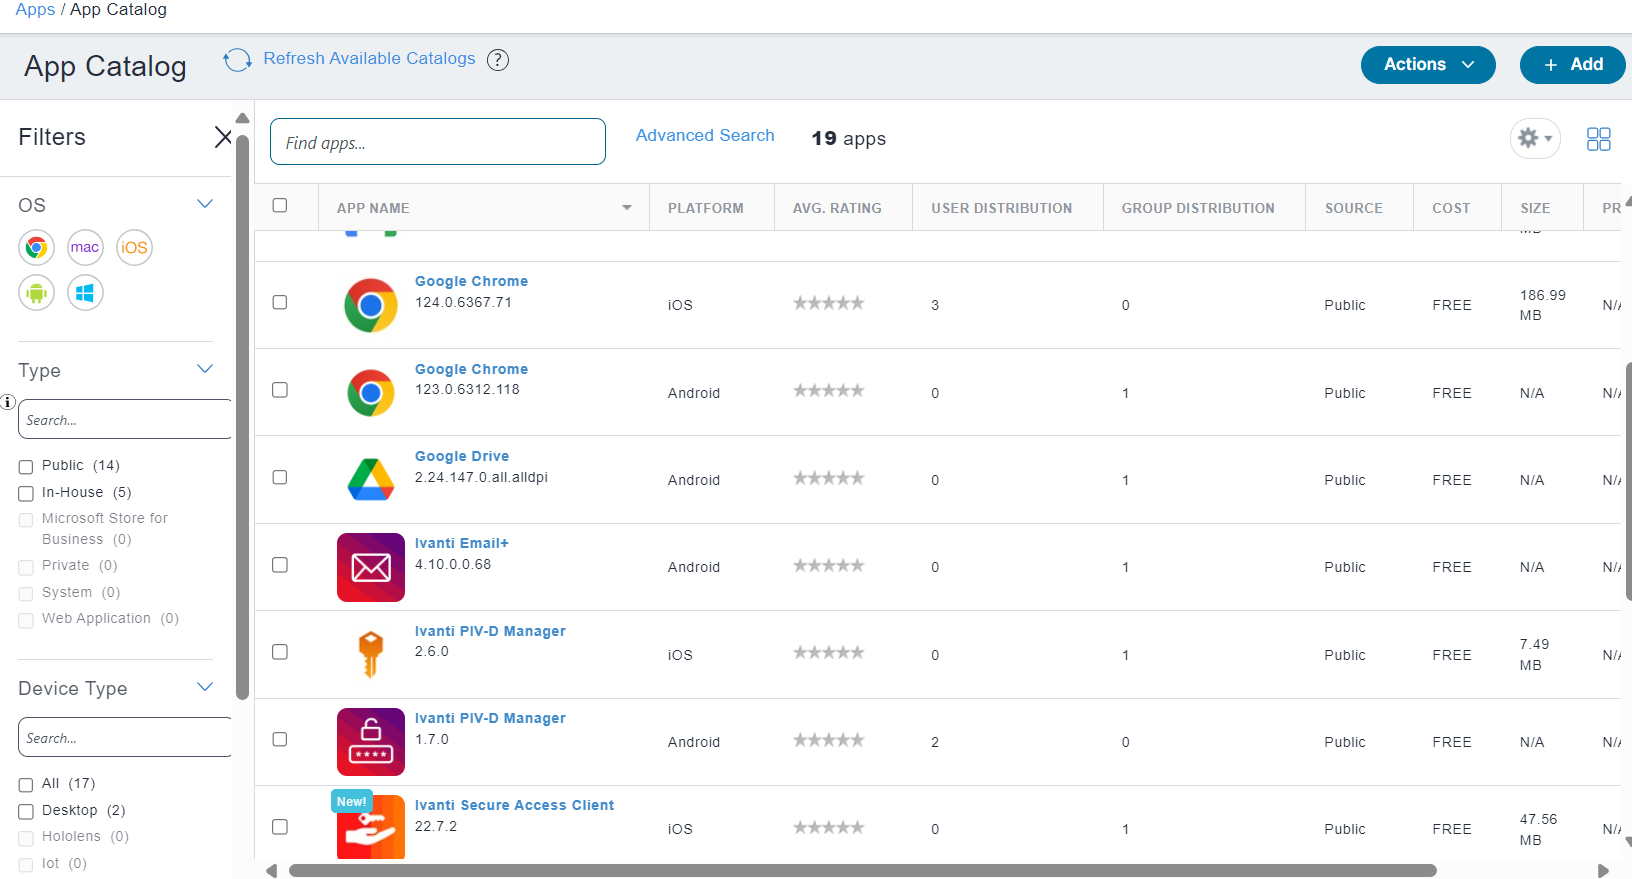
From the Ivanti NMDM console, select Apps > App Catalog, and then click Add.
-
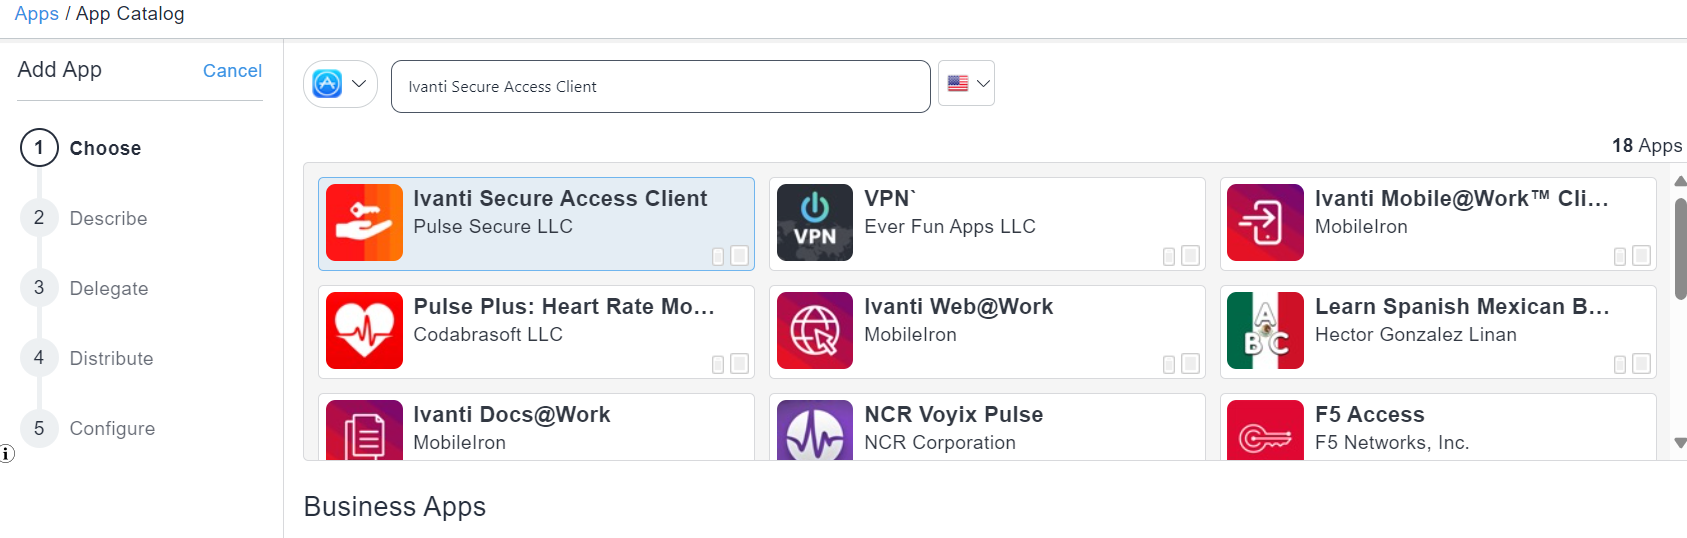
From the application store drop-down list, select iOS Store.
-
In the Apple App Store window, search for Ivanti Secure Access Client app, select the application, and then click Next.
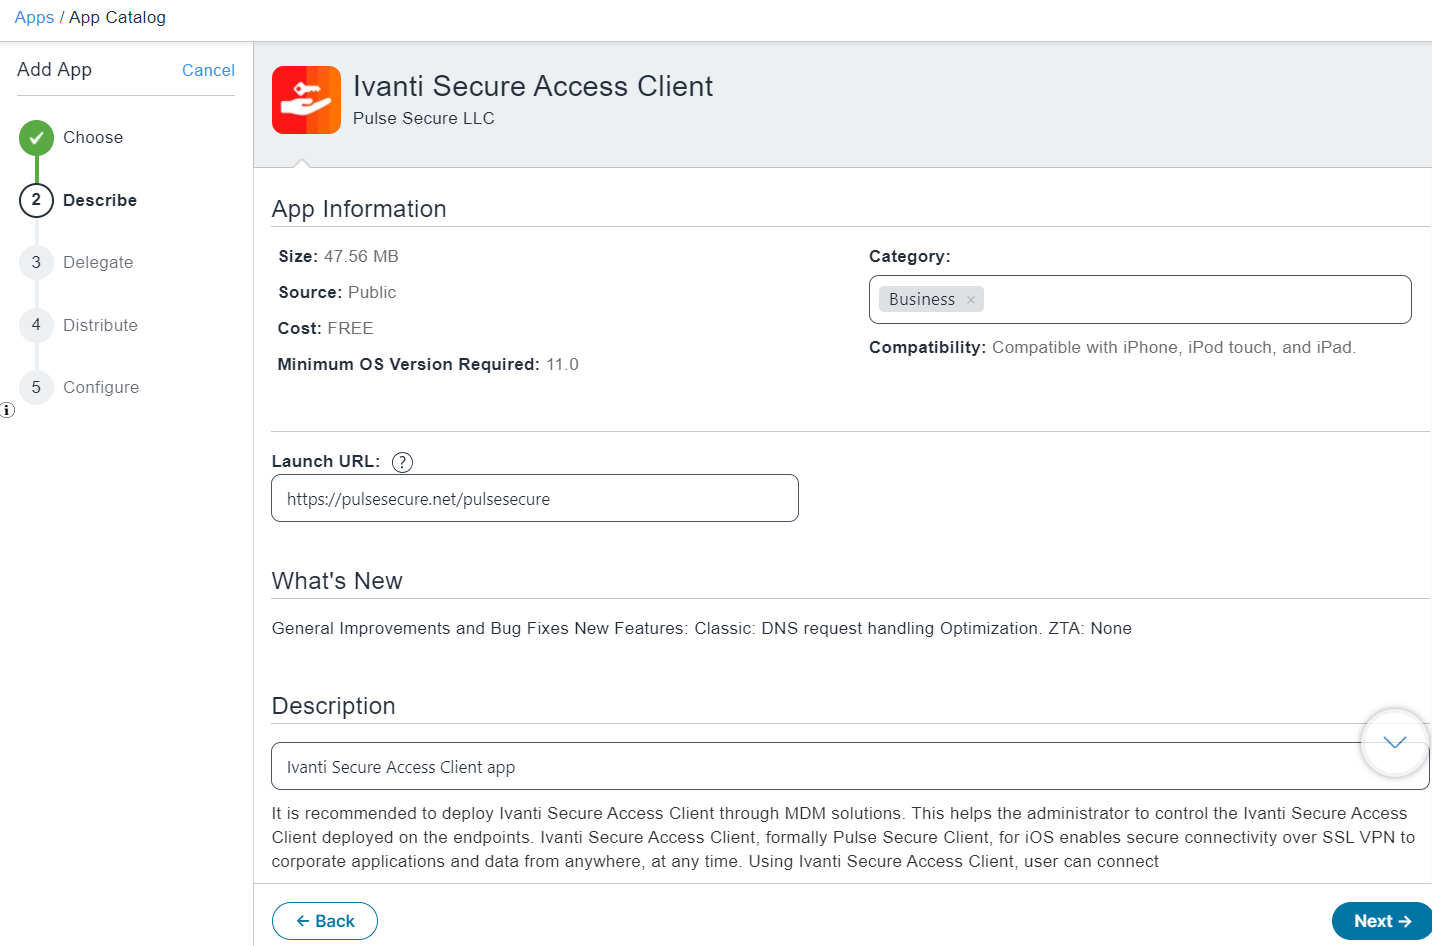
-
In the App Information page, specify Launch URL, add a brief Description (optional), and then click Next.
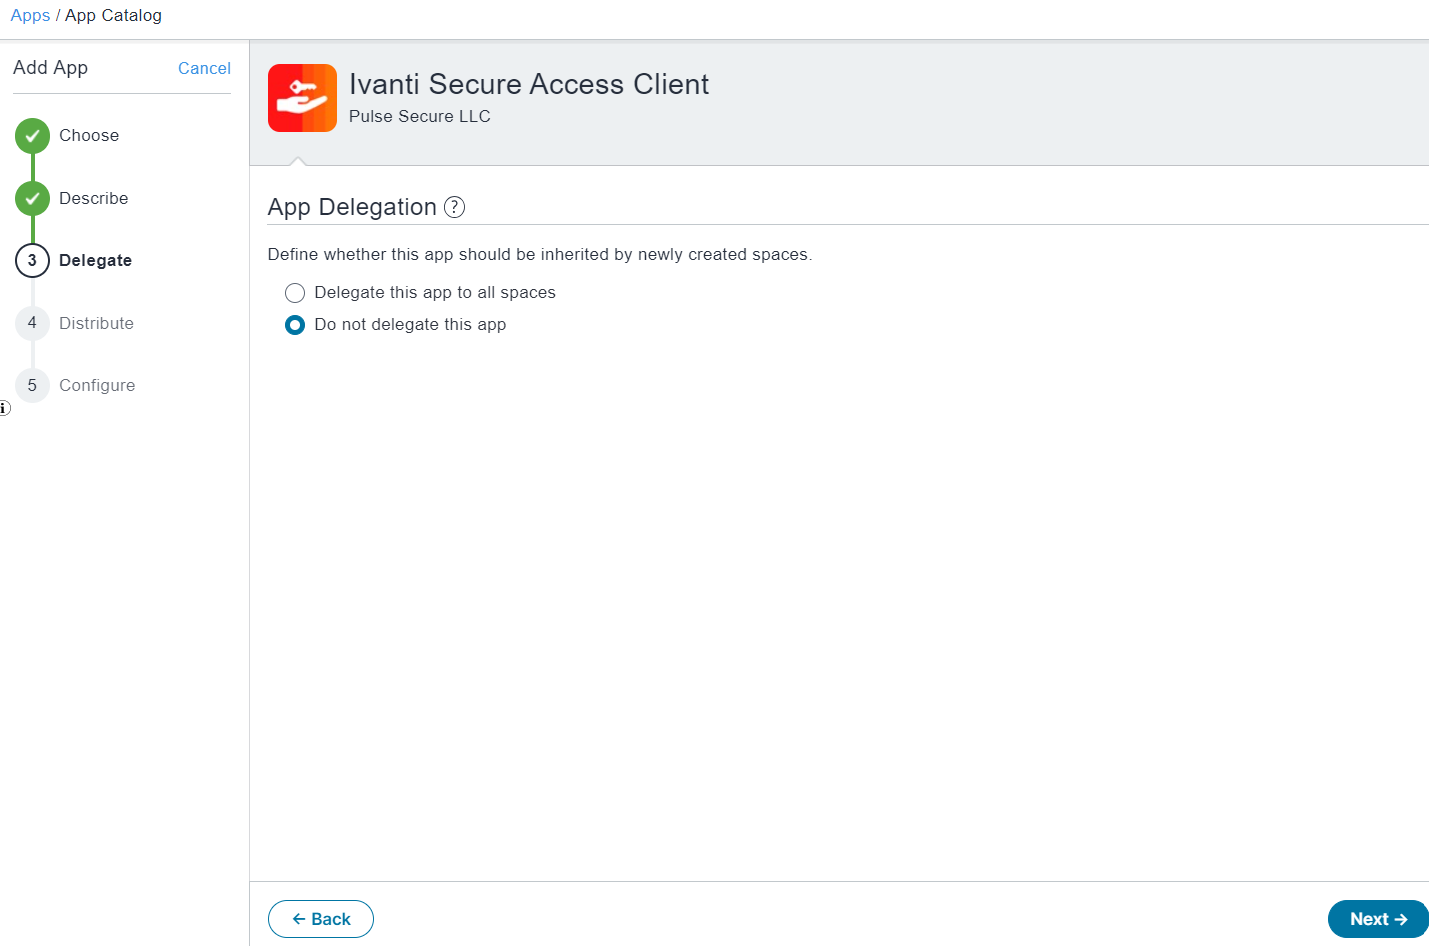
-
In the App Delegation page, select the Do not delegate this app option and click Next.
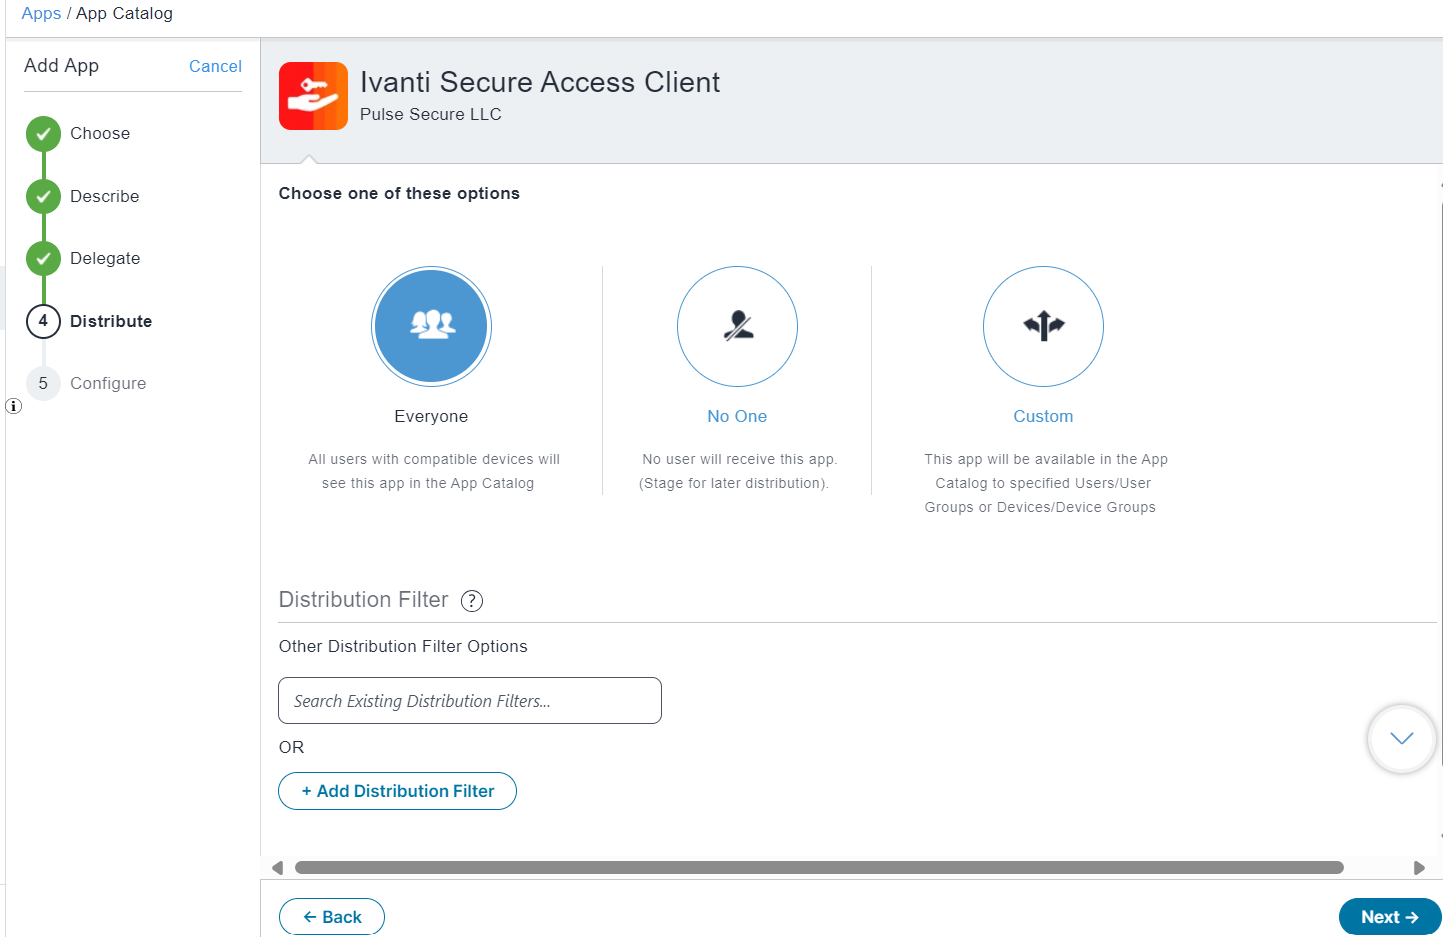
-
Choose a distribution level for this configuration of the app and click Next.
- Every One- The app is added to all the user compatible devices.
- No One - The app is staged for distribution at a later date.
- Custom - Select one of the options from "User/User Groups" or "Device/Device Groups".
-
In the App Configuration page, select Apple Application Management Configuration Settings and click Done.
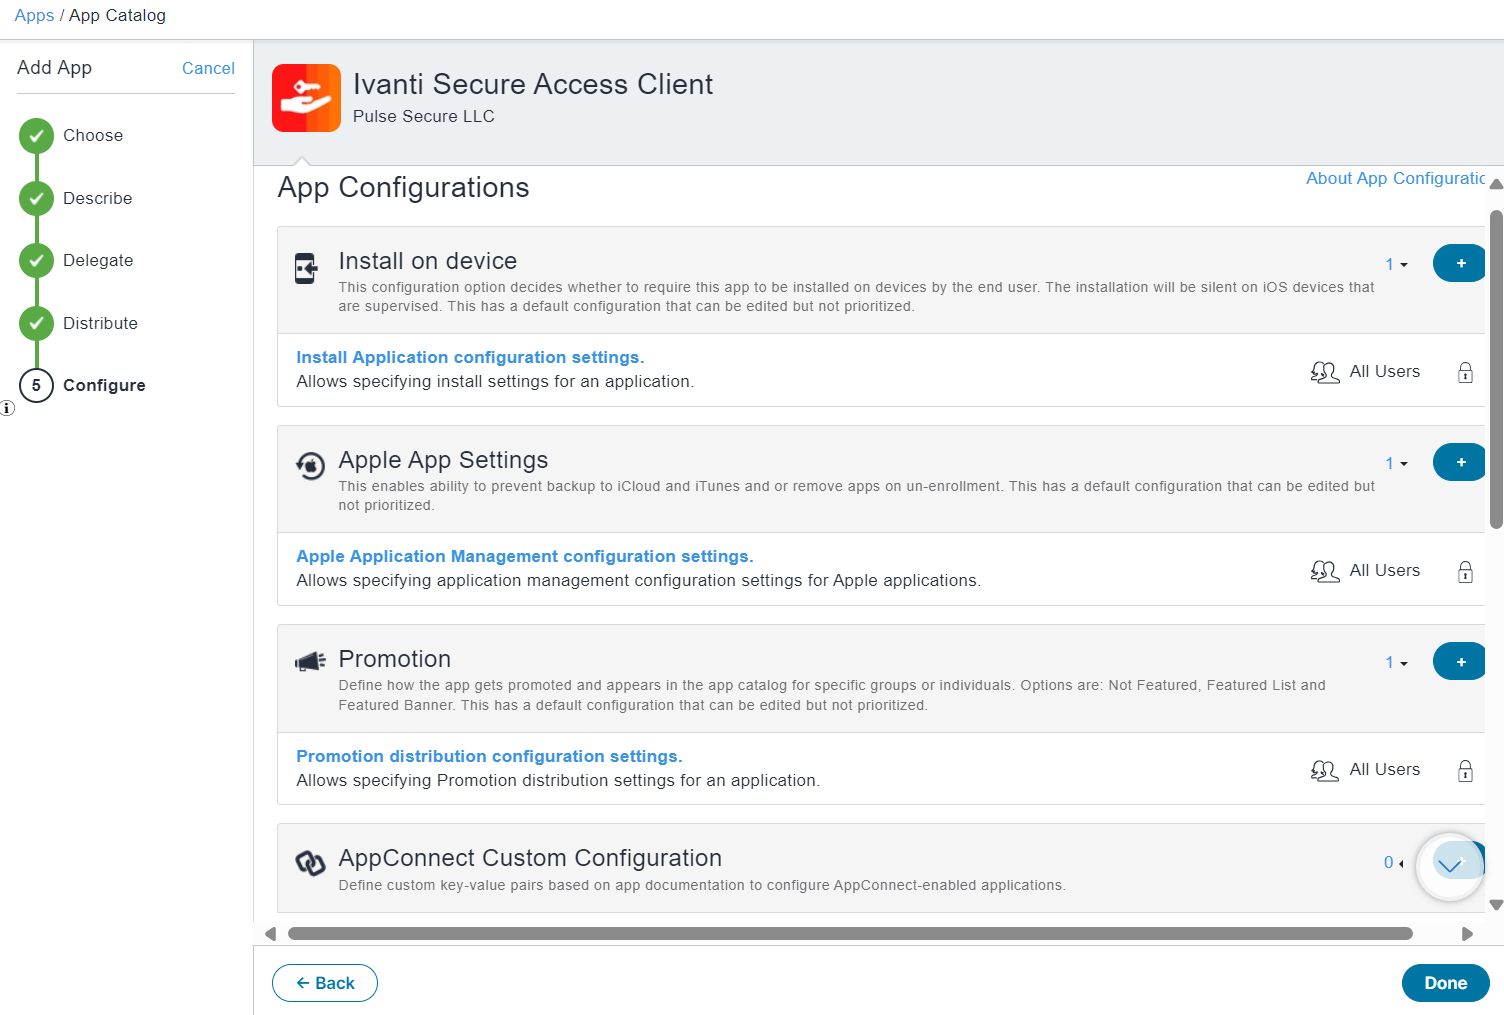
The app is listed in the Apps/App Catalog.
Configuring Per-app VPN, Always On VPN / On Demand VPN for iOS Endpoints Using Ivanti NMDM
Per-app VPN allows iOS devices to establish VPN connections only for specific apps, while other traffic goes through the normal network.
In an Always On VPN configuration, the connection is always on. The traffic that matches specific filters is always routed through the ICS tunnel.
To configure Per-app VPN and enable VPN On Demand:
-
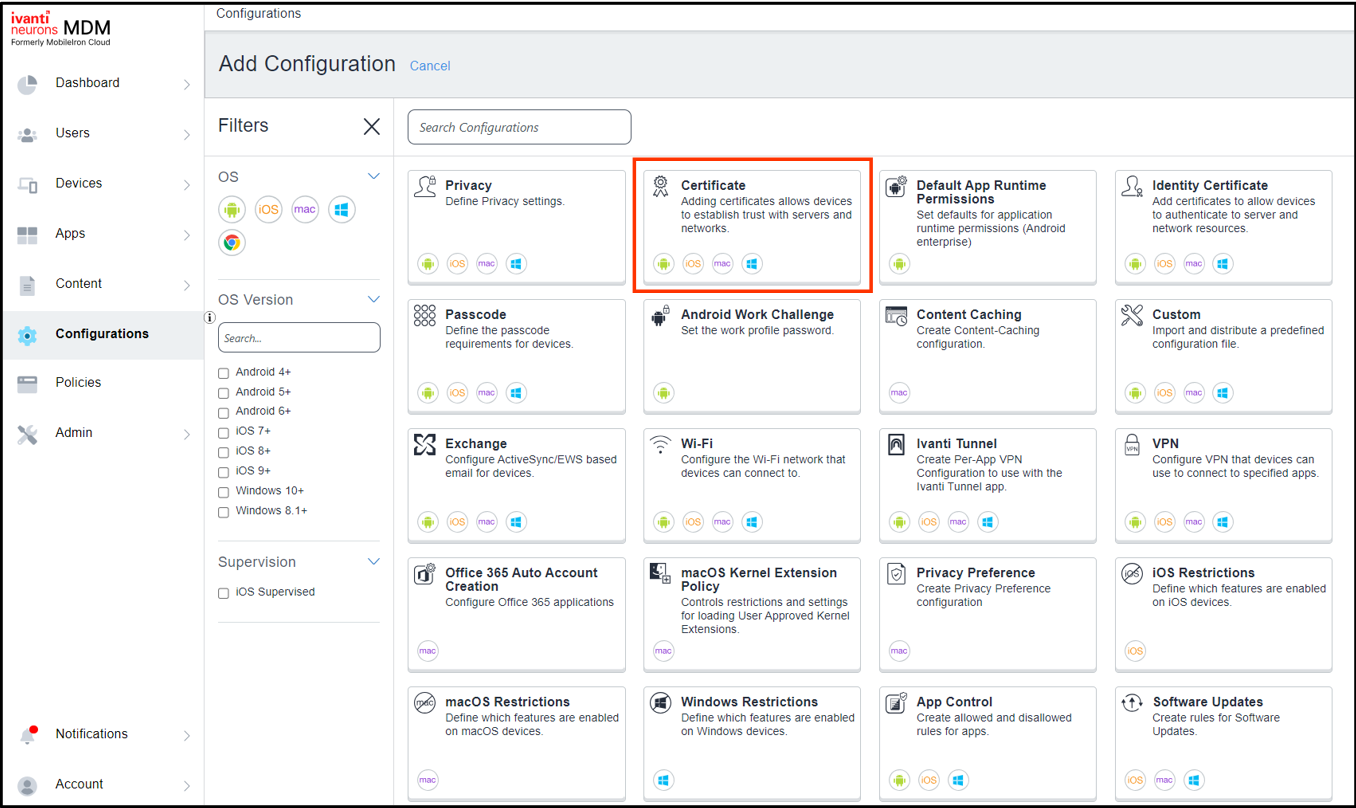
From the Ivanti NMDM console, select Configurations and then click Add.
-
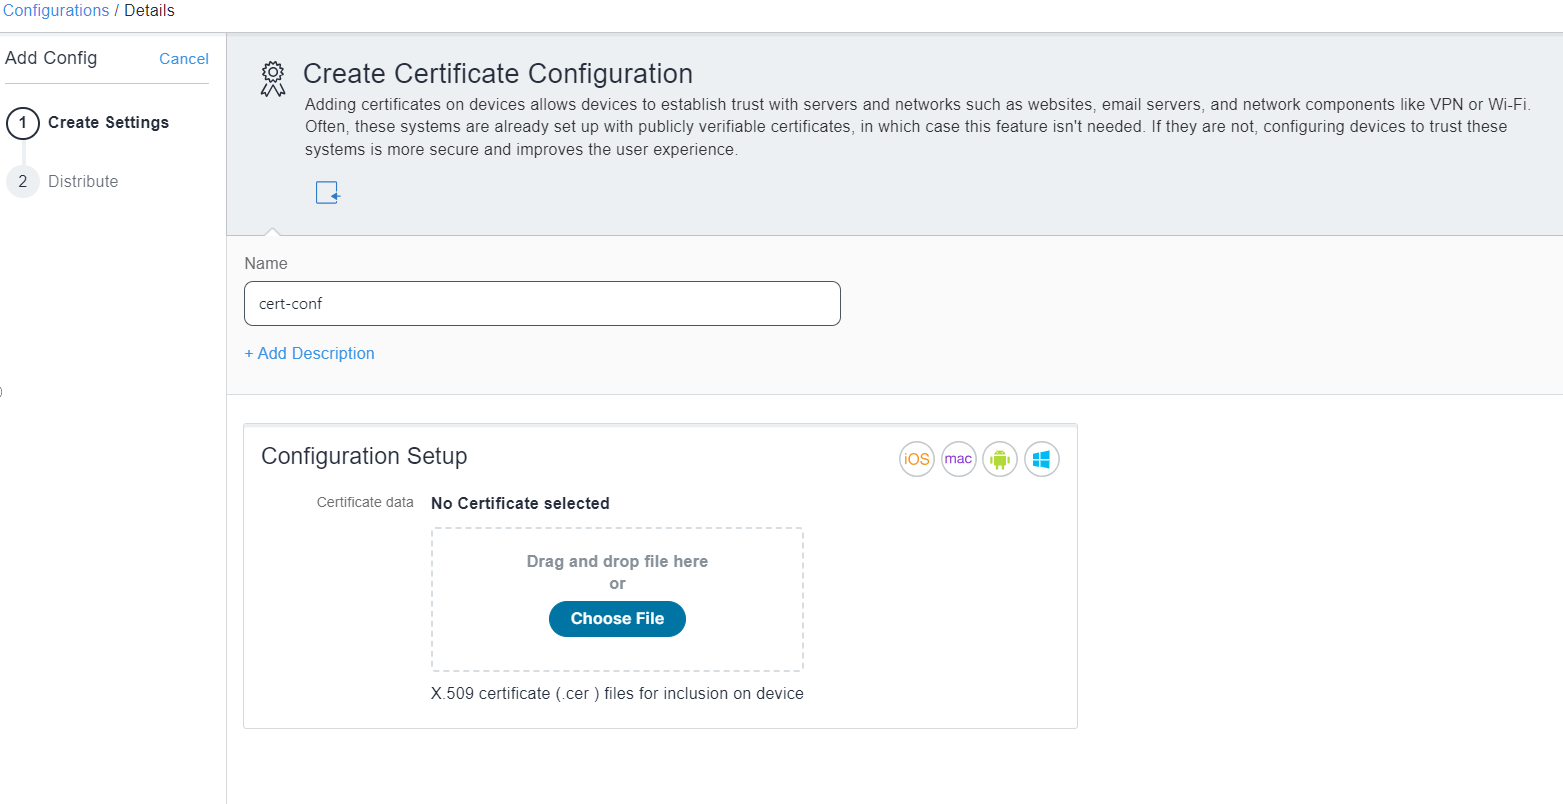
In the Add Configuration page, select the Certificate configuration.
-
Enter a name for the configuration, and then browse and select the certificate file.
-
Click Next and Distribute.
-
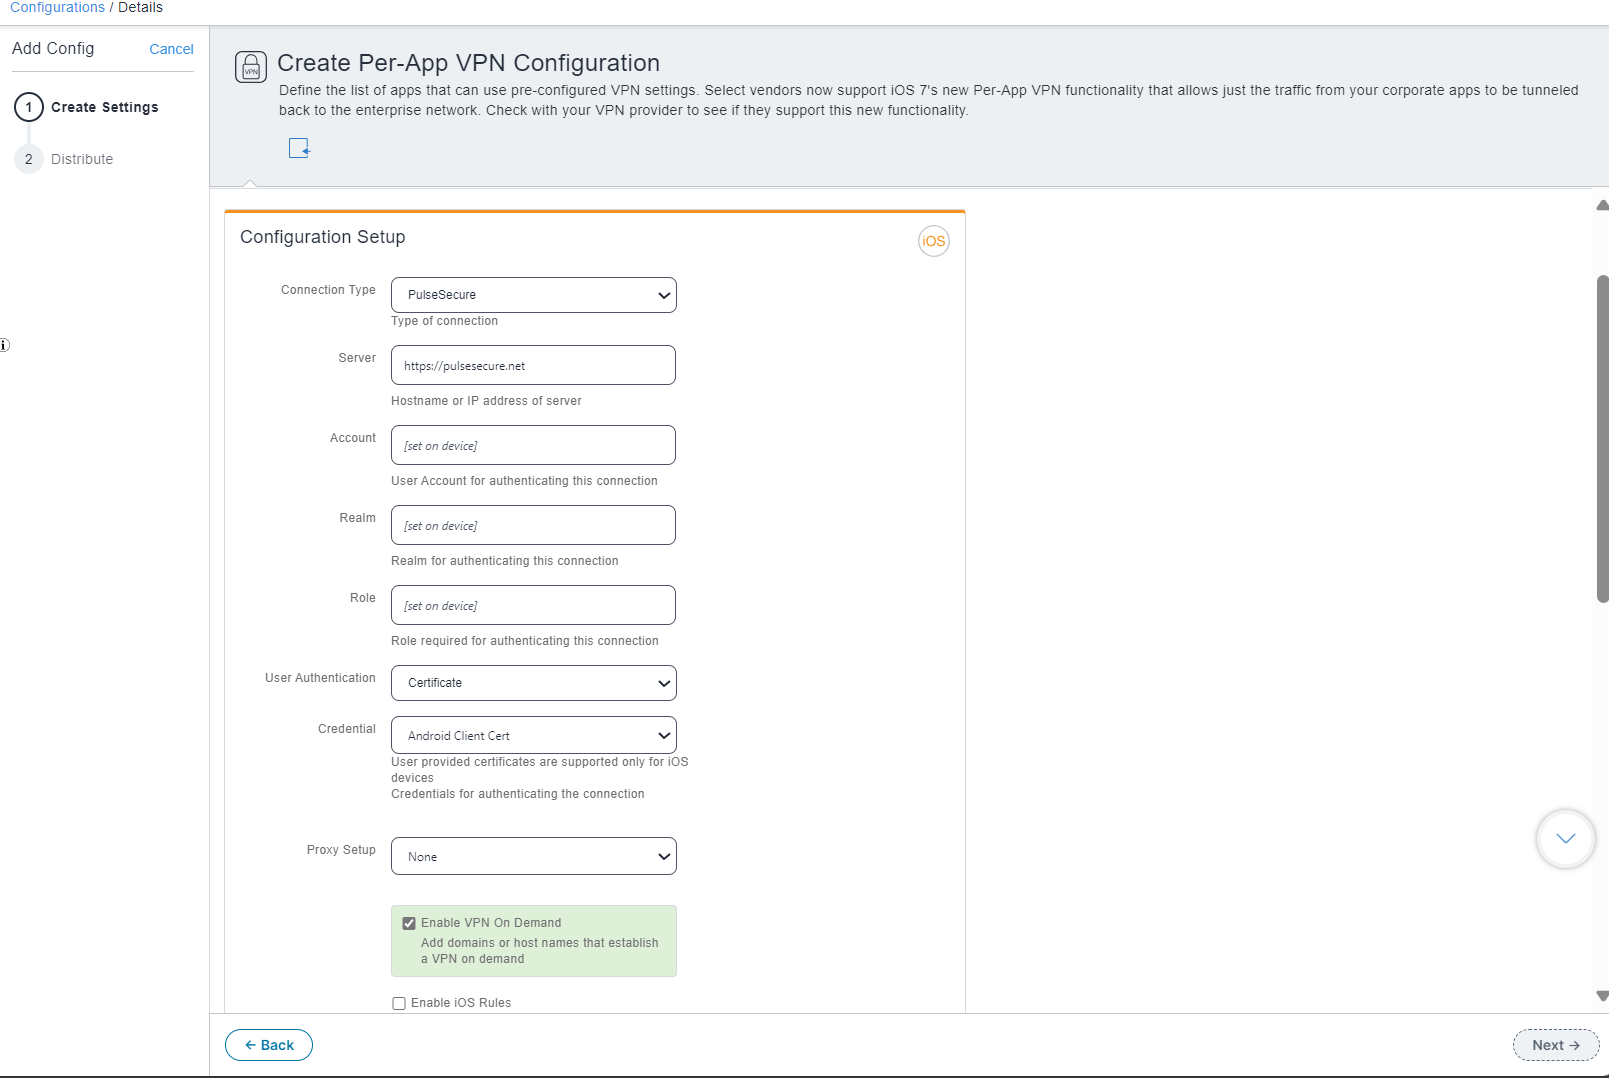
In the Add Configuration page, select the Per-App VPN configuration.

-
In the Per-App VPN Configuration page that is displayed:
- Enter the Connection Name that the endpoint displays.
- Select Pulse Secure from the Connection Type list.
- Enter the Server host name.
- Specify the Realm name and user Role.
- Select Certificate as User Authentication.
- Enable VPN On Demand.
-
Click Next.
-
Choose a distribution level for this configuration of the app and click Done.
- All Devices - The app is added to all the user compatible devices.
- No Devices - The app is staged for distribution at a later date.
- Custom - Select one of the options from "User/User Groups" or "Device/Device Groups".
-
From the Ivanti NMDM console, select Configurations and then click Add.
-
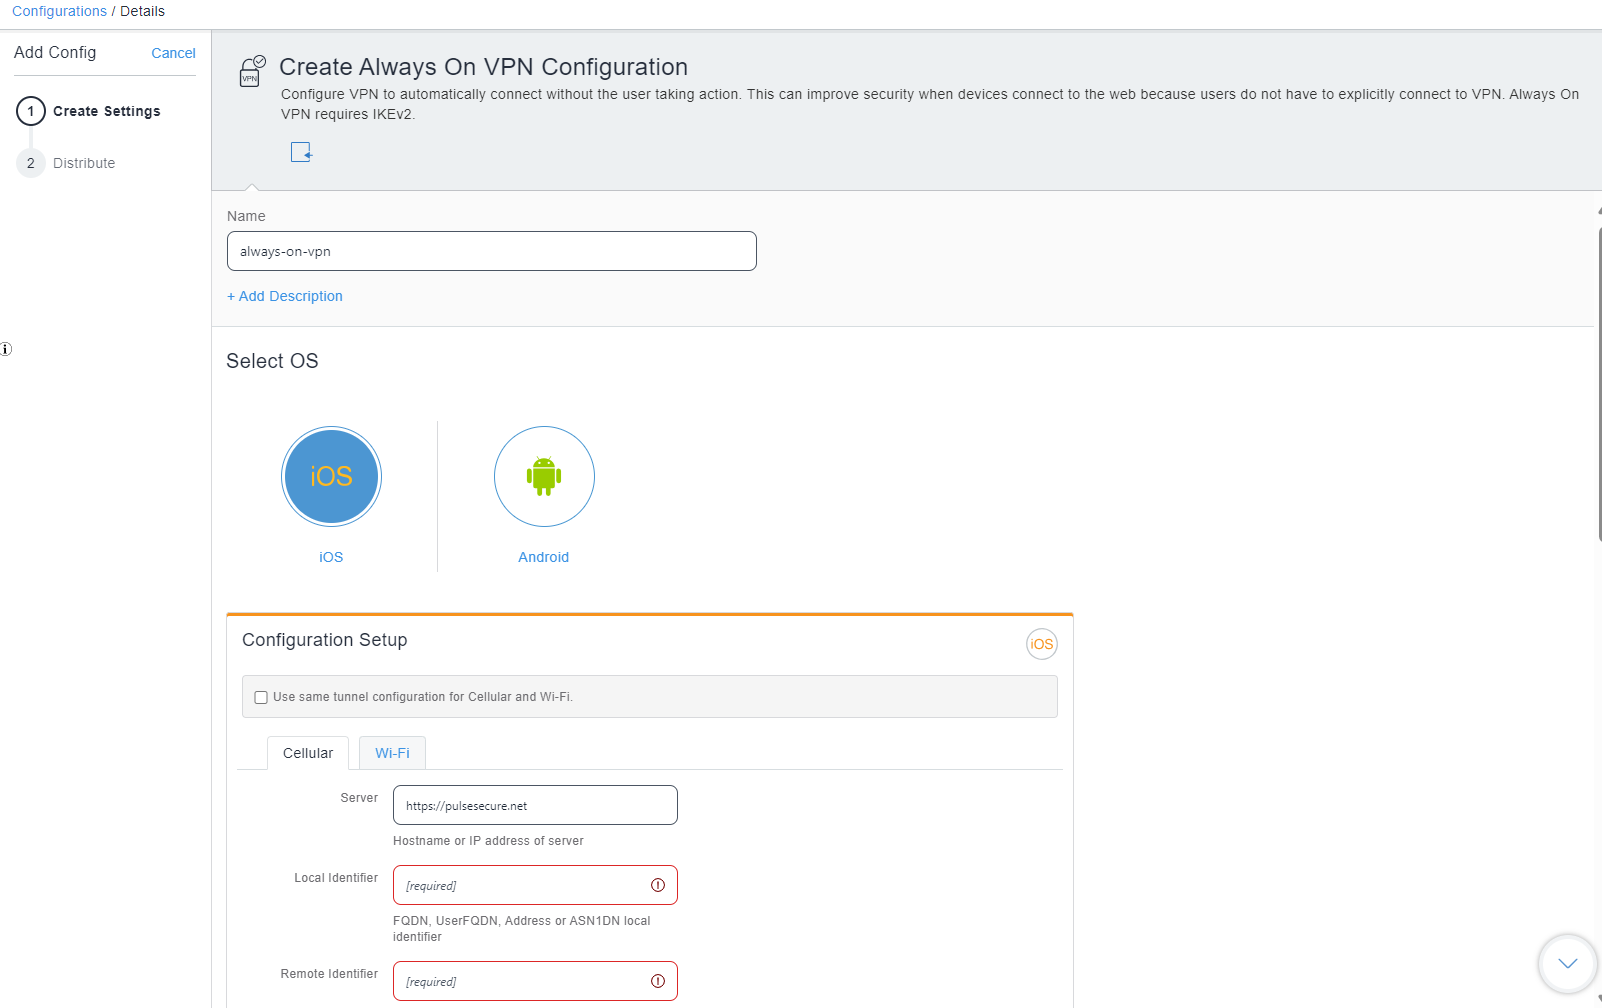
In the Add Configuration page, select the Always On VPN configuration.
-
In the Create Always On VPN Configuration page, enter the required details and click Next.
-
Choose a distribution level for this configuration of the app and click Done.
- All Devices - The app is added to all the user compatible devices.
- No Devices - The app is staged for distribution at a later date.
- Custom - Select one of the options from "User/User Groups" or "Device/Device Groups".
To configure Always On VPN: