Configuring SAML idP in Pulse Connect Secure Server
This section is required for all PCS appliance versions.
This section provides the steps to configure a SAML Identity Provider on Pulse Connect Secure server.
Before proceeding with the configuration, ensure that the Pulse Connect Secure appliance that you intend to use as the Identity Provider is registered with Pulse One, see Registering an Existing PCS/PPS Appliance.
If the PCS server is already configured as a SAML identity provider, make sure that POST binding is enabled and the Accept Unsigned AuthnRequest option is selected.
To configure SAML IdP on the Pulse Connect Secure server:
1.Log in to the Pulse Connect Secure server that is identified as an Identity Provider.
2.Navigate to System > Configuration > SAML > Settings.
3.Configure the following Metadata Server Configuration:
•Timeout value for metadata fetch request to 300.
•Host FQDN for SAML to the Fully Qualified Domain Name, noting the host FQDN guidance below.
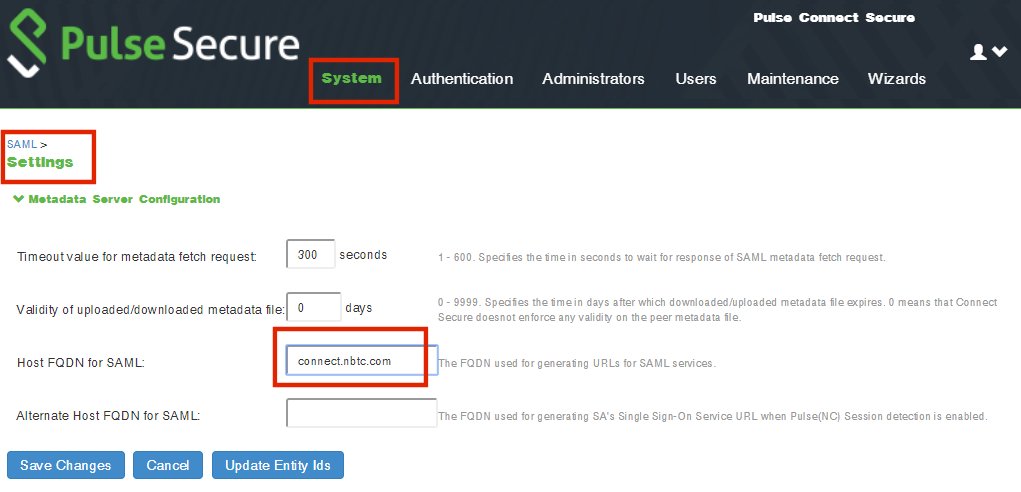
The host FQDN specified here is used in the SAML entity ID, used by browsers to connect to PCS, and used in the URLs for SAML services. Typically:
•If the PCS is standalone, the FQDN should resolve to the IP address of the external interface / internal interface, whichever is chosen.
•If the PCS is an Active-Passive cluster, the FQDN should resolve to the external VIP / Internal VIP, whichever is chosen.
•If the PCS is an Active-Active cluster behind an in-line load balancer, the FQDN should resolve to the load balancer's external VIP / Internal VIP, whichever is chosen.
4.Click Save Changes.
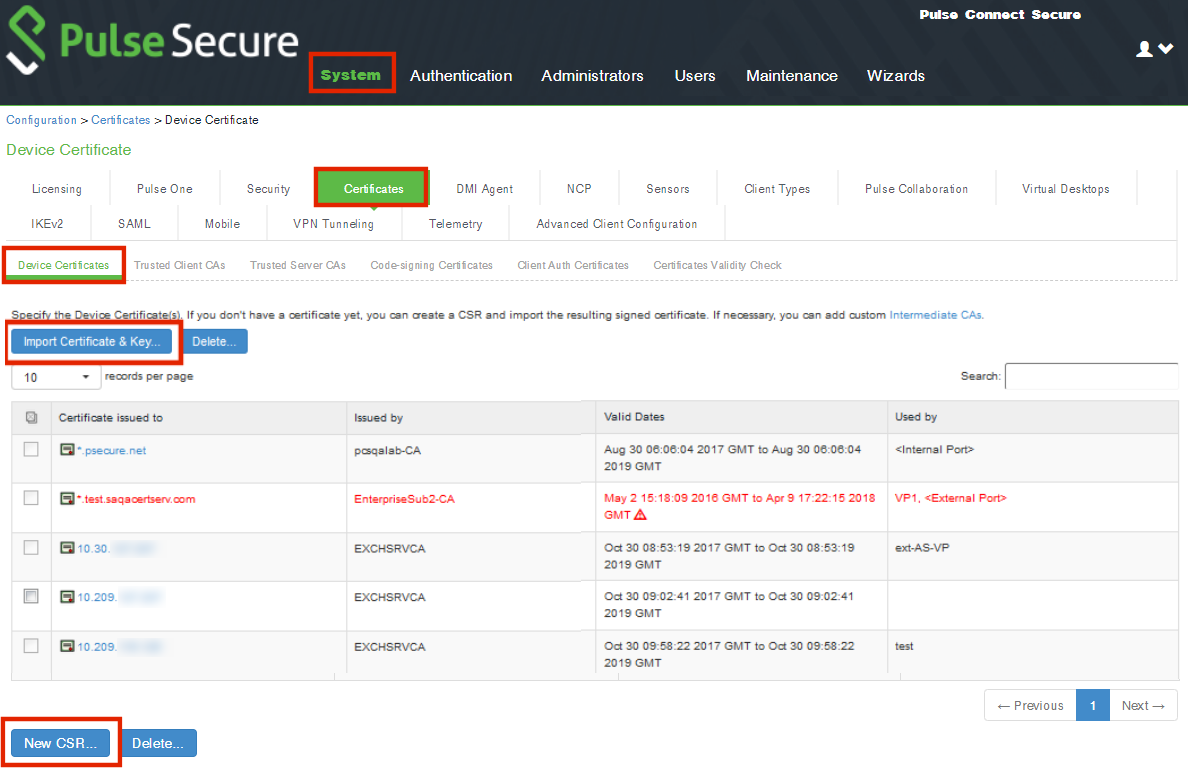
5.Navigate to System > Configuration > Certificates > Device Certificate, create a new CSR, and import certificate and keys. Skip this step if the PCS external interface / internal interface (whichever is chosen) already provides a certificate that matches the host’s Fully Qualified Domain Name.
6.Navigate to Authentication > Signing In > Sign In SAML > Identity Provider.
7.Locate the the Basic Identity Provider (idP) Configuration section. For example:
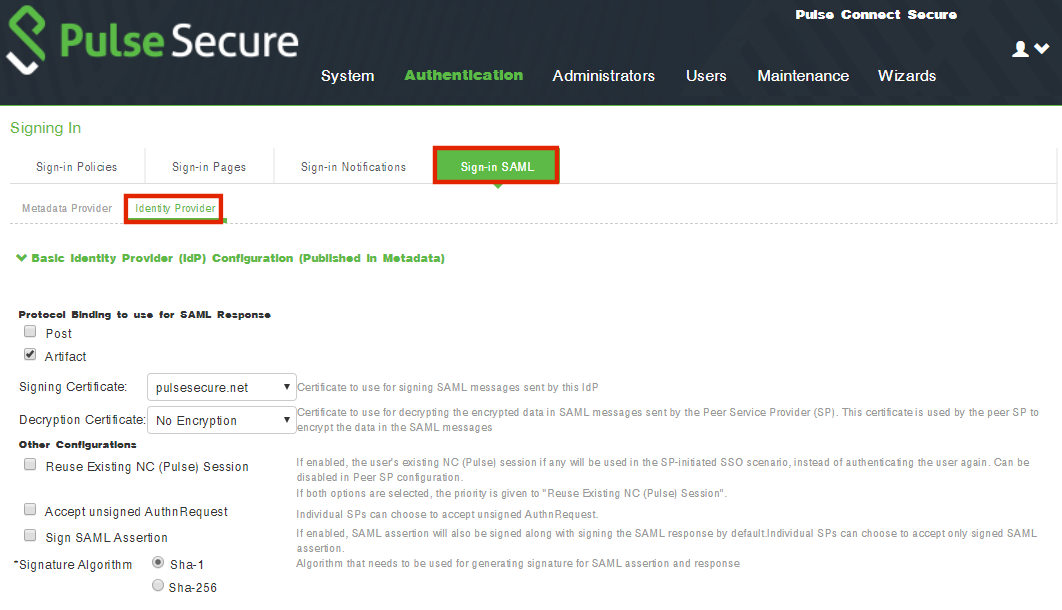
8.In the Basic Identity Provider (idP) Configuration section, do the following:
•Select the Post check box for protocol binding to use for SAML response.
If the PCS server is already configured as a SAML identity provider, make sure that POST binding is enabled and the Accept Unsigned AuthnRequest option is selected.
•Select a Signing Certificate from the list.
•For Decryption Certificate, select No Encryption.
•Clear the Reuse Existing NC (Pulse) Session check box.
•Select the Accept Unsigned AuthnRequest check box.
For more details, refer to the "Configuring Sign-in SAML Identity Provider Settings" section in the Pulse Connect Secure Administration Guide.
9.Click Save Changes to save the Identity Provider configuration.