Working with Appliance Groups
Two or more appliances can be collected into an appliance group to enable group operations:
Creating an Appliance Group
An Appliance Group uses a single base configuration from a master appliance in Pulse One and applies that configuration to all the other target appliances in the group. This master appliance is always used to change the configuration settings for the group. You can add appliances to the group or remove appliances from the group at any time.
All appliances in a group must run the same firmware version and must be the same appliance type as the master. However, the appliance group may contain member appliances using any form factor.
•If the master is a Pulse Connect Secure appliance running firmware version 8.2R5, all other appliances in the group must also be Pulse Connect Secure – either virtual appliances or hardware appliances (PSAs, MAGs, and SAs) - that also run firmware version 8.2R5.
•If the master is Pulse Policy Secure, all other appliances in the group must also be Pulse Policy Secure.
To create an appliance group:
1.Select the Appliances menu.
2.Select the Config Groups tab.
3.Click Create Appliance Group.
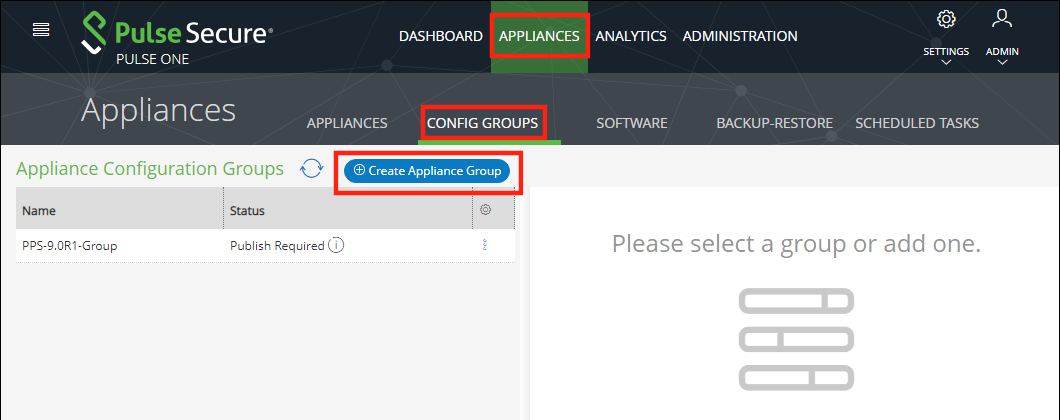
The Create Appliance Group Wizard appears.
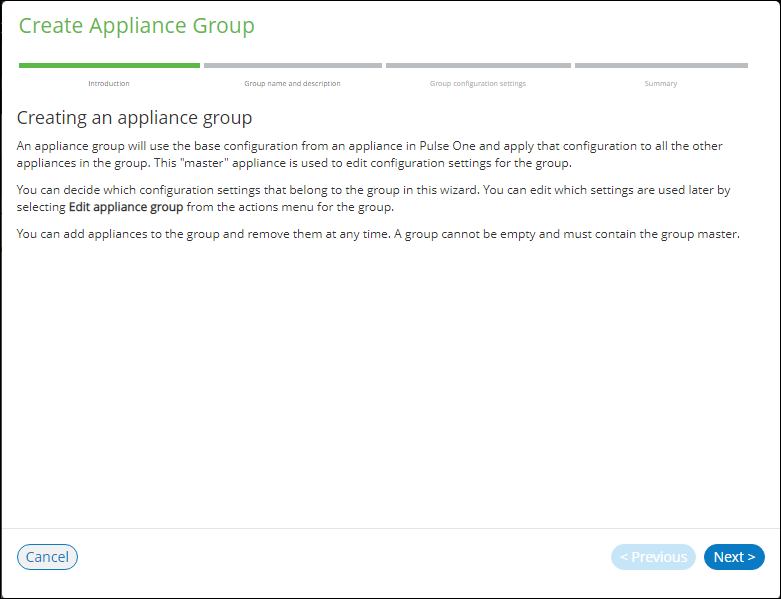
4.Click Next.
The Group name and description panel of the wizard appears.
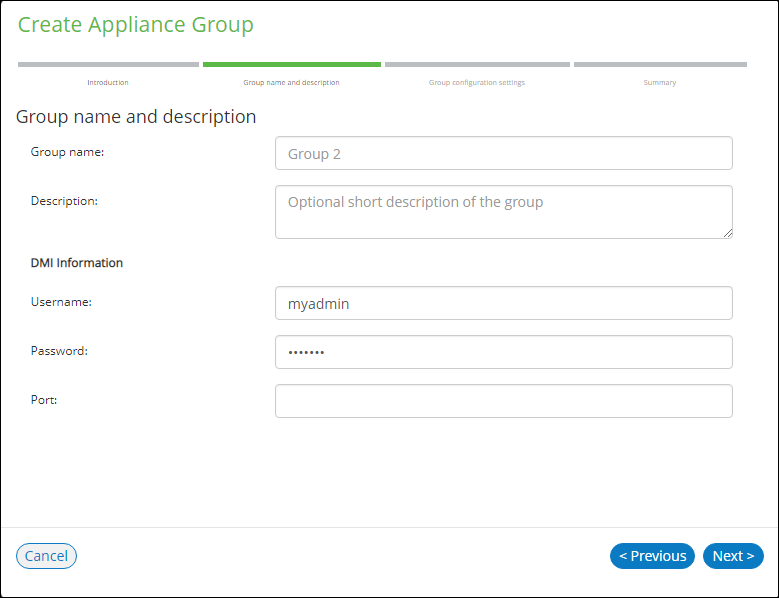
5.In this wizard panel:
•Enter the Group name and a Description.
The Group name should be at least 3 characters and not more than 50 characters.
•Enter a common admin Username and Password for all the appliances under this group, with which all appliances can receive DMI requests from Pulse One.
These credentials must be valid for all group members.
•Specify a common Port number on which all appliances under this group will receive DMI requests. The default value is 830.
For full details of appliance upgrades, see Upgrading Managed Appliances.
6.Click Next.
The Group configuration settings panel of the wizard appears.

7.In this panel:
•For Select master appliance, select an appliance to be the master appliance.
An appliance can be configured as master appliance in one or more groups.
•Enter the Master appliance URL. This is the Internet-facing admin login URL. For example:
https://<ip_address>/admin
•Select the configuration settings that must be shared between all group members.
8.Click Next.
The Summary panel of the wizard appears. For example:
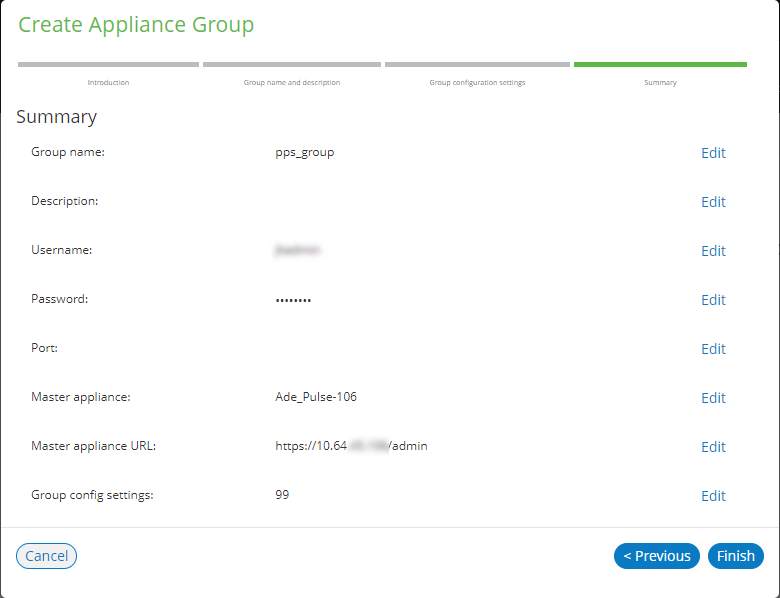
9.(Optional) If you want to make any changes, click on the corresponding Edit link and make the changes.
10.Click Finish.
The new appliance group is listed in the Appliances page. For example:
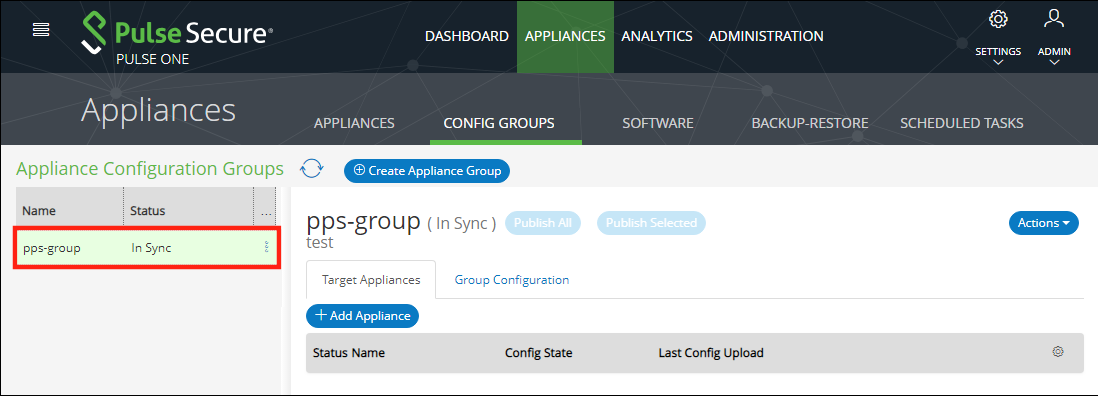
You can now add appliances to the group as target appliances, see Adding Appliances to an Appliance Group.
Adding Appliances to an Appliance Group
To add an appliance into an appliance group as a target appliance:
1.Select the Appliances menu.
2.Select the Config Groups tab.
3.Select the appliances group to which you want to add the appliance.
The right-hand panel updates to show group details.
4.Select the Target Appliances tab. For example:
![]()
5.Click Add Appliance. A dialog appears.
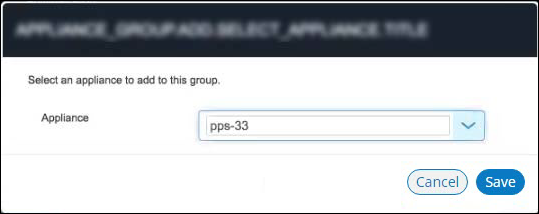
6.In this dialog, select an appliance to be added as a target appliance to the selected group.
Group configuration is only supported for appliances that are of same security appliance type and running the same software version.
7.Click Save to add the appliance to the group.
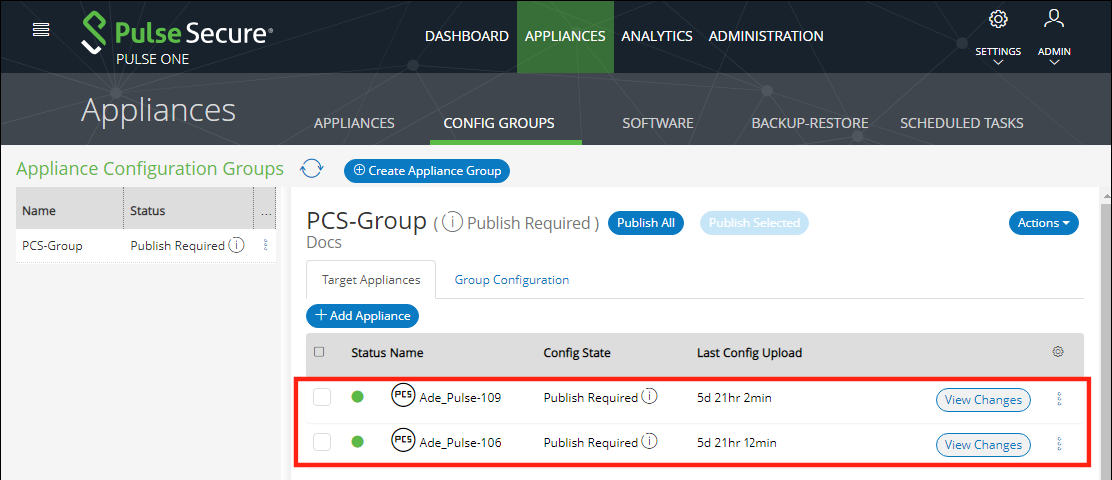
8.Repeat steps 5, 6 and 7 until the group contains all required target appliances. For example:
Distributing a Master Configuration
This section details the steps to distribute the configuration of the master appliance to all target appliances.
Viewing Configuration Changes
To view configuration changes between the master appliance and target appliances, click the View Changes button. The button changes to Close Changes. The configuration changes will be displayed on the same page.

To close the configuration changes view, click Close Changes.
Publishing Configuration Changes Manually to Group Members
If the configuration of the master appliance differs from the configuration of the target appliances in its group, a Publish Required notification is displayed, and the Publish All button is enabled.
Publishing to a group can also be performed as a scheduled task for groups. See Publishing Configuration Changes to Group Members as a Scheduled Task.
To manually publish a configuration to all appliances in a group:
1.Select the Appliances menu and then the Config Groups tab.
2.In the Appliance Group panel, click Publish All.

The Configuration Changes view closes if it is open.
A confirmation dialog appears.
3.In the confirmation dialog, click Yes to confirm the publication.
Pulse One then publishes the master appliance configuration to the target appliances within the group.
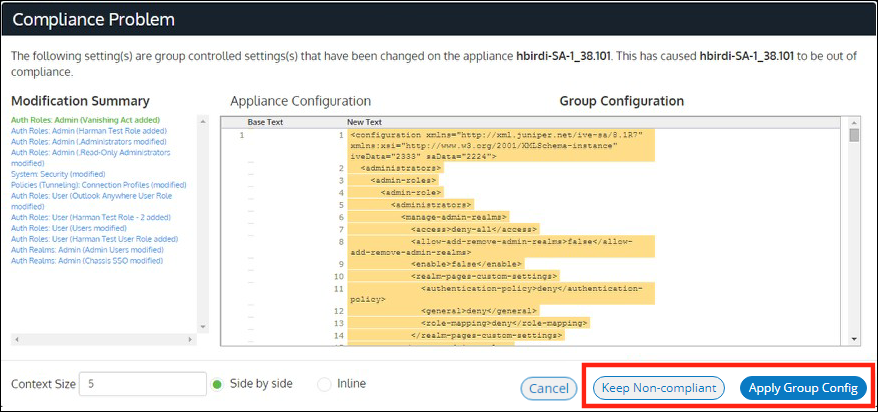
4.To view configuration mismatch scenarios, click the View Changes button and then click the Apply Group Config button. The Publish All button will be disabled.

The Configuration Changes panel shows the changes in the member appliance configuration compared to the master configuration.
5.You can either:
•Retain the changes by clicking Keep Non-compliant, OR
•Apply the group configuration by clicking Apply Group Config.
In either case, the compliance conflict is ignored, and the configuration will be published.
6.If you choose to remain non-compliant, then the Configuration Mismatch notification changes to a Mismatch Ignored notification, indicating that it is intentionally being kept out of compliance.
Publishing Configuration Changes to Group Members as a Scheduled Task
If the configuration of the master appliance differs from the configuration of the target appliances in its group, a Publish Required notification is displayed.
To publish configuration changes at a specific time, you can create a scheduled task to perform this action.
Publishing configuration changes to an appliance group can also be performed manually, see Publishing Configuration Changes Manually to Group Members.
To publish configuration changes from a master appliance to all target appliances as a scheduled task:
1.Select the Appliances menu and then the Config Groups tab.
2.Click the Actions icon (![]() ) for the appliance group you want to upgrade, and then click Schedule Task.
) for the appliance group you want to upgrade, and then click Schedule Task.
The Create Task dialog appears.
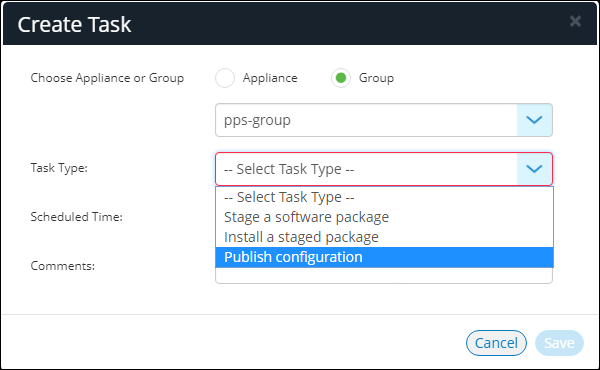
3.In the Create Task dialog, for Task Type, select Publish configuration.
4.For Scheduled Time, select the required start time for the task.
5.(Optional) Add Comments as required. These appear on the Scheduled Tasks list.
6.Click Save.
The new task is added to the list of scheduled tasks in the Scheduled Tasks tab.

7.(Optional) You can edit the details for a scheduled task by clicking the Edit icon (![]() ) for the task.
) for the task.
8.(Optional) You can cancel a scheduled task by clicking the Delete icon for the task.
9.(Optional) You can monitor the progress of scheduled tasks using one of the following methods:
•On the Scheduled Tasks tab. Here, the Task Status updates as a task starts and proceeds through to completion.
•From the Appliance Activities panel. To access this, click the Administration tab, and then the Appliance Activities option.
•From the Config Group tab, you can see status updates for the group as a whole.
•From the Appliances tab, you can see status updates for each appliance group member.
•From the Activities panel for an individual appliance on the right side of the Appliances tab.